UI学习总结1.0
一.UIView
UIView是一种核心的视图类,用于构建用户界面。它是UIKit框架中的一部分,是iOS应用程序中所有可见元素的基本构建块。
1. 创建一个UIView
//创建一个UIView的视图对象
    //UIView是iOS中的视图对象
    //显示在屏幕上的所有的对象的基础类
    //屏幕上能看到的全部都是UIView的子类
    //UIView是一个矩形对象,有背景颜色,可以显示有层级关系
    UIView* view = [[UIView alloc] init];
2.UIView的基本属性
//设置view的位置
    view.frame = CGRectMake(150, 150, 100, 200);
    //设置背景的颜色
    view.backgroundColor = [UIColor orangeColor];
    //是否隐藏视图对象
    //默认值为NO
    view.hidden = NO;

    //设置透明度
    //alpha = 1;不透明
    //alpha = 0;透明
    //alpha = 0.5;半透明
    view.alpha = 1;
    self.view.backgroundColor = [UIColor blueColor];

    //设置是否透明
    //view.opaque = NO;
    //将新建的视图添加到父亲视图上
    //1:将新建的视图显示到屏幕上
    //2:将视图作为父亲视图的子视图管理起来
    [self.view addSubview: view];
 - (void)viewDidLoad {
    [super viewDidLoad];
    // Do any additional setup after loading the view.
    [self creatView];
}
//创建三个视图变量
    UIView* view1 = [[UIView alloc] init];
    view1.frame = CGRectMake(100, 100, 150, 150);
    view1.backgroundColor = [UIColor redColor];

    UIView* view2 = [[UIView alloc] init];
    view2.frame = CGRectMake(125, 125, 150, 150);
    view2.backgroundColor = [UIColor greenColor];

    UIView* view3 = [[UIView alloc] init];
    view3.frame = CGRectMake(150, 150, 150, 150);
    view3.backgroundColor = [UIColor blueColor];
对于创建的子视图一定要添加到父视图上才可以显示
//将三个视图对象显示到屏幕上
    //并且添加到父亲视图上
    //哪一个被先添加到父亲视图中,就先绘制哪一个
    [self.view addSubview:view1];
    [self.view addSubview:view2];
    [self.view addSubview:view3];
代码运行结果如下:
先被添加的子视图会被后面的覆盖掉

二.UIViewController基础
三.UIButton
UIButton是UIKit框架中的一个类,它是继承自UIView的子类,用于创建可点击的按钮控件。UIButton通常用于响应用户的触摸事件,并执行相应的操作或触发特定的动作。
可定制的外观
	//创建一个btn对象,根据类型来创建btn
    //圆角类型btn:UIButtonTypeRoundedRect
    //通过类方法来创建buttonWithType:类名+方法名
    UIButton* btn = [UIButton buttonWithType:UIButtonTypeRoundedRect];
    //设置button的位置
    btn.frame = CGRectMake(150, 150, 100, 40);
    //设置按钮的文字
    //@parameter
    //p1:字符类型,显示到按钮上的文字
    //p2:设置文字的状态类型:UIControlStateNormal 正常状态
    [btn setTitle:@"按钮" forState:UIControlStateNormal];
    //p1:显示文字
    //p2: 显示文字的状态:UIControlStateHighlighted 按下状态
    [btn setTitle:@"按下按钮" forState:UIControlStateHighlighted];
    //设置背景颜色
    btn.backgroundColor = [UIColor grayColor];
    //设置文字显示颜色
    //p1颜色
    //p2状态
    [btn setTitleColor: [UIColor redColor] forState:UIControlStateNormal];
    //设置按下按钮的状态
    [btn setTitleColor:[UIColor greenColor] forState:UIControlStateHighlighted];
    //设置按键风格颜色
    [btn setTintColor:[UIColor whiteColor]];
    //titleLabel:UILabel空间
    btn.titleLabel.font = [UIFont systemFontOfSize: 18];
    //添加到视图中并显示
    [self.view addSubview:btn];
按钮没按下的状态:

按钮按下后:

四.定时器与视图对象
首先创建一个视图:
再创建两个按钮:分别控制开始与结束定时器
UIView* view = [[UIView alloc] init];
view.frame = CGRectMake(0, 0, 80, 80);
view.backgroundColor = [UIColor blueColor];
[self.view addSubview:view];
//启动定时器按钮
    UIButton* btn = [UIButton buttonWithType:UIButtonTypeRoundedRect];
    btn.frame = CGRectMake(150, 150, 80, 40);
    btn.backgroundColor = [UIColor greenColor];
    [btn setTitle:@"启动定时器" forState: UIControlStateNormal];
    [btn addTarget:self action:@selector(pressStart) forControlEvents:UIControlEventTouchUpInside];
    [self.view addSubview:btn];
    //停止定时器按钮
    UIButton* btnStop = [UIButton buttonWithType: UIButtonTypeRoundedRect];
    btnStop.frame = CGRectMake(150, 300, 80, 40);
    btnStop.backgroundColor = [UIColor grayColor];
    [btnStop setTitle:@"停止定时器" forState:UIControlStateNormal];
    [btnStop addTarget: self action:@selector(pressStop) forControlEvents:UIControlEventTouchUpInside];
    [self.view addSubview:btnStop];
创建定时函数
//定时器函数
//可以将定时器本身作为参数传入
- (void) updateTimer: (NSTimer*) timer{
    NSLog(@"test!,name = %@ ", timer.userInfo);
    UIView* view = [self.view viewWithTag: 101];
    view.frame = CGRectMake (view.frame.origin.x + 0.03, view.frame.origin.y + 0.03,80 ,80);
}
再加入相对应的press函数。
 //按下开始按钮
 1. (void) pressStart {
    //NSTimer的类方法创建一个定时器并且启动这个定时器
    //P1: 每隔多长时间调用定时器函数,以秒为单位
    //P2:表示实现定时计时器的对象
    //P3: 定时器函数对象
    //P4:可以传入定时器函数中的一个参数
    //P5:定时器是否重复操作,YES为重复,NO只完成一次。
    //返回值为一个新建好的定时器对象
    _timerView = [NSTimer scheduledTimerWithTimeInterval:0.01 target:self selector:@selector(updateTimer:) userInfo:@"小明" repeats:YES];
}
//按下停止按钮
-(void) pressStop {
    if (_timerView != nil) {
        //停止定时器 (使定时器失效)
        [_timerView invalidate];
    }
}

五.UIAlertController
我们的UIAlertController有两种形式,一种是警告框,一种是操作表。
1. 警告框:
在ViewController.h中添加,成员变量。
#import <UIKit/UIKit.h>
@interface ViewController : UIViewController  <UIAlertViewDelegate> {
    //定义与个警告对话框视图对象
    UIAlertController* _alertView;
    //等待提示对象
    //当下载,或加载比较的文件,可以显示此控件,处于提示等待状态
    UIActivityIndicatorView* _activityIndicator;
}
@property (retain, nonatomic) UIAlertController* alertView;
@property (retain, nonatomic) UIActivityIndicatorView* activityIndicator;
@end
在ViewController.m中
//创建警告对话框
//P1:对话框标题
//P2:提示消息
       _alertView = [UIAlertController alertControllerWithTitle:@"警告" message:@"手机已被入侵,快速打钱" preferredStyle:UIAlertControllerStyleAlert];
       UIAlertAction* sure = [UIAlertAction actionWithTitle:@"确定" style:UIAlertActionStyleDefault handler:^(UIAlertAction * _Nonnull action) {
           NSLog(@"确定");
       }];
       UIAlertAction* cancal = [UIAlertAction actionWithTitle:@"取消" style:UIAlertActionStyleDefault handler:^(UIAlertAction * _Nonnull action) {
           NSLog(@"取消");
       }];
       [_alertView addAction: sure];
       [_alertView addAction: cancal];
       [self presentViewController:_alertView animated:YES completion:nil];
2. 等待提示器
在ViewController.m中
//创建这个等待提示器
_activityIndicator = [[UIActivityIndicatorView alloc] initWithFrame:CGRectMake(150, 300, 80, 80)];
self.view.backgroundColor = [UIColor whiteColor];
[self.view addSubview: _activityIndicator];
//启动动画屏幕显示
[_activityIndicator startAnimating];
再给两者创建相应的按钮。
for (int i = 0; i < 2; i++) {
        UIButton* button = [UIButton buttonWithType:UIButtonTypeRoundedRect];
        button.frame = CGRectMake(150, 150 + 100*i, 100, 40);
        if (i == 0) {
            [button setTitle:@"警告对话框" forState:UIControlStateNormal];
        }
        if (i == 1) {
            [button setTitle:@"等待指示器" forState:UIControlStateNormal];
        }
        button.tag = 101 + i;
        [button addTarget:self action:@selector(pressButton:) forControlEvents:UIControlEventTouchUpInside];
        [self.view addSubview:button];
    }
代码运行的结果如下:


六.UITextField
我们先给出我们一些常用的UITextField属性:
text:文本字段中显示的文本内容。
placeholder:当文本字段为空时显示的占位符文本。
textColor:文本的颜色。
font:文本的字体。
secureTextEntry:设置为YES时,输入的文本将被隐藏,通常用于密码输入。
keyboardType:键盘类型,如默认键盘、数字键盘、邮箱键盘等。
returnKeyType:返回键类型,如Done、Next、Go等。
autocapitalizationType:自动大写设置,控制文本是否自动大写。
autocorrectionType:自动纠正设置,控制是否自动纠正文本。
clearButtonMode:清除按钮的显示模式,控制何时显示清除按钮。
delegate:UITextFieldDelegate委托对象,用于处理文本字段的各种事件和行为。
首先在ViewController.m中定义一个成员变量以及属性。
@interface ViewController : UIViewController  <UITextFieldDelegate> {
    //定义一个textFile,文本输入区域
    //例如:用户名,密码等需要输入文本的内容区域
    //只能输入单行的文字,不能输入或显示多行
    UITextField* _textFiled;
}
@property (nonatomic, retain) UITextField* textFiled;
@end
在ViewController.h中进行接下来的操作
@implementation ViewController
@synthesize  textFiled = _textFiled;
- (void)viewDidLoad {
    [super viewDidLoad];
    // Do any additional setup after loading the view.
    //创建一个输入区的对象
    self.textFiled = [[UITextField alloc] init];
    //设定文本输入区的位置
    self.textFiled.frame = CGRectMake(100, 100, 180, 40);
    //设置textFile的字体内容
    self.textFiled.text = @"用户名";
    //设置文字的字体大小
    self.textFiled.font = [UIFont systemFontOfSize: 18];
    //设置字体的字体颜色
    self.textFiled.textColor = [UIColor blackColor];
    //设置边框风格
    //UITextBorderStyleRoundedRect: 圆角风格
    //UITextBorderStyleLine: 线框风格
    //UITextBorderStyleBezel: bezel风格
    self.textFiled.borderStyle = UITextBorderStyleRoundedRect;
    //设置虚拟键盘风格
    //UIKeyboardTypeDefault: 默认风格
    self.textFiled.keyboardType = UIKeyboardTypeDefault;
    //提示文字信息
    //当text属性为空的时候,显示此条信息
    //浅灰色提示文字
    self.textFiled.placeholder = @"请输入用户名......";
    //是否作为密码输入
    //YES:作为处理,圆点加密
    //NO:正常显示输入的文字
    self.textFiled.secureTextEntry = YES;

    [self.view addSubview:self.textFiled];
    //设置代理对象
    self.textFiled.delegate = self;

}
- (void) touchesBegan:(NSSet<UITouch *> *)touches withEvent:(UIEvent *)event {
    //使虚拟键盘收回,不在作为第一消息响应人
    [self.textFiled resignFirstResponder];
}

- (void) textFieldDidBeginEditing:(UITextField *)textField {
    NSLog(@"开始编辑了!");
}
//
- (void) textFieldDidEndEditing:(UITextField *)textField {
    self.textFiled.text = @"";
    NSLog(@"编辑输入结束");
}
//是否可以进行输入
//如果返回值为YES:可以直接进行输入,默认为yes
//NO:不能输入文字
- (BOOL) textFieldShouldBeginEditing:(UITextField *)textField {
    return YES;
}
//是否可以结束输入
//如果返回值为YES:可以结束输入,默认为yes
//NO:不能输入文字
- (BOOL) textFieldShouldEndEditing:(UITextField *)textField {
    return YES;
}
@end
代码运行结果如下:

七.登陆界面案例
先看一下程序的最终结果:

首先在ViewController.h的定义部分
//登陆界面的组成
    //用户名的提示:输入框
    //密码的提示:密码的输入
    //登陆按钮
    //注册按钮
    //用户名提示Label
    UILabel* _lbUserName;
    //密码提示Label
    UILabel* _lbPassword;
    //用户名提示框
    UITextField* _tfUserName;
    //密码提示框
    UITextField* _tfPassWord;
    //登陆按钮
    UIButton* _buttonLogin;
    //注册按钮
    UIButton* _buttonRegister;
    UIAlertController* _alert;
在ViewController.h的实现部分
- (void)viewDidLoad {
    [super viewDidLoad];
    // Do any additional setup after loading the view.
    //用户名提示标签创建
    _lbUserName = [[UILabel alloc] initWithFrame:CGRectMake(60, 80, 80, 40)];
    _lbUserName.text = @"用户名:";
    _lbUserName.font = [UIFont systemFontOfSize:20];
    _lbUserName.textAlignment = NSTextAlignmentLeft;
    //用户名密码提示
    _lbPassword = [[UILabel alloc] initWithFrame:CGRectMake(60, 140, 80, 40)];
    _lbPassword.text = @"密码:";
    _lbPassword.font = [UIFont systemFontOfSize:20];
    _lbPassword.textAlignment = NSTextAlignmentLeft;
    //用户名输入框
    _tfUserName = [[UITextField alloc] initWithFrame:CGRectMake(140, 80, 180, 40)];
    _tfUserName.placeholder = @"请输入密码";
    _tfUserName.borderStyle = UITextBorderStyleRoundedRect;
    //用户密码输入框
    _tfPassWord = [[UITextField alloc] initWithFrame:CGRectMake(140, 140, 180, 40)];
    _tfPassWord.placeholder = @"请输入密码";
    _tfPassWord.borderStyle = UITextBorderStyleRoundedRect;
    _tfPassWord.secureTextEntry = YES;

    //登陆和注册按钮创建
    _buttonLogin = [UIButton buttonWithType:UIButtonTypeRoundedRect];
    _buttonLogin.frame = CGRectMake(150, 240, 80, 40);
    [_buttonLogin setTitle:@"登陆" forState:UIControlStateNormal];
    [_buttonLogin addTarget:self action:@selector(pressLogin) forControlEvents:UIControlEventTouchUpInside];
    //
    _buttonRegister = [UIButton buttonWithType:UIButtonTypeRoundedRect];
    _buttonRegister.frame = CGRectMake(150, 300, 80, 40);
    [_buttonRegister setTitle:@"注册" forState:UIControlStateNormal];
    [_buttonRegister addTarget:self action:@selector(pressRegister) forControlEvents:UIControlEventTouchUpInside];
    //将所有的控件添加到视图中
    [self.view addSubview:_lbUserName];
    [self.view addSubview:_lbPassword];
    [self.view addSubview:_tfUserName];
    [self.view addSubview:_tfPassWord];
    [self.view addSubview:_buttonRegister];
    [self.view addSubview:_buttonLogin];
}
- (void) pressLogin {
	//先定义一个学生的信息
    NSString* strName = @"michael";
    NSString* strPassWord = @"123456";
    //获取输入框中的用户文字
    NSString* strTextName = _tfUserName.text;
    NSString* strTextPass = _tfPassWord.text;
    if ([strName isEqualToString:strTextName] && [strPassWord isEqual: strTextPass]) {
        NSLog(@"用户名密码正确");
        _alert = [UIAlertController alertControllerWithTitle:@"提示" message:@"登陆成功" preferredStyle:UIAlertControllerStyleAlert];
        UIAlertAction* sure = [UIAlertAction actionWithTitle:@"确定" style:UIAlertActionStyleDefault handler:nil];
        [self presentViewController:_alert animated:YES completion:nil];
        [_alert addAction: sure];

    } else {
        NSLog(@"用户名或者密码输入错误");
        _alert = [UIAlertController alertControllerWithTitle:@"提示" message:@"用户名或者密码输入错误" preferredStyle:UIAlertControllerStyleAlert];
        UIAlertAction* sure = [UIAlertAction actionWithTitle:@"确定" style: UIAlertActionStyleDefault handler: nil];
        [self presentViewController:_alert animated:YES completion:nil];
        [_alert addAction:sure];
    }
}
- (void) pressRegister {


}
- (void)  touchesBegan:(NSSet<UITouch *> *)touches withEvent:(UIEvent *)event {
    //收回键盘对象
    [_tfUserName resignFirstResponder];
    [_tfPassWord resignFirstResponder];
}
@end
如果登陆失败的话:则会提示用户名或者密码输入错误。

八.UIScrollView
UIScrollView是一个强大的视图容器,它提供了许多属性来控制和配置其行为和外观。以下是UIScrollView的一些常见属性:
创建视图的代码如下:
- (void)viewDidLoad {
    [super viewDidLoad];
    // Do any additional setup after loading the view.
    //创建定义一个滚动视图
    //可以对视图内容进行查看
    UIScrollView* sv = [[UIScrollView alloc] initWithFrame:CGRectMake(0, 0, [[UIScreen mainScreen]bounds].size.width, [[UIScreen mainScreen]bounds].size.height)];
    //是否按照整页来滚动
    sv.pagingEnabled = YES;
    //是否可以开启滚动视图
    sv.scrollEnabled = YES;
    //设置画布的大小,画布不显示在滚动视图内部,一般大于Frame大小
    sv.contentSize = CGSizeMake ([[UIScreen mainScreen]bounds].size.width*5, [[UIScreen mainScreen]bounds].size.height);
    //是否可以边缘弹动效果
    sv.bounces = YES;
    //开启横向弹动效果
    sv.alwaysBounceVertical = YES;
    //开启纵向弹动效果
    sv.alwaysBounceHorizontal = YES;
    //显示横向滚动条
    sv.showsVerticalScrollIndicator = YES;
    //显示纵向滚动条
    sv.showsHorizontalScrollIndicator = YES;
    //设置背景颜色
    sv.backgroundColor = [UIColor yellowColor];
    //使用循环创建5张图片
    for ( int i = 0;i < 5 ;i++) {
        NSString* strName = [NSString stringWithFormat:@"%d.jpg", i+1];
        UIImage* image = [UIImage imageNamed:strName];
        UIImageView* iView = [[UIImageView alloc] initWithImage: image];
        iView.frame = CGRectMake([[UIScreen mainScreen]bounds].size.width*i, 0, [[UIScreen mainScreen]bounds].size.width, [[UIScreen mainScreen]bounds].size.height);
        [sv addSubview: iView];
    }
    [self.view addSubview: sv];
}
效果展示:
这是连续的5张图片中的一张:
九.导航栏控制器(UINavigationController)
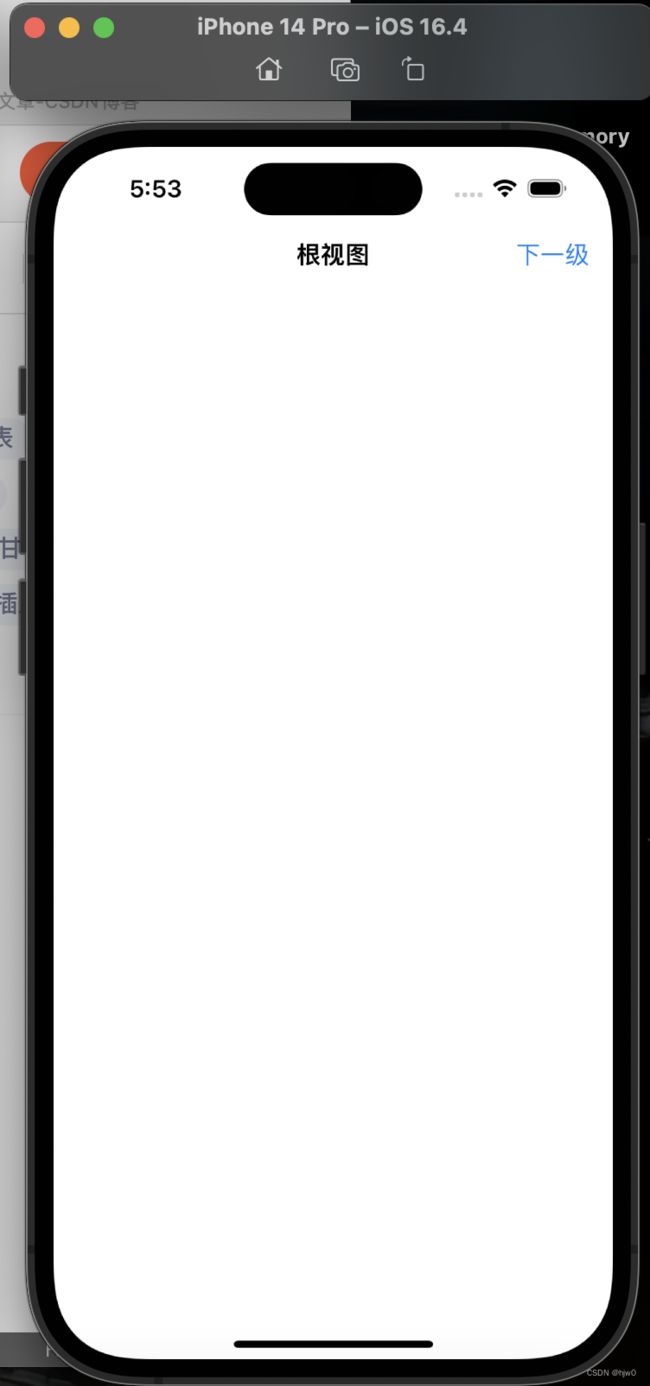
效果展示如下:

可以考到我们的界面多了我们的导航栏,我们先来看一下我们该如何设置我们的导航栏:
//创建根视图控制器
    VCRoot* root = [[VCRoot alloc] init];
    //创建导航控制器
    //导航控制器主要用来管理多个视图控制器的切换
    //层级的方式来管理多个视图控制器
    //创建控制器时,一定要有一个根视图控制器
    //参数一:就是做导航控制器的跟视图控制器
    UINavigationController* nav = [[UINavigationController alloc] initWithRootViewController: root];
    self.window.rootViewController = nav;
    [self.window makeKeyAndVisible];
在这段代码中,我们创建了一个nav变量,它的类型是 UINavigationController,我们将root视图作为nav的根视图控制器,就相当于将root作为我们的导航栏控制器中第一个显示的视图控制器。
根视图控制器通常是导航控制器(UINavigationController)、标签栏控制器(UITabBarController)或分栏控制器(UISplitViewController)等容器控制器,它们可以管理一个或多个子视图控制器。
那么我们将导航控制器的根视图设置完毕后,我们肯定可以试着去切换导航栏控制器的界面,我们这里先给出我们导航栏的根视图的具体代码:
- (void)viewDidLoad {
    [super viewDidLoad];
    // Do any additional setup after loading the view.
    self.view.backgroundColor = [UIColor whiteColor];
    //设置导航栏的标题文字
    self.title = @"根视图";
    //设置导航元素的标题
    //如果没有设置navigationItem.title,
    //系统会使用self.title作为标题
    //如果navigationItem.title不为空
    //将navigationItem.title设置为标题内容。
    self.navigationItem.title = @"Title";
    //创建一个导航栏左侧按钮
    //根据title文字来创建
    //P1:按钮上的文字
    //P2:按钮风格
    //P3:事件拥有者
    //P4:按钮事件
    UIBarButtonItem* leftButton = [[UIBarButtonItem alloc] initWithTitle:@"编辑" style:UIBarButtonItemStyleDone target:self action:@selector(pressLeft)];
    //将导航元素项的左侧按钮赋值
    self.navigationItem.leftBarButtonItem = leftButton;
    //创建一个导航栏左侧按钮
    //根据系统风格来创建按钮
    //只需要指定风格样式,系统风格的按钮内容或者标题文字不能改变
    //P1:按钮风格
    //P2:事件拥有者
    //P3:按钮事件
    UIBarButtonItem* rightButton = [[UIBarButtonItem alloc] initWithBarButtonSystemItem: UIBarButtonSystemItemAdd target: self action:@selector(pressRight)];
    self.navigationItem.rightBarButtonItem = rightButton;
    //标签对象
    UILabel* label = [[UILabel alloc] initWithFrame:CGRectMake(10, 10, 50, 40)];
    label.text = @"test";

    label.textAlignment = NSTextAlignmentCenter;
    label.textColor = [UIColor blueColor];
    //将任何类型的控件添加到导航按钮的方法
    UIBarButtonItem* button = [[UIBarButtonItem alloc] initWithCustomView:label];
    //创建右侧按钮数组
    NSArray* arrayButton = [NSArray arrayWithObjects:rightButton, button, nil];
    //将右侧按钮数组赋值
    self.navigationItem.rightBarButtonItems = arrayButton;

}
- (void) pressLeft {
    NSLog(@"左键被按下");
}
- (void) pressRight {
    NSLog(@"右键被按下");
}
2. 导航栏控制器的切换部分
接下来我们来看一下导航栏控制器的切换部分。
先展示一下效果:


所以首先得定义出来三个视图控制器,分别是用不同的颜色。
先看三个视图部分的代码
//第一个视图的代码
#import "VCRoot.h"
#import "VCSecond.h"
@interface VCRoot ()

@end

@implementation VCRoot

- (void)viewDidLoad {
    [super viewDidLoad];
    // Do any additional setup after loading the view.
    //设置导航栏的透明度
    //默认透明度为YES:可透明
    //NO:使导航栏不透明
    self.navigationController.navigationBar.translucent = YES;
    //设置导航栏的风格颜色
    self.navigationController.navigationBar.barStyle = UIBarStyleDefault;
    self.view.backgroundColor = [UIColor whiteColor];
    self.title = @"根视图";
    //
    UIBarButtonItem* next = [[UIBarButtonItem alloc] initWithTitle:@"下一级" style:UIBarButtonItemStylePlain target:self action:@selector(pressNext)];
    self.navigationItem.rightBarButtonItem = next;

}
- (void) pressNext {
    //创建新的视图控制器
    VCSecond* vcSecond = [[VCSecond alloc] init];
    //使用当前视图控制器的导航控制器对象
    //把第二个视图控制器推入到主视图控制器中
    [self.navigationController pushViewController:vcSecond animated:YES];

}
@end
//第二个视图的代码
#import "VCSecond.h"
#import "VCThird.h"
@interface VCSecond ()

@end
@implementation VCSecond
- (void)viewDidLoad {
    [super viewDidLoad];
    // Do any additional setup after loading the view.
    self.view.backgroundColor = [UIColor greenColor];
    self.title = @"第二级";
    UIBarButtonItem* next = [[UIBarButtonItem alloc] initWithTitle:@"下一级" style:UIBarButtonItemStylePlain target:self action:@selector(pressNext)];
    self.navigationItem.rightBarButtonItem = next;

}
- (void) pressNext {
    VCThird* vc = [[VCThird alloc] init];
    //推入第三个制图控制器
    //self.navigationController 表示的是当前的视图控制器
    [self.navigationController pushViewController:vc animated:YES];
}
@end
//第三个视图控制器的代码
#import "VCThird.h"

@interface VCThird ()

@end

@implementation VCThird

- (void)viewDidLoad {
    [super viewDidLoad];
    // Do any additional setup after loading the view.
    self.view.backgroundColor = [UIColor orangeColor];
    self.title = @"第三级";
    //创建一个返回上一界面的控制器按钮
    UIBarButtonItem* btn = [[UIBarButtonItem alloc] initWithTitle:@"返回" style:UIBarButtonItemStylePlain target:self action:@selector(pressBack)];
    self.navigationItem.leftBarButtonItem = btn;
    //创建一个返回主界面的控制器按钮
    UIBarButtonItem* rbtn = [[UIBarButtonItem alloc] initWithTitle:@"返回主界面" style:UIBarButtonItemStylePlain target:self action:@selector(pressZhu)];
    self.navigationItem.rightBarButtonItem = rbtn;

}
 - (void) pressZhu {
    //直接返回主界面
    [self.navigationController popToRootViewControllerAnimated:YES];
}
 - (void) pressBack {
    //空降当前视图控制器弹出,返回上一级界面
    [self.navigationController popViewControllerAnimated:YES];
}
@end
注意:
在同一个导航控制器堆栈中的视图控制器,它们的 self.navigationController 属性是相同的。因为这些视图控制器都属于同一个导航控制器,它们共享同一个导航堆栈,因此它们的 navigationController 属性指向同一个导航控制器对象。
十.UITabBarController(分栏控制器)
我们先看一下样例:

这底部的几个选项就是我们的分栏控制器,我们还可以配合导航栏对其进行操作,这就像我们qq中的切换消息与动态的功能。
具体步骤如下:
1. 创建视图:
//创建6个视图
	VCone* vc01 = [[VCone alloc] init];
    VCtwo* vc02 = [[VCtwo alloc] init];
    VCthree* vc03 = [[VCthree alloc] init];
    VCfour* vc04 = [[VCfour alloc] init];
    VCfive* vc05 = [[VCfive alloc] init];
    VCsix* vc06 = [[VCsix alloc] init];
2. 设置各个视图控制器的属性:
//设置背景颜色
    vc01.view.backgroundColor = [UIColor redColor];
    vc02.view.backgroundColor = [UIColor orangeColor];
    vc03.view.backgroundColor = [UIColor yellowColor];
    vc04.view.backgroundColor = [UIColor greenColor];
    vc05.view.backgroundColor = [UIColor grayColor];
    vc06.view.backgroundColor = [UIColor blueColor];
    //设置标题
    vc01.title = @"视图1";
    vc02.title = @"视图2";
    vc03.title = @"视图3";
    vc04.title = @"视图4";
    vc05.title = @"视图5";
    vc06.title = @"视图6";
3. 创建UITabBarController对象
创建UITabBarController对象,并将之前创建的视图控制器添加到UITabBarController中。
将所有视图控制器添加到数组中,再将数组添加到tbController.viewControllers中。
    NSArray* arrayVC = [NSArray arrayWithObjects:vc01, vc02, vc03, vc04, vc05, vc06, nil];
    UITabBarController* tbc = [[UITabBarController alloc] init];
    tbc.viewControllers = arrayVC;
    //改变透明度
    tbc.tabBar.translucent = NO;
    tbc.tabBar.barTintColor = [UIColor greenColor];
    //更改按钮颜色风格
    tbc.tabBar.barTintColor = [UIColor whiteColor];
    //设置UITabBarController为根视图控制器
    self.window.rootViewController = tbc;
    tbc.delegate = self;
#import "VCRoot.h"
#import "VCImageShow.h"
#define  WIDTH [[UIScreen mainScreen] bounds].size.width
#define  HEIGHT [[UIScreen mainScreen] bounds].size.height
@interface VCRoot ()

@end

@implementation VCRoot

- (void)viewDidLoad {
    [super viewDidLoad];
    // Do any additional setup after loading the view.
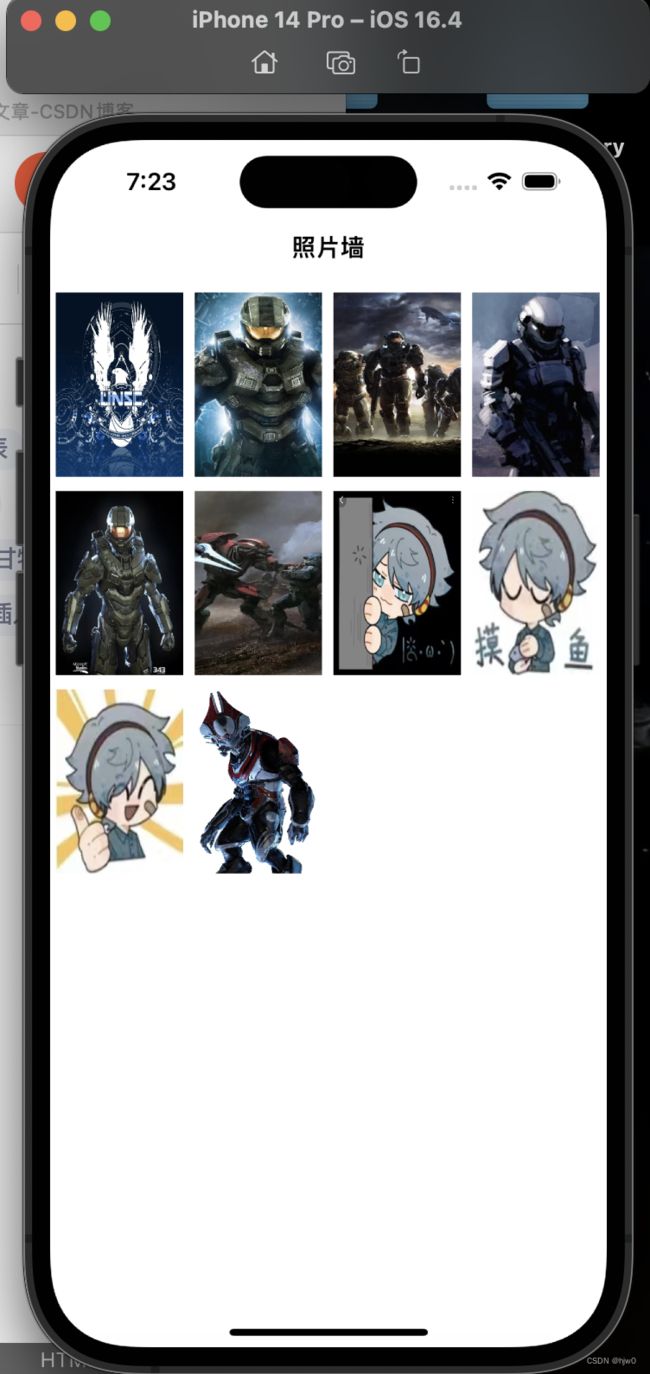
    self.title = @"照片墙";
    //使导航栏不透明
    self.navigationController.navigationBar.translucent = YES;
    //设置位置以及大小
    UIScrollView* sv = [[UIScrollView alloc] initWithFrame:CGRectMake(0, 0, self.view.bounds.size.width, [UIScreen mainScreen].bounds.size.height)];
    //设置画布的大小
    sv.contentSize = CGSizeMake(WIDTH, HEIGHT * 1.5);
    sv.showsVerticalScrollIndicator = NO;
    //打开交互事件
    sv.userInteractionEnabled = YES;
    self.view.backgroundColor = [UIColor whiteColor];
    for (int i = 0; i < 10; i++) {
        NSString* strName = [NSString stringWithFormat:@"%d.jpg", i+1];

        UIImage* image = [UIImage imageNamed:strName];

        UIImageView* iView = [[UIImageView alloc] initWithImage:image];

        iView.frame = CGRectMake(4 + (i%4)*98, (i/4)*140 + 10, 90, 130);

        [sv addSubview: iView];
        //打开交互界面
        iView.userInteractionEnabled = YES;
        //创建点击手势
        UITapGestureRecognizer* tap = [[UITapGestureRecognizer alloc] initWithTarget:self action:@selector(pressTap:)];
        //单次点击
        tap.numberOfTapsRequired = 1;
        //单个手指
        tap.numberOfTouchesRequired = 1;

        [iView addGestureRecognizer: tap];
        //图像对象的tag值
        iView.tag = 101 + i;
    }
    [self.view addSubview:sv];
}
//方法三:
//- (void) pressTap: (UITapGestureRecognizer*) tap{
//    UIImageView* imageView = (UIImageView*) tap.view ;
//    //创建显示视图控制器
//    VCImageShow* imageShow = [[VCImageShow alloc] init];
//    imageShow.imageTag = imageView.tag;
//    //将控制器推出去
//    [self.navigationController pushViewController:imageShow animated:YES];
//}


//方法二:
- (void) pressTap: (UITapGestureRecognizer*) tap{
    UIImageView* imageView = (UIImageView*) tap.view ;
    //创建显示视图控制器
    VCImageShow* imageShow = [[VCImageShow alloc] init];
    //点击的图像视图赋值
    imageShow.image = imageView.image;
    //将控制器推出去
    [self.navigationController pushViewController:imageShow animated:YES];
}

@end
- VCImageShow.h文件
#import <UIKit/UIKit.h>

NS_ASSUME_NONNULL_BEGIN

@interface VCImageShow : UIViewController
//图像视图的Tag
@property (nonatomic, assign) NSUInteger imageTag;
//图像对象
@property (nonatomic, retain) UIImage* image;
//
@property (nonatomic, retain) UIImageView* imageView;
@end
在显示照片的过程中有两种方法:


