idea+docker技术(以及docker_tls安全连接)
idea+docker技术(以及docker_tls安全连接)
1,测试环境1
本地centos7,Docker version 20.10.16, idea2022,jdk8,springboot2.6.7
1.打开docker远程连接:
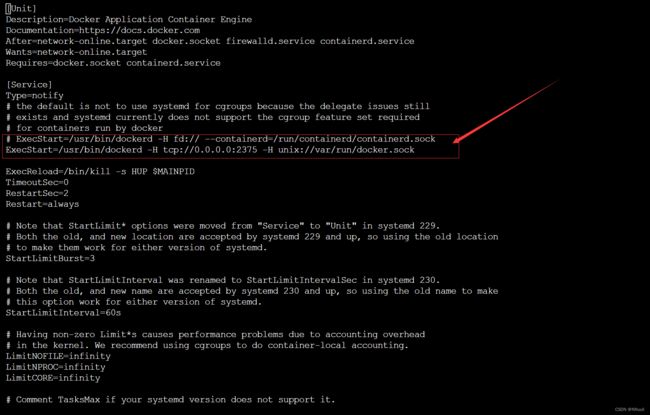
修改docker.service文件
vi /usr/lib/systemd/system/docker.service
![]()
将原来的ExecStart=/usr/bin/dockerd -H fd:// --containerd=/run/containerd/containerd.sock注释掉
添加: ExecStart=/usr/bin/dockerd -H tcp://0.0.0.0:2375 -H unix://var/run/docker.sock
wq保存
重载并重启docker
systemctl daemon-reload && systemctl restart docker
![]()
测试是否成功:
curl 192.168.91.133:2375/version

得到如图结果,说明开启远程连接成功
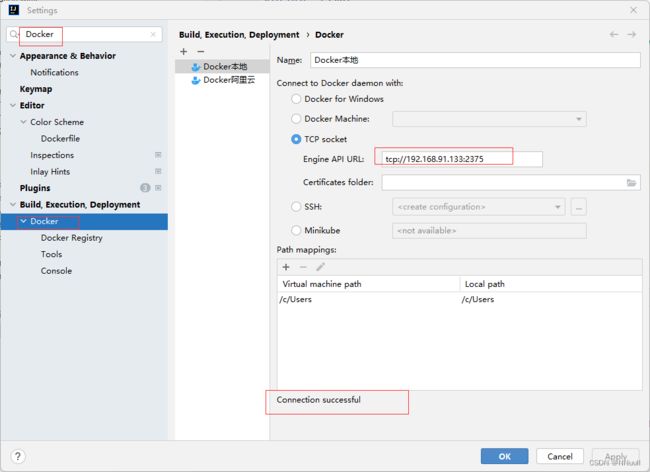
2.idea连接docker
打开setting,找到docker
Eng API URL中输入: tcp://192.168.91.133:2375, 即可简介成功(如果不成功,就在防火墙中开启2375端口)
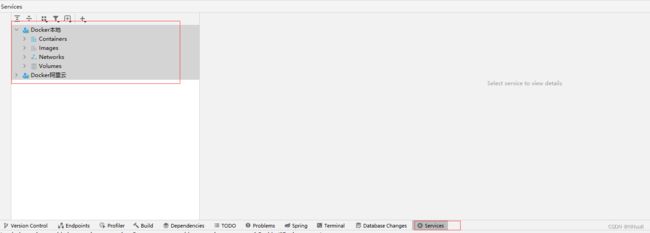
连接成功后,idea下方services中会多出docker的功能
3.项目发布到docker
maven导入docker插件
<plugin>
    <groupId>org.apache.maven.pluginsgroupId>
    <artifactId>maven-surefire-pluginartifactId>
    <configuration>
        <testFailureIgnore>truetestFailureIgnore>
    configuration>
plugin>

<plugin>
    <groupId>com.spotifygroupId>
    <artifactId>docker-maven-pluginartifactId>
    <version>1.0.0version>

    <configuration>

        <dockerHost>http://192.168.91.133:2375dockerHost>

        <imageName>${docker.image.prefix}/${project.artifactId}imageName>
        <dockerDirectory>src/main/dockerdockerDirectory>
        <resources>
            <resource>
                <targetPath>/targetPath>
                <directory>${project.build.directory}directory>
                <include>${project.build.finalName}.jarinclude>
            resource>
        resources>
    configuration>
plugin>
编写Dockerfile文件
FROM java:8
VOLUME /tmp
# zhiyuan02-0.0.1-SNAPSHOT.jar是打包之后jar的名字
ADD zhiyuan02-0.0.1-SNAPSHOT.jar /test.jar
ENTRYPOINT ["java","-Djava.security.egd=file:/dev/./urandom","-jar","/test.jar"]
打包好之后点击maven中的docker build
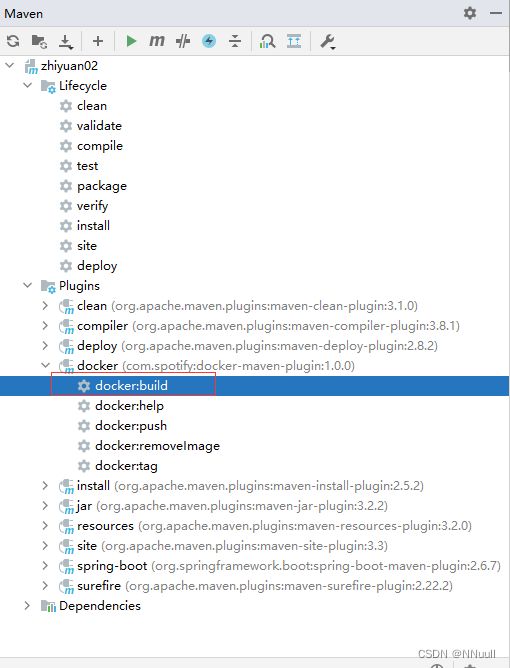
制作镜像成功:
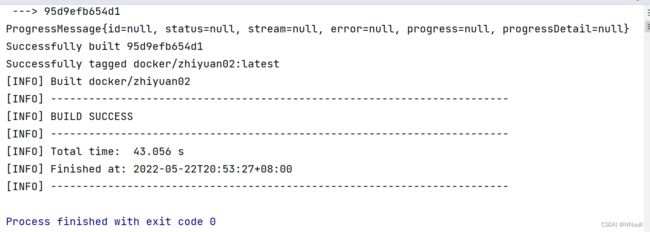
镜像中会多出本项目个jdk8环境

测试运行镜像:


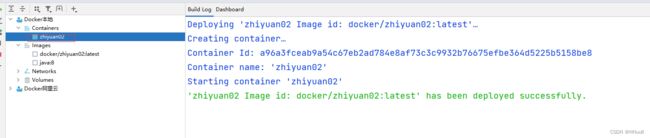

运行成功!
2,测试环境2
参考文献:https://blog.csdn.net/u013737132/article/details/111090922
服务器Alibaba Cloud linux3,Docker version 20.10.16, idea2022,jdk8,springboot2.6.7
由于docker连接并没有身份验证,特别容易中恶意挖矿程序,如果是服务器远程建立连接,则需要考虑身份验证问题
1.首先添加域名解析:
域名为:hanbing777.top
![]()
2.修改主机名为你解析的域名:
vi /etc/hostname
![]()
![]()
reboot重启后生效:
3.生成TLS证书
编写tls.sh脚本
mkdir -p /opt/sh /opt/cert/docker
touch /opt/sh/tls.sh
vim /opt/sh/tls.sh
这里的Docker服务器主机名就是你刚才设置的域名
#!/bin/bash
set -e
if [ -z $1 ];then
        echo "请输入Docker服务器主机名"
        exit 0
fi
HOST=$1
mkdir -p /opt/cert/docker
cd /opt/cert/docker
openssl genrsa -aes256 -out ca-key.pem 4096
openssl req -new -x509 -days 365 -key ca-key.pem -sha256 -out ca.pem
openssl genrsa -out server-key.pem 4096
openssl req -subj "/CN=$HOST" -sha256 -new -key server-key.pem -out server.csr
# 配置白名单,推荐配置0.0.0.0,允许所有IP连接但只有证书才可以连接成功
echo subjectAltName = DNS:$HOST,IP:0.0.0.0 > extfile.cnf
openssl x509 -req -days 365 -sha256 -in server.csr -CA ca.pem -CAkey ca-key.pem -CAcreateserial -out server-cert.pem -extfile extfile.cnf
openssl genrsa -out key.pem 4096
openssl req -subj '/CN=client' -new -key key.pem -out client.csr
echo extendedKeyUsage = clientAuth > extfile.cnf
openssl x509 -req -days 365 -sha256 -in client.csr -CA ca.pem -CAkey ca-key.pem -CAcreateserial -out cert.pem -extfile extfile.cnf
rm -v client.csr server.csr
chmod -v 0400 ca-key.pem key.pem server-key.pem
chmod -v 0444 ca.pem server-cert.pem cert.pem
4执行 tls.sh 脚本
sh tls.sh
![]()
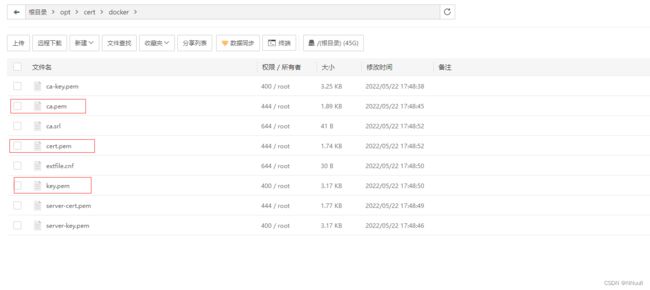
按照提示输入相关信息,密码一致,其他信息可留空,等脚本指定完成之后,可在 /opt/cert/docker 目录查看到生成的证书。
生成证书放置 /opt/cert/docker 目录中
5.配置docker.service文件
将原来的ExecStart=/usr/bin/dockerd -H fd:// --containerd=/run/containerd/containerd.sock注释掉
改成:
ExecStart=/usr/bin/dockerd \
--tlsverify --tlscacert=/opt/cert/docker/ca.pem  \
--tlscert=/opt/cert/docker/server-cert.pem \
--tlskey=/opt/cert/docker/server-key.pem \
-H tcp://0.0.0.0:2376 -H unix://var/run/docker.sock
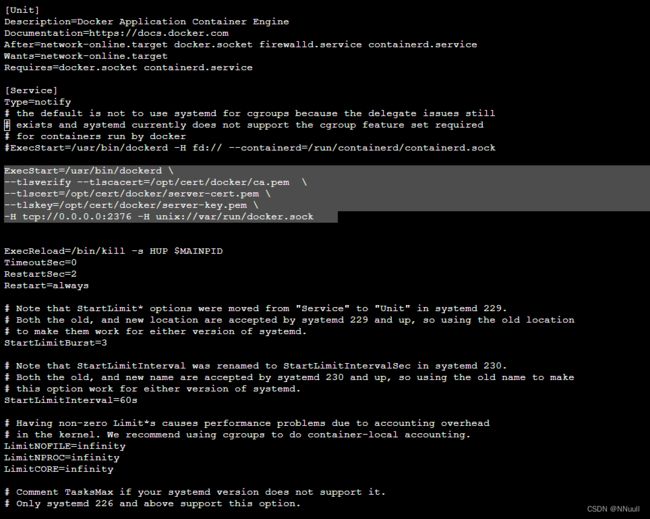
wq保存
重载并重启docker
systemctl daemon-reload && systemctl restart docker
6.测试
查看2376端口是否启动
netstat -nltp | grep 2376

- 没有指定证书访问测试
curl https://hanbing777.top:2376/info
报错:

- 指定证书访问测试
curl --insecure https://hanbing777.top:2376/info --cert /opt/cert/docker/cert.pem --key /opt/cert/docker/key.pem --cacert /opt/cert/docker/ca.pem
成功:

7.idea连接:
1.下载证书到本地
将ca.pem, cert.pem, key.pem下载到本地

连接地址:https://hanbing777.top:2376
注意:这里是https协议
证书地址: F:\dockerkey\ali
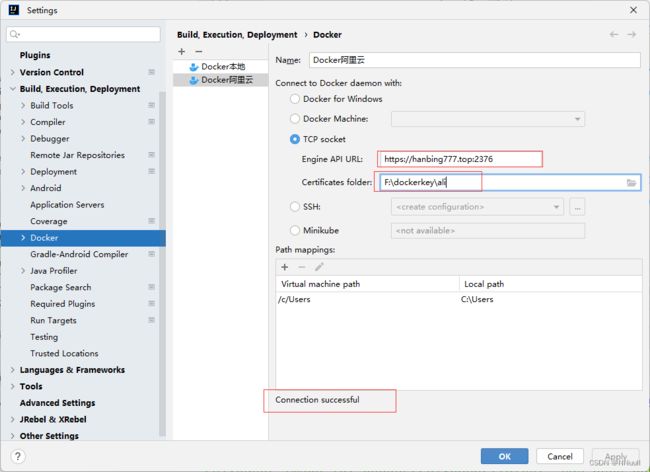
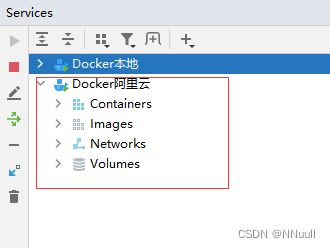
此时services中就可以看到阿里云的docker
8.项目发布:
maven配置(比原来多出tls证书的地址)
<plugin>
    <groupId>org.apache.maven.pluginsgroupId>
    <artifactId>maven-surefire-pluginartifactId>
    <configuration>
        <testFailureIgnore>truetestFailureIgnore>
    configuration>
plugin>

<plugin>
    <groupId>com.spotifygroupId>
    <artifactId>docker-maven-pluginartifactId>
    <version>1.0.0version>

    <configuration>

        <dockerHost>https://hanbing777.top:2376dockerHost>

        <dockerCertPath>F:\dockerkey\alidockerCertPath>

        <imageName>${docker.image.prefix}/${project.artifactId}imageName>
        <dockerDirectory>src/main/dockerdockerDirectory>
        <resources>
            <resource>
                <targetPath>/targetPath>
                <directory>${project.build.directory}directory>
                <include>${project.build.finalName}.jarinclude>
            resource>
        resources>
    configuration>
plugin>
其余打包发布和测试环境1完全一致,不再赘述
最终结果:
