UnityShader(十二)实现标准光照模型中的高光反射
目录
基本光照模型中的高光反射公式:
逐顶点光照
逐像素光照
基本光照模型中的高光反射公式:
![]()
从公式可以看出 要计算高光反射需要知道四个参数:入射光线的颜色和强度clight,材质的高光反射系数mspecular,视角方向v以及反射方向r。其中,反射方向r可以由表面法线n和光源方向l计算得到
即:
上述公式很简单,Cg也提供了计算反射方向的函数reflect
函数:reflect(i,n)
参数:i:入射方向;n:法线方向。可以是float,float2,float3等类型。
描述:当给定入射方向i和法线方向n时,reflect函数可以返回反射方向
逐顶点光照
//给Shader命名
Shader "MyShader/SpecularVertex"
{
    //_Specular控制材质的高光反射属性,_Gloss控制高光区域的大小
    Properties
    {
        _Diffuse("Diffuse",color)=(1,1,1,1)
        _Specular("Specular",color)=(1,1,1,1)
        _Gloss("Gloss",Range(8.0,256))=20
    }

    SubShader
    {
        Pass
        {
            Tags{"LightMode"="ForwardBase"}

            CGPROGRAM

            #pragma vertex vert
            #pragma fragment frag
            #include "Lighting.cginc"

            fixed4 _Diffuse;
            fixed4 _Specular;
            float _Gloss;

            struct a2v
            {
                float4 vertex:POSITION;
                float3 normal:NORMAL;
            };

            struct v2f
            {
                float4 pos:SV_POSITION;
                fixed3 color:COLOR;
            };

            v2f vert(a2v v)
            {
                v2f o;
                o.pos=UnityObjectToClipPos(v.vertex);
                fixed3 ambient=UNITY_LIGHTMODEL_AMBIENT.xyz;

                fixed3 worldNormal=normalize(mul(v.normal,(float3x3)unity_WorldToObject));
                fixed3 worldLightDir=normalize(_WorldSpaceLightPos0.xyz);
                fixed3 diffuse=_LightColor0.rgb*_Diffuse.rgb*saturate(dot(worldNormal,worldLightDir));

                /*对于高光反射部分,先计算入射光线方向关于表面法线的反射方向reflectDir
                由于Cg的reflect函数的入射方向要求是由光源指向交点处,因此需要对worldLightDir取反后再传给reflect函数。
                然后通过_WorldSpaceCameraPos得到世界空间中的摄像机位置,再把顶点位置从模型空间变换到世界空间下,
                再通过和_WorldSpaceCameraPos相减得到世界空间下的视角方向。*/
                fixed3 reflectDir=normalize(reflect(-worldLightDir,worldNormal));
                fixed3 viewDir=normalize(_WorldSpaceCameraPos.xyz-mul(unity_ObjectToWorld,v.vertex).xyz);
                fixed3 specular=_LightColor0.rgb*_Specular.rgb*pow(saturate(dot(reflectDir,viewDir)),_Gloss);

                o.color=ambient+diffuse+specular;
                return o;
            }

            fixed4 frag(v2f i):SV_TARGET
            {
                return fixed4(i.color,1.0);
            }

            ENDCG
        }
    }

    FallBack "Specular"
}
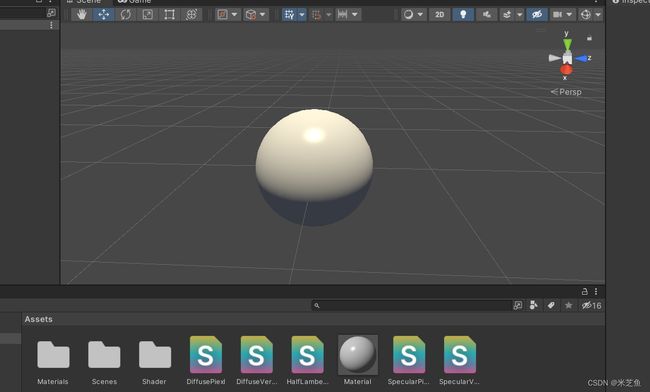
效果:
使用逐顶点的方法得到的效果有较大的问题。我们可以看到高光部分并不平滑,这是因为高光反射部分的计算是非线性的,而在顶点着色器中计算光照再进行插值的过程是线性的,破坏了原计算的非线性关系。因此我们就需要采用逐像素的方法计算高光反射。
逐像素光照
//给Shader命名
Shader "MyShader/SpecularPiexl"
{
    //_Specular控制材质的高光反射属性,_Gloss控制高光区域的大小
    Properties
    {
        _Diffuse("Diffuse",color)=(1,1,1,1)
        _Specular("Specular",color)=(1,1,1,1)
        _Gloss("Gloss",Range(8.0,256))=20
    }

    SubShader
    {
        Pass
        {
            Tags{"LightMode"="ForwardBase"}

            CGPROGRAM

            #pragma vertex vert
            #pragma fragment frag
            #include "Lighting.cginc"

            fixed4 _Diffuse;
            fixed4 _Specular;
            float _Gloss;

            struct a2v
            {
                float4 vertex:POSITION;
                float3 normal:NORMAL;
            };

            //修改顶点着色器的输出结构体
            struct v2f
            {
                float4 pos:SV_POSITION;
                fixed3 worldNormal:TEXCOORD0;
                fixed3 worldPos:TEXCOORD1;
            };

            //顶点着色器只需要计算世界空间下的法线方向和顶点坐标并传递给片元着色器
            v2f vert(a2v v)
            {
                v2f o;
                o.pos=UnityObjectToClipPos(v.vertex);
                o.worldNormal=mul(v.normal,(float3x3)unity_WorldToObject);
                o.worldPos=mul(unity_ObjectToWorld,v.vertex).xyz;

                return o;
            }

            fixed4 frag(v2f i):SV_TARGET
            {
                fixed3 ambient=UNITY_LIGHTMODEL_AMBIENT.xyz;

                fixed3 worldNormal=normalize(i.worldNormal);
                fixed3 worldLightDir=normalize(_WorldSpaceLightPos0.xyz);
                fixed3 diffuse=_LightColor0.rgb*_Diffuse.rgb*saturate(dot(worldNormal,worldLightDir));

                fixed3 reflectDir=normalize(reflect(-worldLightDir,worldNormal));
                fixed3 viewDir=normalize(_WorldSpaceCameraPos.xyz-i.worldPos.xyz);
                fixed3 specular=_LightColor0.rgb*_Specular.rgb*pow(saturate(dot(reflectDir,viewDir)),_Gloss);

                return fixed4(ambient+diffuse+specular,1.0);
            }

            ENDCG
        }
    }

    FallBack "Specular"
}
效果:
可以看出,按照逐像素的方式处理光照可以得到更加平滑的高光效果。

