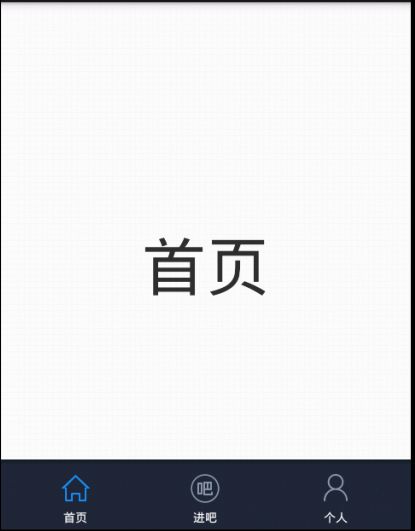
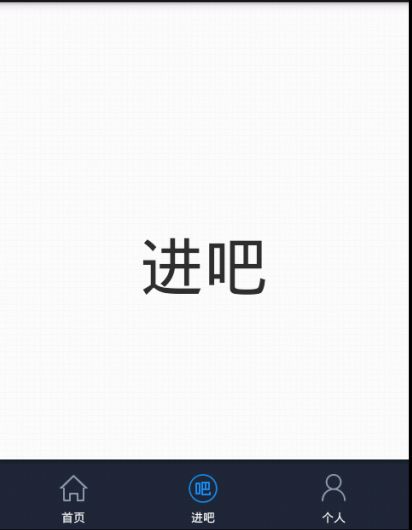
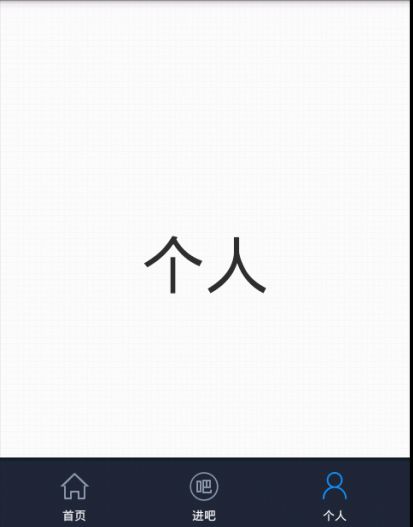
小杨的Android学习之旅(2)——模拟百度贴吧底部导航栏
晚上没啥事做,朋友过生日喝了点酒,就不准备敲代码了,在之前在网上找了一个底部导航栏的demo,下午就做了一下,实现的方法比较简单,也很容易理解,是用TabActivity和TabHost做的。
不过好像在Android4.0以后放弃了TabActivity 改用 FragmentActivity,对于Fragment和 FragmentActivity我不是很懂,等我下来学懂了,再结合网上的例子写一个demo。
好吧,废话就不说了,我们上代码,照旧先来布局文件。
这就是底部TabHost的主布局文件
<TabHost xmlns:android="http://schemas.android.com/apk/res/android"
xmlns:tools="http://schemas.android.com/tools"
android:id="@android :id/tabhost"
android:layout_width="fill_parent"
android:layout_height="fill_parent" >
<LinearLayout
android:layout_width="fill_parent"
android:layout_height="fill_parent"
android:orientation="vertical">
<FrameLayout
android:id="@android :id/tabcontent"
android:layout_width="fill_parent"
android:layout_height="0.0dip"
android:layout_weight="1.0" />
<TabWidget
android:id="@android :id/tabs"
android:layout_width="fill_parent"
android:layout_height="wrap_content"
android:layout_weight="0.0"
android:visibility="gone" />
<FrameLayout
android:layout_width="fill_parent"
android:layout_height="wrap_content"
android:layout_gravity="bottom"
android:layout_marginTop="-10.0dip"
android:background="@drawable/bg_group_information_image"
android:paddingLeft="7.0dip"
android:paddingRight="7.0dip" >
<RadioGroup
android:id="@+id/main_radio"
android:layout_width="fill_parent"
android:layout_height="wrap_content"
android:gravity="center_vertical"
android:orientation="horizontal" >
<RadioButton
android:id="@+id/radio_home"
style="@style/main_tab_bottom"
android:drawableTop="@drawable/home_selector"
android:text="首页" />
<RadioButton
android:id="@+id/radio_jinba"
style="@style/main_tab_bottom"
android:drawableTop="@drawable/jinba_selector"
android:text="进吧" />
<RadioButton
android:id="@+id/radio_person_info"
style="@style/main_tab_bottom"
android:drawableTop="@drawable/individual_selector"
android:text="个人" />
</RadioGroup>
</FrameLayout>
</LinearLayout>
</TabHost>
接下来就是按钮的style
<style name="main_tab_bottom">
<item name="android:textSize">9.0sp</item>
<item name="android:textColor">#FFF</item>
<item name="android:gravity">center_horizontal</item>
<item name="android:paddingTop">3.0dip</item>
<item name="android:paddingBottom">1.0dip</item>
<item name="android:layout_width">wrap_content</item>
<item name="android:layout_height">wrap_content</item>
<item name="android:layout_marginTop">2.0dip</item>
<item name="android:layout_marginBottom">1.0dip</item>
<item name="android:button">@null</item>
<item name="android:singleLine">true</item>
<item name="android:drawablePadding">3.0dip</item>
<item name="android:layout_weight">1.0</item>
</style>这个很好理解,相信大家一看就会明白,为什么这么写,就是因为所有的按钮都是一个布局,写一个总比写一大堆好吧,这就是style的好处
剩下的就是activity的java代码
package com.example.myalarmclock;
import android.app.TabActivity;
import android.content.Intent;
import android.os.Bundle;
import android.widget.CompoundButton;
import android.widget.CompoundButton.OnCheckedChangeListener;
import android.widget.RadioButton;
import android.widget.TabHost;
public class MainActivity extends TabActivity implements
OnCheckedChangeListener {
//定义单选按钮
private RadioButton person, jinba, home;
// 定义Intent对象
private Intent mHomeIntent, mJinbaIntent, mPersonIntent;
// 定义TabHost对象
private TabHost mTabHost;
// 定义Tab选项卡标示符
private static final String HOME_TAB = "home_tab";
private static final String JINBA_TAB = "jinba_tab";
private static final String PERSON_TAB = "person_tab";
@Override
protected void onCreate(Bundle savedInstanceState) {
super.onCreate(savedInstanceState);
setContentView(R.layout.activity_main);
initView();
initData();
}
/**
* 初始化组件
*/
private void initView(){
//得到TabHost
mTabHost = getTabHost();
//得到Intent对象
mHomeIntent = new Intent(this, HomeActivity.class);
mJinbaIntent = new Intent(this, JinbaActivity.class);
mPersonIntent = new Intent(this, PersonActivity.class);
//得到单选按钮对象
home = (RadioButton) findViewById(R.id.radio_home);
person = (RadioButton) findViewById(R.id.radio_person_info);
jinba = (RadioButton) findViewById(R.id.radio_jinba);
}
/**
* 初始化数据
*/
private void initData(){
//给单选按钮设置监听
home.setOnCheckedChangeListener(this);
person.setOnCheckedChangeListener(this);
jinba.setOnCheckedChangeListener(this);
//添加进Tab选项卡
mTabHost.addTab(buildTabSpec(HOME_TAB, mHomeIntent));
mTabHost.addTab(buildTabSpec(JINBA_TAB, mJinbaIntent));
mTabHost.addTab(buildTabSpec(PERSON_TAB, mPersonIntent));
//设置当前默认的Tab选项卡页面
home.setChecked(true);
mTabHost.setCurrentTabByTag(HOME_TAB);
}
private TabHost.TabSpec buildTabSpec(String tag, Intent intent) {
TabHost.TabSpec tabSpec = mTabHost.newTabSpec(tag);
tabSpec.setContent(intent).setIndicator("");
return tabSpec;
}
/**
* Tab按钮选中监听事件
*/
public void onCheckedChanged(CompoundButton buttonView, boolean isChecked) {
if (isChecked) {
switch (buttonView.getId()) {
case R.id.radio_home:
mTabHost.setCurrentTabByTag(HOME_TAB);
break;
case R.id.radio_jinba:
mTabHost.setCurrentTabByTag(JINBA_TAB);
break;
case R.id.radio_person_info:
mTabHost.setCurrentTabByTag(PERSON_TAB);
break;
}
}
}
}
不难吧,我都觉得没什么要说。
然后在去写你定义好的avtivity吧,每个activity都在intent里定义好了,你也可以自己修改自己的radiobutton
接下来就看看截图
http://115.com/lb/5lbdaatj91iw#
BaiduDemo.rar
115网盘礼包码:5lbdaatj91iw


