WF4.0实战(十六):模拟红绿灯
概述:
在我眼里,每天马路上的红绿灯闪呀闪的,也是一个流程,这个流程是一个反复的流程。这个流程算从红灯开始吧,然后是黄灯,然后是绿灯,然后又是黄灯,接着回到红灯。这个流程是反复的。黄灯是个过度,时间相对较短,红灯和绿灯时间较长,所以,很多人称交通灯为红绿灯,而不是红黄绿灯。这个例子使用WPF和WF模拟交通灯的功能。主要为了说明WPF和WF是如何交互的。先看效果,在讲述一下如何实现,最后总结。
这个示例的流程为:红灯显示5秒,黄灯显示2秒,绿灯显示5秒 ,黄灯显示2秒,红灯显示5秒。如此反复。
效果:
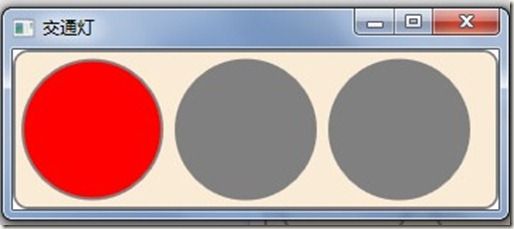
启动为红灯:
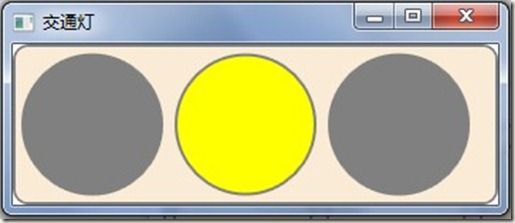
5秒之后红绿灯变黄
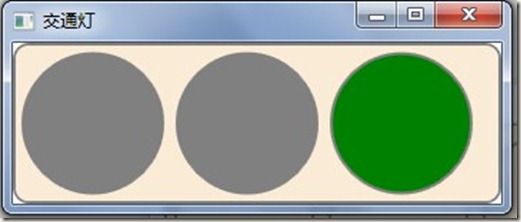
2秒之后变绿灯
5秒之后又变成黄灯,接着2秒之后变红灯,如此来回反复下去。
实现篇:
新建一个wpf应用程序,在MainWindow.xaml中添加下面xaml代码用于模拟红绿灯:
        <Grid>
            <Border Background="AntiqueWhite"
                CornerRadius="10"
                BorderBrush="Gray"
                BorderThickness="2">
                <StackPanel VerticalAlignment="Center" Orientation="Horizontal" >
                    <StackPanel.Resources>
                        <Style TargetType="{x:Type Ellipse}">
                            <Setter Property="Width"
                                Value="100" />
                            <Setter Property="Height"
                                Value="100" />
                            <Setter Property="Fill"
                                Value="LightGray" />
                            <Setter Property="Stroke"
                                Value="Gray" />
                            <Setter Property="StrokeThickness"
                                Value="2" />
                            <Setter Property="Margin"
                                Value="4" />
                        </Style>
                    </StackPanel.Resources>

                    <Ellipse  Fill="{Binding variable1, UpdateSourceTrigger=PropertyChanged}"  />
                    <Ellipse  Fill="{Binding variable2, UpdateSourceTrigger=PropertyChanged}" />
                    <Ellipse   Fill="{Binding variable3, UpdateSourceTrigger=PropertyChanged}" />
                </StackPanel>
            </Border>
        </Grid>
定义流程:
定义三个变量variable1、variable2、variable3表示三种灯的颜色。流程的一部分,初始值variable1为红色,variable2、variable3为灰色。“更新为红色灯”活动用于更新WPF应用程序中的一个绑定属性,Delay用于暂停流程,延时5秒
在MainWindow中添加个属性:
  WorkflowDataContext _workflowContext;
        public WorkflowDataContext WorkflowContext
        {
            get { return _workflowContext; }
            set
            {
                this.Dispatcher.BeginInvoke(DispatcherPriority.Normal,
                    (Action)delegate() { this.DataContext = value; });

                _workflowContext = value;
            }

        }
WorkflowContext就是流程中需要更新的属性。
在构造函数中添加启动流程的代码:
            _application1 = new WorkflowApplication(new Activity1());
            _application1.Completed = (workflowApplicationCompletedEventArgs) =>
            {
                this.Dispatcher.Invoke(DispatcherPriority.Normal,
                    (Action)delegate()
                    {
                        this.DataContext = null;
                        _isWorkflowStarted = false;
                    }
                        );

            };

            _application1.Extensions.Add(this);
            _application1.Run();
            _isWorkflowStarted = true;
如果窗体关闭的时候,流程还没有结束,在窗体关闭事件中添加下面代码:
        private void Window_Closed(object sender, EventArgs e)
        {
            if (_application1 != null && _isWorkflowStarted == true)
                _application1.Terminate("Main Window closed");
        }
总结:
这个例子很简单,主要是为了说明WPF和WF的另一种交互方式。本系列前面也提出了一种WPF和WF交互的方式:WF4.0实战(六):控制WPF动画,这个例子中wpf应用程序通过WF的扩展的方式将WPF窗体传递给流程的,方式为:
_application1.Extensions.Add(this);
代码:
http://files.cnblogs.com/zhuqil/WpfApplication2.rar
原文链接: http://www.cnblogs.com/zhuqil/archive/2010/05/18/TrafficLight.html


