ios游戏开发 Sprite Kit教程:初学者 2
注:本文译自Sprite Kit Tutorial for Beginners
目录
- Sprite Kit的优点和缺点
- Sprite Kit vs Cocos2D-iPhone vs Cocos2D-X vs Unity
- Hello, Sprite Kit!
- 横屏显示
- 移动怪兽
- 发射炮弹
- 碰撞检测: 概述
- 碰撞检测: 实现
- 收尾
- 何去何从?
横屏显示
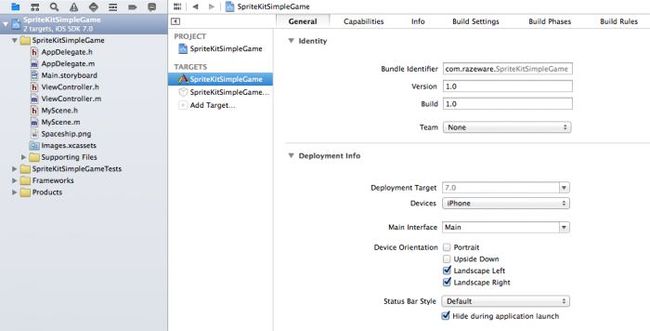
首先,在Project Navigator中单击SpriteKitSimpleGame工程以打开target设置,选中SpriteKitSimpleGame target。然后在Deployment Info中,不要勾选Portrait,只选中Landscape和Landscape Right,如下所示:
编译并运行工程,会看到如下运行画面:
下面我们试着添加一个忍者(ninja)。
首先,下载此工程的资源文件,并将其拖拽到Xcode工程中。确保勾选上“Copy items into destination group’s folder (if needed)”和SpriteKitSimpleGame target。
接着,打开MyScene.m,并用下面的内容替换之:
1 2 3 4 5 6 7 8 9 10 11 12 13 14 15 16 17 18 19 20 21 22 23 24 25 26 27 28 |
#import "MyScene.h" // 1 @interface MyScene () @property (nonatomic) SKSpriteNode * player; @end @implementation MyScene -(id)initWithSize:(CGSize)size { if (self = [super initWithSize:size]) { // 2 NSLog(@"Size: %@", NSStringFromCGSize(size)); // 3 self.backgroundColor = [SKColor colorWithRed:1.0 green:1.0 blue:1.0 alpha:1.0]; // 4 self.player = [SKSpriteNode spriteNodeWithImageNamed:@"player"]; self.player.position = CGPointMake(100, 100); [self addChild:self.player]; } return self; } @end |
我们来看看上面的代码。
- 为了给player(例如忍者)声明一个私有变量,在这里创建了一个私有的interface,之后可以把这个私有变量添加到场景中。
- 在这里打印出了场景的size,至于什么原因很快你就会看到了。
- 在Sprite Kit中设置一个场景的背景色非常简单——只需要设置backgroundColor属性,在这里将其设置位白色。
- 在Sprite Kit场景中添加一个精灵同样非常简单,只需要使用spriteNodeWithImageNamed方法,并把一副图片的名称传递进去就可以创建一个精灵。接着设置一下精灵的位置,然后调用addChild方法将该精灵添加到场景中。在代码中将忍者的位置设置为(100, 100),该位置是从屏幕的左下角到右上角计算的。
编译并运行,看看效果如何…
呀!屏幕是白色的,并没有看到忍者。这是为什么呢?你可能在想设计之初就是这样的,实际上这里有一个问题。
如果你观察一下控制台输出的内容,会看到如下内容
1 |
SpriteKitSimpleGame[3139:907] Size: {320, 568} |
可能你会认为场景的宽度是320,高度则是568——实际上刚好相反!
我们来看看具体发生了什么:定位到ViewController.m的viewDidLoad方法:
1 2 3 4 5 6 7 8 9 10 11 12 13 14 15 16 |
- (void)viewDidLoad { [super viewDidLoad]; // Configure the view. SKView * skView = (SKView *)self.view; skView.showsFPS = YES; skView.showsNodeCount = YES; // Create and configure the scene. SKScene * scene = [MyScene sceneWithSize:skView.bounds.size]; scene.scaleMode = SKSceneScaleModeAspectFill; // Present the scene. [skView presentScene:scene]; } |
上面的代码中利用view的边界size创建了场景。不过请注意,当viewDidLoad被调用的时候,在这之前view已经被添加到view层次结构中了,因此它还没有响应出布局的改变。所以view的边界可能还不正确,进而在viewDidLoad中并不是开启场景的最佳时机。
提醒:要想了解更多相关内容,请看由Rob Mayoff带来的最佳解释。
解决方法就是将开启场景代码的过程再靠后一点。用下面的代码替换viewDidLoad:
1 2 3 4 5 6 7 8 9 10 11 12 13 14 15 16 17 18 |
- (void)viewWillLayoutSubviews { [super viewWillLayoutSubviews]; // Configure the view. SKView * skView = (SKView *)self.view; if (!skView.scene) { skView.showsFPS = YES; skView.showsNodeCount = YES; // Create and configure the scene. SKScene * scene = [MyScene sceneWithSize:skView.bounds.size]; scene.scaleMode = SKSceneScaleModeAspectFill; // Present the scene. [skView presentScene:scene]; } } |
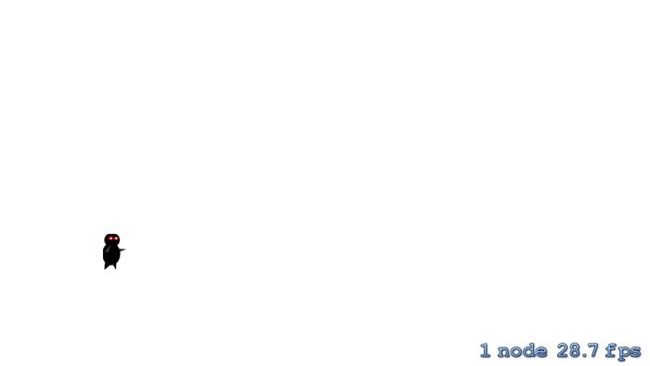
编译并运行程序,可以看到,忍者已经显示在屏幕中了!
如上图所示,可以看到坐标系已经正确了,如果想要把忍者的位置设置为其中间靠左,那么在MyScene.m中用下面的代码来替换设置忍者位置相关的代码:
1 |
self.player.position = CGPointMake(self.player.size.width/2, self.frame.size.height/2); |
移动怪兽
接下来,我们希望在场景中添加一些怪兽,让忍者进行攻击。为了让游戏更有趣一点,希望怪兽能够移动——否则没有太大的挑战!OK,我们就在屏幕的右边,离屏的方式创建怪兽,并给怪兽设置一个动作:告诉它们往左边移动。
将下面这个方法添加到MyScene.m中:
1 2 3 4 5 6 7 8 9 10 11 12 13 14 15 16 17 18 19 20 21 22 23 24 25 26 27 28 |
- (void)addMonster { // Create sprite SKSpriteNode * monster = [SKSpriteNode spriteNodeWithImageNamed:@"monster"]; // Determine where to spawn the monster along the Y axis int minY = monster.size.height / 2; int maxY = self.frame.size.height - monster.size.height / 2; int rangeY = maxY - minY; int actualY = (arc4random() % rangeY) + minY; // Create the monster slightly off-screen along the right edge, // and along a random position along the Y axis as calculated above monster.position = CGPointMake(self.frame.size.width + monster.size.width/2, actualY); [self addChild:monster]; // Determine speed of the monster int minDuration = 2.0; int maxDuration = 4.0; int rangeDuration = maxDuration - minDuration; int actualDuration = (arc4random() % rangeDuration) + minDuration; // Create the actions SKAction * actionMove = [SKAction moveTo:CGPointMake(-monster.size.width/2, actualY) duration:actualDuration]; SKAction * actionMoveDone = [SKAction removeFromParent]; [monster runAction:[SKAction sequence:@[actionMove, actionMoveDone]]]; } |
在上面,我尽量让代码看起来容易理解。首先是通过一个简单的计算,确定怪兽出现的位置,并将该位置设置给怪兽,然后将其添加到场景中。
接着是添加动作(actions)。跟Cocos2D一样,Sprite Kit同样提供了很多方便的内置动作,例如移动动作、旋转动作、淡入淡出动作、动画动作等。在这里我们只需要在怪兽上使用3中动作即可:
- moveTo:duration:使用这个动作可以把怪兽从屏幕外边移动到左边。移动过程中,我们可以指定移动持续的时间,上面的代码中,指定为2-4秒之间的一个随机数。
- removeFromParent:在Sprite Kit中,可以使用该方法,方便的将某个node从parent中移除,能有效的从场景中删除某个对象。此处,将不再需要显示的怪兽从场景中移除。这个功能非常的重要,否则当有源源不断的怪兽出现在场景中时,会耗尽设备的所有资源。
- sequence:sequence动作可以一次性就把一系列动作串联起来按照一定顺序执行。通过该方法我们就能让moveTo:方法先执行,当完成之后,在执行removeFromParent:动作。
最后,我们需要做的事情就是调用上面这个方法addMonster,以实际的创建出怪兽!为了更加好玩,下面我们来让怪兽随着时间持续的出现在屏幕中。
在Sprite Kit中,并不能像Cocos2D一样,可以配置每隔X秒就回调一下update方法。同样也不支持将从上次更新到目前为止的时间差传入方法中。(非常令人吃惊!)。
不过,我们可以通过一小段代码来仿造这种行为。首先在MyScene.m的private interface中添加如下属性:
1 2 |
@property (nonatomic) NSTimeInterval lastSpawnTimeInterval; @property (nonatomic) NSTimeInterval lastUpdateTimeInterval; |
通过lastSpawnTimeInterval可以记录着最近出现怪兽时的时间,而lastUpdateTimeInterval可以记录着上次更新时的时间。
接着,我们写一个方法,该方法在画面每一帧更新的时候都会被调用。记住,该方法不会被自动调用——需要另外写一个方法来调用它:
1 2 3 4 5 6 7 8 |
- (void)updateWithTimeSinceLastUpdate:(CFTimeInterval)timeSinceLast { self.lastSpawnTimeInterval += timeSinceLast; if (self.lastSpawnTimeInterval > 1) { self.lastSpawnTimeInterval = 0; [self addMonster]; } } |
上面的代码中简单的将上次更新(update调用)的时间追加到self.lastSpawnTimeInterval中。一旦该时间大于1秒,就在场景中新增一个怪兽,并将lastSpawnTimeInterval重置。
最后,添加如下方法来调用上面的方法:
1 2 3 4 5 6 7 8 9 10 11 12 13 |
- (void)update:(NSTimeInterval)currentTime { // Handle time delta. // If we drop below 60fps, we still want everything to move the same distance. CFTimeInterval timeSinceLast = currentTime - self.lastUpdateTimeInterval; self.lastUpdateTimeInterval = currentTime; if (timeSinceLast > 1) { // more than a second since last update timeSinceLast = 1.0 / 60.0; self.lastUpdateTimeInterval = currentTime; } [self updateWithTimeSinceLastUpdate:timeSinceLast]; } |
Sprite Kit在显示每帧时都会调用上面的update:方法。
上面的代码其实是来自苹果提供的Adventure示例中。该方法会传入当前的时间,在其中,会做一些计算,以确定出上一帧更新的时间。注意,在代码中做了一些合理性的检查,以避免从上一帧更新到现在已经过去了大量时间,并且将间隔重置为1/60秒,避免出现奇怪的行为。
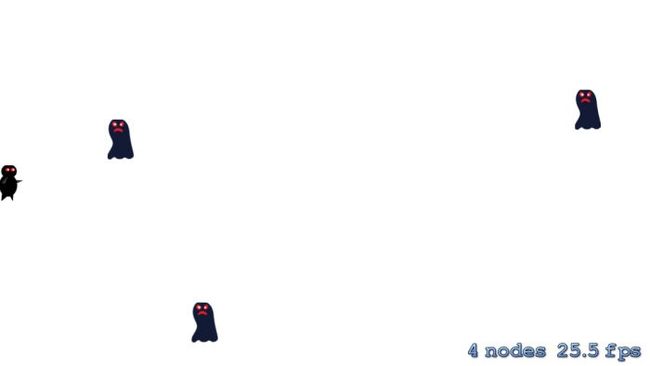
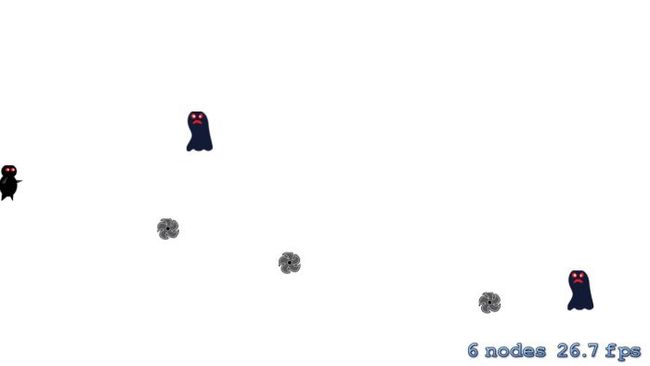
现在编译并运行程序,可以看到许多怪兽从左边移动到屏幕右边并消失。
发射炮弹
现在我们开始给忍者添加一些动作,首先从发射炮弹开始!实际上有多种方法来实现炮弹的发射,不过,在这里要实现的方法时当用户tap屏幕时,从忍者的方位到tap的方位发射一颗炮弹。
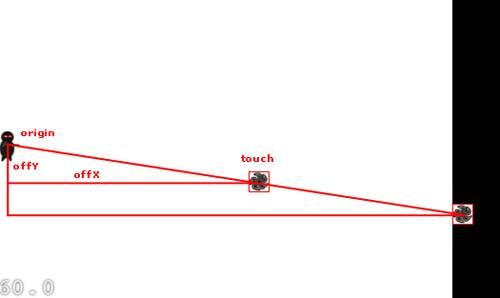
由于本文是针对初级开发者,所以在这里我使用moveTo:动作来实现,不过这需要做一点点的数学运算——因为moveTo:方法需要指定炮弹的目的地,但是又不能直接使用touch point(因为touch point仅仅代表需要发射的方向)。实际上我们需要让炮弹穿过touch point,直到炮弹在屏幕中消失。
如下图,演示了上面的相关内容:
如图所示,我们可以通过origin point到touch point得到一个小的三角形。我们要做的就是根据这个小三角形的比例创建出一个大的三角形——而你知道你想要的一个端点是离开屏幕的地方。
为了做这个计算,如果有一些基本的矢量方法可供调用(例如矢量的加减法),那么会非常有帮助,但很不幸的时Sprite Kit并没有提供相关方法,所以,我们必须自己实现。
不过很幸运的时这非常容易实现。将下面的方法添加到文件的顶部(implementation之前):
1 2 3 4 5 6 7 8 9 10 11 12 13 14 15 16 17 18 19 20 21 |
static inline CGPoint rwAdd(CGPoint a, CGPoint b) { return CGPointMake(a.x + b.x, a.y + b.y); } static inline CGPoint rwSub(CGPoint a, CGPoint b) { return CGPointMake(a.x - b.x, a.y - b.y); } static inline CGPoint rwMult(CGPoint a, float b) { return CGPointMake(a.x * b, a.y * b); } static inline float rwLength(CGPoint a) { return sqrtf(a.x * a.x + a.y * a.y); } // Makes a vector have a length of 1 static inline CGPoint rwNormalize(CGPoint a) { float length = rwLength(a); return CGPointMake(a.x / length, a.y / length); } |
上面实现了一些标准的矢量函数。如果你看得不是太明白,请看这里关于矢量方法的解释。
接着,在文件中添加一个新的方法:
1 2 3 4 5 6 7 8 9 10 11 12 13 14 15 16 17 18 19 20 21 22 23 24 25 26 27 28 29 30 31 32 33 34 35 36 |
-(void)touchesEnded:(NSSet *)touches withEvent:(UIEvent *)event { // 1 - Choose one of the touches to work with UITouch * touch = [touches anyObject]; CGPoint location = [touch locationInNode:self]; // 2 - Set up initial location of projectile SKSpriteNode * projectile = [SKSpriteNode spriteNodeWithImageNamed:@"projectile"]; projectile.position = self.player.position; // 3- Determine offset of location to projectile CGPoint offset = rwSub(location, projectile.position); // 4 - Bail out if you are shooting down or backwards if (offset.x <= 0) return; // 5 - OK to add now - we've double checked position [self addChild:projectile]; // 6 - Get the direction of where to shoot CGPoint direction = rwNormalize(offset); // 7 - Make it shoot far enough to be guaranteed off screen CGPoint shootAmount = rwMult(direction, 1000); // 8 - Add the shoot amount to the current position CGPoint realDest = rwAdd(shootAmount, projectile.position); // 9 - Create the actions float velocity = 480.0/1.0; float realMoveDuration = self.size.width / velocity; SKAction * actionMove = [SKAction moveTo:realDest duration:realMoveDuration]; SKAction * actionMoveDone = [SKAction removeFromParent]; [projectile runAction:[SKAction sequence:@[actionMove, actionMoveDone]]]; } |
上面的代码中做了很多事情,我们来详细看看。
- SpriteKit为我们做了很棒的一件事情就是它提供了一个UITouch的category,该category中有locationInNode:和previousLocationInNode:方法。这两个方法可以帮助我们定位到在SKNode内部坐标系中touch的坐标位置。这样一来,我们就可以寻得到在场景坐标系中touch的位置。
- 然后创建一个炮弹,并将其放置到忍者的地方,以当做其开始位置。注意,现在还没有将其添加到场景中,因为还需要先做一个合理性的检查——该游戏不允许忍者向后发射。
- 接着利用touch位置减去炮弹的当前位置,这样就能获得一个从当前位置到touch位置的矢量。
- 如果X值小于0,就意味着忍者将要向后发射,由于在这里的游戏中是不允许的(真实中的忍者是不回头的!),所以就return。
- 否则,将可以将炮弹添加到场景中。
- 调用方法rwNormalize,将offset转换为一个单位矢量(长度为1)。这样做可以让在相同方向上,根据确定的长度来构建一个矢量更加容易(因为1 * length = length)。
- 在单位矢量的方向上乘以1000。为什么是1000呢?因为着肯定足够超过屏幕边缘了 :]
- 将上一步中计算得到的位置与炮弹的位置相加,以获得炮弹最终结束的位置。
- 最后,参照之前构建怪物时的方法,创建moveTo:和removeFromParent:两个actions。
编译并运行程序,现在忍者可以发射炮弹了!
……Sprite Kit教程:初学者 2 结束……
