Android游戏框架Libgdx使用入门
Libgdx作者博客:http://www.badlogicgames.com/
Libgdx项目地址:http://code.google.com/p/libgdx/
Libgdx是一款支持2D与3D游戏开发的游戏类库,兼容大多数微机平台(标准JavaSE实现,能运行在Mac、Linux、Windows等系统)与Android平台(Android1.5以上即可使用,Android2.1以上可满功率发挥),
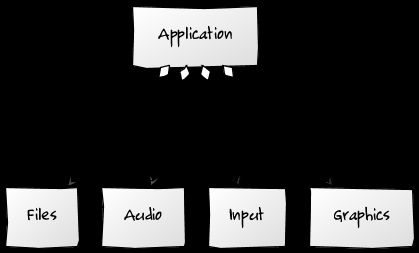
Libgdx由audio、files、graphics、math、physics、scenes、utils这些主要类库所组成,它们分别对应了 Libgdx中的音频操作,文件读取,2D/3D渲染,Libgdx绘图相关运算,Box2D封装,2D/3D游戏组件(3D部分目前无组件),以及 Libgdx内置工具类。
Libgdx主要构成如下所示(Libgdx作者wiki提供):
下面开始,我将就Libgdx的具体实现,开始讲解如何正确使用Libgdx类库。
不过在正式开始之前,我们首先还得讲讲Gdx类。
关于Libgdx中的Gdx类:
单从表面上看,Gdx类占用空间不足2KB,甚至不具备一行可以被直接执行的函数,并没什么重要好说。
然而,真实的Gdx却是Libgdx类库运行的核心所在,没有它你将寸步难行,不单运行Graphics、Input、Files、Audio、 AndroidApplication等Libgdx关键部分所必需的实例会在Libgdx初始化时注入Gdx中对应的graphics、input、 files、audio、app等静态变量里面,就连Libgdx对OpenGL接口(或OpenGLES,视Libgdx运行平台而定,以下统称 OpenGL)的GL10、GL11、GL20、GLCommon等封装类也会在Graphics实例化时分别注入到gl10、gl11、gl20、gl 这四个同样位于Gdx的静态变量当中(在Graphics中也会继续保留它们的引用,因此无论你执行Gdx.graphics.getGL10还是 Gdx.gl10,其实都在调用同一个静态变量)。事实上,如果你想不使用Gdx而正常运行Libgdx,那么除了重构源码,就再没有任何办法可想了。
PS:如果你不清楚自己究竟在什么环境使用Libgdx,其实也不必强分gl10或gl11,大可以通过Gdx.gl方式调用Libgdx中对于OpenGL接口的默认封装(执行某些非多版本共有接口时,依旧需要使用对应版本专属gl)。
想要使用Libgdx,却不明白Gdx是干什么用的,那么一切就都是空谈。
下面开始,我将具体讲解Libgdx中的图像处理与游戏组件部分:
关于Libgdx的图像处理部分:
Mesh:
本质上讲,Libgdx中所有可见的3D物体首先都是一个Mesh(网格,或者说三维网格形式的高级图元)。Mesh是如何生成的呢?众所周知,数学上讲 的立体几何由点、线、面三部分组成,无论多么复杂的图像也可以分解为无数细小的这三部分,或者说可以由非常基础的N个这三部分所组合而成;到了3D游戏开 发时,当我们要构建复杂的3D图像,首先会以一系列有序的vertices(顶点)构成这些具体的点、线、三角要素,即构成绘图基本图元 (Primitives),再将基本图元组合成更完整的高级图元也就是具体3D对象。因此,如果对Mesh概念进行简单的理解,其实它就是一个象征完整图 像的基本图元集合体,Libgdx先让我们把一个个细分的vertices组成基本图元,再由Mesh类将基本图元制成更加复杂的高级图元展示出来。
具体可见Libgdx作者提供的returntomarchfeld示例,基本效果如下图所示:
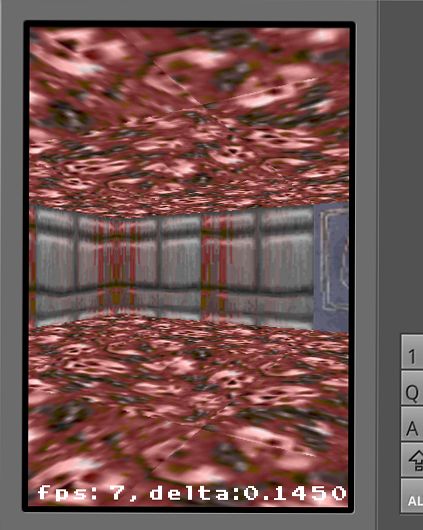
(勿看FPS,一切信真机)
PS:如果对此类认识不足,可以去玩玩模拟人生,下个修改器尝试编辑角色或物品造型后就懂了……
Texture:
Libgdx所提供的游戏纹理用类,其实质可理解为保存在显存中的Image,它以贴图的方式通过OpenGL将图片显示到游戏界面之上。Libgdx的 纹理可以直接从指定文件路径加载,也可以通过它提供的Pixmap类凭空创建(它的Texture(int width, int height, Format format)构造内部直接调用了Pixmap,不是必须在外部生成Pixmap后注入)。另外在加载Texture时,个人建议通过Libgdx提供的 TextureDict.loadTexture函数调用,该方法内部提供了Texture缓存管理,能够避免无意义的资源重复加载。此 外,Texture通常会与TextureRegion类配套使用,利用TextureRegion包装Texture后,再利用SpriteBatch 进行绘制,可以很方便的修订Texture为我们需要的显示范围。还有,Libgdx中Sprite类为TextureRegion子类,因此能够将 Sprite当作TextureRegion来使用,只是Sprite类比TextureRegion有所扩展。不过Libgdx的 SpriteCache类并没有继承Sprite或TextureRegion,所以起不到TextureRegion的作用,只能构建一组静态贴图集合 罢了,特此说明。
- // Libgdx的Texture与Sprite使用
- public class Main extends AndroidApplication {
- class TestSprite implements ApplicationListener {
- // 准备绘图用SpriteBatch
- SpriteBatch spriteBatch;
- // 准备游戏精灵
- Sprite sprite;
- // 准备图片加载用Texture
- Texture texture;
- public void create() {
- // 构建SpriteBatch
- spriteBatch = new SpriteBatch();
- // 构建Texture,图像宽与高大小都必须为2的整数次幂,否则提示异常
- // PS:在Android环境使用Libgdx的internal加载时必须文件必须位于assets目录下
- texture = new Texture(Gdx.files.internal( "mySprite.png" ));
- // 以指定Texture构建Sprite
- sprite = new Sprite(texture);
- // 定位到100, 180(Libgdx使用标准笛卡尔坐标系,自左下0,0开始)
- sprite.setPosition(100 , 180 );
- }
- public void render() {
- // 清屏
- Gdx.gl.glClear(GL10.GL_COLOR_BUFFER_BIT);
- // 初始化绘图调用
- spriteBatch.begin();
- // 绘制精灵到游戏屏幕
- sprite.draw(spriteBatch);
- // 结束绘图调用
- spriteBatch.end();
- }
- public void dispose() {
- // 释放占用的资源
- spriteBatch.dispose();
- texture.dispose();
- }
- public void resume() {
- }
- public void pause() {
- }
- public void resize( int width, int height) {
- }
- }
- public void onCreate(Bundle bundle) {
- super .onCreate(bundle);
- // 初始化游戏屏幕,并设置是否支持GLES 2.0,如果您对向下兼容没什么需要选择true即可(2.1以上),否则选择false。
- initialize(new TestSprite(), true );
- }
- }
Pixmap:
Libgdx所提供的像素级图像渲染用类,由于Libgdx目前以JNI方式自带图像解码器,所以我们可以直接将Pixmap理解为一个Android中 Bitmap的替代者,两者间实现细节虽有差别,但具体作用却大同小异。Pixmap支持Alpha、LuminanceAlpha、RGB565、 RGBA4444、RGB888、RGBA8888等五种图像彩色模式,支持png、jpg、bmp等三种图像文件的读取和加载。一般来说,Pixmap 必须和Texture混用才能真正显示画面。不过在事实上,Libgdx的Texture里已经内置有Pixmap了。
- // Libgdx的Pixmap使用
- public class Main extends AndroidApplication {
- class TestPixmap implements ApplicationListener {
- // 准备绘图用SpriteBatch
- SpriteBatch spriteBatch;
- // Pixmap是Libgdx提供的针对opengl像素操作的上级封装,它可以凭空构建一个像素贴图,
- // 但是它的现实必须通过Texture。
- Pixmap pixmap;
- // 准备Texture
- Texture texture;
- public void create() {
- // 构建SpriteBatch
- spriteBatch = new SpriteBatch();
- // 构建Pixmap(在Android环境使用internal加载模式时,文件必须放置于assets文件夹下)
- pixmap = new Pixmap(Gdx.files.internal( "myPixmap.png" ));
- // 绘制一个蓝方块到Ball图像之上
- pixmap.setColor(Color.BLUE.r, Color.BLUE.g, Color.BLUE.b,
- Color.BLUE.a);
- pixmap.drawRectangle(15 , 15 , 40 , 40 );
- // 以指定Pixmap构建Texture
- texture = new Texture(pixmap);
- // 注入Texture后的pixmap已经没用,可以注销
- pixmap.dispose();
- }
- public void dispose() {
- spriteBatch.dispose();
- texture.dispose();
- }
- public void pause() {
- }
- public void render() {
- // 清屏
- Gdx.gl.glClear(GL10.GL_COLOR_BUFFER_BIT);
- // 初始化绘图调用
- spriteBatch.begin();
- // 绘制精灵到游戏屏幕
- spriteBatch.draw(texture, 100 , 180 );
- // 结束绘图调用
- spriteBatch.end();
- }
- public void resize( int width, int height) {
- }
- public void resume() {
- }
- }
- public void onCreate(Bundle bundle) {
- super .onCreate(bundle);
- // 初始化游戏屏幕,并设置是否支持GLES 2.0,如果您对向下兼容没什么需要选择true即可(2.1以上),否则选择false。
- initialize(new TestPixmap(), true );
- }
- }
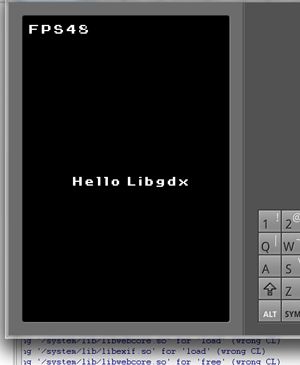
BitmapFont:
Libgdx所提供的OpenGL文字用类,构造BitmapFont时需要一个描述文字构成的fnt文件,和一个提供文字图片的png文件(PS:在 Libgdx的com.badlogic.gdx.utils包下有提供内置字库,目前仅支持英文、数字和常见符号),同SpriteBatch相配合时 能够完成一些基础的文字绘图。值得一提的是,我们也可以使用BitmapFontCache类将BitmapFont包装成了一个静态的Font实例,以 避免大量贴图时产生的不必要损耗。
- //libgdx的文字显示
- public class Main extends AndroidApplication {
- class TestFont extends Game {
- // SpriteBatch是libgdx提供的opengl封装,可以在其中执行一些常规的图像渲染,
- // 并且libgdx所提供的大多数图形功能也是围绕它建立的。
- SpriteBatch spriteBatch;
- // BitmapFont是libgdx提供的文字显示用类,内部将图片转化为可供opengl调用的
- // 文字贴图(默认不支持中文)。
- BitmapFont font;
- public void create() {
- //构建SpriteBatch用于图像处理(内部调用opengl或opengles)
- spriteBatch = new SpriteBatch();
- //构建BitmapFont,必须有一个fnt文件描述文字构成,一个图片文件提供文字用图
- font = new BitmapFont(Gdx.files.internal( "font.fnt" ), Gdx.files
- .internal("font.png" ), false );
- }
- public void render() {
- // 调用清屏
- Gdx.gl.glClear(GL10.GL_COLOR_BUFFER_BIT);
- // 初始要有begin起始
- spriteBatch.begin();
- // 显示文字到屏幕指定位置
- // PS:Libgdx采用标准笛卡尔坐标系,自左下0,0开始
- font.draw(spriteBatch, "FPS" + Gdx.graphics.getFramesPerSecond(),
- 5 , 475 );
- font.draw(spriteBatch, "Hello Libgdx" , 255 , 255 );
- // 结束要有end结尾
- spriteBatch.end();
- }
- public void resize( int width, int height) {
- }
- public void pause() {
- }
- public void resume() {
- }
- public void dispose() {
- // 释放占用的资源
- spriteBatch.dispose();
- font.dispose();
- }
- }
- public void onCreate(Bundle bundle) {
- super .onCreate(bundle);
- // 初始化游戏屏幕,并设置是否支持GLES 2.0,如果您对向下兼容没什么需要选择true即可(2.1以上),否则选择false。
- initialize(new TestFont(), true );
- }
- }
SpriteBatch:
Libgdx所提供的纹理渲染器,本质上是OpenGL的简易封装体,具体实现上与XNA中的SpriteBatch类非常近似,每次调用 SpriteBatch类都必须以begin函数开头,以end函数结尾。由于Libgdx中SpriteBatch提供的功能还非常有限,所以在完全不 懂OpenGL的前提下使用其进行游戏开发或许有一定难度。
ShaderProgram:
Libgdx所提供的着色器,在Android环境使用时需要GLES2.0或以上版本才能完整支持的高级渲染功能之一,内部封装着GLES2.0专用的 顶点着色与片断着色Shader Model,它的本质作用是对3D对象表面进行渲染处理,此物性能基本取决于GPU(除了Google Nexus系列手机暂未见能完全跑出速度的机型)。
- //libgdx的ShaderProgram使用
- public class Main extends AndroidApplication {
- class TestShader implements ApplicationListener {
- ShaderProgram shader;
- Texture texture;
- Texture texture2;
- Mesh mesh;
- public void create() {
- // 以下命令供GPU使用(不支持GLES2.0就不用跑了)
- String vertexShader = "attribute vec4 a_position; \n"
- + "attribute vec2 a_texCoord; \n"
- + "varying vec2 v_texCoord; \n"
- + "void main() \n"
- + "{ \n"
- + " gl_Position = a_position; \n"
- + " v_texCoord = a_texCoord; \n"
- + "} \n" ;
- String fragmentShader = "#ifdef GL_ES\n"
- + "precision mediump float;\n"
- + "#endif\n"
- + "varying vec2 v_texCoord; \n"
- + "uniform sampler2D s_texture; \n"
- + "uniform sampler2D s_texture2; \n"
- + "void main() \n"
- + "{ \n"
- + " gl_FragColor = texture2D( s_texture, v_texCoord ) * texture2D( s_texture2, v_texCoord);\n"
- + "} \n" ;
- // 构建ShaderProgram
- shader = new ShaderProgram(vertexShader, fragmentShader);
- // 构建网格对象
- mesh = new Mesh( true , 4 , 6 , new VertexAttribute(Usage.Position, 2 ,
- "a_position" ), new VertexAttribute(
- Usage.TextureCoordinates, 2 , "a_texCoord" ));
- float [] vertices = { - 0 .5f, 0 .5f, 0 .0f, 0 .0f, - 0 .5f, - 0 .5f, 0 .0f,
- 1 .0f, 0 .5f, - 0 .5f, 1 .0f, 1 .0f, 0 .5f, 0 .5f, 1 .0f, 0 .0f };
- short [] indices = { 0 , 1 , 2 , 0 , 2 , 3 };
- // 注入定点坐标
- mesh.setVertices(vertices);
- mesh.setIndices(indices);
- // 以Pixmap生成两个指定内容的Texture
- Pixmap pixmap = new Pixmap( 256 , 256 , Format.RGBA8888);
- pixmap.setColor(1 , 1 , 1 , 1 );
- pixmap.fill();
- pixmap.setColor(0 , 0 , 0 , 1 );
- pixmap.drawLine(0 , 0 , 256 , 256 );
- pixmap.drawLine(256 , 0 , 0 , 256 );
- texture = new Texture(pixmap);
- pixmap.dispose();
- pixmap = new Pixmap( 256 , 256 , Format.RGBA8888);
- pixmap.setColor(1 , 1 , 1 , 1 );
- pixmap.fill();
- pixmap.setColor(0 , 0 , 0 , 1 );
- pixmap.drawLine(128 , 0 , 128 , 256 );
- texture2 = new Texture(pixmap);
- pixmap.dispose();
- }
- public void dispose() {
- }
- public void pause() {
- }
- public void render() {
- // PS:由于使用了ShaderProgram,因此必须配合gl20模式(否则缺少关键opengles接口)
- Gdx.gl20.glViewport(0 , 0 , Gdx.graphics.getWidth(), Gdx.graphics
- .getHeight());
- Gdx.gl20.glClear(GL20.GL_COLOR_BUFFER_BIT);
- Gdx.gl20.glActiveTexture(GL20.GL_TEXTURE0);
- texture.bind();
- Gdx.gl20.glActiveTexture(GL20.GL_TEXTURE1);
- texture2.bind();
- // 开始使用ShaderProgram渲染
- shader.begin();
- shader.setUniformi("s_texture" , 0 );
- shader.setUniformi("s_texture2" , 1 );
- mesh.render(shader, GL20.GL_TRIANGLES);
- // 结束ShaderProgram渲染
- shader.end();
- }
- public void resize( int width, int height) {
- }
- public void resume() {
- }
- }
- public void onCreate(Bundle bundle) {
- super .onCreate(bundle);
- // 初始化游戏屏幕,并设置是否支持GLES 2.0,如果您对向下兼容没什么需要选择true即可(2.1以上),否则选择false。
- initialize(new TestShader(), true );
- }
- }
FrameBuffer:
Libgdx所提供的帧缓冲器,在Android环境使用时需要GLES2.0或以上版本才能完整支持的高级渲染功能之一,也就是常说的 FrameBuffer Object(FBO)功能封装(用过JavaSE或JavaME开发游戏的朋友,绘图时大概都接触过双缓存这个概念,虽然有所差别,不过将 FrameBuffer理解成起近似作用也未尝不可)此物性能彻底取决于GPU(除了Google Nexus系列手机暂未见能完全跑出速度的机型)。
- //libgdx的FrameBuffer使用
- public class Main extends AndroidApplication {
- class TestFrameBuffer implements ApplicationListener {
- FrameBuffer frameBuffer;
- Mesh mesh;
- ShaderProgram meshShader;
- Texture texture;
- SpriteBatch spriteBatch;
- // PS:如果不支持GLES2.0就不用试了
- public void create() {
- mesh = new Mesh( true , 3 , 0 , new VertexAttribute(Usage.Position, 3 ,
- "a_Position" ), new VertexAttribute(Usage.ColorPacked, 4 ,
- "a_Color" ), new VertexAttribute(Usage.TextureCoordinates,
- 2 , "a_texCoords" ));
- float c1 = Color.toFloatBits( 255 , 0 , 0 , 255 );
- float c2 = Color.toFloatBits( 255 , 0 , 0 , 255 );
- float c3 = Color.toFloatBits( 0 , 0 , 255 , 255 );
- mesh.setVertices(new float [] { - 0 .5f, - 0 .5f, 0 , c1, 0 , 0 , 0 .5f,
- -0 .5f, 0 , c2, 1 , 0 , 0 , 0 .5f, 0 , c3, 0 .5f, 1 });
- texture = new Texture(Gdx.files.internal( "myTest.png" ));
- spriteBatch = new SpriteBatch();
- frameBuffer = new FrameBuffer(Format.RGB565, 128 , 128 , true );
- String vertexShader = "attribute vec4 a_Position; \n"
- + "attribute vec4 a_Color;\n"
- + "attribute vec2 a_texCoords;\n" + "varying vec4 v_Color;"
- + "varying vec2 v_texCoords; \n" +
- "void main() \n"
- + "{ \n"
- + " v_Color = a_Color;"
- + " v_texCoords = a_texCoords;\n"
- + " gl_Position = a_Position; \n"
- + "} \n" ;
- String fragmentShader = "precision mediump float;\n"
- + "varying vec4 v_Color;\n"
- + "varying vec2 v_texCoords; \n"
- + "uniform sampler2D u_texture;\n"
- +
- "void main() \n"
- + "{ \n"
- + " gl_FragColor = v_Color * texture2D(u_texture, v_texCoords);\n"
- + "}" ;
- meshShader = new ShaderProgram(vertexShader, fragmentShader);
- if (meshShader.isCompiled() == false )
- throw new IllegalStateException(meshShader.getLog());
- }
- public void dispose() {
- }
- public void pause() {
- }
- public void render() {
- frameBuffer.begin();
- Gdx.graphics.getGL20().glViewport(0 , 0 , frameBuffer.getWidth(),
- frameBuffer.getHeight());
- Gdx.graphics.getGL20().glClearColor(0f, 1f, 0f, 1 );
- Gdx.graphics.getGL20().glClear(GL20.GL_COLOR_BUFFER_BIT);
- Gdx.graphics.getGL20().glEnable(GL20.GL_TEXTURE_2D);
- texture.bind();
- meshShader.begin();
- meshShader.setUniformi("u_texture" , 0 );
- mesh.render(meshShader, GL20.GL_TRIANGLES);
- meshShader.end();
- frameBuffer.end();
- Gdx.graphics.getGL20().glViewport(0 , 0 , Gdx.graphics.getWidth(),
- Gdx.graphics.getHeight());
- Gdx.graphics.getGL20().glClearColor(0 .2f, 0 .2f, 0 .2f, 1 );
- Gdx.graphics.getGL20().glClear(GL20.GL_COLOR_BUFFER_BIT);
- spriteBatch.begin();
- spriteBatch.draw(frameBuffer.getColorBufferTexture(), 0 , 0 , 256 ,
顶
踩


评论