FLASH Smoke simulation
【my word】
图形学里面,在标准的3D API下面模拟这些现象已经很成熟了, 以前也看见过用粒子模拟的这些效果(不过没有收录),这次也就权当补上,这些模拟并非数值上的模拟,仅仅是视觉上的模拟,不过在一般的游戏应用中已经足够了。
原文:http://asgamer.com/2009/game-graphic-design-smoke-flash
----------------------------------------------------------------------------------------------------------------------------------------------------
Graphic Design - Making Smoke in Flash
Flash Animated Fire Smoke Alarms Action Flash Games Photoshop Tutorial
What good is smoke? Let’s think for a second. What produces smoke? Failing mechanical equipment, grenades, guns, volcanoes, factories, fires, vehicles, and probably a million other things. So does your Flash game need smoke, well, that’s for your to decide. But the fact of the matter is we can produce some rather convincing smoke with a very simple bit of code and a little Adobe Photoshop. So let’s make some smoke.
Creating Our Smoke Graphic Texture in Photoshop
Open up Photoshop and create a new document 40×40. Now go to your brushes window (F5) and select the brush in the image below.
and change a few of the settings on this brush as in the image below.
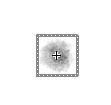
Now simply go in the middle of your canvas and make a smoke puff. Set the opacity down a little maybe 20% and start drawing. Make a little texture to it.
It should look a little something like the above. Take your puff and save it as a png. If you don’t like how your puff looks then you can feel free to copy mine above. Just save it, it’s a png and will work well.
Setting Our Smoke Puff up in Flash
Okay. Very simple, Import from the Library your smoke puff. File > Import > Import to Library…
Now just drop the image of your smoke puff dead center in the middle of a new MovieClip, name is SmokePuff. Your stage should look like the image below:
Okay so one more thing left to do and you are set. Right click your SmokePuff MovieClip from the Library(CTRL+L) and select Linkage… Now just copy what you see below and click okay.
One last thing… set your document class to Main. Nice. Flash is ready, let’s start writing some code.
Writing the Actionscript to make some Smoke
Okay guys, this has been a super quick tutorial so far. Lots of images and little to say. Let’s get into the code that will say everything we need to make our smoke fly beautifully. Honestly guys this code is so straight forward, let me just post the Smokepuff.as class at once and explain it later. Make sure you save it to com/asgamer/graphics
package com.asgamer.graphics
{ import flash.display.BlendMode;
	import flash.display.MovieClip;
	import flash.events.Event; public class Smokepuff extends MovieClip
	{ public var vx:Number;
		public var vy:Number; public function Smokepuff() : void
		{
			alpha = Math.random();
			vx = Math.random() - Math.random();
			vy = Math.random() * 3 - 5;
			scaleX = scaleY = Math.random();
			addEventListener(Event.ENTER_FRAME, loop, false, 0, true);
		} private function loop(e:Event) : void
		{
			alpha -= 0.01;
			y += vy;
			x += vx;
			scaleX = scaleY += 0.02; if (alpha

Let’s break it down:
- We have a vx(velocity x) and vy(velocity y) class variable. Both are numbers and will hold the velocity of our smoke puff.
- In our constructor we set up some basic information we need to use through our smoke puff.
- alpha = Math.random(); We need some diversity with our puffs, let’s make them all start at a random alpha.
- vx = Math.random() - Math.random(); Set the vx to something randomly between -1 and 1
- vy = Math.random() * 3 - 5; We need a negative vy so our smoke will move upward. This line will give us a number between -5 and -2 and some diversity in the speed of our smoke.
- scaleX = scaleY = Math.random(); Choose a random value to start our smoke’s size. Once again to add some diversity.
- addEventListener(Event.ENTER_FRAME, loop, false, 0, true); each time we enter a frame… call loop.
- alpha -= 0.01; Make the alpha go down with each frame.
- y += vy; x += vx; Apply our velocity to our smokepuff.
- scaleX = scaleY += 0.02; Make our smoke spread out as it travels.
- if (alpha If our smoke is no longer visible… let’s get rid of it.
- removeSelf() no need to fully explain this. It simply removes our event listener and removes the smoke puff from the display stack.
Alright, so that makes our smoke move. Let’s write the code for the main class.
package
{ import flash.display.Stage;
	import flash.display.MovieClip;
	import flash.events.Event;
	import com.asgamer.graphics.Smokepuff;
	import flash.display.Sprite; public class Main extends Sprite
	{ public function Main() : void
		{
			addEventListener(Event.ENTER_FRAME, loop, false, 0, true);
		} private function loop(e:Event) : void
		{
			var smokepuff:Smokepuff = new Smokepuff();
			smokepuff.x = 250;
			smokepuff.y = 250;
			stage.addChild(smokepuff);
		} } }
Okay breaking this down is extremely simple. We’re just creating an event listener to call loop on every enter frame like we did in Smokepuff. In the loop class we simply are creating a Smokepuff and positioning it at (250, 250) and adding it to the stage. From here our Smokepuff code will do everything on it’s own with a little help from garbage collection in the end.
Ready to see what it looks like?
The Flash plugin is required to view this object.
Awesome we’re done. Here’s the final source:
Making Smoke in Flash Source Code Zip Archive


