android控件
Button , MediaPlayer, SoundPool,ListView,Spinner,checkBox,RadioGroup,TimePicker
DatePicker,多行EditText
alert提示框
-----------------------------------------------------------
button
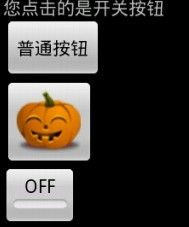

监听事件
------------------------------------------------------
播放声音控件
--------------------------------------------------------------------
ListView
item样式文件
main.xml中的ListView
-------------------------------------------------------------
下拉框

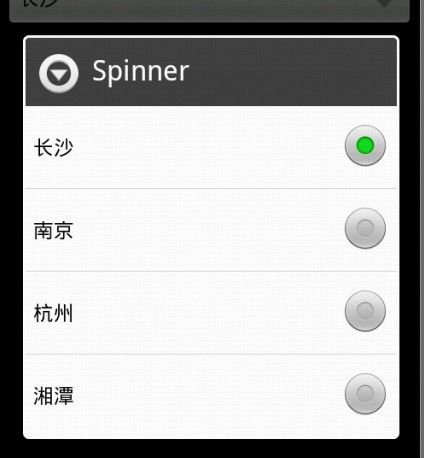
方法一: 纯xml
xml控件,且数据关联写死在xml中
xml数据
方法二:
方法三:数据也不需要去取了
事件:
二级联动菜单
----------------------------------------------------------------------
复选框---就是一个按钮而已,和单选框差别很大

-----------------------------------------------------------
单选钮
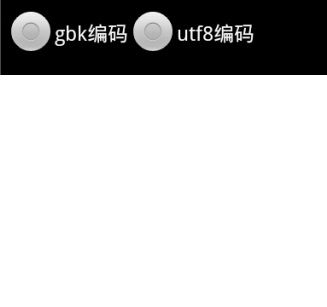
xml
---------------------------------------------------
图片显示控件, 就是显示一张图片 ,和TextView差不多,一个显示文字,一个显示图片
---------------------------------------------------
TimePicker 时间管理器 ---时,分
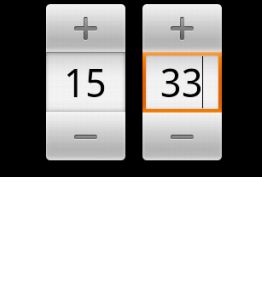
xml
--------------------------------------------
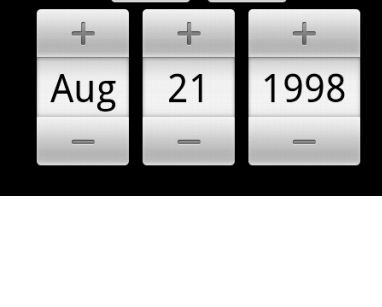
日期管理器-----年月日
-----------------
EditText多行
DatePicker,多行EditText
alert提示框

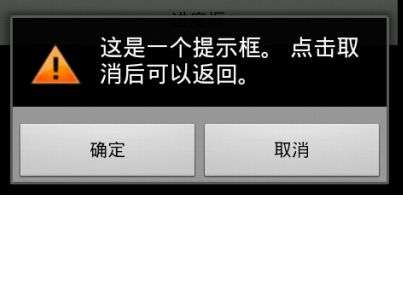
private Dialog buildDialog1(Context context) {
		AlertDialog.Builder builder = new AlertDialog.Builder(context);
		builder.setIcon(R.drawable.alert_dialog_icon);//三角形中间一个感叹号的图
		builder.setTitle(R.string.alert_dialog_two_buttons_title);//提示的文字
		builder.setPositiveButton(R.string.alert_dialog_ok,
				new DialogInterface.OnClickListener() {
					public void onClick(DialogInterface dialog, int whichButton) {

						setTitle("点击了对话框上的确定按钮");
					}
				});
		builder.setNegativeButton(R.string.alert_dialog_cancel,
				new DialogInterface.OnClickListener() {
					public void onClick(DialogInterface dialog, int whichButton) {

						setTitle("点击了对话框上的取消按钮");
					}
				});
		return builder.create();
	}

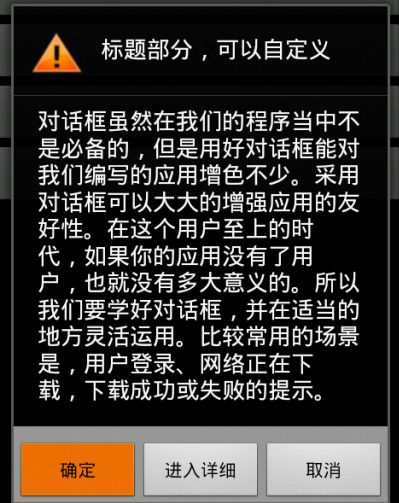
private Dialog buildDialog2(Context context) {
		AlertDialog.Builder builder = new AlertDialog.Builder(context);
		builder.setIcon(R.drawable.alert_dialog_icon);//同上
		builder.setTitle(R.string.alert_dialog_two_buttons_msg);
		builder.setMessage(R.string.alert_dialog_two_buttons2_msg);// 中间一大段文字
		builder.setPositiveButton(R.string.alert_dialog_ok,
				new DialogInterface.OnClickListener() {
					public void onClick(DialogInterface dialog, int whichButton) {

						setTitle("点击了对话框上的确定按钮");
					}
				});
		builder.setNeutralButton(R.string.alert_dialog_something,
				new DialogInterface.OnClickListener() {//中间的按钮
					public void onClick(DialogInterface dialog, int whichButton) {

						setTitle("点击了对话框上的进入详细按钮");
					}
				});
		builder.setNegativeButton(R.string.alert_dialog_cancel,
				new DialogInterface.OnClickListener() {
					public void onClick(DialogInterface dialog, int whichButton) {

						setTitle("点击了对话框上的取消按钮");
					}
				});
		return builder.create();
	}

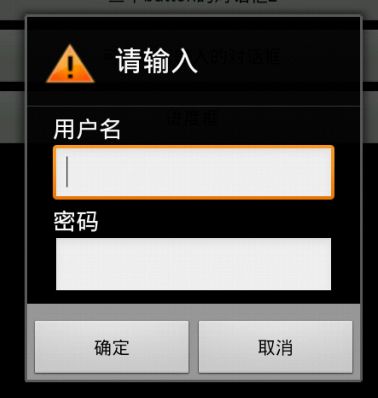
private Dialog buildDialog3(Context context) {
		LayoutInflater inflater = LayoutInflater.from(this);//这个类专门用来实例化一个xml
		final View textEntryView = inflater.inflate(
				R.layout.alert_dialog_text_entry, null);//加载一个xml
		AlertDialog.Builder builder = new AlertDialog.Builder(context);
		builder.setIcon(R.drawable.alert_dialog_icon);
		builder.setTitle(R.string.alert_dialog_text_entry);
		builder.setView(textEntryView);//设置xml
		builder.setPositiveButton(R.string.alert_dialog_ok,
				new DialogInterface.OnClickListener() {
					public void onClick(DialogInterface dialog, int whichButton) {
						setTitle("点击了对话框上的确定按钮");
					}
				});
		builder.setNegativeButton(R.string.alert_dialog_cancel,
				new DialogInterface.OnClickListener() {
					public void onClick(DialogInterface dialog, int whichButton) {
						setTitle("点击了对话框上的取消按钮");
					}
				});
		return builder.create();
	}

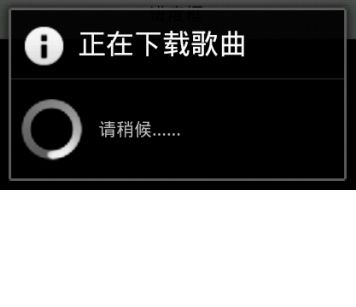
private Dialog buildDialog4(Context context) {
		ProgressDialog dialog = new ProgressDialog(context);
		dialog.setTitle("正在下载歌曲");
		dialog.setMessage("请稍候……");
		return  dialog;
	}
-----------------------------------------------------------
button


<Button
		android:id="@+id/button"
		android:layout_width="wrap_content"
		android:layout_height="wrap_content"
		android:text="普通按钮"
	>
	</Button>
	<ImageButton
		android:id="@+id/imageButton"
		android:layout_width="wrap_content"
		android:layout_height="wrap_content"
		android:src="@drawable/img"
	>
	</ImageButton>
	<ToggleButton
		android:id="@+id/toggleButton"
		android:layout_width="wrap_content"
		android:layout_height="wrap_content"
	>
	</ToggleButton>
监听事件
public void onClick(View v) {//重写的事件处理回调方法
		if(v == button){//点击的是普通按钮
			textView.setText("您点击的是普通按钮");
		}
		else if(v == imageButton){//点击的是图片按钮
			textView.setText("您点击的是图片按钮");
		}
		else if(v == toggleButton){//点击的是开关按钮
			textView.setText("您点击的是开关按钮");
		}
	}
------------------------------------------------------
播放声音控件
public void initSounds(){//初始化声音的方法
		mMediaPlayer = MediaPlayer.create(this, R.raw.backsound);//初始化MediaPlayer
		//soundPool第一个参数是允许有多少个声音流同时播放,第2个参数是声音类型,第三个参数是声音的品质;
	    soundPool = new SoundPool(4, AudioManager.STREAM_MUSIC, 100);
	    soundPoolMap = new HashMap<Integer, Integer>(); //存入多个音频的ID,播放的时候可以同时播放多个音频
	    soundPoolMap.put(1, soundPool.load(this, R.raw.dingdong, 1));//API中指出,其中的priority参(第三个)目前没有效果,建议设置为1
	}
	public void playSound(int sound, int loop) {//用SoundPoll播放声音的方法
	    AudioManager mgr = (AudioManager)this.getSystemService(Context.AUDIO_SERVICE);
	    float streamVolumeCurrent = mgr.getStreamVolume(AudioManager.STREAM_MUSIC);
	    float streamVolumeMax = mgr.getStreamMaxVolume(AudioManager.STREAM_MUSIC);
	    float volume = streamVolumeCurrent/streamVolumeMax;
	    //play(int soundID, float leftVolume, float rightVolume, int priority, int loop, float rate)
	    //loop —— 循环播放的次数,0为值播放一次,-1为无限循环
	    //rate —— 播放的速率,范围0.5-2.0(0.5为一半速率,1.0为正常速率,2.0为两倍速率)
	    soundPool.play(soundPoolMap.get(sound), volume, volume, 1, loop, 1f);//播放声音
	}
	public void onClick(View v) {//实现接口中的方法
		// TODO Auto-generated method stub
		if(v == button1){//点击了使用MediaPlayer播放声音按钮
			textView.setText("使用MediaPlayer播放声音");
			if(!mMediaPlayer.isPlaying()){
				mMediaPlayer.start();//播放声音
			}
		}
		else if(v == button2){//点击了暂停MediaPlayer声音按钮
			textView.setText("暂停了MediaPlayer播放的声音");
			if(mMediaPlayer.isPlaying()){
				mMediaPlayer.pause();//暂停声音
			}
		}
		else if(v == button3){//点击了使用SoundPool播放声音按钮
			textView.setText("使用SoundPool播放声音");
			this.playSound(1, 0);
		}
		else if(v == button4){//点击了暂停SoundPool声音按钮,
			textView.setText("暂停了SoundPool播放的声音");
			soundPool.pause(1);//暂停SoundPool的声音
		}
	}
--------------------------------------------------------------------
ListView
item样式文件
<LinearLayout
  xmlns:android="http://schemas.android.com/apk/res/android"
  android:orientation="horizontal"
  android:layout_width="fill_parent"
  android:layout_height="wrap_content">

  <TextView
	  android:layout_width="100dip"
	  android:layout_height="wrap_content"
	  android:text="姓名"
	  android:id="@+id/name"
	  />

  <TextView
	  android:layout_width="100dip"
	  android:layout_height="wrap_content"
	  android:text="电话"
	  android:id="@+id/phone"
	  />

  <TextView
	  android:layout_width="fill_parent"
	  android:layout_height="wrap_content"
	  android:text="存款"
	  android:id="@+id/amount"
	  />
</LinearLayout>
main.xml中的ListView
<ListView
    android:layout_width="fill_parent"
    android:layout_height="fill_parent"
    android:id="@+id/listView"
    />
listView = (ListView)this.findViewById(R.id.listView);
List<Person> persons = service.getScrollData(0, 5); //得到数据
        List<HashMap<String, Object>> data = new ArrayList<HashMap<String,Object>>();
        for(Person person : persons){//装入List
        	HashMap<String, Object> item = new HashMap<String, Object>();
        	item.put("name", person.getName());
        	item.put("phone", person.getPhone());
        	item.put("amount", person.getAmount());
        	data.add(item);
        }
        SimpleAdapter adapter = new SimpleAdapter(this, data, R.layout.item,
        		new String[]{"name","phone", "amount"}, new int[]{R.id.name, R.id.phone, R.id.amount});//数据,key,样式绑定
        listView.setAdapter(adapter);
listView.setOnItemClickListener(new ItemClickListener());

或者:
 Cursor cursor = service.getCursorScrollData(0, 5);
        SimpleCursorAdapter cursorAdapter = new SimpleCursorAdapter(this, R.layout.item, cursor,
        		new String[]{"name","phone","amount"}, new int[]{R.id.name, R.id.phone, R.id.amount});
        listView.setAdapter(cursorAdapter);
-------------------------------------------------------------
下拉框


方法一: 纯xml
xml控件,且数据关联写死在xml中
<Spinner
        android:layout_width="fill_parent"
        android:layout_height="wrap_content"
        android:prompt="@string/app_name"
        android:entries="@array/city_arr"
        />
xml数据
<string-array name="city_arr">
        <item>长沙</item>
        <item>南京</item>
        <item>杭州</item>
        <item>湘潭</item>
    </string-array>
方法二:
<Spinner
        android:layout_width="fill_parent"
        android:layout_height="wrap_content"
        android:prompt="@string/app_name"
          --entries没了,在程序里面绑定
        />
 spinner = (Spinner)findViewById(R.id.myspinner);
        spinner.setPrompt("选择城市");

        this.adapterColor = ArrayAdapter.createFromResource(this, R.array.city_arr, android.R.layout.simple_spinner_item);
//第三个参数是样式
adapterColor.setDropDownViewResource(android.R.layout.simple_spinner_dropdown_item); //重置样式,也就是第三个参数
方法三:数据也不需要去取了
List<CharSequence> list = new ArrayList<CharSequence>();
        list.add("长沙");
        list.add("南京");
        list.add("北京");
        this.adapterColor = new ArrayAdapter(this, android.R.layout.simple_spinner_item,list);
        this.adapterColor.setDropDownViewResource(android.R.layout.simple_spinner_dropdown_item);
        spinner.setAdapter(this.adapterColor);
事件:
 citySpinner = (Spinner)findViewById(R.id.sp);
        citySpinner.setOnItemSelectedListener(new OnItemSelectedListenerImpl());
	private class OnItemSelectedListenerImpl implements OnItemSelectedListener{
		@Override
		public void onItemSelected(AdapterView<?> parent, View view, int position,
				long id) {//表示选项改变时候触发
			String item = parent.getItemAtPosition(position).toString(); //得到选项的值
			//...
		}
		@Override
		public void onNothingSelected(AdapterView<?> parent) {//表示没有选则时候触发
		}
	}
二级联动菜单
private Spinner citySpinner;
private Spinner areaSpinner;
	String[][] areaData = new String[][]{
			{"aa","bb","cc","cc"},{"aa2","bb2","cc2"},{"aa3","bb3","cc3"}
	};

citySpinner = (Spinner)findViewById(R.id.sp);
        citySpinner.setOnItemSelectedListener(new OnItemSelectedListenerImpl());


	private class OnItemSelectedListenerImpl implements OnItemSelectedListener{
		@Override
		public void onItemSelected(AdapterView<?> parent, View view, int position,
				long id) {//表示选项改变时候触发
			TestAndroidActivity.this.adpterArea = new ArrayAdapter<CharSequence>(TestAndroidActivity.this,
					android.R.layout.simple_spinner_item,
					TestAndroidActivity.this.areaData[position]);//把二级数据放入适配器
			TestAndroidActivity.this.areaSpinner.setAdapter(TestAndroidActivity.this.adpterArea);
		}
		@Override
		public void onNothingSelected(AdapterView<?> parent) {//表示没有选则时候触发
		}
	}
----------------------------------------------------------------------
复选框---就是一个按钮而已,和单选框差别很大

  <CheckBox
        android:id="@+id/url1"
        android:layout_width="fill_parent"
        android:layout_height="wrap_content"
        android:text="www.aa.com"
        />
   <CheckBox
        android:id="@+id/url2"
        android:layout_width="fill_parent"
        android:layout_height="wrap_content"
        android:text="www.bb.com"     ---文字在xml中
        />
   <CheckBox                          --文字没在xml中
        android:id="@+id/url3"
        android:layout_width="fill_parent"
        android:layout_height="wrap_content"
        />
CheckBox url3 = (CheckBox)findViewById(R.id.url3);
        url3.setChecked(true);
        url3.setText("www.zzz.com");
-----------------------------------------------------------
单选钮

xml
    <RadioGroup
        android:id="@+id/encoding"
        android:layout_width="fill_parent"
        android:layout_height="wrap_content"
        android:orientation="horizontal"   --控制方向
        android:checkedButton="@+id/gbk_btn">  ---默认选中,这里要有加号

        <RadioButton
            android:id="@+id/gbk_btn"   ---这里也要有加号
            android:text="gbk编码"/>
          <RadioButton
            android:id="@+id/utf8_btn"
            android:text="utf8编码"/>
    </RadioGroup>
sex = (RadioGroup)findViewById(R.id.sex);
        male = (RadioButton)findViewById(R.id.male);
        female = (RadioButton)findViewById(R.id.female);
        this.sex.setOnCheckedChangeListener(new setOnCheckedChangeListenerImpl());

  private class setOnCheckedChangeListenerImpl implements OnCheckedChangeListener{
		@Override
		public void onCheckedChanged(RadioGroup group, int checkedId) {
			if(TestAndroidActivity.this.male.getId()==checkedId){
			}else if(TestAndroidActivity.this.female.getId()==checkedId){
			}
		}
    }
---------------------------------------------------
图片显示控件, 就是显示一张图片 ,和TextView差不多,一个显示文字,一个显示图片
<ImageView
        android:layout_width="fill_parent"
        android:layout_height="wrap_content"
        android:src="@drawable/ic_launcher"
            />
---------------------------------------------------
TimePicker 时间管理器 ---时,分

xml
  <TimePicker
        android:layout_width="fill_parent"
        android:layout_height="wrap_content"
        android:id="@+id/tp01"
        />
TimePicker tp = (TimePicker)findViewById(R.id.tp01);
        tp.setIs24HourView(true);
        tp.setCurrentHour(15);
        tp.setCurrentMinute(33);
tp.setOnTimeChangedListener(new OnTimeChangedListenerImpl());
  private class OnTimeChangedListenerImpl implements OnTimeChangedListener {

    	@Override
    	public void onTimeChanged(TimePicker view, int hourOfDay, int minute) {
    		 //当按加减键的时候触发此方法


    	}
    }
--------------------------------------------
日期管理器-----年月日

 <DatePicker
         android:layout_width="fill_parent"
        android:layout_height="wrap_content"
        android:id="@+id/dp01"
        />
DatePicker dp = (DatePicker)findViewById(R.id.dp01);
        dp.updateDate(1998, 7, 21);
 dp.init(dp.getYear(), dp.getMonth(), dp.getDayOfMonth(),new  OnDateChangedListenerImpl());
  private class OnDateChangedListenerImpl implements OnDateChangedListener{
                //按加减按钮的时候触发此方法
		@Override
		public void onDateChanged(DatePicker view, int year, int monthOfYear,
				int dayOfMonth) {
		}

    }
-----------------
EditText多行
<EditText android:layout_width="fill_parent"
    android:layout_height="120.0dip"
    android:inputType="textMultiLine"
    android:singleLine="false"
    android:gravity="left|top"/>