openstack cinder+drbd+nfs实现高可用存储【kilo版】
1,两台redhat7.1服务器
2,互相解析hosts文件
3,关闭iptables和selinux,ssh开启
4,配置yum源,安装pacemaker,corosync,drbd,cinder
5,配置drbd,选择procoto C ,复制模式,验证结果
6,配置corosync,基于crm管理VIP,FSsystem,NFS,DRBD块设备
7,openstack启动虚机挂载volume,console到虚机看是否生效,往盘里写数据,卸载,换台虚机再挂载,看看数据是否还在。
7,验证结果,第一个cinder节点down,第二个cinder节点能否发生故障自动切换。
1,cinderAA eth0 9.111.222.61 eth1 192.168.100.61
cinderBB eth0 9.111.222.62 eth1 192.168.100.62
192.168.100.0/24段为心跳检测地址及drbd同步网段,这样不占用管理网络带宽
2,两个节点执行
systemctl stop firewalld
systemctl disable firewalld
vim /etc/selinux/config
将enforing 改为disabled
reboot使其生效
.配置各节点ssh互信
cinderAA:
[root@cinderAA ~]# ssh-keygen -t rsa
[root@cinderAA ~]# ssh-copy-id -i .ssh/id_rsa.pub root@cinderAA
cinderBB:
[root@cinderBB ~]# ssh-keygen -t rsa
[root@cinderBB ~]# ssh-copy-id -i .ssh/id_rsa.pub root@ncinderBB
3.两台节点执行
yum clean all
yum makecache
4.安装drbd
这里是yum安装,编译安装容易报错,需要两台节点执行
rpm --import https://www.elrepo.org/RPM-GPG-KEY-elrepo.org 安装yum源
yum install http://www.elrepo.org/elrepo-release-7.0-2.el7.elrepo.noarch.rpm
yum install drbd84-utils kmod-drbd84 安装drbd
5,挂载硬盘,kvm及virtual,vmwarestation虚拟机挂载方法一样,两个节点分区一样,盘符一样,我这里都为8G,sdb
6,fdisk -l 查看是否加载磁盘设备,为磁盘设备分区
fdisk /dev/sdb
m
p
n
enter
enter
w
7,drbd用的端口是7789,生产环境中一般都配置iptables规则,实验环境关闭iptables即可
8,drbd配置文件是分为模块化的,drbd.conf是主配置文件,其它模块配置文件在/etc/drbd.d/下
9,[root@drbdAA ~]# vim /etc/drbd.d/global_common.conf
global {
usage-count no;
# minor-count dialog-refresh disable-ip-verification
# cmd-timeout-short 5; cmd-timeout-medium 121; cmd-timeout-long 600;
}
common {
handlers {
pri-on-incon-degr "/usr/lib/drbd/notify-pri-on-incon-degr.sh; /usr/lib/drbd/notify-emergency-reboot.sh; echo b > /proc/sysrq-trigger ; reboot -f"; 去掉注释
pri-lost-after-sb "/usr/lib/drbd/notify-pri-lost-after-sb.sh; /usr/lib/drbd/notify-emergency-reboot.sh; echo b > /proc/sysrq-trigger ; reboot -f";去掉注释
local-io-error "/usr/lib/drbd/notify-io-error.sh; /usr/lib/drbd/notify-emergency-shutdown.sh; echo o > /proc/sysrq-trigger ; halt -f";去掉注释
#fence-peer "/usr/lib/drbd/crm-fence-peer.sh";
# split-brain "/usr/lib/drbd/notify-split-brain.sh root";
# out-of-sync "/usr/lib/drbd/notify-out-of-sync.sh root";
# before-resync-target "/usr/lib/drbd/snapshot-resync-target-lvm.sh -p 15 -- -c 16k";
#after-resync-target /usr/lib/drbd/unsnapshot-resync-target-lvm.sh;
}
startup {
# wfc-timeout degr-wfc-timeout outdated-wfc-timeout wait-after-sb
#wfc-timeout 30;
#degr-wfc-timeout 30;
}
options {
# cpu-mask on-no-data-accessible
}
disk {
on-io-error detach; 同步错误的做法是分离
fencing resource-only;
}
net {
protocol C;复制模式
cram-hmac-alg "sha1"; 设置加密算法sha1
shared-secret "mydrbd";设置加密key
}
syncer {
rate 1000M; 传输速率
}
}
增加资源
[root@cinderAA ~]#vim /etc/drbd.d/r0.res
resource r0 {
on cinderAA {
device /dev/drbd0;
disk /dev/sdb1;
address 192.168.100.61:7789;
meta-disk internal;
}
on cinderBB {
device /dev/drbd0;
disk /dev/sdb1;
address 192.168.100.62:7789;
meta-disk internal;
}
}
将配置文件同步到cinderBB
scp -r /etc/drbd.d/* root@cinderBB:/etc/drbd.d/
初始化资源
[root@cinderAA ~]# drbdadm create-md r0
Writing meta data...
initializing activity log
NOT initializing bitmap
New drbd meta data block successfully created.
[root@cinderBB ~]# drbdadm create-md r0
Writing meta data...
initializing activity log
NOT initializing bitmap
New drbd meta data block successfully created.
cinderAA与cinderBB上启动DRBD服务
systemctl start drbd
查看一下启动状态
cinderAA:
[root@cinderAA ~]# cat /proc/drbd
version: 8.4.2 (api:1/proto:86-101)
GIT-hash: 7ad5f850d711223713d6dcadc3dd48860321070c build by dag@Build64R6, 2012-09-06 08:16:10
0: cs:Connected ro:Secondary/Secondary ds:Inconsistent/Inconsistent C r-----
ns:0 nr:0 dw:0 dr:0 al:0 bm:0 lo:0 pe:0 ua:0 ap:0 ep:1 wo:f oos:20970844
cinderBB:
[root@cinderBB ~]# cat /proc/drbd
version: 8.4.2 (api:1/proto:86-101)
GIT-hash: 7ad5f850d711223713d6dcadc3dd48860321070c build by dag@Build64R6, 2012-09-06 08:16:10
0: cs:Connected ro:Secondary/Secondary ds:Inconsistent/Inconsistent C r-----
ns:0 nr:0 dw:0 dr:0 al:0 bm:0 lo:0 pe:0 ua:0 ap:0 ep:1 wo:f oos:20970844
(8).命令查看一下
cinderAA:
[root@cinderAA ~]# drbd-overview
0:web/0 Connected Secondary/Secondary Inconsistent/Inconsistent C r-----
cinderBB:
[root@cinderBB ~]# drbd-overview
0:web/0 Connected Secondary/Secondary Inconsistent/Inconsistent C r-----
从上面的信息中可以看出此时两个节点均处于Secondary状态。于是,我们接下来需要将其中一个节点设置为Primary。在要设置为Primary 的节点上执行如下命令:drbdsetup /dev/drbd0 primary �Co ,也可以在要设置为Primary的节点上使用如下命令来设置主节点: drbdadm -- --overwrite-data-of-peer primary r0
(9).将cinderAA设置为主节点
[root@cinderAA ~]#drbdadm primary --force r0
[root@cinderAA ~]# drbd-overview #drbdAA为主节点
0:web/0 SyncSource Primary/Secondary UpToDate/Inconsistent C r---n-
[>...................] sync'ed: 5.1% (19440/20476)M
注:大家可以看到正在同步数据,得要一段时间
[root@cinderBB ~]# drbd-overview #node2为从节点
0:web/0 SyncTarget Secondary/Primary Inconsistent/UpToDate C r-----
[==>.................] sync'ed: 17.0% (17016/20476)M
同步完成后,查看一下
[root@cinderAA ~]# drbd-overview
0:web/0 Connected Primary/Secondary UpToDate/UpToDate C r-----
[root@cinderBB ~]# drbd-overview
0:web/0 Connected Secondary/Primary UpToDate/UpToDate C r-----
格式化并挂载
[root@cinderAA ~]# mkfs.ext4 /dev/drbd0
[root@cinderAA ~]#mount /dev/drbd0 /mnt
[root@cinderAA ~]#mount | grep /dev/drbd0
切换Primary和Secondary节点
说明:对主Primary/Secondary模型的drbd服务来讲,在某个时刻只能有一个节点为Primary,因此,要切换两个节点的角色,只能在先将原有的Primary节点设置为Secondary后,才能原来的Secondary节点设置为Primary。
cinderAA:
[root@cinderAA ~]# umount /mnt/
[root@cinderAA ~]# drbdadm secondary r0
查看状态drbdAA
[root@cinderAA ~]# drbd-overview
0:web/0 Connected Secondary/Secondary UpToDate/UpToDate C r-----
node2:
[root@cinderBB ~]# drbdadm primary r0
查看状态cinderBB
[root@cinderBB ~]# drbd-overview
0:web/0 Connected Primary/Secondary UpToDate/UpToDate C r-----
[root@drbdBB ~]# mount /dev/drbd0 /mnt/
使用下面的命令查看在此前在主节点上复制至此设备的文件是否存在
[root@cinderBB ~]# ll /mnt/
总用量 20
-rw-r--r-- 1 root root 884 8月 17 13:50 inittab
drwx------ 2 root root 16384 8月 17 13:49 lost+found
十三、DRBD 双主模式配置示例(只是说明一下,cinder高可用只做主备模式)
drbd 8.4中第一次设置某节点成为主节点的命令
[root@cinderAA ~]# drbdadm primary --force r0
配置资源双主模型的示例:
resource r0 {
net {
protocol C;
allow-two-primaries yes; 加上此项即可
}
startup {
become-primary-on both;
}
disk {
fencing resource-and-stonith;
}
handlers {
# Make sure the other node is confirmed
# dead after this!
outdate-peer "/sbin/kill-other-node.sh";
}
on cinderAA {
device /dev/drbd0;
disk /dev/sdb1;
address 192.168.100.61:7789;
meta-disk internal;
}
on cinderBB {
device /dev/drbd0;
disk /dev/sdb1;
address 192.168.100.62:7789;
meta-disk internal;
}
}
安装集群管理工具,corosync,pacemaker,crmsh,nfs 两节点都需安装
[root@cinderAA]#yum install nfs-utils rpcbind
[root@cinderAA]#yum install -y corosync pacemaker
[root@cinderAA]#cd /etc/corosync/
[root@cinderAA corosync]# cp corosync.conf.example corosync.conf
[root@cinderAA corosync]# vim corosync.conf
# Please read the corosync.conf.5 manual page
compatibility: whitetank
totem {
version: 2 ##版本号,只能是2,不能修改
secauth: on ##安全认证,当使用aisexec时,会非常消耗CPU
threads: 0 ##线程数,根据CPU个数和核心数确定
interface {
ringnumber: 0 ##冗余环号,节点有多个网卡是可定义对应网卡在一个环内
bindnetaddr: 192.168.10.0 ##绑定心跳网段
mcastaddr: 226.94.10.10 ##心跳组播地址
mcastport: 5405 ##心跳组播使用端口
ttl: 1
}
}
logging {
fileline: off ##指定要打印的行
to_stderr: no ##是否发送到标准错误输出
to_logfile: yes ##记录到文件
to_syslog: no ##记录到syslog
logfile: /var/log/cluster/corosync.log
debug: off
timestamp: on ##是否打印时间戳,利于定位错误,但会消耗CPU
logger_subsys {
subsys: AMF
debug: off
}
}
amf {
mode: disabled
}
service {
ver: 0
name: pacemaker ##定义corosync启动时同时启动pacemaker
}
aisexec {
user: root
group: root
}
quorum {
provider:corosync_votequorum
expected_votes:2
two_node:1
}
生成密钥文件
[root@cinderAA corosync]# mv /dev/{random,random.bak}
[root@cinderAA corosync]# ln -s /dev/urandom /dev/random
[root@cinderAA corosync]# corosync-keygen
Corosync Cluster Engine Authentication key generator.
Gathering 1024 bits for key from /dev/random.
Press keys on your keyboard to generate entropy.
Writing corosync key to /etc/corosync/authkey.
将cinderAA上配置文件复制到cinderBB上
[root@cinderAA corosync]# scp authkey corosync.conf cinderBB:/etc/corosync/
安装crmsh
下载源,两节点都要安装
[root@cinderAA]#wget http://download.opensuse.org/repositories/network:/ha-clustering:/Stable/CentOS_CentOS-7/network:ha-clustering:Stable.repo
或者下载rpm包
[root@cinderAA]#wget http://download.opensuse.org/repositories/network:/ha-clustering:/Stable/CentOS_CentOS-7/x86_64/crmsh-2.1.4-1.1.x86_64.rpm
[root@cinderAA]#yum install -y python-dateutil python-lxml 此为crmsh依赖包
[root@cinderAA]#yum install -y crmsh

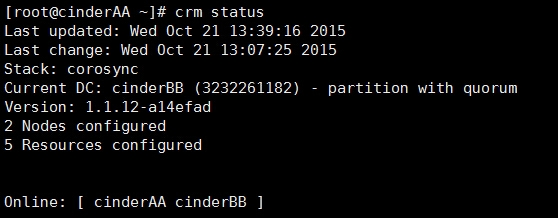
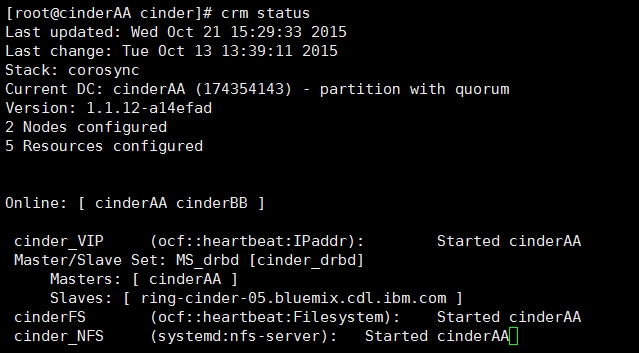
可以看见两台机器互为集群,都在线。
配置集群服务,drbd,Filesystem,NFS,openstack-volume
创建块设备目录
[root@cinderAA]#mkdir /cinder-volumes 此处不定义路径,可随意定义文件夹路径和名
cinder安装省略。。。。。。。。
配置cinder
[root@cinderAA]#cd /etc/cinder/
[root@cinderAA cinder]#vim nfs.config 定义nfs文件
9.111.222.99:/cinder-volumes
配置nfs
[root@cinderAA ~]# vim /etc/exports
/cinder-volumes *(rw,sync)
[root@cinderBB ~]# vim /etc/exports
/cinder-volumes *(rw,sync)
赋予权限
[root@cinderAA]#chown cinder:cinder /cinder-volume
[root@cinderAA]#chmod 775 /cinder-volume
[root@cinderAA]#chown cinder:cinder /var/lib/cinder/mnt/58974c6c7ef30b7ae95120b9d5972ae2
[root@cinderAA]#chmod 775 /var/lib/cinder/mnt/58974c6c7ef30b7ae95120b9d5972ae2
[root@cinderBB]#chown cinder:cinder /cinder-volume
[root@cinderBB]#chmod -R 775 /cinder-volume
[root@cinderBB]#chown cinder:cinder /var/lib/cinder/mnt/58974c6c7ef30b7ae95120b9d5972ae2
[root@cinderBB]#chmod 775 /var/lib/cinder/mnt/58974c6c7ef30b7ae95120b9d5972ae2
[root@cinderAA]#vim cinder.conf 两边配置一样
[DEFAULT]
debug=False
verbose=True
nfs_shares_config = /etc/cinder/nfs.config
volume_driver = cinder.volume.drivers.nfs.NfsDriver
log_file = /var/log/cinder/cinder.log
enable_v1_api=True
enable_v2_api=True
state_path=/var/lib/cinder
my_ip=9.111.222.99 此处写VIP地址
glance_host=9.111.222.100
glance_port=9292
glance_api_servers=http://9.111.222.100:9292
glance_api_insecure=false
glance_ca_certificates_file=
glance_api_version=1
api_rate_limit=True
storage_availability_zone=cinder_cluster 默认为nova
rootwrap_config=/etc/cinder/rootwrap.conf
auth_strategy=keystone
quota_volumes=10
quota_gigabytes=1000
quota_driver=cinder.quota.DbQuotaDriver
quota_snapshots=10
no_snapshot_gb_quota=false
use_default_quota_class=true
osapi_volume_listen=9.111.222.99
osapi_volume_listen_port=8776
osapi_volume_workers=8
volume_name_template=volume-%s
snapshot_name_template=snapshot-%s
rpc_backend=cinder.openstack.common.rpc.impl_kombu
control_exchange=cinder
rpc_thread_pool_size=64
rpc_response_timeout=60
max_gigabytes=10000
iscsi_ip_address=127.0.0.1
iscsi_port=3260
iscsi_helper=lioadm
volumes_dir=/var/lib/cinder/volumes
default_volume_type=
[database]
backend=sqlalchemy
connection=mysql://cinder:[email protected]/cinder
[keystone_authtoken]
auth_uri = http://9.111.222.100:5000/v2.0
identity_uri = http://9.111.222.100:35357/
admin_user = cinder
admin_password = cinder
admin_tenant_name = service
insecure = false
signing_dir = /var/cache/cinder/api
hash_algorithms = md5
[oslo_concurrency]
lock_path=/var/lib/cinder/lock
[oslo_messaging_rabbit]
amqp_durable_queues=true
amqp_auto_delete=false
rpc_conn_pool_size=30
rabbit_hosts=9.111.222.100:5671
rabbit_ha_queues=True
rabbit_use_ssl=true
rabbit_userid=rabbit
rabbit_password=rabbit
rabbit_virtual_host=/
notification_topics=notifications
为集群添加集群资源,想了解详细请访问另外一篇博客http://gushiren.blog.51cto.com/3392832/1704855
corosync支持heartbeat,LSB和ocf等类型的资源代理,目前较为常用的类型为LSB和OCF两类,stonith类专为配置stonith设备而用;
可以通过如下命令查看当前集群系统所支持的类型:
# crm ra classes
heartbeat
lsb
ocf / heartbeat pacemaker
stonith
如果想要查看某种类别下的所用资源代理的列表,可以使用类似如下命令实现:
# crm ra list lsb
# crm ra list ocf heartbeat
# crm ra list ocf pacemaker
# crm ra list stonith
[root@cinderAA]#crm
crm(live)#configure
crm(live)configure#
禁用stonith
crm(live)configure# property stonith-enabled=false
调整默认quorum策略
crm(live)configure# property no-quorum-policy=ignore
指定默认黏性值:
crm(live)configure# rsc_defaults resource-stickiness=100
创建文件系统资源
crm(live)configure#primitive cinderFS ocf:heartbeat:Filesystem params device="/dev/drbd0" directory="/dev/cinder-volumes" fstype=ext4 op start timeout=60 interval=0 op stop timeout=60 interval=0 op monitor timeout=40s interval=0
创建NFS资源
crm(live)configure#primitive cinder_NFS systemd:nfs-server op monitor interval=30s
创建drbd资源
crm(live)configure#primitive cinder_drbd ocf:linbit:drbd params drbd_resource=r0 op start timeout=240 interval=0 op stop timeout=100 interval=0 op monitor role=Master interval=20 timeout=30 op monitor role=Slave interval=30 timeout=30
crm(live)configure#ms MS_drbd cinder_drbd meta master-max=1 master-node-max=1 clone-max=2 clone-node-max=1 notify=true target-role=Started
创建VIP资源
crm(live)configure#primitive cinder_VIP ocf:heartbeat:IPaddr params ip=9.111.222.99 op monitor interval=30s
定义约束关系
文件系统和vip运行在drbd主节点上
crm(live)configure#colocation cinderFS_with_MS_drbd inf: cinder_VIP MS_drbd:Master cinderFS
文件系统在drbd之后启动
crm(live)configure#order cinderFS_after_MS_drbd inf: MS_drbd:promote cinderFS:start
NFS在文件系统之后启动
crm(live)configure#order cinderFS_before_cinder_NFS inf: cinderFS cinder_NFS:start
检测语法错误
crm(live)configure#verify
提交
crm(live)configure#commit
之所以没把cinder-volume服务加到pacemaker中,是因为,集群模式只能一个服务在线,如果cinderAA宕机 ,服务会自动切换到cinderBB不错,但是在dashboard中创建的volume会无法卸载,它会找cinderAA节点的cinder-volume服务,而不是cinderBB的。
简单来说,cinderAA创建的volume只允许自己本节点上的服务控制挂载,卸载,扩展,同理,cinderBB也是。这个问题测试过,两节点必须单独启动cinder-volume服务,才能在宕机的情况下,卸载云硬盘。
systemctl restart openstack-cinder-volume
systemctl enable openstack-cinder-volume


