React Native基础教程
React Native是Facebook开源的框架,用来写Android和iOS移动App。它的口号是 “Learning once, write anywhere”,目的是统一View的编写。我个人也是由于公司需要,故入坑学习,下面就我的理解简单总结下React Native的基本知识。
需要的预备知识:
1、学习JavaScript(最新JS核心标准ES6)
2、简单学习React.js(开发网页)
3、学习JSX(HTML和JavaScript的混写)
我主要讲一下几个方面:
1、React Native的基本模板写法
2、React Native的Flexbox布局
3、React Native组件化
4、React Native的生命周期
5、React Native的数据状态引用
1、React Native的基本模板写法
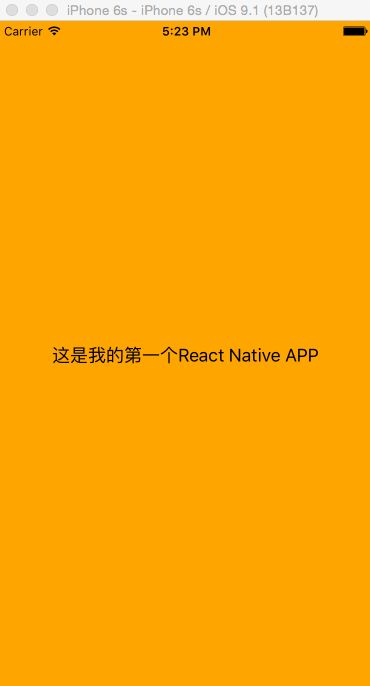
 1 'use strict';  =====>(严格模式)  2
 3 var React = require('react-native');   =====>(导入模块react-native,关键字是: require)  4 var {
 5   AppRegistry,
 6   StyleSheet,     =====>(声明要用到得系统组件)  7   Text,
 8   View,
 9 } = React;
10
11 var FirstApp = React.createClass({   =====>(创建组件名称是:FirstApp, 关键字是createClass) 12
13     render: function() {   =====>(渲染方法, 组件中必须得方法) 14
15         return (
16
17               <View style={styles.container}>                        =====>(这几行就是JSX语法写的)
18
19                   <Text style={{fontSize: 18}}>这是我的第一个React Native APP</Text>   =====>(显示在手机屏幕上的内容在这写)
20
21               </View>                                    =====>(这里用view包起来,而不是用div)
22           );
23     }
24 });
25
26 var styles = StyleSheet.create( =====>(创建样式,看上面加粗划线的代码,可以在这里定义,也可以直接写在代码里面,如上面的fontSize:18) 27   container: {
28       flex: 1,
29       justifyContent: 'center',
30       alignItems: 'center',
31       backgroundColor: 'orange'
32     }
33 });
34
35 AppRegistry.registerComponent('FirstApp', () => FirstApp);   =====>(注册应用,使能够加载运行, FirstApp就是你的App名称) 36
37 module.exports = FirstApp; =====>(导出组件,使能够在别的组件中用)
最终的打印结果:
2、React Native的Flexbox布局(样式)
官网的链接:http://facebook.github.io/react-native/docs/flexbox.html#content
这个比较简单,需自己多实践就行,简单说几个:
flex: 这个是一个灵活的布局属性,类似比例, 比如你想在一行中定义三张图片,它们的宽比为1:3:2,那么你可以分别设置它们的flex为: 1,3,2
flexDirection: 这个是设置布局的方向(column 和 row), 视图排列方法是列布局还是行布局
justifyContent 和 alignItems: 这2个是水平和垂直布局,可以设置水平居中,垂直居中等
margin(包括marginLeft, marginRight, marginTop, marginBottom) :这个是设置间距(距离左,右, 上, 下)多少
position (包括absolute和relative): 这个是设置视图的位置是固定的还是相对的
......
3、React Native的组件化, 我们可以分功能来自定义模块写代码,然后把所有模块组合起来,就是一个完整的程序了
 1 'use strict';
 2
 3 var React = require('react-native');
 4 var {
 5   AppRegistry,
 6   StyleSheet,
 7   Text,
 8   View,
 9 } = React;
10
11 var FirstApp = React.createClass({
12
13     render: function() {
14
15         return (
16
17               <View style={styles.container}>
18
19                   <HelloWorld myText='我是第一' />
20                   <HelloWorld myText='我是第二' />   =====>(这里三个是引用了下面定义的组件,HelloWorld自动成为FirstApp的子组件)
21                   <HelloWorld myText='我是第三' />  =====>(myText是传给HelloWorld的属性)
22
23               </View>
24           );
25     }
26 });
27
28 var HelloWorld = React.createClass({
29
30     render: function() {
31
32         return (
33
34               <View>
35                   <Text style={{fontSize: 20, color: 'red'}}>{this.props.myText}</Text>
36               </View>                    =====>(从父组件传过来的myText属性,用this.props.myText接收)
37           );
38     }
39 });
最终的打印结果:
4、React Native的生命周期
a、getInitialState: 在组建被挂载之前调用,我们一般在里面定义初始state值
b、getDefaultProps: 在组件类创建的时候调用一次,然后返回值被缓存下来。如果父组件没有指定 getDefaultProps 中定义的属性,则此处返回的对象中的相应属性将会合并到 this.props
c、componentWillMount: 服务器端和客户端都只调用一次,在初始化渲染执行之前立刻调用
d、render: 执行视图的渲染操作
e、componentDidMount: 在初始化渲染执行之后立刻调用一次,仅客户端有效(服务器端不会调用)
f、componentWillUnmount: 组件从DOM中移除时调用,一般在次方法进行必要的清理工作
 1 'use strict';
 2
 3 var React = require('react-native');
 4 var {
 5   AppRegistry,
 6   StyleSheet,
 7   Text,
 8   View,
 9 } = React;
10
11 var FirstApp = React.createClass({
12
13     getDefaultProps: function() {
14
15         console.log('getDefaultProps');
16
17     },
18
19     getInitialState: function() {
20
21         console.log('getInitialState');
22
23         return {
24
25         };
26     },
27
28     componentWillMount: function() {
29
30         console.log('componentWillMount');
31     },
32
33     componentDidMount: function() {
34
35         console.log('componentDidMount');
36     },
37
38     componentWillUnmount: function() {
39
40         console.log('componentWillUnmount');
41     },
42
43     render: function() {
44
45         console.log('render');
46
47         return (
48
49               <View style={styles.container}>
50
51                   <HelloWorld myText='我是第一' />
52                   <HelloWorld myText='我是第二' />
53                   <HelloWorld myText='我是第三' />
54
55               </View>
56           );
57     }
58 });
59
60 var HelloWorld = React.createClass({
61
62     render: function() {
63
64         return (
65
66               <View>
67                   <Text style={{fontSize: 20, color: 'red'}}>{this.props.myText}</Text>
68               </View>
69           );
70     }
71 });
72
73 var styles = StyleSheet.create({
74   container: {
75       flex: 1,
76       justifyContent: 'center',
77       alignItems: 'center',
78       backgroundColor: 'orange'
79     }
80 });
81
82 AppRegistry.registerComponent('FirstApp', () => FirstApp);
83
84 module.exports = FirstApp;
最终的打印结果(执行顺序):
5、React Native的数据状态引用
a、props: 属性, 用于不同组件之间数值传递,一般是从父组件中传值给子组件,子组件最好不要修改此值,而由父组件来修改,进而更新子组件的值
还是上面的栗子:
 1 'use strict';
 2
 3 var React = require('react-native');
 4 var {
 5   AppRegistry,
 6   StyleSheet,
 7   Text,
 8   View,
 9 } = React;
10
11 var FirstApp = React.createClass({
12
13     render: function() {
14
15         console.log('render');
16
17         return (
18
19               <View style={styles.container}>
20
21                   <HelloWorld myText='我是第一' />
22                   <HelloWorld myText='我是第二' />  =====>(HelloWorld嵌套在FirstApp中,所以HelloWorld自动成为了FirstApp的子组                                    件,myText就是要传递给子组件的属性值)
23                   <HelloWorld myText='我是第三' />
24
25               </View>
26           );
27     }
28 });
29
30 var HelloWorld = React.createClass({
31
32     render: function() {
33
34         return (
35
36               <View>
37                   <Text style={{fontSize: 20, color: 'red'}}>{this.props.myText}</Text> =====>(HelloWorld通过props来接收传                                                        过来的myText属性值)
38               </View>
39           );
40     }
41 });
42
43 var styles = StyleSheet.create({
44   container: {
45       flex: 1,
46       justifyContent: 'center',
47       alignItems: 'center',
48       backgroundColor: 'orange'
49     }
50 });
51
52 AppRegistry.registerComponent('FirstApp', () => FirstApp);
53
54 module.exports = FirstApp;
最终的打印结果:
b、state: 状态,用于同一组件中数据的更新
 1 'use strict';
 2
 3 var React = require('react-native');
 4 var {
 5   AppRegistry,
 6   StyleSheet,
 7   Text,
 8   View,
 9   TouchableHighlight
10 } = React;
11
12 var FirstApp = React.createClass({
13
14     getInitialState: function() {
15
16         return {
17            myValue: '我是初始值'    =====>(设置初始值)
18         };
19
20     },
21
22     render: function() {
23
24         console.log('render');
25
26         return (
27
28             <View style={{flex: 1, justifyContent: 'center', alignItems: 'center'}}>
29                 <Text onPress={this.changeText}  =====>(设置文字点击事件,当点击的时候会调用changeText方法) 30                       style={{fontSize: 30,
31                               color: 'orange',       =====>(设置文字样式) 32                               textAlign: 'center'}}>
33
34                                 {this.state.myValue}   =====>(第一次加载数据的时候会获取初始值,用state来获取到初始值) 35                 </Text>
36             </View>
37           );
38     },
39
40     changeText: function() {
41
42       this.setState({     =====>(这是文字的点击事件, 当我想要更改state初始值的时候,需要用到setState来更改) 43
44           myValue: '我是修改后的值'  =====>(修改初始值myValue,当我修改这里后,系统会自动去调用render函数方法,this.state.myValue会自动更新成最新的值,即:我是修改后的值)
45       })
46     }
47 });
48
49
50 AppRegistry.registerComponent('FirstApp', () => FirstApp);
51
52 module.exports = FirstApp;
最终的打印结果:
c、ref: 用来指示render中某组件,调用的话就是this.refs.xxx.xxx
 1 'use strict';
 2
 3 var React = require('react-native');
 4 var {
 5   AppRegistry,
 6   StyleSheet,
 7   Text,
 8   View,
 9   Image,
10   TouchableHighlight
11 } = React;
12
13 var FirstApp = React.createClass({
14
15     render: function() {
16
17         console.log('render');
18
19         return (
20
21             <View style={{flex: 1, justifyContent: 'center', alignItems: 'center', backgroundColor: 'yellow'}}>
22
23                <Image
24                     ref='myImg'
25                     source={{uri: 'http://pic14.nipic.com/20110522/7411759_164157418126_2.jpg' }}
26                     style={{width: 350, height: 350}} />    =====>(设置一张图片,并且设置宽高为350)
27
28                <Text onPress={this.changePic} style={{marginTop: 50}}>改变图片的大小</Text> ===>(点击文字,触发事件changePic)
29             </View>
30           );
31     },
32
33     changePic: function() {  =====>(点击文字会调用这个方法) 34
35        console.log('我打印出上面的image的属性来看看:',this.refs.myImg.props); =====>(打印出上面的Image来看看) 36     }
37 });
38
39 AppRegistry.registerComponent('FirstApp', () => FirstApp);
40
41 module.exports = FirstApp;
最终的执行结果:


