Post-processing in Ogre
什么是 Post-processing
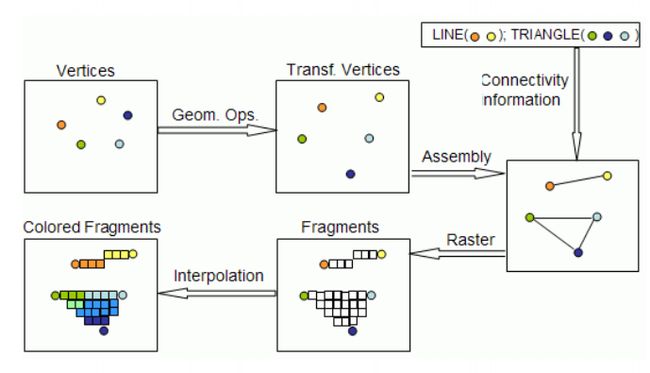
首先看一下一个典型的Rendering Pipeline。
Post-processing所处理的对象的是Colored Fragments,其实就是图像处理,但是这里的图像是由三维世界栅格化之后得到的图像。
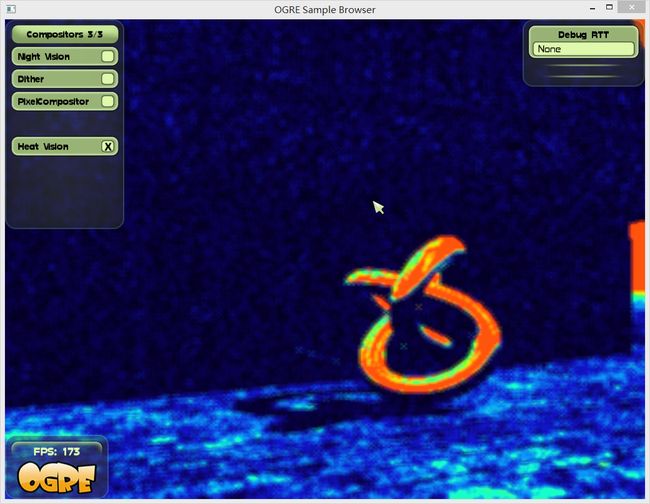
Ogre中有一个Post-processing的例子,里面实现了很多Post-processing的效果。
Compositor框架
合成器架构是OGRE API的一部分,它允许你轻松定义全屏的后加工处理效果。合成器脚本给你提供了在脚本里定义合成器效果的能力,并且它们可以重复使用而且容易更改,而不必使用API去定义它们。虽然你仍然要使用代码实例化一个针对可视视口的合成器,但是比起实际上定义合成器本身这已经是相当简单的过程了。
进行后处理效果通常包括最开始的用纹理渲染场景,其中有些是添加到主窗口的有些是替代主窗口的。一旦场景中有了纹理,你就可以将场景图像送入一个片断程序,并在片断程序中通过全屏范围渲染它。这一后处理渲染的目标可以是主结果,又或者是另一种渲染纹理,以至于在画面上形成多级回旋。你甚至可以在两个渲染纹理之间反复进行渲染,以达到需要多次循环的回旋效果,而不是每层使用一个单独的纹理。最终,你将得到一个全屏窗口的最终渲染输出结果。这将代替整个窗口(因此,主窗口不必渲染场景本身),或者是一个联合效果。
创建一个简单的黑白效果Compositor
自带的demo里面已经有很多现成的Compositor,参考一下写一个简单的。
在X/Ogre/Samples/Media/materials/scripts 下载创建三个文件 —— BlackWhite.compositor BlackWhite.material BlackWhite.cg
BlackWhite.compositor
compositor BlackWhite
{
	technique
	{
		texture scene target_width target_height PF_R8G8B8
		target scene
		{
			input previous
		}
		target_output
		{
			input none
			pass render_quad
			{
				material BlackWhiteMaterial
				input 0 scene
			}
		}
	}
}
BlackWhite.material
fragment_program BlackWhiteShader cg
{
	source BlackWhite.cg
	entry_point PixelShader
	profiles ps_1_1 arbfp1
}

material BlackWhiteMaterial
{
	technique
	{
		pass
		{
			depth_check off
            polygon_mode_overrideable false

			fragment_program_ref BlackWhiteShader
			{
			}

			texture_unit
			{
			    // texture will get added at runtime
                		tex_coord_set 0
				tex_address_mode clamp
				filtering linear linear linear
			}

		}
	}
}
BlackWhite.cg
void PixelShader(float2 uv:TEXCOORD0, out float4 color:COLOR, uniform sampler2D texture)
{
	float4 temp_color = tex2D(texture, uv);
	float greyvalue = temp_color.r * 0.3 + temp_color.g * 0.59 + temp_color.b * 0.11;
	color = float4(greyvalue, greyvalue, greyvalue, 0);
}
这里用的cg语言写的,感觉和GLSL差不多,第3,4行是将RGB色转换成灰度。
加载到场景中,添加下面的代码到createScene()中
	Ogre::CompositorManager::getSingleton().addCompositor(mCamera->getViewport(), "BlackWhiteCompositor");
	Ogre::CompositorManager::getSingleton().setCompositorEnabled(mCamera->getViewport(), "BlackWhiteCompositor", true);
效果如下
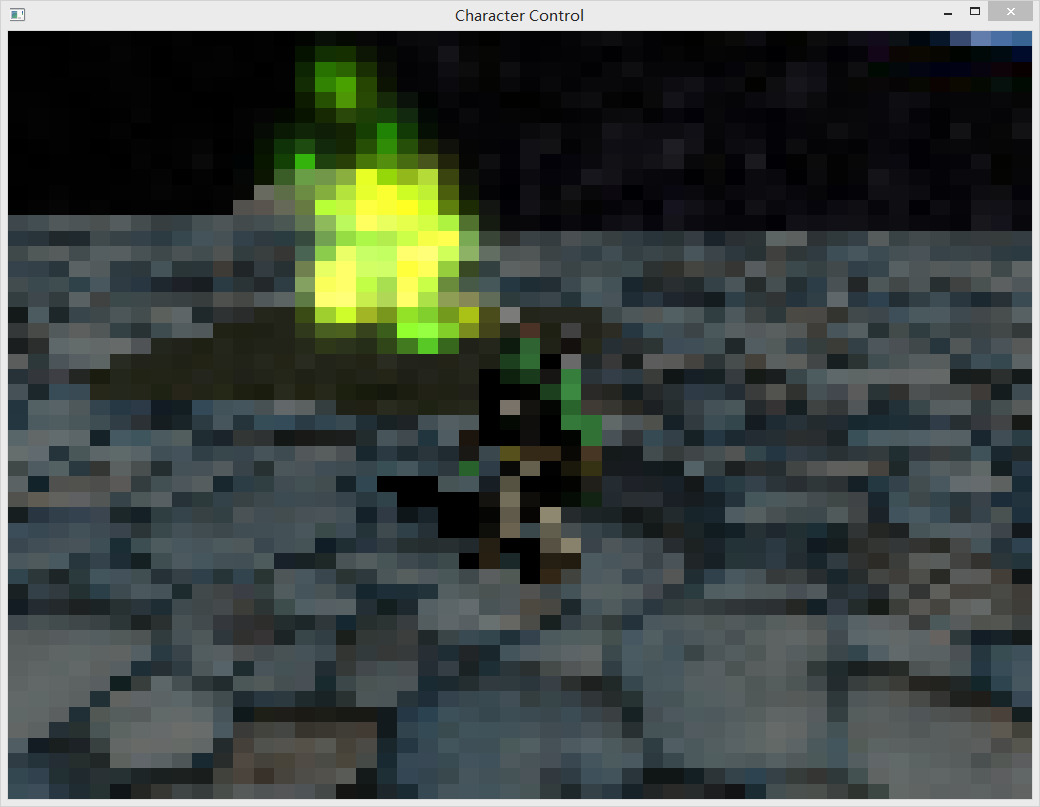
3D转像素风格2D
效果是这样
只需要修改cg部分的代码就可以了
	//Pixel effect
	float num = 50;
	float stepsize = 1.0/num;
	float2 fragment = float2(stepsize * floor(uv.x * num), stepsize * floor(uv.y * num));
	color = tex2D(texture, fragment);
首先定义num为横向和纵向有多少个像素,接着定义stepsize为步长,fragment等于是一个新的uv坐标,用到floor函数,就是向下取整。 最后用tex2D索引颜色。
将num换成80看看
参考
Ogre Beginner's Guide


