Django 探索(一) HelloWorld
一、Django怎么读
酱狗
二、Django下载 安装
下载地址1
下载地址2 (我的CSDN免积分下载)
安装:
tar zxvf Django-1.5.4.tar.gz
python setup.py install
三、建立一个HelloWorld项目
有人会问,如果在win下,我应该怎么找到这个django-admin.py?
把:C:\Python27\Scripts 放到环境变量PATH中~~就OK了。。OK你个头!!
还是得这样:
C:\Python27\helloworld>python C:\Python27\Scripts\django-admin.py startproject helloworld
Linux下:
django-admin.py startproject helloworld
注意你在哪里用这命令,就在哪里生成项目
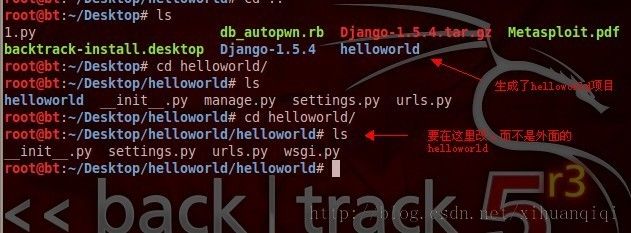
四、进入到准确的目录下
为什么我把这个地方单独出一个小节,明明很简单,好吧,我之前没找对目录浪费了半小时不止。
差点怀疑自己的人生了。
其他人的教程都没讲到这一点,害我沮丧了好久。。。哎,请允悲。。。
生成的helloworld项目,之中,还有一个helloworld,我们的view啊,urls.py啊,都是在里面修改,别修改外面的那个,没用。
五、生成view.py视图
view.py
六、修改urls.py配置
from django.conf.urls import patterns, include, url

# Uncomment the next two lines to enable the admin:
# from django.contrib import admin
# admin.autodiscover()
from view import hello #上一步生成的view.py

urlpatterns = patterns('',
    url(r'^hello/$',hello)
    # Examples:
    # url(r'^$', 'helloworld.views.home', name='home'),
    # url(r'^helloworld/', include('helloworld.foo.urls')),

    # Uncomment the admin/doc line below to enable admin documentation:
    # url(r'^admin/doc/', include('django.contrib.admindocs.urls')),

    # Uncomment the next line to enable the admin:
    # url(r'^admin/', include(admin.site.urls)),
)
七、runserver
到外层的helloword目录中
python manage.py runserver 8080
如果runserver后不跟8080端口,那么默认的就是8000端口
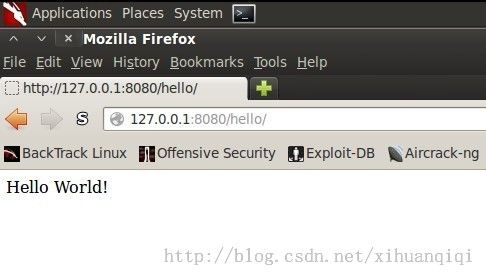
八、效果图
成功的URL(urls.py 中的 r'^hello/$' 你不会没看出是
正则了吧?呵呵。。r' ' 是原字符串的意思。。):
失败的URL:


