Android之Wifi学习1
在Android中对Wifi操作,android本身提供了一些有用的包,在android.net.wifi包下面。简单介绍一下:
大致可以分为四个主要的类ScanResult,wifiConfiguration,WifiInfo,WifiManager
(1)ScanResult,主要是通过wifi 硬件的扫描来获取一些周边的wifi 热点的信息。
(2)wifiConfiguration 在我们连通一个wifi 接入点的时候,需要获取到的一些信息。大家可以跟我们有线的设备进行对比一下。
(3)WifiInfo 在我们的wifi 已经连通了以后,可以通过这个类获得一些已经连通的wifi 连接的信息获取当前链接的信息,这里信息就比较简单了,这里简单介绍一下这里的方法:
getBSSID() 获取BSSID
getDetailedStateOf() 获取客户端的连通性
getHiddenSSID() 获得SSID 是否被隐藏
getIpAddress() 获取IP 地址
getLinkSpeed() 获得连接的速度
getMacAddress() 获得Mac 地址
getRssi() 获得802.11n 网络的信号
getSSID() 获得SSID
getSupplicanState() 返回具体客户端状态的信息
(4)wifiManager 这个不用说,就是用来管理我们的wifi 连接,这里已经定义好了一些类,可以供我们使用。这里来说相对复杂,里面的内容比较多,但是通过字面意思,我们还是可以获得很多相关的信息。这个类里面预先定义了许多常量,我们可以直接使用,不用再次创建。
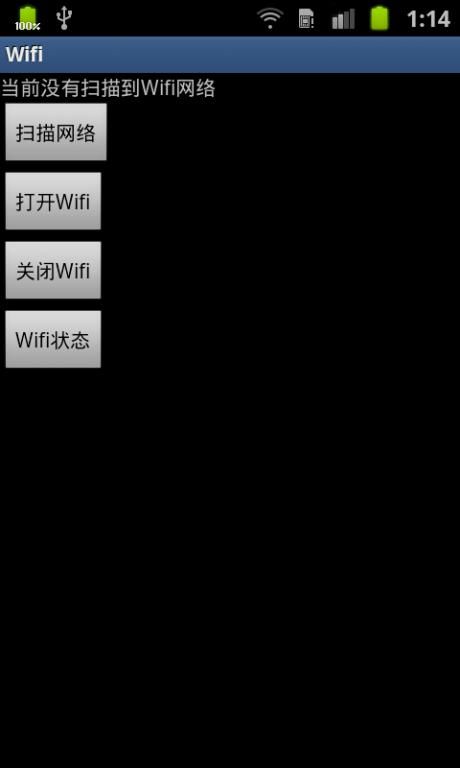
介绍完了,开始写一个Demo吧。程序已启动效果图如下:
看代码,其中有注释,我就不多说了。
布局文件代码:
- <?xml version="1.0" encoding="utf-8"?>
- <ScrollView xmlns:android="http://schemas.android.com/apk/res/android"
- android:id="@+id/mScrollView" android:layout_width="fill_parent"
- android:layout_height="wrap_content" android:scrollbars="vertical">
- <LinearLayout xmlns:android="http://schemas.android.com/apk/res/android"
- android:orientation="vertical"
- android:layout_width="fill_parent"
- android:layout_height="fill_parent"
- >
- <TextView
- android:id="@+id/allNetWork"
- android:layout_width="fill_parent"
- android:layout_height="wrap_content"
- android:text="当前没有扫描到Wifi网络"
- />
- <Button
- android:id="@+id/scan"
- android:layout_width="wrap_content"
- android:layout_height="wrap_content"
- android:text="扫描网络"
- />
- <Button
- android:id="@+id/start"
- android:layout_width="wrap_content"
- android:layout_height="wrap_content"
- android:text="打开Wifi"
- />
- <Button
- android:id="@+id/stop"
- android:layout_width="wrap_content"
- android:layout_height="wrap_content"
- android:text="关闭Wifi"
- />
- <Button
- android:id="@+id/check"
- android:layout_width="wrap_content"
- android:layout_height="wrap_content"
- android:text="Wifi状态"
- />
- </LinearLayout>
- </ScrollView>
上面布局文件中的ScrollView用来在Activity中显示右侧滚动条,如果数据多的话,则可以往下滑动继续显示未显示完的数据。
主页面代码:
- package org.sunchao;
- import java.util.List;
- import android.app.Activity;
- import android.net.wifi.ScanResult;
- import android.os.Bundle;
- import android.view.View;
- import android.view.View.OnClickListener;
- import android.widget.Button;
- import android.widget.ScrollView;
- import android.widget.TextView;
- import android.widget.Toast;
- public class Main extends Activity implements OnClickListener {
- // 右侧滚动条按钮
- private ScrollView sView;
- private TextView allNetWork;
- private Button scan;
- private Button start;
- private Button stop;
- private Button check;
- private WifiAdmin mWifiAdmin;
- // 扫描结果列表
- private List<ScanResult> list;
- private ScanResult mScanResult;
- private StringBuffer mStringBuffer = new StringBuffer();
- /** Called when the activity is first created. */
- @Override
- public void onCreate(Bundle savedInstanceState) {
- super.onCreate(savedInstanceState);
- setContentView(R.layout.main);
- mWifiAdmin = new WifiAdmin(Main.this);
- init();
- }
- // 按钮的初始化
- public void init() {
- sView = (ScrollView) findViewById(R.id.mScrollView);
- allNetWork = (TextView) findViewById(R.id.allNetWork);
- scan = (Button) findViewById(R.id.scan);
- start = (Button) findViewById(R.id.start);
- stop = (Button) findViewById(R.id.stop);
- check = (Button) findViewById(R.id.check);
- scan.setOnClickListener(Main.this);
- start.setOnClickListener(Main.this);
- stop.setOnClickListener(Main.this);
- check.setOnClickListener(Main.this);
- }
- // WIFI_STATE_DISABLING 0
- // WIFI_STATE_DISABLED 1
- // WIFI_STATE_ENABLING 2
- // WIFI_STATE_ENABLED 3
- public void start() {
- mWifiAdmin.openWifi();
- Toast.makeText(Main.this, "当前Wifi网卡状态为" + mWifiAdmin.checkState(),
- Toast.LENGTH_SHORT).show();
- }
- public void stop() {
- mWifiAdmin.closeWifi();
- Toast.makeText(Main.this, "当前Wifi网卡状态为" + mWifiAdmin.checkState(),
- Toast.LENGTH_SHORT).show();
- }
- public void check() {
- Toast.makeText(Main.this, "当前Wifi网卡状态为" + mWifiAdmin.checkState(),
- Toast.LENGTH_SHORT).show();
- }
- public void getAllNetWorkList() {
- // 每次点击扫描之前清空上一次的扫描结果
- if (mStringBuffer != null) {
- mStringBuffer = new StringBuffer();
- }
- // 开始扫描网络
- mWifiAdmin.startScan();
- list = mWifiAdmin.getWifiList();
- if (list != null) {
- for (int i = 0; i < list.size(); i++) {
- mScanResult = list.get(i);
- // 得到网络的SSID:the network name
- mStringBuffer = mStringBuffer
- .append(mScanResult.SSID).append(" ")
- .append(mScanResult.BSSID).append(" ")
- .append(mScanResult.capabilities).append(" ")
- .append(mScanResult.frequency).append(" ")
- .append(mScanResult.level).append(" ")
- .append("\n\n");
- }
- allNetWork.setText("扫描到的所有Wifi网络:\n" + mStringBuffer.toString());
- }
- }
- @Override
- public void onClick(View v) {
- switch (v.getId()) {
- case R.id.scan:
- getAllNetWorkList();
- break;
- case R.id.start:
- start();
- break;
- case R.id.stop:
- stop();
- break;
- case R.id.check:
- check();
- break;
- default:
- break;
- }
- }
- }
上面用到了一个WifiAdmin类,这是我自己写的一个类,用于对Wifi的操作进行一次封装,里面的方法很多,我们本次Demo只用到了其中几种,但我还是先全部放上去吧,以后会用到的。
WifiAdmin工具类代码:
- package org.sunchao;
- import java.util.List;
- import android.content.Context;
- import android.net.wifi.ScanResult;
- import android.net.wifi.WifiConfiguration;
- import android.net.wifi.WifiInfo;
- import android.net.wifi.WifiManager;
- import android.net.wifi.WifiManager.WifiLock;
- public class WifiAdmin {
- // 定义WifiManager对象
- private WifiManager mWifiManager;
- // 定义WifiInfo对象
- private WifiInfo mWifiInfo;
- // 扫描出的网络连接列表
- private List<ScanResult> mWifiList;
- // 网络连接列表
- private List<WifiConfiguration> mWifiConfiguration;
- // 定义一个WifiLock
- WifiLock mWifiLock;
- // 构造器
- public WifiAdmin(Context context) {
- // 取得WifiManager对象
- mWifiManager = (WifiManager) context
- .getSystemService(Context.WIFI_SERVICE);
- // 取得WifiInfo对象
- mWifiInfo = mWifiManager.getConnectionInfo();
- }
- // 打开WIFI
- public void openWifi() {
- if (!mWifiManager.isWifiEnabled()) {
- mWifiManager.setWifiEnabled(true);
- }
- }
- // 关闭WIFI
- public void closeWifi() {
- if (mWifiManager.isWifiEnabled()) {
- mWifiManager.setWifiEnabled(false);
- }
- }
- // 检查当前WIFI状态
- public int checkState() {
- return mWifiManager.getWifiState();
- }
- // 锁定WifiLock
- public void acquireWifiLock() {
- mWifiLock.acquire();
- }
- // 解锁WifiLock
- public void releaseWifiLock() {
- // 判断时候锁定
- if (mWifiLock.isHeld()) {
- mWifiLock.acquire();
- }
- }
- // 创建一个WifiLock
- public void creatWifiLock() {
- mWifiLock = mWifiManager.createWifiLock("Test");
- }
- // 得到配置好的网络
- public List<WifiConfiguration> getConfiguration() {
- return mWifiConfiguration;
- }
- // 指定配置好的网络进行连接
- public void connectConfiguration(int index) {
- // 索引大于配置好的网络索引返回
- if (index > mWifiConfiguration.size()) {
- return;
- }
- // 连接配置好的指定ID的网络
- mWifiManager.enableNetwork(mWifiConfiguration.get(index).networkId,
- true);
- }
- public void startScan() {
- mWifiManager.startScan();
- // 得到扫描结果
- mWifiList = mWifiManager.getScanResults();
- // 得到配置好的网络连接
- mWifiConfiguration = mWifiManager.getConfiguredNetworks();
- }
- // 得到网络列表
- public List<ScanResult> getWifiList() {
- return mWifiList;
- }
- // 查看扫描结果
- public StringBuilder lookUpScan() {
- StringBuilder stringBuilder = new StringBuilder();
- for (int i = 0; i < mWifiList.size(); i++) {
- stringBuilder
- .append("Index_" + new Integer(i + 1).toString() + ":");
- // 将ScanResult信息转换成一个字符串包
- // 其中把包括:BSSID、SSID、capabilities、frequency、level
- stringBuilder.append((mWifiList.get(i)).toString());
- stringBuilder.append("/n");
- }
- return stringBuilder;
- }
- // 得到MAC地址
- public String getMacAddress() {
- return (mWifiInfo == null) ? "NULL" : mWifiInfo.getMacAddress();
- }
- // 得到接入点的BSSID
- public String getBSSID() {
- return (mWifiInfo == null) ? "NULL" : mWifiInfo.getBSSID();
- }
- // 得到IP地址
- public int getIPAddress() {
- return (mWifiInfo == null) ? 0 : mWifiInfo.getIpAddress();
- }
- // 得到连接的ID
- public int getNetworkId() {
- return (mWifiInfo == null) ? 0 : mWifiInfo.getNetworkId();
- }
- // 得到WifiInfo的所有信息包
- public String getWifiInfo() {
- return (mWifiInfo == null) ? "NULL" : mWifiInfo.toString();
- }
- // 添加一个网络并连接
- public void addNetwork(WifiConfiguration wcg) {
- int wcgID = mWifiManager.addNetwork(wcg);
- mWifiManager.enableNetwork(wcgID, true);
- }
- // 断开指定ID的网络
- public void disconnectWifi(int netId) {
- mWifiManager.disableNetwork(netId);
- mWifiManager.disconnect();
- }
- }
最后,我们看一下AndroidManifest.xml配置文件的代码,里面有需要用到的权限。这个比较重要,我刚开始就是忘记添加这些权限,程序一启动就挂。后来看LogCat才知道少了这些权限的。
AndroidManifest.xml:
- <?xml version="1.0" encoding="utf-8"?>
- <manifest xmlns:android="http://schemas.android.com/apk/res/android"
- package="org.sunchao" android:versionCode="1" android:versionName="1.0">
- <uses-sdk android:minSdkVersion="8" />
- <application android:icon="@drawable/icon" android:label="@string/app_name">
- <activity android:name=".Main" android:label="@string/app_name">
- <intent-filter>
- <action android:name="android.intent.action.MAIN" />
- <category android:name="android.intent.category.LAUNCHER" />
- </intent-filter>
- </activity>
- </application>
- <!-- 以下是使用wifi访问网络所需的权限 -->
- <uses-permission android:name="android.permission.CHANGE_NETWORK_STATE"></uses-permission>
- <uses-permission android:name="android.permission.CHANGE_WIFI_STATE"></uses-permission>
- <uses-permission android:name="android.permission.ACCESS_NETWORK_STATE"></uses-permission>
- <uses-permission android:name="android.permission.ACCESS_WIFI_STATE"></uses-permission>
- </manifest>
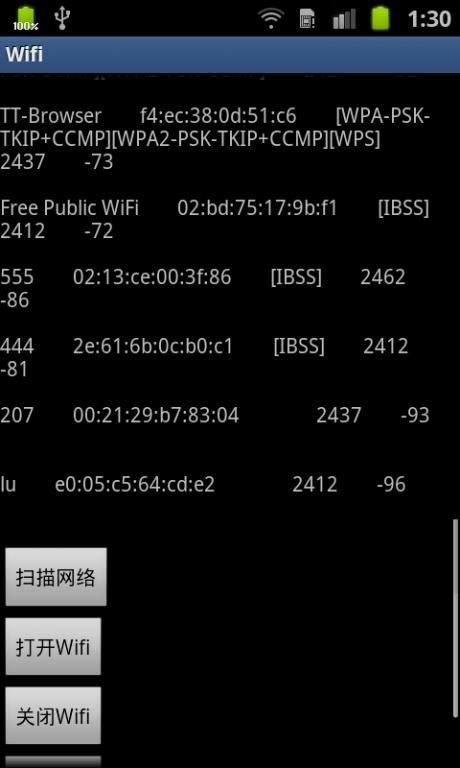
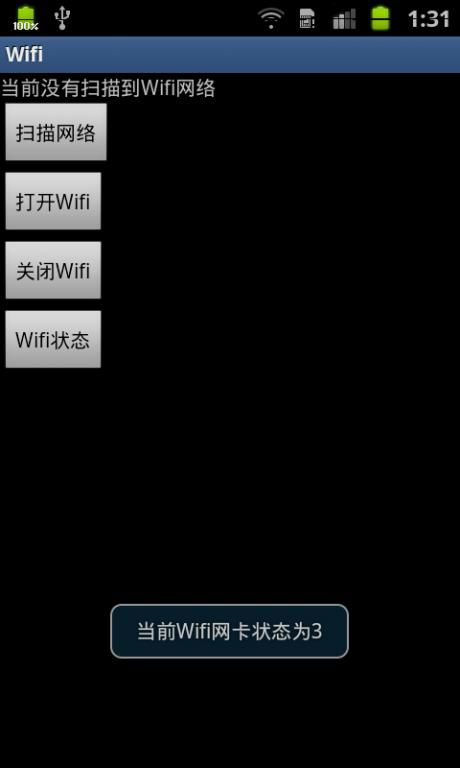
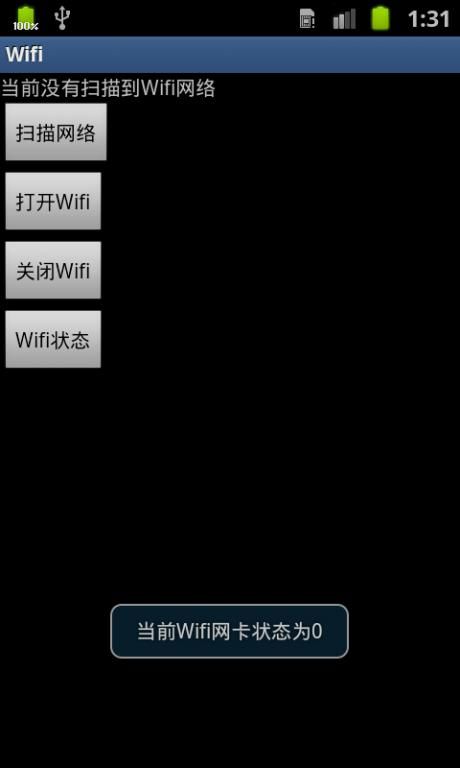
至此这个Demo就完成了,看效果图。


