Android广播接收机制(BroadcastReceiver)
和活动、服务及ContentProvider一样BroadcastReceiver也是Android组件之一,它是可以对客户端发送的广播消息作出响应。消息本身是一个Android广播Intent,广播消息可以被多个接收程序接收。
在Android系统中,广播体现在方方面面,例如当开机完成后系统会产生一条广播,接收到这条广播就能实现开机启动服务的功能;当网络状态改变时系统会产生一条广播,接收到这条广播就能及时地做出提示和保存数据等操作;当电池电量改变时,系统会产生一条广播,接收到这条广播就能在电量低时告知用户及时保存进度,等等。
下面我们就对BroadcastReceiver进行全面的介绍,以了解和掌握它的各种功能和用法。
首先,我们来看一下如何发送广播:
那么如何接收广播呢?看代码
最后,我们还必须在描述文件中注册我们编写的接收程序,否则你将无法收到广播。
还有一种代码中实现的动态注册方式,具体代码为:
下面我们看一个发送接收广播的完整例子:
首先来看主活动类:
layout/main.xml
menu/main_menu.xml

广播的概念意味着可能有多个接收程序。我们将再建两个BroadcastReceiver,并在描述文件中注册,以测试多个接收者情况。
在Android系统中,广播体现在方方面面,例如当开机完成后系统会产生一条广播,接收到这条广播就能实现开机启动服务的功能;当网络状态改变时系统会产生一条广播,接收到这条广播就能及时地做出提示和保存数据等操作;当电池电量改变时,系统会产生一条广播,接收到这条广播就能在电量低时告知用户及时保存进度,等等。
下面我们就对BroadcastReceiver进行全面的介绍,以了解和掌握它的各种功能和用法。
首先,我们来看一下如何发送广播:
private void testSendBroadcast(Activity activity){
    //create an intent with an action
    String uniqueActionString = "com.test.broadcast";
    Intent intent = new Intent(uniqueActionString);
    intent.putExtra("message","HelloWoreld!");
    //send Broadcast
    activity.sendBroadcast(intent);
}
在上面的代码中,我们创建了一个唯一、特定操作的Intet,并向其中添加了一个extra消息,然后调用sendBroadcast()方法,发送了一条广播。
那么如何接收广播呢?看代码
public class TestReceiver extends BroadcastReceiver{
    private static final String tag = "TestReceiver";
    public void onReceive(Context context,Intent intent){
        Log.i(tag,"intent" + intent);
        String message = intent.getStringExtra("message");
        Log.i(tag,message);
    }
}
创建广播接收程序非常简单,只需扩展BroadcastReceiver类并改写onReceive()方法。我们可以在接收程序中通过Intent取得广播发送的具体消息内容。
最后,我们还必须在描述文件中注册我们编写的接收程序,否则你将无法收到广播。
<receiver android:name=".TestReceiver">
    <intent-filter>
        <action android:name="com.test.broadcast"/>
        <category android:name="android.intent.category.DEFAULT" />
    </intent-filter>
</receiver>
这种在描述文件中注册的方式我们称之为:静态方式。这种方式的注册是常驻型的,也就是说当应用关闭后,如果有广播信息传来,TestReceiver也会被系统调用而自动运行,从而接收到广播消息。
还有一种代码中实现的动态注册方式,具体代码为:
TestReceiver receiver = new TestReceiver();
IntentFilter filter = new IntentFilter();
filter.addAction("com.test.broadcast");
registerReceiver(receiver, filter);
registerReceiver是android.content.ContextWrapper类中的方法,Activity和Service都继承了ContextWrapper,所以可以直接调用。在实际应用中,我们在Activity或Service中注册了一个BroadcastReceiver,当这个Activity或Service被销毁时如果没有解除注册,系统会报一个异常,提示我们是否忘记解除注册了。可以通过在onDestory()方法中解除注册来解决这个问题:
protected void onDestroy() {
    super.onDestroy();
    unregisterReceiver(receiver);
}
动态注册与静态注册不同的是:它不是常驻的,一旦程序结束,广播接收也将结束。
下面我们看一个发送接收广播的完整例子:
首先来看主活动类:
public class MainActivity extends Activity
{
    private static final String TAG = "MainActivity";
    /** Called when the activity is first created. */
    @Override
    public void onCreate(Bundle savedInstanceState)
    {
        super.onCreate(savedInstanceState);
        setContentView(R.layout.main);
    }
    //创建菜单
    @Override
    public boolean onCreateOptionsMenu(Menu menu)
    {
        super.onCreateOptionsMenu(menu);
        MenuInflater inflater = getMenuInflater();
        inflater.inflate(R.menu.main_menu, menu);
        return true;
    }
    //绑定菜单事件
    @Override
    public boolean onOptionsItemSelected(MenuItem item)
    {
        appendMenuItemText(item);
        //清空textview
        if (item.getItemId() == R.id.menu_clear)
        {
            this.emptyText();
            return true;
        }
        //发送广播
        if (item.getItemId() == R.id.menu_menu_send_broadcast)
        {
            this.testSendBroadcast();
            return true;
        }
        return true;
    }
    private TextView getTextView()
    {
        return (TextView)findViewById(R.id.text1);
    }
    private void appendMenuItemText(MenuItem item)
    {
        String title = item.getTitle().toString();
        TextView tv = getTextView();
        tv.setText(tv.getText() + "\n" + title);
    }
    private void emptyText()
    {
        TextView tv = getTextView();
        tv.setText("");
    }
    private void testSendBroadcast()
    {
        //create an intent with an action
        String uniqueActionString = "com.test.intents.broadcast";
        Intent intent = new Intent(uniqueActionString);
        intent.putExtra("message","广播消息发送!");
        //send Broadcast
        this.sendBroadcast(intent);
    }
}
广播接收器类:
public class TestReceiver extends BroadcastReceiver{
    private static final String tag = "TestReceiver";
    public void onReceive(Context context,Intent intent){
        Log.i(tag,"intent" + intent);
        String message = intent.getStringExtra("message");
        Log.i(tag,message);
    }
}
下来是布局文件:
layout/main.xml
<?xml version="1.0" encoding="utf-8"?>
<LinearLayout xmlns:android="http://schemas.android.com/apk/res/android"
    android:orientation="vertical"
    android:layout_width="fill_parent"
    android:layout_height="fill_parent"
    >
<TextView
    android:id="@+id/text1"
    android:layout_width="fill_parent"
    android:layout_height="wrap_content"
    android:text="Your debug will appear here"
    />
</LinearLayout>
菜单资源文件:
menu/main_menu.xml
<?xml version="1.0" encoding="utf-8"?>
<menu xmlns:android="http://schemas.android.com/apk/res/android">
    <group android:id="@+id/menuGroup_Main">
        <item android:id="@+id/menu_clear" android:title="clear"/>
        <item android:id="@+id/menu_menu_send_broadcast" android:title="broadcast"/>
    </group>
</menu>
描述文件注册广播:
<application android:icon="@drawable/icon" android:label="@string/app_name">
        <activity android:name=".MainActivity"
                  android:label="@string/app_name">
            <intent-filter>
                <action android:name="android.intent.action.MAIN" />
                <category android:name="android.intent.category.LAUNCHER" />
            </intent-filter>
        </activity>
        <receiver android:name=".TestReceiver">
            <intent-filter>
                <action android:name="com.test.intents.broadcast"></action>
            </intent-filter>
        </receiver>
</application>
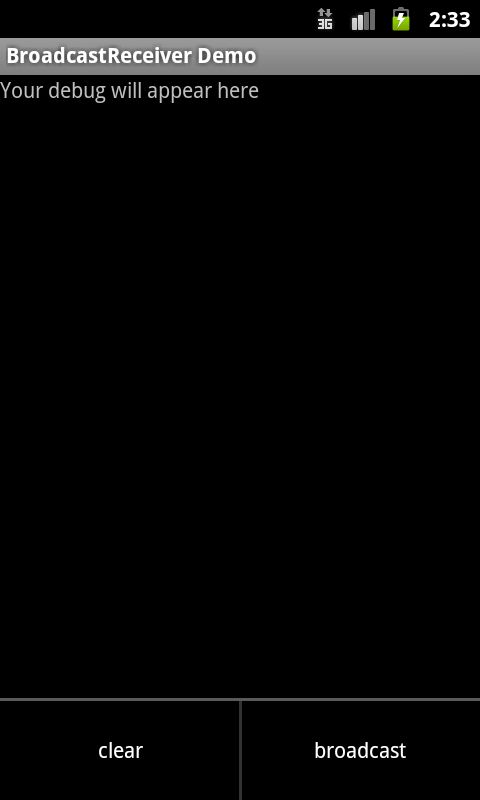
运行程序,点击模拟器menu菜单,结果如图:
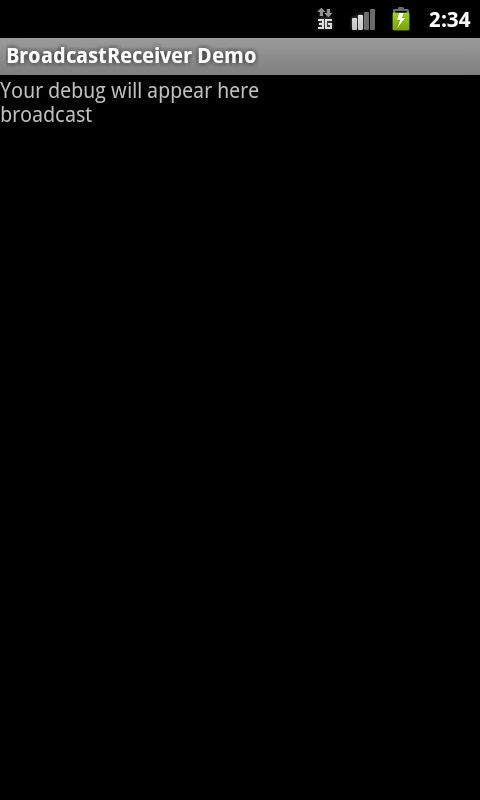
点击broadcast,clear结果如图:
广播的概念意味着可能有多个接收程序。我们将再建两个BroadcastReceiver,并在描述文件中注册,以测试多个接收者情况。
public class TestReceiver2 extends BroadcastReceiver{
    private static final String tag = "TestReceiver2";
    public void onReceive(Context context,Intent intent){
        Log.i(tag,"intent" + intent);
        String message = intent.getStringExtra("message");
        Log.i(tag,message);
    }
}
同时修改描述文件,注册关播:
<receiver android:name=".TestReceiver2">
    <intent-filter>
        <action android:name="com.test.intents.broadcast"></action>
    </intent-filter>
</receiver>
运行程序,打印日志如下:
04-27 15:03:24.028: INFO/TestReceiver1(1317): intentIntent { act=com.test.intents.broadcast cmp=com.test.broadcast/.TestReceiver (has extras) }
04-27 15:03:24.038: INFO/TestReceiver1(1317): 广播消息发送!
04-27 15:03:24.088: INFO/TestReceiver2(1317): intentIntent { act=com.test.intents.broadcast cmp=com.test.broadcast/.TestReceiver2 (has extras) }
04-27 15:03:24.088: INFO/TestReceiver2(1317): 广播消息发送!
可以知道多个接收器都接收到了广播,并且是依次接收,我们还可以通过在描述文件中修改,从而改变接收顺序:
<receiver android:name=".TestReceiver">
    <intent-filter android:priority="999">
        <action android:name="com.test.intents.broadcast"></action>
    </intent-filter>
</receiver>
<receiver android:name=".TestReceiver2">
    <intent-filter android:priority="1000">
        <action android:name="com.test.intents.broadcast"></action>
    </intent-filter>
</receiver>
运行,打印日志如下:
04-27 15:08:09.778: INFO/TestReceiver2(1470): intentIntent { act=com.test.intents.broadcast cmp=com.test.broadcast/.TestReceiver2 (has extras) }
04-27 15:08:09.778: INFO/TestReceiver2(1470): 广播消息发送!
04-27 15:08:09.888: INFO/TestReceiver1(1470): intentIntent { act=com.test.intents.broadcast cmp=com.test.broadcast/.TestReceiver (has extras) }
04-27 15:08:09.898: INFO/TestReceiver1(1470): 广播消息发送!
可知receiver2先接收,receiver1后接收,这是因为priority值越大,优先级越高。priority值在-1000到1000之
好了,关于广播接收器就暂时介绍到这。
