If u have ever run into problems of porting a Visual C++ (Visual Studio) project/ solution from one location to other or even worse if from one machine to other with an entirely different version of Visual C++ / Visual Studio as well as different configurations of add on libraries, then this post is for you.
We present a very easy and simple way of porting one or all files of a Visual C++ project from one location/ machine to any other place, even in fact across platforms like Windows, Linux etc.
For the said purpose we will make use of CMake utility i.e. the cross platform make utility. Its a freely available utility and can be downloaded from here. This utility requires only all your source files i.e. .c /.cpp files and the header files (.h) files in addition to one more file i.e. CMakeLists.Txt.
The main target of writing this post is to familiarise with the procedure of writing a simple CmakeLists.Txt file, which is very simple to write. A very complex documentation which is available online as on date, makes it very difficult for a novice to make use of this very beneficial tool. So here we go, writing a very simple CmakeLists.Txt and explaining it each statement side by side. We are taking a very complex project having multiple header files, with numerous external libraries and additional dependencies, so as to completely explain the concept.
Following is a completely working version of CMakeLists.Txt which you may use as required by you after modifications. Please note that all statement beginning with # are taken as comments by CMake and will be used for explaination of the file to you.
cmake_minimum_required(VERSION 2.8 FATAL_ERROR)
# In following lines we try to find out the packages of additional libraries, if reqd. Here we are trying to locate PCL and mrpt library. # here we specify the additional include directories for the project. These files come in additional include directories option of VC++ # here we specify the additional library directories for the linker in the project. These files come in additional library directories # here we add definitions for any package if requred. # The following line is very important. |
After you have created your CMakeLists.Txt file, save it in the same folder as all your *.c/*.cpp/*.h files.
Create a new folder to hold all your project/ solution files within same folder. Lets say u name it MyPrjFiles.
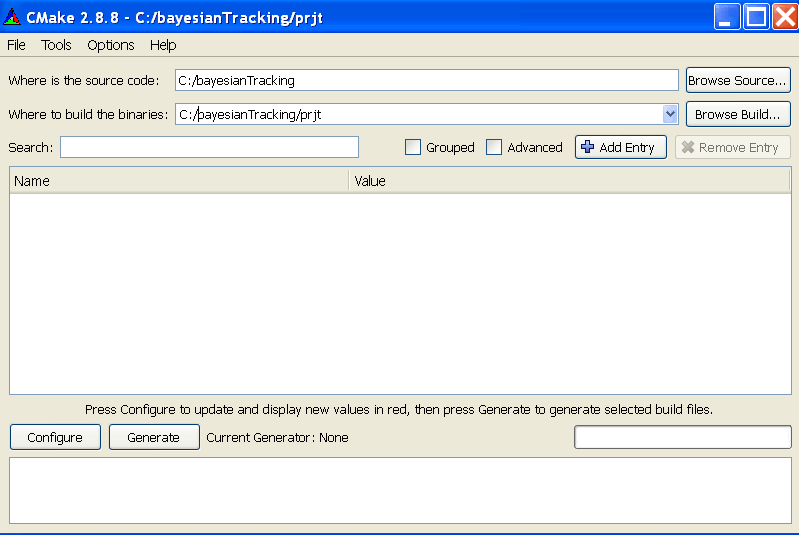
Now open the CMake Gui application (These are for Windows platform only, for Linux refer to CMake instructions here).
Specify the source folder location as the location where you have kept your source, header and CMakeLists.Txt file.
Specify the location of MyPrjFiles folder in the text field for where to build binaries.
Then click on the configure button on the bottom. It will read your CMakeLists.Txt file and try to configure the project for you. It is in fact checking for errors (if any) and will ask you for the version of compiler for which binaries are to be built for. Specify the correct version of your compiler. In case of errors it will report in red. You will have to rectify the errors before proceeding further.
After no errors are reported, you may click on generate button. And ur job is done. You will find all your reqired solution and project files in MyPrjFiles folder. When you open your solution and try to compile it, it compiles so smoothly i.e. there are no problems of setting up the environment.
Now for taking a backup or shifting your project from one place to other, just take all your source file and ur CMakeLists.Txt file to new location and generate project in new environment once using CMake utility. So you have the complete independence now to work between multiple machines, multiple environments, multiple platforms without a hassle. Just keep a CMakeLists.Txt file for each place handy and it does the work for you.
Please do drop in your feedback/ suggestions for the article below……
