MFC(窗口,菜单栏,状态等的风格,孙鑫C++第九讲笔记整理)
1.修改外观和图标可以在MainFrm中进行,而修改背景和光标只能在View中进行。为什么?因为view的显示挡在了MainFrame的前面。
a.在MainFrame中
PreCreateWindow()中,在窗口创建之前,用重新注册窗口类的方法,比较麻烦。在PreCreateWindow()中修改
也可以用简单的方法,用全局函数
//cs.lpszClass=AfxRegisterWndClass(CS_HREDRAW | CS_VREDRAW,0,0,
// LoadIcon(NULL,IDI_WARNING));
在窗口创建之后,在OnCreate()中修改
//SetWindowLong(m_hWnd,GWL_STYLE,WS_OVERLAPPEDWINDOW);
//SetWindowLong(m_hWnd,GWL_STYLE,GetWindowLong(m_hWnd,GWL_STYLE) & ~WS_MAXIMIZEBOX);
// SetClassLong(m_hWnd,GCL_HICON,(LONG)LoadIcon(NULL,IDI_ERROR));
b.在View中
PreCreateWindow()中
//cs.lpszClass=AfxRegisterWndClass(CS_HREDRAW | CS_VREDRAW,
// LoadCursor(NULL,IDC_CROSS),(HBRUSH)GetStockObject(BLACK_BRUSH),NULL);
cs.lpszClass=AfxRegisterWndClass(CS_HREDRAW | CS_VREDRAW);
OnCreate()中
SetClassLong(m_hWnd,GCL_HBRBACKGROUND,(LONG)GetStockObject(BLACK_BRUSH));
SetClassLong(m_hWnd,GCL_HCURSOR,(LONG)LoadCursor(NULL,IDC_HELP));
2.创建一个不断变化的图标。用定时器和SetClassLong完成
a.准备三个图标文件,放在RES文件夹,Insert->Resource-三个图标,
b.在CMainFrame中增加图标句柄数组,m_hIcons[3]
m_hIcons[0]=LoadIcon(AfxGetInstanceHandle(),MAKEINTRESOURCE(IDI_ICON1));//MAKEINTRESOURCE是一个宏,它将整数转化为Win32的资源类型,简单的说它是一个类型转换#define MAKEINTRESOURCEA(i) (LPSTR)((DWORD)((WORD)(i)))
m_hIcons[1]=LoadIcon(theApp.m_hInstance,MAKEINTRESOURCE(IDI_ICON2));//此处需要用到theAPP对象,故要在文件中声明extern CStyleApp theApp;
m_hIcons[2]=LoadIcon(AfxGetApp()->m_hInstance,MAKEINTRESOURCE(IDI_ICON3));
然后将其初始化
c.然后在定时器中实现
3.工具栏的编程
a.加入分隔符的方法,向右拖动即可;
b.删除按纽的方法,拖出即可。
4.创建一个新的工具栏的方法
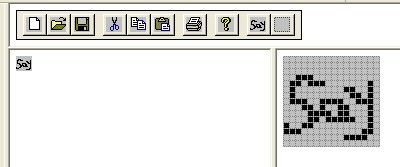
a.插入一个工具栏,画出其图形。
b.在头文件中,定义CToolBar m_newToolBar
c.在MainFrm.cpp的OnCreate()中调用
if (!m_newToolBar.CreateEx(this, TBSTYLE_FLAT, WS_CHILD | WS_VISIBLE | CBRS_RIGHT
| CBRS_GRIPPER | CBRS_TOOLTIPS | CBRS_FLYBY | CBRS_SIZE_DYNAMIC) ||
!m_newToolBar.LoadToolBar(IDR_TOOLBAR1))
{
TRACE0("Failed to create toolbar\n");
return -1; // fail to create
}
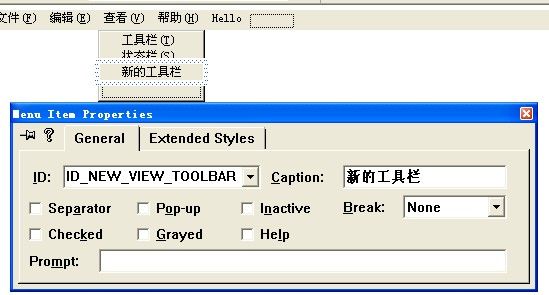
d.点击“新的工具栏”菜单时,隐藏工具栏。两种方法
第一种/*if(m_newToolBar.IsWindowVisible())
{
m_newToolBar.ShowWindow(SW_HIDE);
}
else
{
m_newToolBar.ShowWindow(SW_SHOW);
}
RecalcLayout();
DockControlBar(&m_newToolBar);*/
第二种ShowControlBar(&m_newToolBar,!m_newToolBar.IsWindowVisible(),FALSE);
e.将菜单增加复选标记。在OnUpdateUI中加入代码
pCmdUI->SetCheck(m_newToolBar.IsWindowVisible());
5.状态栏编程
a.Indicator[]数组中有状态栏的信息
如果要增加,可以在String Table中加入一个IDS_Timer,然后将其加入到[]中。
b.在时间栏显示时间,代码略,比较简单
6.进度栏
a.增加成员变量,CProgressCtrl m_progress
b.OnCreate中 m_progress.Create(WS_CHILD | WS_VISIBLE,// | PBS_VERTICAL,
rect,&m_wndStatusBar,123);
m_progress.SetPos(50);*/ c.将其创建到状态栏的方法!如果在OnCreate()中创建,则不成立,因为获取矩形大小时失败。
解决办法,用自定义消息:
在MainFrm.h中#define UM_PROGRESS WM_USER+1
afx_msg void OnProgress();
在MainFrm.cpp中
ON_MESSAGE(UM_PROGRESS,OnProgress)
然后实现这个函数
void CMainFrame::OnProgress()
{
CRect rect;
m_wndStatusBar.GetItemRect(2,&rect);
m_progress.Create(WS_CHILD | WS_VISIBLE | PBS_SMOOTH,
rect,&m_wndStatusBar,123);
m_progress.SetPos(50);
}
最后在OnCreate中调用 PostMessage(UM_PROGRESS);//不能用SendMessage()
d.解决重绘时进度栏改变的问题。在OnPain()中重写代码
CRect rect;
m_wndStatusBar.GetItemRect(2,&rect);
m_progress.Create(WS_CHILD | WS_VISIBLE | PBS_SMOOTH,
rect,&m_wndStatusBar,123);
m_progress.SetPos(50);
然后在定时器消息处理函数中加入
m_progress.StepIt();
e.显示鼠标位置。在View中增加OnMouseMove()处理函数
CString str;
str.Format("x=%d,y=%d",point.x,point.y);
//((CMainFrame*)GetParent())->m_wndStatusBar.SetWindowText(str);
//((CMainFrame*)GetParent())->SetMessageText(str);
//((CMainFrame*)GetParent())->GetMessageBar()->SetWindowText(str);
GetParent()->GetDescendantWindow(AFX_IDW_STATUS_BAR)->SetWindowText(str);
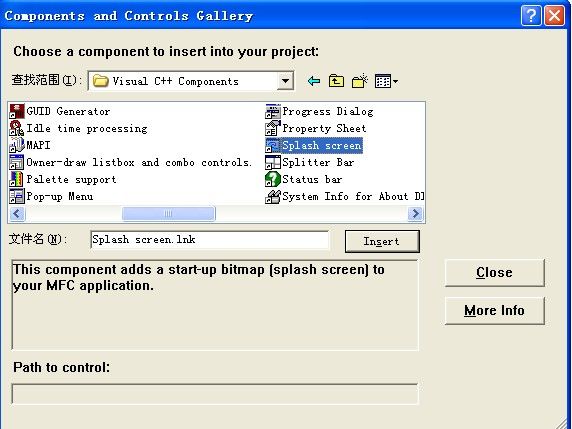
7.加入启动画面
Project-Component and ->Visual C++ Components->SplashScreen->插入
代码如下:
- BOOL CMainFrame::PreCreateWindow(CREATESTRUCT& cs)
- {
- if( !CFrameWnd::PreCreateWindow(cs) )
- return FALSE;
- // TODO: Modify the Window class or styles here by modifying
- // the CREATESTRUCT cs
- //cs.cx=300;//直接改变窗口的大小
- //cs.cy=200;
- //cs.x=0;//改变窗口显示位置
- //cs.y=0;
- //cs.style&=~FWS_ADDTOTITLE ;//MFC窗口默认的风格是WS_OVERLAPPEDWINDOW & FWS_ADDTOTITLE
- //cs.style=WS_OVERLAPPEDWINDOW;
- //cs.lpszName="[email protected]";//有以上两条其中一条,改变窗口的标题
- /*WNDCLASS wndclass;
- wndclass.cbClsExtra=0;
- wndclass.cbWndExtra=0;
- wndclass.hbrBackground=(HBRUSH)GetStockObject(BLACK_BRUSH);//被客户区的VIEW窗体覆盖了
- wndclass.hCursor=LoadCursor(NULL,IDC_ARROW);
- wndclass.hIcon=LoadIcon(NULL,IDI_ERROR);
- wndclass.hInstance=AfxGetInstanceHandle();//使用全局函数,获取运用程序实例
- wndclass.lpfnWndProc=::DefWindowProc;//使用默认的,Cwnd也有DefWindowProc函数,所以要加一个作用域操作符
- wndclass.lpszClassName="MRzhang";
- wndclass.lpszMenuName=NULL;
- wndclass.style=CS_HREDRAW|CS_VREDRAW;
- RegisterClass(&wndclass);
- cs.lpszClass="MRzhang";//名字要和注册的窗口名字一样,这样才能生效*/
- return TRUE;
- }
CMainFrom OnCreate
- //SetWindowLong(m_hWnd,GWL_STYLE,WS_OVERLAPPEDWINDOW|WS_VSCROLL);//改变窗口风格,有滚动条
- int CWindowTestView::OnCreate(LPCREATESTRUCT lpCreateStruct)
- {
- if (CView::OnCreate(lpCreateStruct) == -1)
- return -1;
- // TODO: Add your specialized creation code here
- //SetClassLong(m_hWnd,GCL_HCURSOR,(LONG)LoadCursor(NULL,IDC_CROSS));//讲光标设成十字
- return 0;
- }
一个函数,既可以在CMainFram中用,也可以在CXXView中用(PreCreateWindow)
- LPCTSTR AFXAPI AfxRegisterWndClass( UINT nClassStyle, HCURSOR hCursor = 0, HBRUSH hbrBackground = 0, HICON hIcon = 0 );
CMainFram中
- //cs.lpszClass=AfxRegisterWndClass(CS_VREDRAW|CS_HREDRAW,0,0,LoadIcon(NULL,IDI_ERROR));
- //cs.lpszClass=AfxRegisterWndClass(CS_VREDRAW|CS_HREDRAW);
CXXView中
- //cs.lpszClass=AfxRegisterWndClass(CS_HREDRAW|CS_VREDRAW,LoadCursor(NULL,IDC_CROSS),(HBRUSH)GetStockObject(BLACK_BRUSH),0);
- //cs.lpszClass=AfxRegisterWndClass(CS_HREDRAW|CS_VREDRAW);
三种获取Hinstance的方法
- hIcon[0]=LoadIcon(AfxGetInstanceHandle(),MAKEINTRESOURCE(IDI_ICON1));
- hIcon[1]=LoadIcon(theApp.m_hInstance,MAKEINTRESOURCE(IDI_ICON2));
- hIcon[2]=LoadIcon(AfxGetApp()->m_hInstance,MAKEINTRESOURCE(IDI_ICON3));
- SetClassLong(m_hWnd, // window handle
- GCL_HICON, // changes icon
- (LONG) LoadIcon(AfxGetInstanceHandle(), MAKEINTRESOURCE(IDI_ICON1)));
- SetTimer(1,1000,NULL);
每个XXAPP中都有一个全局变量theApp,在OnCreate之前,extern CXXApp theApp;声明
- void CMainFrame::OnTimer(UINT nIDEvent)
- {
- // TODO: Add your message handler code here and/or call default
- static int index=1;
- SetClassLong(m_hWnd,GCL_HICON,(LONG)hIcon[index]);
- index=++index%3;
- CFrameWnd::OnTimer(nIDEvent);
- }
改变的是小图标
工具栏,小工具,自己创建一个:
ID和自己创建的菜单选项的ID是一样的
添加自己的工具栏
- protected: // control bar embedded members
- CStatusBar m_wndStatusBar;
- CToolBar m_wndToolBar;
- CToolBar newToolBar;
CMAINFRAM中 OnCreate中添加
- if (!newToolBar.CreateEx(this, TBSTYLE_FLAT, WS_CHILD | WS_VISIBLE | CBRS_RIGHT
- | CBRS_GRIPPER | CBRS_TOOLTIPS | CBRS_FLYBY | CBRS_SIZE_DYNAMIC) ||
- !newToolBar.LoadToolBar(IDR_TOOLBAR1))
- {
- TRACE0("Failed to create toolbar\n");
- return -1; // fail to create
- }
- newToolBar.EnableDocking(CBRS_ALIGN_ANY);
- //EnableDocking(CBRS_ALIGN_ANY);
- DockControlBar(&newToolBar);
- void CMainFrame::OnNewViewToolbar()
- {
- // TODO: Add your command handler code here
- if(newToolBar.IsWindowVisible())
- {
- newToolBar.ShowWindow(SW_HIDE);
- }
- else
- {
- newToolBar.ShowWindow(SW_SHOW);
- }
- RecalcLayout();//重新调整工具栏的位置
- DockControlBar(&newToolBar);//使得把工具栏拖出来后,还能放回工具栏
- }
- void CMainFrame::OnNewViewToolbar()
- {
- // TODO: Add your command handler code here
- /*if(newToolBar.IsWindowVisible())
- {
- newToolBar.ShowWindow(SW_HIDE);
- }
- else
- {
- newToolBar.ShowWindow(SW_SHOW);
- }
- RecalcLayout();//重新调整工具栏的位置
- DockControlBar(&newToolBar);//使得把工具栏拖出来后,还能放回工具栏
- */
- ShowControlBar(&newToolBar,!newToolBar.IsWindowVisible(),FALSE);//直接解决了 隐藏,显示浮动工具栏在原处的问题
- }
- void CMainFrame::OnUpdateNewViewToolbar(CCmdUI* pCmdUI)
- {
- // TODO: Add your command update UI handler code here
- /*static int i=1;
- ++i;
- if(i%2)
- {
- GetMenu()->GetSubMenu(2)->CheckMenuItem(2,MF_CHECKED|MF_BYPOSITION);
- }
- else
- {
- GetMenu()->GetSubMenu(2)->CheckMenuItem(2,MF_UNCHECKED|MF_BYPOSITION);
- }*/
- pCmdUI->SetCheck(newToolBar.IsWindowVisible());
- }
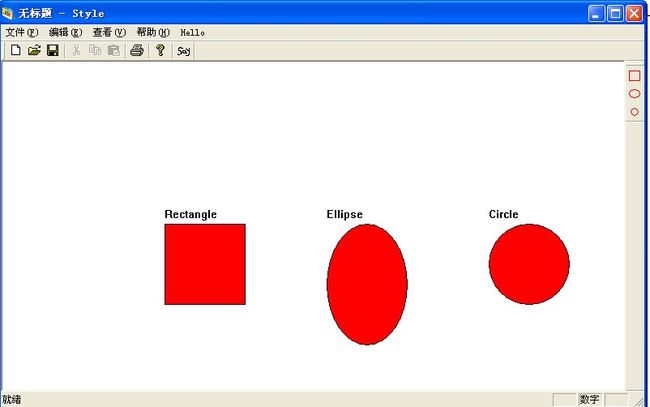
添加工具栏事件
- void CStyleView::OnRectangle()
- {
- // TODO: Add your command handler code here
- CClientDC ccdc(this);
- CBrush cb(RGB(255,0,0));
- ccdc.SelectObject(&cb);
- ccdc.Rectangle(200,200,300,300);
- ccdc.TextOut(200,180,"Rectangle");
- }
- void CStyleView::OnEllipse()
- {
- // TODO: Add your command handler code here
- CClientDC ccdc(this);
- CBrush cpen(RGB(255,0,0));
- ccdc.SelectObject(&cpen);
- ccdc.Ellipse(400,200,500,350);
- ccdc.TextOut(400,180,"Ellipse");
- }
- void CStyleView::OnCircle()
- {
- // TODO: Add your command handler code here
- CClientDC ccdc(this);
- CBrush cpen(RGB(255,0,0));
- ccdc.SelectObject(&cpen);
- ccdc.Ellipse(600,200,700,300);
- ccdc.TextOut(600,180,"Circle");
- }
状态栏:
String Tablet添加String iD
添加到数组
- static UINT indicators[] =
- {
- ID_SEPARATOR, // status line indicator
- ID_SHOWTIME,
- ID_SHOWPROGRESS,
- ID_INDICATOR_CAPS,
- ID_INDICATOR_NUM,
- ID_INDICATOR_SCRL,
- };
状态栏有显示了:
![]()
- CTime t=CTime::GetCurrentTime();
- CString strtime=t.Format("%H:%M:%S");
- m_wndStatusBar.SetPaneText(1,strtime);//所以是在indicators数组中的索引
状态中的格子容不下这个字符串,所以用GetTextExtent来设置格子的大小
- CTime t=CTime::GetCurrentTime();
- CString strtime=t.Format("%H:%M:%S");
- m_wndStatusBar.SetPaneText(1,strtime);//所以是在indicators数组中的索引
- CClientDC ccdc(this);
- CSize csize=ccdc.GetTextExtent(strtime);
- m_wndStatusBar.SetPaneInfo(1,ID_SHOWTIME,SBPS_NORMAL,csize.cx);
这样就能正常显示时间了,可是时间却是静态的,这个时候可以用一个定时器,定时的去显示时间。
把上面的代码也复制到OnTimer中,就可以是先动态显示时间了。
- cpg.Create(WS_CHILD|WS_VISIBLE,CRect(300,300,450,330),this,123);
- cpg.SetPos(50);
OnCreate中没有反应,是因为窗口都还没有建立,怎么获取状态栏的大小?
- CRect crect;
- m_wndStatusBar.GetItemRect(2,&crect);
- cpg.Create(WS_CHILD|WS_VISIBLE,crect,&m_wndStatusBar,123);
所以尝试着用SendMessage或PostMessage去尝试一下,是否可以在窗口创建之后获取状态栏的大小:
自定义消息响应函数,(跟前面菜单按钮自定义消息步骤是一样的)
- #define WM_CPG WM_USER+1
- afx_msg void Oncpg();
- ON_MESSAGE(WM_CPG,Oncpg)
- void CMainFrame::Oncpg()
- {
- CRect crect;
- m_wndStatusBar.GetItemRect(2,&crect);
- cpg.Create(WS_CHILD|WS_VISIBLE,crect,&m_wndStatusBar,123);
- cpg.SetPos(50);
- }
在OnCreate中最后添加:
SendMessage(WM_CPG);
运行结果还是跟原来一样,没有显示,这是什么原因呢,原来SendMessage发送消息的时候,也是先调用了WM_CPG,还是在窗口调用前获取状态栏的大小,这当然也是不行的,把SendMessage(WM_CPG)改成PostMessage(WM_CPG);试试
这个时候就看到,原来PostMessage是将消息投递到消息队列里面了。
这样就确保了先创建完窗体之后才获取状态栏的大小
但是改变窗口大小,进度条不会跟着移动。
把OnCpg方法的代码剪切到OnPaint方法中去,把PostMessage方法注释掉
但是这样,当窗口改变是,会发生异常,同一对象建立多次(跟前面对话框的添加按钮是一样的)
所以将代码改成这样就完美了
- void CMainFrame::OnPaint()
- {
- CPaintDC dc(this); // device context for painting
- // TODO: Add your message handler code here
- CRect crect;
- m_wndStatusBar.GetItemRect(2,&crect);
- if(!cpg.m_hWnd)
- {
- cpg.Create(WS_CHILD|WS_VISIBLE,crect,&m_wndStatusBar,123);
- }
- else{
- cpg.MoveWindow(crect);
- }
- cpg.SetPos(50);
- // Do not call CFrameWnd::OnPaint() for painting messages
- }
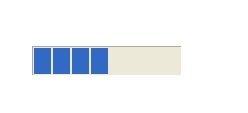
进度条可以设置步长SetStep SetpIt进度走动 在OnTimer中添加 cpg.StepIt();
进度条的风格可以设置成一格格的,也可以设置成平滑的
在状态栏中显示鼠标的位置(有几种方法可以使用)在CXXView中添加鼠标移动事件
- void CStyleView::OnMouseMove(UINT nFlags, CPoint point)
- {
- // TODO: Add your message handler code here and/or call default
- CString cstring;
- cstring.Format("x=%d,y=%d",point.x,point.y);
- //((CMainFrame*)GetParent())->m_wndStatusBar.SetWindowText(cstring);
- //((CMainFrame*)GetParent())->m_wndStatusBar.SetPaneText(0,cstring);
- //((CMainFrame*)GetParent())->SetMessageText(cstring);
- GetParent()->GetDescendantWindow(AFX_IDW_STATUS_BAR)->SetWindowText(cstring);//父窗口通过ID获取子孙窗口
- CView::OnMouseMove(nFlags, point);
- }
设置启动画面:
启动画面是一个位图,可以修改它显示的时间:
