android调用摄像头拍照,从相册中选择照片并裁剪
在此知识点上笔者也是花了大量的时间,由于android版本的更新,android4.4和android4.3在OnActivityResult中返回的uri是完全不同的,所以也造成了笔者的学习资料中的demo不能正常运行的情况,也是纠结了大半天。
但是在此博文中也是对其中细节不做介绍了,还是把正确的代码展示给大家把。
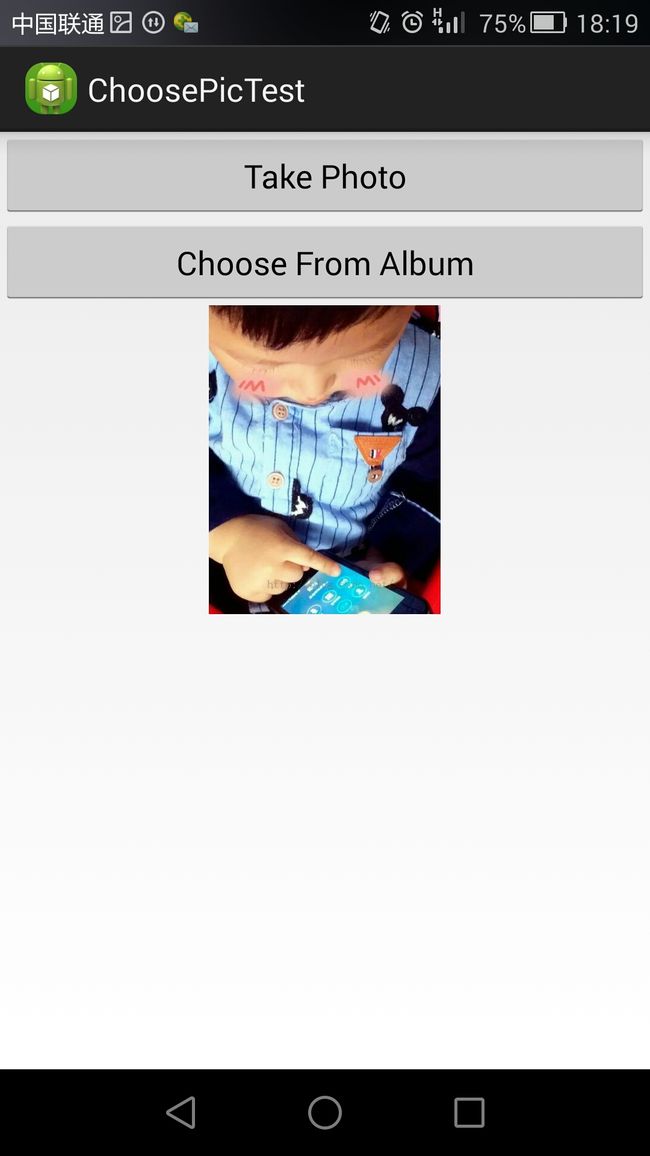
主界面:
选择相册中的照片:
选择照片后的裁剪界面:
完成后效果:
MainActivity:
import java.io.File;
import java.io.FileNotFoundException;
import java.io.IOException;

import android.app.Activity;
import android.content.Intent;
import android.graphics.Bitmap;
import android.graphics.BitmapFactory;
import android.net.Uri;
import android.os.Bundle;
import android.os.Environment;
import android.provider.MediaStore;
import android.view.View;
import android.view.View.OnClickListener;
import android.widget.Button;
import android.widget.ImageView;
import android.widget.Toast;

public class MainActivity extends Activity {

	public static final int CUT_PICTURE = 1;

	public static final int SHOW_PICTURE = 2;

	private Button takePhoto;

	private Button chooseFromAlbum;

	private ImageView picture;

	private Uri imageUri;

	@Override
	protected void onCreate(Bundle savedInstanceState) {
		super.onCreate(savedInstanceState);
		setContentView(R.layout.activity_main);
		takePhoto = (Button) findViewById(R.id.take_photo);
		chooseFromAlbum = (Button) findViewById(R.id.choose_from_album);
		picture = (ImageView) findViewById(R.id.picture);

		takePhoto.setOnClickListener(new OnClickListener() {
			@Override
			public void onClick(View v) {
				//创建File对象,用于存储拍照后的图片
				//将此图片存储于SD卡的根目录下
				File outputImage = new File(Environment.getExternalStorageDirectory(),
						"output_image.jpg");
				try {
					if (outputImage.exists()) {
						outputImage.delete();
					}
					outputImage.createNewFile();
				} catch (IOException e) {
					e.printStackTrace();
				}
				//将File对象转换成Uri对象
				//Uri表标识着图片的地址
				imageUri = Uri.fromFile(outputImage);
				//隐式调用照相机程序
				Intent intent = new Intent("android.media.action.IMAGE_CAPTURE");
				//拍下的照片会被输出到output_image.jpg中去
				intent.putExtra(MediaStore.EXTRA_OUTPUT, imageUri);
				//此处是使用的startActivityForResult()
				//因此在拍照完后悔有结果返回到onActivityResult()中去,返回值即为<span style="font-size: 13.3333px; font-family: Arial, Helvetica, sans-serif;">CUT_PICTURE</span>
				//onActivityResult()中主要是实现图片裁剪
				startActivityForResult(intent, CUT_PICTURE);
			}
		});

		chooseFromAlbum.setOnClickListener(new OnClickListener() {
			@Override
			public void onClick(View v) {
				File outputImage = new File(Environment.getExternalStorageDirectory(),
						"output_image.jpg");
				try {
					if (outputImage.exists()) {
						outputImage.delete();
					}
					outputImage.createNewFile();
				} catch (IOException e) {
					e.printStackTrace();
				}
				imageUri = Uri.fromFile(outputImage);
				Intent intent = new Intent(Intent.ACTION_PICK,null);
				//此处调用了图片选择器
				//如果直接写intent.setDataAndType("image/*");
				//调用的是系统图库
				intent.setDataAndType(MediaStore.Images.Media.EXTERNAL_CONTENT_URI, "image/*");
				intent.putExtra(MediaStore.EXTRA_OUTPUT, imageUri);
				startActivityForResult(intent, CUT_PICTURE);
			}
		});
	}


	@Override
	protected void onActivityResult(int requestCode, int resultCode, Intent data) {
		switch (requestCode) {
		case CUT_PICTURE:
			if (resultCode == RESULT_OK) {
				//此处启动裁剪程序
				Intent intent = new Intent("com.android.camera.action.CROP");
				//此处注释掉的部分是针对android 4.4路径修改的一个测试
				//有兴趣的读者可以自己调试看看
//				String text=data.getData().toString();
//				Toast.makeText(MainActivity.this, text, Toast.LENGTH_SHORT).show();
				intent.setDataAndType(data.getData(), "image/*");
				intent.putExtra("scale", true);
				intent.putExtra(MediaStore.EXTRA_OUTPUT, imageUri);
				startActivityForResult(intent, SHOW_PICTURE);
			}
			break;
		case SHOW_PICTURE:
			if (resultCode == RESULT_OK) {
				try {
					//将output_image.jpg对象解析成Bitmap对象,然后设置到ImageView中显示出来
					Bitmap bitmap = BitmapFactory.decodeStream(getContentResolver()
							.openInputStream(imageUri));
					picture.setImageBitmap(bitmap);
				} catch (FileNotFoundException e) {
					e.printStackTrace();
				}
			}
			break;
		default:
			break;
		}
	}


}
<LinearLayout xmlns:android="http://schemas.android.com/apk/res/android"
    android:layout_width="match_parent"
    android:layout_height="match_parent"
    android:orientation="vertical" >

    <Button
        android:id="@+id/take_photo"
        android:layout_width="match_parent"
        android:layout_height="wrap_content"
        android:text="Take Photo" />

    <Button
        android:id="@+id/choose_from_album"
        android:layout_width="match_parent"
        android:layout_height="wrap_content"
        android:text="Choose From Album" />

    <ImageView
        android:id="@+id/picture"
        android:layout_width="wrap_content"
        android:layout_height="wrap_content"
        android:layout_gravity="center_horizontal" />

</LinearLayout>
<?xml version="1.0" encoding="utf-8"?>
<manifest xmlns:android="http://schemas.android.com/apk/res/android"
    package="com.example.choosepictest"
    android:versionCode="1"
    android:versionName="1.0" >

    <uses-permission android:name="android.permission.WRITE_EXTERNAL_STORAGE" />

    <uses-sdk
        android:minSdkVersion="14"
        android:targetSdkVersion="17" />

    <application
        android:allowBackup="true"
        android:icon="@drawable/ic_launcher"
        android:label="@string/app_name"
        android:theme="@style/AppTheme" >
        <activity
            android:name="com.example.choosepictest.MainActivity"
            android:label="@string/app_name" >
            <intent-filter>
                <action android:name="android.intent.action.MAIN" />

                <category android:name="android.intent.category.LAUNCHER" />
            </intent-filter>
        </activity>
    </application>

</manifest>

