AndroidGUI04:Button(Basic Button,ImageButton, Check Box, Toggle Button, Radio Button)的常用技巧
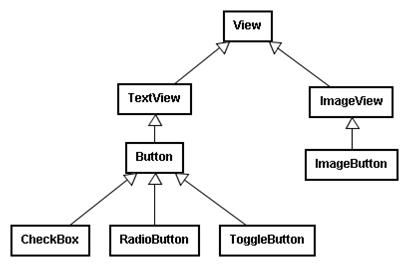
各种按钮之间的继承关系:
一、 Basic Button 的基本用法:
1. 在布局文件 (main.xml) 增加对按钮的相关属性进行如下描述:
< Button
android:id = "@+id/basic_button"
android:layout_width = "wrap_content"
android:layout_height = "wrap_content"
android:text = " 基本按钮 "
/>
2. 修改 Activity 所对应的代码,如下:
public class ControlButtons extends Activity
implements
OnClickListener
{
// 声明一个 Button 对象
private Button basic_button ;
@Override
public void onCreate(Bundle savedInstanceState)
{
super .onCreate(savedInstanceState);
setContentView(R.layout. main );
// 根据 id 获取 Button 对象
basic_button = (Button)findViewById(R.id. basic_button );
// 给 Button 对象设定 listener
basic_button .setOnClickListener( this );
// 设定文字大小
basic_button .setTextSize(( float ) 30.0);
// 设定文字颜色
basic_button .setTextColor(Color. RED );
// … 还可以做更多设定
}
public void onClick(View v)
{
if (v.getId() == R.id. basic_button )
{
Toast.makeText ( this , " 按钮被点击了 " , Toast. LENGTH_LONG ).show();
}
}
}
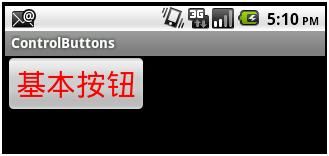
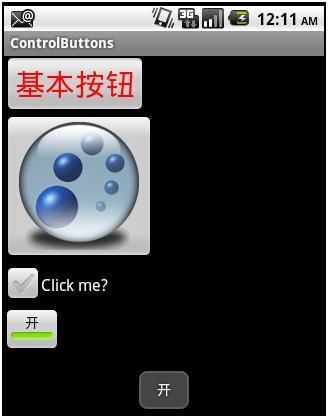
运行结果如下:
二、 ImageButton 的基本用法:
ImageButton 和 Button 的用法基本一样,只不过 Button 上显示的是文字, ImageButton 上显示的是图片。
1. 先把 ball1.png 、 ball2.png 和 ball3.png 拖入 res/drawable-mdpi 文件夹中。系统为自动在 R.java 生成与之对应的 id :
R.drawable.ball1 、 R.drawable.ball2 和 R.drawable.ball3.png 。 ball1.png 、 ball2.png 和 ball3.png 图像如下:
2. 在布局文件 (main.xml) 中,增加一个 ImageButton 的相关属性描述如下:
< ImageButton
android:id = "@+id/image_button"
android:layout_width = "wrap_content"
android:layout_height = "wrap_content"
android:src = "@drawable/ball1"
/>
3. 修改 Activity 所对应的代码 ( 粗体字部分是为 ImageButton 增加的代码 ) ,如下:
public class ControlButtons extends Activity
implements
OnClickListener
{
private Button basic_button ;
private ImageButton image_button ;
private int indicator ;
@Override
public void onCreate(Bundle savedInstanceState)
{
super .onCreate(savedInstanceState);
setContentView(R.layout. main );
indicator = 0;
basic_button = (Button)findViewById(R.id. basic_button );
image_button = (ImageButton)findViewById(R.id. image_button );
basic_button .setOnClickListener( this );
image_button .setOnClickListener( this );
basic_button .setTextSize(( float ) 30.0);
basic_button .setTextColor(Color. RED );
}
public void onClick(View v)
{
if (v.getId() == R.id. basic_button )
{
Toast.makeText ( this , " 按钮被点击了 " , Toast. LENGTH_LONG ).show();
}
if (v.getId() == R.id. image_button )
{
indicator ++;
if ( indicator % 2 == 1)
{
image_button .setImageResource(R.drawable. ball2 );
}
else
{
image_button .setImageResource(R.drawable. ball1 );
}
}
}
}
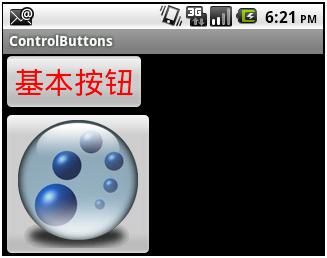
运行结果如下:
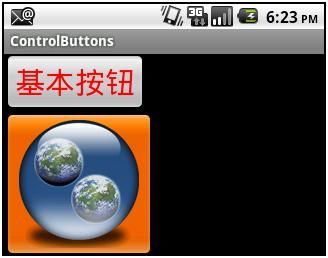
在 ImageButton 上每次 click ,按钮上的图片会发生变化:
4. 对于 ImageButton 还可以根据其所处不同的状态 (normal, focused, pressed) 显示不同的图片。为此我们现在 res/drawable 文件夹下,创建一个 imageselector.xml 文件如下:
<? xml version = "1.0" encoding = "utf-8" ?>
< selector xmlns:android = "http://schemas.android.com/apk/res/android" >
< item android:state_pressed = "true"
android:drawable = "@drawable/ball3" /> <!-- pressed -->
< item android:state_focused = "true"
android:drawable = "@drawable/ball2" /> <!-- focused -->
< item android:drawable = "@drawable/ball1" /> <!-- default -->
</ selector >
保存该文件,系统会自动生成一个 id : R.drawable.imageselector 。
将布局文件中的 image_button 的属性描述,修改如下:
< ImageButton
android:id = "@+id/image_button"
android:layout_width = "wrap_content"
android:layout_height = "wrap_content"
android:src = "@drawable/imageselector"
/>
把 onClick 方法中和 image_button 有关的代码注释掉。
运行结果如下:
正常状态:
拥有焦点时的状态 ( 用鼠标中间的滚动轮可以得到 ) :
按下状态:
可以看到,按钮处于不同的状态时,它上面显示的图片是不同的。
ImageButton 的其他用法和 Button 基本上没有什么太大的不同。
三、 CheckBox 的基本用法:
1. 在布局文件 (main.xml) 中,增加一个 CheckBox 的属性描述如下:
< CheckBox
android:id = "@+id/checkbox"
android:layout_width = "wrap_content"
android:layout_height = "wrap_content"
android:text = "Click me?"
/>
2. 修改 Activity 相应的代码,使之如下:
public class ControlButtons extends Activity
implements
OnClickListener
{
// ......
private CheckBox checkbox ;
@Override
public void onCreate(Bundle savedInstanceState)
{
super .onCreate(savedInstanceState);
setContentView(R.layout. main );
// ......
checkbox = (CheckBox)findViewById(R.id. checkbox );
checkbox .setOnClickListener( this );
}
public void onClick(View v)
{
// ......
if (v.getId() == R.id. checkbox )
{
checkbox .setText( checkbox .isChecked() ? "This option is checked" : "This option is not checked" );
}
}
}
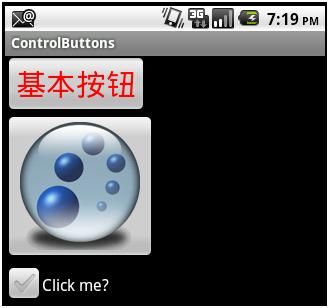
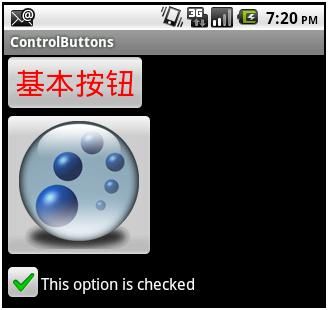
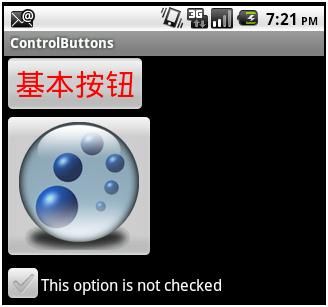
运行结果如下:
Checked 状态:
Unchecked 状态:
四、 ToggleButton 的基本用法:
1. 现在布局文件 (main.xml) 中,增加一个 ToggleButton 对象的描述:
< ToggleButton
android:id = "@+id/toggle_button"
android:layout_width = "wrap_content"
android:layout_height = "wrap_content"
android:text = "Toggle" // 是否设定 android:text 属性 , 无关紧要 , 它不会被显示
android:textOff = " 关 "
android:textOn = " 开 "
/>
2. 修改 Activity 相应的代码,使之如下:
public class ControlButtons extends Activity
implements
OnClickListener
{
// ... ...
private ToggleButton toggle_button ;
@Override
public void onCreate(Bundle savedInstanceState)
{
super .onCreate(savedInstanceState);
setContentView(R.layout. main );
// ... ...
toggle_button = (ToggleButton)findViewById(R.id. toggle_button );
toggle_button .setOnClickListener( this );
}
public void onClick(View v)
{
// ... ...
if (v.getId() == R.id. toggle_button )
{
if ( toggle_button .isChecked())
{
Toast.makeText ( this , toggle_button .getText(), Toast. LENGTH_LONG ).show();
}
else
{
Toast.makeText ( this , toggle_button .getText(), Toast. LENGTH_LONG ).show();
}
}
}
}
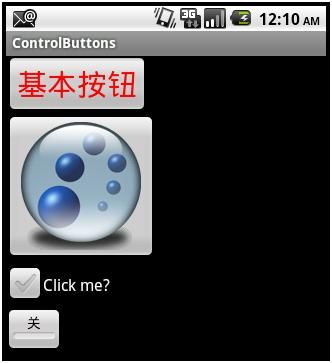
运行结果如下:
五、 RadioButton 的基本用法:
1. 在布局文件 (main.xml) 中,增加 RadioGroup 和 RadioButton 的描述如下:
< RadioGroup
android:id = "@+id/radio_group"
android:layout_width = "wrap_content"
android:layout_height = "wrap_content"
>
< RadioButton
android:id = "@+id/radio_button1"
android:layout_width = "wrap_content"
android:layout_height = "wrap_content"
android:text = " 选项一 "
/>
< RadioButton
android:id = "@+id/radio_button2"
android:layout_width = "wrap_content"
android:layout_height = "wrap_content"
android:text = " 选项二 "
/>
< RadioButton
android:id = "@+id/radio_button3"
android:layout_width = "wrap_content"
android:layout_height = "wrap_content"
android:text = " 选项三 "
/>
</ RadioGroup >
2. 修改 Activity 相应的代码,使之如下:
public class ControlButtons extends Activity
implements
OnClickListener,
OnCheckedChangeListener
{
// ... ...
private RadioGroup radio_group ;
private RadioButton radio_button1 ;
private RadioButton radio_button2 ;
private RadioButton radio_button3 ;
@Override
public void onCreate(Bundle savedInstanceState)
{
super .onCreate(savedInstanceState);
setContentView(R.layout. main );
// ... ...
radio_group = (RadioGroup)findViewById(R.id. radio_group );
radio_button1 = (RadioButton)findViewById(R.id. radio_button1 );
radio_button2 = (RadioButton)findViewById(R.id. radio_button2 );
radio_button3 = (RadioButton)findViewById(R.id. radio_button3 );
radio_group .setOnCheckedChangeListener( this );
}
public void onClick(View v)
{
// ... ...
if (v.getId() == R.id. toggle_button )
{
if ( toggle_button .isChecked())
{
Toast.makeText ( this , toggle_button .getText(), Toast. LENGTH_LONG ).show();
radio_group .check(R.id. radio_button1 ); // 使 radio_button1 车位 Checked
}
else
{
Toast.makeText ( this , toggle_button .getText(), Toast. LENGTH_LONG ).show();
radio_group .clearCheck(); // 使 radio_group 中所有的 RadioButton 成为 unChecked
}
}
}
public void onCheckedChanged(RadioGroup group, int checkedId)
{
if (group.getId() == R.id. radio_group )
{
//switch(radio_group.getCheckedRadioButtonId())
switch (checkedId) // 和上面的语句具有同样的效果 , 从 checked<->unchecked 都会为返回 checkedId
{
case R.id. radio_button1 :
if ( radio_button1 .isChecked())
Toast.makeText ( this , radio_button1 .getText(), Toast. LENGTH_LONG ).show();
break ;
case R.id. radio_button2 :
if ( radio_button2 .isChecked())
Toast.makeText ( this , radio_button2 .getText(), Toast. LENGTH_LONG ).show();
break ;
case R.id. radio_button3 :
if ( radio_button3 .isChecked())
Toast.makeText ( this , radio_button3 .getText(), Toast. LENGTH_LONG ).show();
break ;
}
}
}
}
运行结果大致如下:
其他所展现的界面情形,略。
