LNMP3台主机分离进行部署
LNMP 3台主机分离进行部署
第一台虚拟主机进行部署nginx 第二台虚拟主机进行部署php-fpm 第三台虚拟主机进行部署mariadb-server
第一台主机进行部署nginx 的安装:实现静态网页的处理工作(192.168.1.107)
1.先下载1.8版本的,然后进行解压工作。
2.编译安装如下操作
3.yum groupinstall "Development Tools" "Server Platform Development" -y
yum -y install openssl-devel pcre-devel zlib-devel
useradd -r nginx
4.创建环境
./configure --prefix=/usr/local/nginx --conf-path=/etc/nginx/nginx.conf --user=nginx --group=nginx --error-log-path=/var/log/nginx/error.log --http-log-path=/var/log/nginx/access.log --pid-path=/var/run/nginx/nginx.pid --lock-path=/var/lock/nginx.lock --with-http_ssl_module --with-http_gzip_static_module --with-debug --with-http_stub_status_module
5.进行编译工作
make && make install
6.[root@localhost nginx]# /usr/local/nginx/sbin/nginx -t 检查语法是否正确
nginx: the configuration file /etc/nginx/nginx.conf syntax is ok
nginx: configuration file /etc/nginx/nginx.conf test is successful
7./usr/local/nginx/sbin/nginx 启动服务
8.进行测试如下
9.将其 命令进行修改工作,编辑配置文件
[root@localhost ~]# vim /etc/profile.d/nginx.sh
export PATH=/usr/local/nginx/sbin:$PATH
exec bash /etc/profile.d/nginx.sh
[root@localhost ~]# echo $PATH
/usr/local/nginx/sbin:/usr/local/sbin:/usr/local/bin:/sbin:/bin:/usr/sbin:/usr/bin:/root/bin
nginx -t 测试一下语法
nginx -s reload 重新载入一下
10.启动nginx 就可以查看到80端口了 cd /usr/local/nginx
然后执行 nginx 使用命令ss -tnl 查看一下 端口是否已经启用。
11.对nginx 的配置文件进行定义vim /etc/nginx/nginx.conf
server {
listen 80;
server_name www.magedu.com;
#charset koi8-r;
#access_log logs/host.access.log main;
location / {
root html/wordpress;
index index.html index.htm;
}
location ~ \.php$ {
root html;
fastcgi_pass 192.168.1.109:9000;
fastcgi_index index.php;
fastcgi_param SCRIPT_FILENAME /var/www/html/wordpress/scripts$fastcgi_script_name;
include fastcgi_params;
}
12.重新载入配置文件 nginx -t nginx -s reload
13进行单机Nginx 服务是否能够正常的访问,如果不能的话,将其 selinux 一定要关闭 ,防火墙一定要关闭ok
Welcome to nginx!
If you see this page, the nginx web server is successfully installed and working. Further configuration is required.
For online documentation and support please refer to nginx.org.
Commercial support is available at nginx.com.
Thank you for using nginx.
来源: http://192.168.1.107/ 可以正常访问了,没有问题了,接下来进行下面的测试下面的服务。
第二台虚拟主机进行php-fpm 的安装工作(192.168.1.100)
1.yum install php-fpm -y yum install php-mbstring yum install php-mysql
然后启动服务 service php-fpm start
查看一下监听的端口 默认为127.0.0.1:9000更改后变成了192.168.1.100:9000端口
2.编辑配置文件vim /etc/php-fpm.d/www.conf
listen.allowed_clients = 192.168.1.107 这里写的是Nginx 的虚拟机的IP地址 也就是第一台虚拟机的IP
listen = 192.168.1.100:9000
3.重新启动服务 service php-fpm restart
第三台 虚拟主机进行mariadb-server 数据库的安装工作(192.168.1.109)
1.然后启动服务 service mysqld start 监听的端口号是3306 ssl -tnlp 进行查看工作
[root@localhost ~]# ss -tnl
State Recv-Q Send-Q Local Address:Port Peer Address:Port
LISTEN 0 50 *:3306 *:*
2.进行数据名称的设置工作,和开放所准许的网络可以进行连接数据库。
mysql 进行数据库
MariaDB [(none)]> GRANT ALL ON *.* TO root@'192.168.%.%' IDENTIFIED BY 'root'; 可以让这个网段的主机访问任意数据库
Query OK, 0 rows affected (0.00 sec)
MariaDB [(none)]> CREATE DATABASE rootdb; 创建的数据库的名称
Query OK, 1 row affected (0.00 sec)
MariaDB [(none)]> FLUSH PRIVILEGES; 立即生效
Query OK, 0 rows affected (0.00 sec)
3.可以进行对数据库进行测试工作
可以将其虚拟机的数据库装好,然后进行对虚拟机3的数据进行测试,如果可以登陆进入说明没有问题了,命令mysql -uroot -h192.168.1.109 -proot
测试完成之后将其数据库进行关闭就OK了。
4.然后将其软件wordpress 分别上传至 虚拟机1的/usr/local/nginx/html/ 和虚拟机2的 /var/www/html 下
在192.168.1.100的 提供php-fpm虚拟机主机创建目录 mkdir -pv /var/www/html
然后将其软件拷贝到 这个目录即可,将其软件的配置文件进行编辑配置工作 vim config.php
其中有两项是需要修改的 $cfg['blowfish_secret'] = '68/w1KBacRDOt/pTgbBO'; 红色区域部分是设置密码的地方 使用命令 openssl rand -base64 15
会生成一段加密的秘钥,将其粘贴在红色区域就可以了。$cfg['Servers'][$i]['host'] = '192.168.1.109'; 这个IP地址要写数据库所在主机的IP地址。ok
同理 将其软件上传到提供静态服务的nginx 服务器,放在/usr/local/nginx/html/下面即可
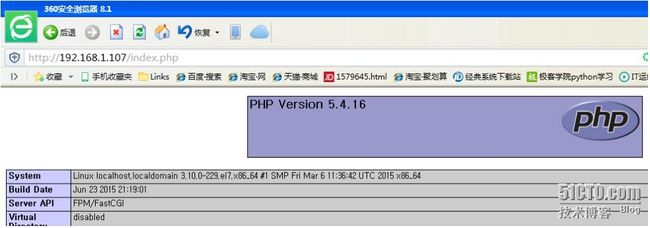
5.现在可以进行对第二台虚拟主机提供的服务进行测试了,通过第一台虚拟主机,看能否转发到第二台,如下所示;看第二台提供的测试页面能否显示出来。
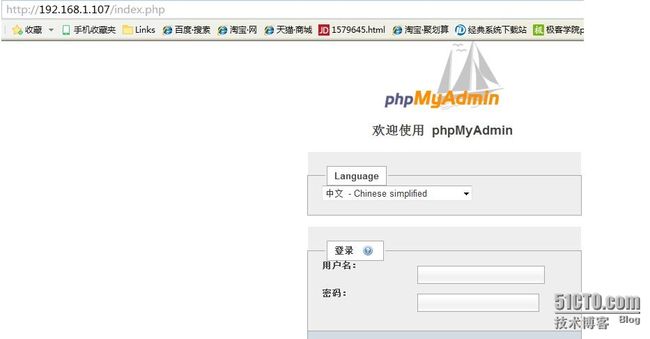
6.然后接下来就是连接第三台虚拟主机提供的数据库了,如果可以正常链接的话,我们编辑的phpMyAdmin软件应该就会显示登陆界面了。好了,我们来进行测试一下。(登陆界面已经显示出来了,说明我们的LNMP搭建成功了)。

