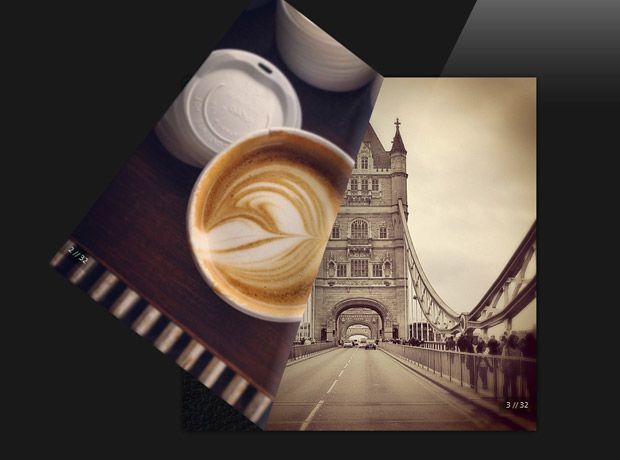
教你用turn.js制作一个炫丽的翻页杂志
教你用turn.js制作一个炫丽的翻页杂志
这个翻页效果使用的是典型的Flash动画翻页效果,在网络上,随着时间的推移,其受欢迎程度下降,经过点小改造可以让他用在移动设备上。
在本教程中,我们将使用PHP和turn.js插件,纯CSS3和jQuery的页面翻页效果来实现,建立一本漂亮的杂志。
HTML
首先,我们需要做好今天的例子的基础。我们将使用一个单一的页面,在同一个文件中结合HTML5标记和PHP,使之更为简明。你可以看到生成的布局如下:
index.php
<!DOCTYPE html> <html>

<head>

<meta charset="utf-8" /> <title>用turn.js制作一个翻页杂志</title>

<!-- 导入css -->

 <link rel="stylesheet" href="http://www.web0752.com/assets/css/styles.css" />

 <!--[如果是IE 9]>

<script src="http://html5shiv.googlecode.com/svn/trunk/html5.js"></script>

<![endif]-->

</head>

<body> <div id="magazine" class="centerStart">

</div> <!-- 引入turn.js和我们自己的script.js -->

<script src="http://code.jquery.com/jquery-1.7.1.min.js"></script>

<script src="http://www.web0752.com/assets/js/turn.js"></script>

<scriptsrc="http://www.web0752.com/assets/js/script.js"></script>

</body>

</html>
我们把CSS文件包含在头部,js文件包含在底部。然后初始化js插件和监听键盘事件。PHP代码将写在#magazine div中。
举个例子,这里是前三页的杂志的标记:
Generated code
<div id="page1" class="page"> <div class="img1"> <span class="pageNum right">1 // 32</span> <img src="http://www.web0752.com/assets/img/cover.jpg" alt="Cover" /> </div> </div> <div id="page2" class="page"> <div class="img2"> <span class="pageNum left">2 // 32</span> <img src="http://www.web0752.com/images/logo.gif" alt="网站建设logo" /> </div> </div> <div id="page3" class="page"> <div class="img3"> <span class="pageNum right">3 // 32</span> <img src="http://www.web0752.com/images/logo.gif" alt="网站建设logo" /> </div> </div>
PHP
这里是目前一个流行的JSON响应图像的Instagram例子。我省略了一些属性,使代码更易于阅读。
Popular images JSON response
{    "meta": {
        "code": 200
    },
    "data": [{
        "tags": ["beautiful", "sky"],
        "location": "null",
        "comments": {
            "count": 31,
            "data": [...]
        },
        "filter": "Normal",
        "created_time": "1331910134",
        "link": "http:\/\/instagr.am\/p\/IPNNknqs84\/",
        "likes": {
            "count": 391,
            "data": [..]
        },
        "images": {
            "low_resolution": {
                "url": "http:\/\/distilleryimage8.instagram.com\/03c80dd86f7911e1a87612313804ec91_6.jpg",
                "width": 306,
                "height": 306
            },
            "thumbnail": {
                "url": "http:\/\/distilleryimage8.instagram.com\/03c80dd86f7911e1a87612313804ec91_5.jpg",
                "width": 150,
                "height": 150
            },
            "standard_resolution": {
                "url": "http:\/\/distilleryimage8.instagram.com\/03c80dd86f7911e1a87612313804ec91_7.jpg",
                "width": 612,
                "height": 612
            }
        },
        "caption": {
            "created_time": "1331910148",
            "text": "Goodnight.\ue056",
            "from": {
                "username": "jent99",
                "profile_picture": "http:\/\/images.instagram.com\/profiles\/profile_6227738_75sq_1319878922.jpg",
                "id": "6227738",
                "full_name": "jent99"
            },
            "id": "148395540733414783"
        },
        "type": "image",
        "id": "148395420004568888_6227738",
        "user": {
            "username": "jent99",
            "website": "",
            "bio": "Mostly nature pics.\ue32b\ue32b\ue32b Hope you like them.\ue056\ue32a     \ue334gi\ue334                    ",
            "profile_picture": "http:\/\/images.instagram.com\/profiles\/profile_6227738_75sq_1319878922.jpg",
            "full_name": "jent99",
            "id": "6227738"
        }
    }, {
		/* More photos here*/
	}]
}
API限制最多只能返回32张图片,但对于我们来说已经足够了。每张图片有三个尺寸,但是我们用普通的就可以。
PHP缓存API调用的结果,使得Instagram每小时请求服务器只有一次,这使得我们的程序请求和响应服务器的数量得到控制。
index.php
// 你可以从Instagram API取得页面的客户端ID

$instagramClientID = '-- place your client id key here --';

$api = 'https://api.instagram.com/v1/media/popular?client_id='.$instagramClientID;
$cache = 'cache.txt';

if(file_exists($cache) && filemtime($cache) > time() - 60*60){
 // If a cache file exists, and it is
 // fresher than 1 hour, use it
 $images = unserialize(file_get_contents($cache));
}
else{
 // 触发API请求和创建缓存文件

 //取得图象

 $response = file_get_contents($api);

 $images = array();

 // Decode the response and build an array
 foreach(json_decode($response)->data as $item){

  $title = '';

  if($item->caption){
   $title = mb_substr($item->caption->text,0,70,"utf8");
  }

  $src = $item->images->standard_resolution->url;

  $images[] = array(
   "title" => htmlspecialchars($title),
   "src" => htmlspecialchars($src)
  );
 }

 // Remove the last item, so we still have
 // 32 items when when the cover is added
 array_pop($images);

 // Push the cover in the beginning of the array
 array_unshift($images,array("title"=>"Cover", "src"=>"assets/img/cover.jpg"));

 // Update the cache file
 file_put_contents($cache,serialize($images));
}

# Generate the markup
$totalPages = count($images);
foreach($images as $i=>$image){

 ?>

 <div id="page<?php echo $i+1?>" class="page">
  <div class="img<?php echo $i+1?>">
   <span class="pageNum <?php echo ($i+1)%2? 'right' : 'left'?>"><?php echo $i+1?> // <?php echo $totalPages?></span>
   <img src="<?php echo $image['src']?>" alt="<?php echo $image['title']?>" />
  </div>
 </div>

 <?php

}
缓存很简单:我们使用的是一个临时的文件 - cache.txt的 - 存储图像阵列的序列化表示。如果缓存文件是不存在的,或超过一个多小时,我们发出了一个新的API请求。
使用turn.js是非常简单。
assets/js/script.js
$(function(){

	var mag = $('#magazine');

	// initiazlie turn.js on the #magazine div
	mag.turn();

	// turn.js defines its own events. We are listening
	// for the turned event so we can center the magazine
	mag.bind('turned', function(e, page, pageObj) {

		if(page == 1 && $(this).data('done')){
			mag.addClass('centerStart').removeClass('centerEnd');
		}
		else if (page == 32 && $(this).data('done')){
			mag.addClass('centerEnd').removeClass('centerStart');
		}
		else {
			mag.removeClass('centerStart centerEnd');
		}

	});

	setTimeout(function(){
		// Leave some time for the plugin to
		// initialize, then show the magazine
		mag.fadeTo(500,1);
	},1000);

	$(window).bind('keydown', function(e){

		// listen for arrow keys

		if (e.keyCode == 37){
			mag.turn('previous');
		}
		else if (e.keyCode==39){
			mag.turn('next');
		}

	});

});
CSS
我们需要建立明确的尺寸的杂志和风格的页面和页码。 turn.js将处理其余部分。
#magazine{
	width:1040px;
	height:520px;
	margin:0 auto;
	position:relative;
	left:0;

	opacity:0;

	-moz-transition:0.3s left;
	-webkit-transition:0.3s left;
	transition:0.3s left;
}

#magazine .page{
	width:520px;
	height:520px;
	background-color:#ccc;
	overflow:hidden;
}

/* Center the magazine when the cover is shown */
#magazine.centerStart{
	left:-260px;
}

/* Center the magazine when the last page is shown */
#magazine.centerEnd{
	left:260px;
}

.page img{
	height:520px;
	width:520px;
	display:block;
}

/* Show a dark shadow when the cover is shown */
.centerStart .turn-page-wrapper:first-child{
	box-shadow:0 0 10px #040404;
}

/* Page Numbers */

span.pageNum{
    background-color: rgba(0, 0, 0, 0.3);
    bottom: 25px;
    box-shadow: 0 0 3px rgba(0, 0, 0, 0.25);
    color: #FFFFFF;
    font-size: 11px;
    height: 24px;
    line-height: 22px;
    opacity: 0.9;
    position: absolute;
    text-align: center;
    width: 55px;
}

span.pageNum.left{
	left:0;
	right:auto;
}

span.pageNum.right{
	left:auto;
	right:0;
}

/* Hide the page number on the cover */
#page1 .pageNum{
	display:none;
}
我们就大功告成了!
这个例子可以在所有最新的浏览器 - 火狐,Chrome,Safari,Opera和甚至IE浏览器。它甚至可用iOS和Android。
这个例子可以在所有最新的浏览器 - 火狐,Chrome,Safari,Opera和甚至IE浏览器。它甚至可用iOS和Android。
