matplot.pyplot
来源代码:matplotlib帮助文档
Matplotlib.pyplot是用来画图的方法,类似于matlab中plot命令,用法基本相同。
一.最基本的:
例如:
In [1]: import matplotlib.pyplot as plt
In [2]: plt.plot([1,2,3])
Out[2]: [<matplotlib.lines.Line2D object at 0x06518A10>]
In [3]: plt.ylabel('some numbers')
Out[3]: <matplotlib.text.Text object at 0x0652D550>
In [4]: plt.show()
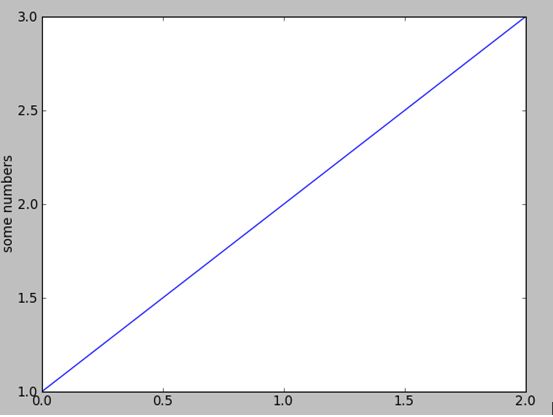
结果如图1
从图中可以看到,如果我们给plot()参数是一个list或者array,那么画图默认是作为Y轴来显示,x轴是自动生成的数值范围。
其实plot可以带一些参数,和matlab类似。如:plt.plot([1,2,3],[1,4,9])
则会按(1,1),(2,4),(3,9)来划线。
当然和matlab类似,我们也可以指定线的类型和颜色,如果默认,则为’b-‘,即蓝色的实线(如上图)。
>>> import matplotlib.pyplot as plt
>>> plt.plot([1,2,3,4], [1,4,9,16], 'ro')
[<matplotlib.lines.Line2D object at 0x00D62150>]
>>> plt.axis([0, 6, 0, 20])
[0, 6, 0, 20]
>>> plt.show()
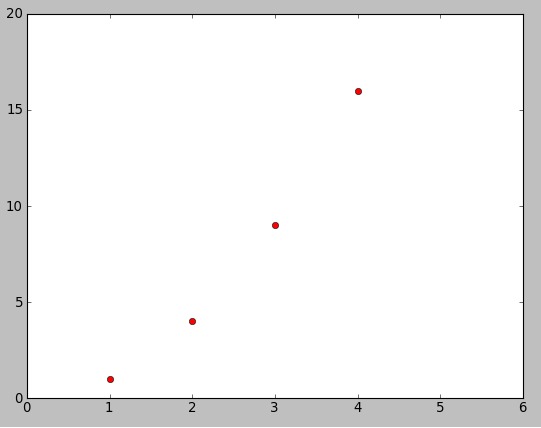
结果如图2:
'ro'代表线形为红色圈。plt.axis([0, 6, 0, 20])是指定xy坐标的起始范围,它的参数是列表[xmin, xmax, ymin, ymax]。
二,统一图上画多条曲线
下面看看如何在同一张图画多条曲线,我们用numpy生成的array
>>> import numpy as np
>>> t = np.arange(0.,5.,0.2)
>>> t
array([ 0. , 0.2, 0.4, 0.6, 0.8, 1. , 1.2, 1.4, 1.6, 1.8, 2. , 2.2, 2.4, 2.6, 2.8, 3. , 3.2, 3.4, 3.6, 3.8, 4. , 4.2, 4.4, 4.6, 4.8])
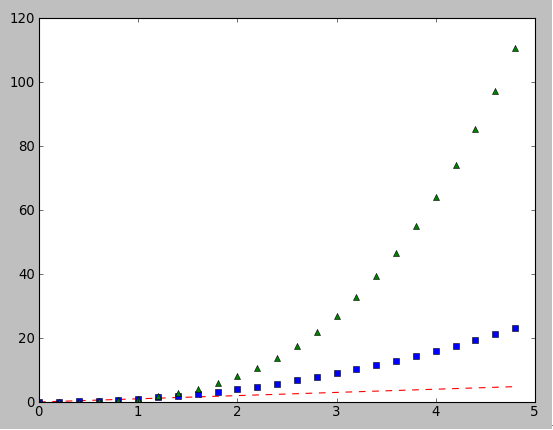
>>> plt.plot(t,t,'r--',t,t**2,'bs',t,t**3,'g^')
>>> plt.show()
结果如图3:
对于线的属性,我们也可以如下设定:
lines = plt.plot(x1, y1, x2, y2)
# use keyword args
plt.setp(lines, color='r', linewidth=2.0)
# or matlab style string value pairs
plt.setp(lines, 'color', 'r', 'linewidth', 2.0)
三,subplot命令
Matplotlib也有和matlab中一样的subplot命令
>>> import numpy as np
>>> import matplotlib.pyplot as plt
>>> def f(t):
return np.exp(-t)*np.cos(2*np.pi*t)
>>> t1 = np.arange(0.0,5.0,0.1)
>>> t2 = np.arange(0.0,5.0,0.02)
>>> plt.figure(1)
<matplotlib.figure.Figure object at 0x0433FF50>
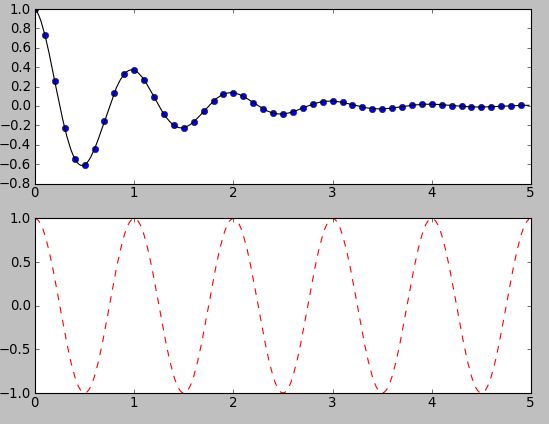
>>> plt.subplot(211)
<matplotlib.axes.AxesSubplot object at 0x02700830>
>>> plt.plot(t1,f(t1),'bo',t2,f(t2),'k')
[<matplotlib.lines.Line2D object at 0x04463310>, <matplotlib.lines.Line2D object at 0x0447E570>]
>>> plt.subplot(212)
<matplotlib.axes.AxesSubplot object at 0x0447E450>
>>> plt.plot(t2,np.cos(2*np.pi*t2),'r--')
[<matplotlib.lines.Line2D object at 0x04530510>]
>>> plt.show()
结果如图4:
当然,也可以用figure来画多个图。
import matplotlib.pyplot as plt
plt.figure(1) # the first figure
plt.subplot(211) # the first subplot in the first figure
plt.plot([1,2,3])
plt.subplot(212) # the second subplot in the first figure
plt.plot([4,5,6])
plt.figure(2) # a second figure
plt.plot([4,5,6]) # creates a subplot(111) by default
plt.figure(1) # figure 1 current; subplot(212) still current
plt.subplot(211) # make subplot(211) in figure1 current
plt.title('Easy as 1,2,3') # subplot 211 title
四,在图片上标上text。
如:
import numpy as np
import matplotlib.pyplot as plt
mu,sigma = 100,15
x = mu + sigma*np.random.randn(10000)
# the histogram of the data
n,bins,patches = plt.hist(x,50,normed=1,facecolor='g',alpha=0.75)
plt.xlabel('Smarts')
plt.ylabel('Probability')
plt.title('Histogram of IQ')
plt.text(60,.025,r'$\mu=100,\ \sigma=15$')
plt.axis([40,160,0,0.03])
plt.grid(True)
plt.show()
结果如图5:
可以看到matplotlib接受Tex的数学公式模式‘$$‘. 如此借助latex,可以在图形中显示复杂的数学公式了。


