利用quem+gdb调试Linux内核
本机的Linux系统的信息为:
fantasy@fantasy:~/Debug_Kernel$ uname -a
Linux fantasy 3.8.0-29-generic #42~precise1-Ubuntu SMP Wed Aug 14 16:19:23 UTC 2013 x86_64 x86_64 x86_64 GNU/Linux
gdb和gcc的版本为:
fantasy@fantasy:/usr/src/linux-3.12.3$gdb --version
GNU gdb (Ubuntu/Linaro 7.4-2012.04-0ubuntu2.1) 7.4-2012.04
Copyright (C) 2012 Free Software Foundation, Inc.
License GPLv3+: GNU GPL version 3 or later <http://gnu.org/licenses/gpl.html>
This is free software: you are free to change and redistribute it.
There is NO WARRANTY, to the extent permitted by law. Type "show copying"
and "show warranty" for details.
This GDB was configured as "x86_64-linux-gnu".
For bug reporting instructions, please see:
<http://bugs.launchpad.net/gdb-linaro/>.
fantasy@fantasy:/usr/src/linux-3.12.3$gcc --version
gcc (Ubuntu/Linaro 4.6.3-1ubuntu5) 4.6.3
Copyright (C) 2011 Free Software Foundation, Inc.
This is free software; see the source for copying conditions. There is NO
warranty; not even for MERCHANTABILITY or FITNESS FOR A PARTICULAR PURPOSE.
1. 下载并安装QEMU
下载地址:http://wiki.qemu.org/Download;选的软件版本为:qemu-1.7.0.tar.bz2
解压安装:
1)新建一个文件夹,用于安装qemu
fantasy@fantasy:/opt$ sudo mkdir /usr/local/src/qemu
2)配置
fantasy@fantasy:~/Debug_Kernel/qemu-1.7.0$./configure --prefix=/usr/local/src/qemu --target-list="arm-softmmu i386-softmmu x86_64-softmmu arm-linux-user i386-linux-user x86_64-linux-user" --audio-drv-list=alsa --enable-debug
3)make
在该过程中出现了如下错误:
错误1:
(cd /home/fantasy/Debug_Kernel/qemu-1.7.0/pixman; autoreconf -v --install)
/bin/sh: 1: autoreconf: not found
make: *** [/home/fantasy/Debug_Kernel/qemu-1.7.0/pixman/configure] Error 127
解决方法:
sudo apt-get install autoconf
错误2:
configure.ac:75: error: possibly undefined macro: AC_PROG_LIBTOOL
If this token and others are legitimate, please use m4_pattern_allow.
See the Autoconf documentation.
解决方法:
缺少libtool库
sudo apt-get install libtool
4)make install
2.下载并编译带调试信息的Linux内核
1)下载Linux内核,从地址:http://www.kernel.org/下载,我下载的版本是3.12.3稳定版
2)解压到文件夹/usr/src中:
sudo tar -xvf linux-3.12.3.tar.xz -C /usr/src/
3)配置内核
首先,从当前系统中.config文件拷贝到下载的源代码目录中
sudo cp /usr/src/linux-headers-3.8.0-29-generic/.config .config
接着,运行如下命令进行配置
sudo make menuconfig
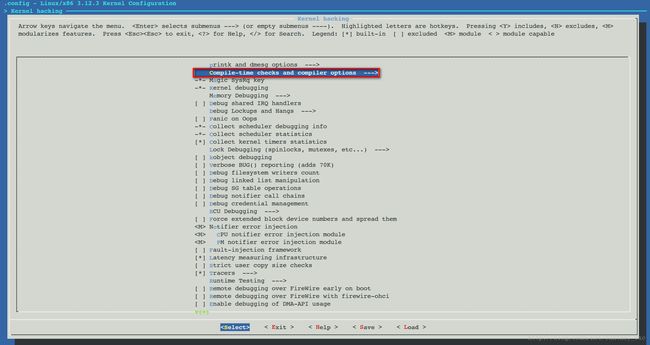
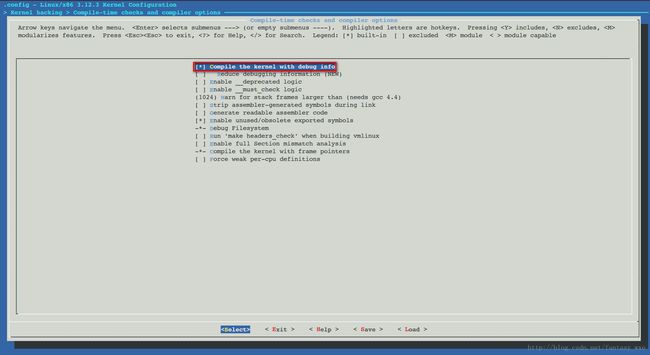
在配置中,需要加入:compile the kernel with debug info,加入内核的调试信息,类似于gdb中的-g选项。设置流程如下图:
4)编译内核
sudo make
3.利用qemu+gdb调试编译好的内核
若利用系统自带的gdb进行调试时,会出现如下的问题:
Remote 'g' packet reply is too long:。。。。。
解决方法:
下载自带的gdb,然后重新下载gdb并安装
sudo apt-get remove gdb
sudo apt-get autoremove
此时从gdb网站下重新下载gdb源码,然后编译并安装,对于下载的gdb源码,对于其中的gdb/remote.c中的源码需要进行修改。
原始为:
改为:
这样此时系统的gdb版本为:
fantasy@fantasy:~/Debug_Kernel/gdb-7.6/gdb$ gdb --version
GNU gdb (GDB) 7.6
Copyright (C) 2013 Free Software Foundation, Inc.
License GPLv3+: GNU GPL version 3 or later <http://gnu.org/licenses/gpl.html>
This is free software: you are free to change and redistribute it.
There is NO WARRANTY, to the extent permitted by law. Type "show copying"
and "show warranty" for details.
This GDB was configured as "x86_64-unknown-linux-gnu".
For bug reporting instructions, please see:
<http://www.gnu.org/software/gdb/bugs/>.
此时进行调试:
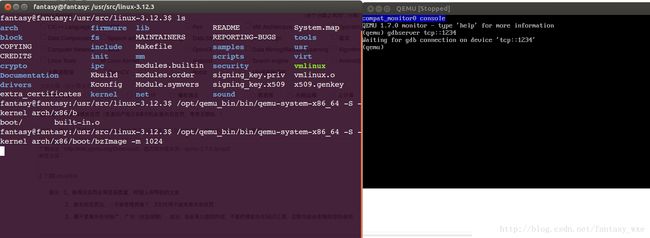
打开两个终端,其中一终端输入为:
在终端输入/opt/qemu_bin/bin/qemu-system-x86_64 ....此处运行起来的qemu是黑屏,需要通过ctrl+alt+2来切换到控制台,可利用ctrl+alt+1切回来。
然后在qemu出现的控制台窗口中输入gdbserver tcp::1234
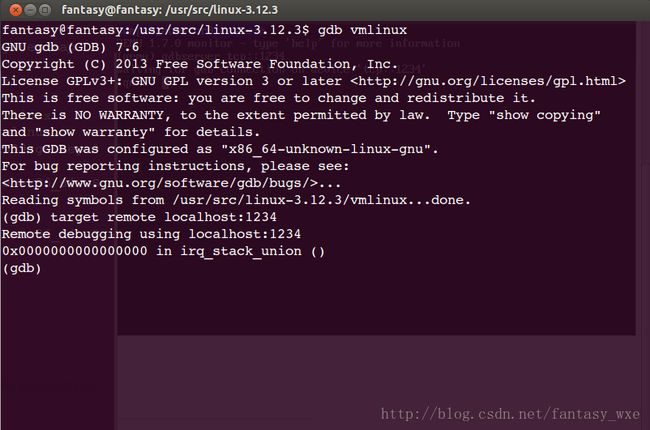
另一终端为:
在终端中输入:gdb vmlinux后,此时进入gdb调试环境,、
然后输入:target remote localhost:1234
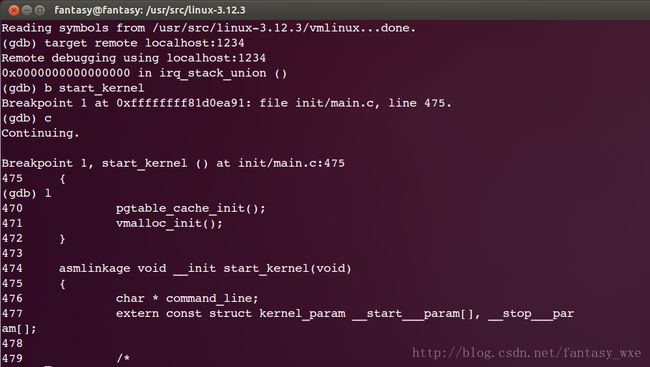
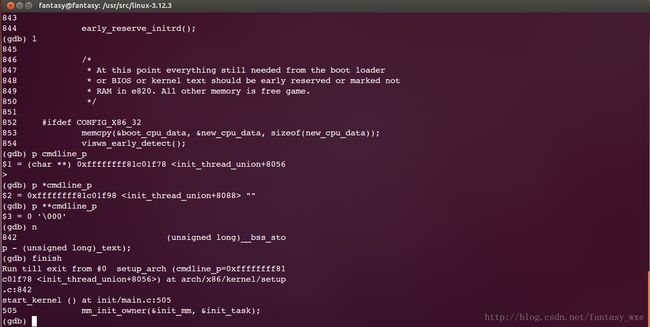
此时就进行了内核的调试环境,此时利用gdb的调试命令进行调试即可,如下:
==================================================================================
===============================================================================
=================================================================================
=================================================================================
参考:
- http://blog.csdn.net/silangquan/article/details/9090915
- http://blog.csdn.net/gdt_a20/article/details/7231652

