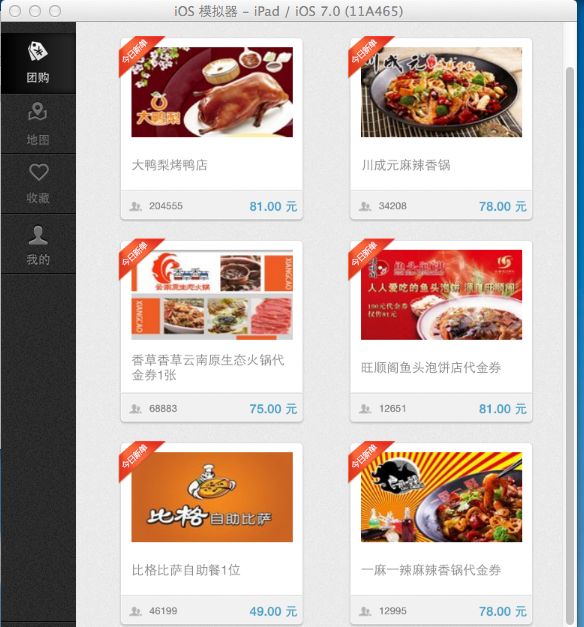
用UICollectionViewController 来进行横竖屏九宫格布局
转自:http://www.cnblogs.com/qingche/p/3548057.html
1.简单说说UICollectionViewController
我们在做九宫格布局时,可以使用UIScrollView,也可以使用UICollectionViewController。
当我们用UICollectionViewController来进行九宫格布局,可以更加方便,省去很多麻烦,例如横竖屏的适配。
UICollectionViewController 用起来非常简单,只需要简单的几步,就能实现非常的漂亮的九宫格布局。
下面就说说UICollectionViewController实现的几步。
2.UICollectionViewController的实现
2.1.传递布局
首页创建UICollectionViewController时,需要给它传一个展示的布局,一般九宫格用的都使流水布局!
    // 1.创建流水布局

      UICollectionViewFlowLayout *layout = [[UICollectionViewFlowLayout alloc] init];

      // 2.设置每个格子的尺寸
     layout.itemSize = CGSizeMake(250, 250);

      // 3.设置整个collectionView的内边距
 CGFloat paddingY = 20;
     CGFloat paddingX = 40;
     layout.sectionInset = UIEdgeInsetsMake(paddingY, paddingX, paddingY, paddingX);

     // 4.设置每一行之间的间距
    layout.minimumLineSpacing = paddingY;
2.2.初始化UICollectionViewController,设置展示布局
//初始化 UICollectionViewController
UICollectionViewController *controller = [[UICollectionViewController alloc] initWithCollectionViewLayout:layout]
在对 UICollectionViewController 的 View 进行相关属性设置和属性修改时,记得要拿到UICollectionViewController.collectionView 再设置。
 //设置背景
self.collectionView.backgroundColor = [UIColor colorWithPatternImage:[UIImage imageNamed:@"bg_deal"]];
2.3.显示数据
记得分别实现
<UICollectionViewDelegate, UICollectionViewDataSource>
之后再调用代理数据源方法和代理方法
#pragma mark - 数据源方法
 2 /**
 3  *  第section组有多少个格子(cell)
 4  */
 5 - (NSInteger)collectionView:(UICollectionView *)collectionView numberOfItemsInSection:(NSInteger)section
 6 {
 7     return _deals.count;
 8 }
 9
10 //每个格子的内容
11 - (UICollectionViewCell *)collectionView:(UICollectionView *)collectionView cellForItemAtIndexPath:(NSIndexPath *)indexPath
12 {
13 //    indexPath.item    某一组的哪一个
14 //    indexPath.section 哪一组
15     // 1.创建cell
16     QCDealCell *cell = [QCDealCell cellWithCollectionView:collectionView indexPath:indexPath];
17
18     // 2.取出模型,传递模型
19     cell.deal = _deals[indexPath.item];
20
21     return cell;
22 }
模型数据封装好后,就能实现上图展示效果,横竖屏自动适配好!
清澈Saup
