Cocos2d-x加Box2D制作弹弓类游戏
原创作品,允许转载,转载时请务必以超链接形式标明文章 原始出处 、作者信息和本声明。否则将追究法律责任。 http://mssyy2010.blog.51cto.com/4595971/847000
文章原版为英文版,地址链接在文章尾部给出。原文代码版本为object-c版,本文代码版本为C++版。对原文大部分内容进行了翻译,并将对oc版的说明更改为C++版。文章cocos2d-x版本cocos2d-1.0.1-x-0.11.0。
如何用Box2D和cocos2d-x制作弹弓类游戏 第一部分
这是一篇由ios教程团队成员Gustavo Ambrozio上传的博客。一位拥有超过20年软件开发经验,超过3年ios开发经验的软件工程师,CodeCrop软件创始人。
在这个教程系列中我们将会通过使用cocos2d-x和Box2D创建一个很COOL的弹弓类型游戏。
我们将使用Ray的可爱而富有天赋的老婆Vicki创作的弹弓,栗子,狗,猫和愤怒的松鼠素材来创建游戏。(素材我会在上传附件)
在这个教程系列,你将学到:
- 怎么用旋转关节(rotation joints)
- 怎么用连接关节(weld joints)
- 怎么让视角跟随抛射物
- 怎么根据碰撞检测判断力量来消除敌人
- 和很多其他的
这个教程系列假设你已经掌握了 Intro to Box2D with Cocos2D Tutorial: Bouncing Balls Tutorial或者已经掌握了相关知识。
教程中还会使用很多制作撞球游戏中的概念。
开始吧
新建HelloWorld项目,清空项目。记得选择需要Box2d支持的cocos2d-x工程。声明一个catapult类。和HelloWorld类除了名字全都一样。
加入些精灵
首先我们先添加项目将用的资源。
现在我们来加入些不会被物理模拟的精灵。默认的CCSprite的锚点是中心,我将锚点改到了左下角为了更容易的放置它们。
在init方法中// add your codes below...下面添加代码:
- CCSprite *sprite = CCSprite::spriteWithFile("bg.png"); //背景图
- sprite->setAnchorPoint(CCPointZero);
- this->addChild(sprite, -1);
- CCSprite *sprite = CCSprite::spriteWithFile("catapult_base_2.png"); //投射器底部后面那块
- sprite->setAnchorPoint(CCPointZero);
- sprite->setPosition(CCPointMake(181.0, FLOOR_HEIGHT));
- this->addChild(sprite, 0);
- sprite = CCSprite::spriteWithFile("squirrel_1.png"); //左边松鼠
- sprite->setAnchorPoint(CCPointZero);
- sprite->setPosition(CCPointMake(11.0, FLOOR_HEIGHT));
- this->addChild(sprite, 0);
- sprite = CCSprite::spriteWithFile("catapult_base_1.png"); //投射器底部前面那块
- sprite->setAnchorPoint(CCPointZero);
- sprite->setPosition(CCPointMake(181.0, FLOOR_HEIGHT));
- this->addChild(sprite, 9);
- sprite = CCSprite::spriteWithFile("squirrel_2.png"); //右边松鼠
- sprite->setAnchorPoint(CCPointZero);
- sprite->setPosition(CCPointMake(240.0, FLOOR_HEIGHT));
- this->addChild(sprite, 9);
- sprite = CCSprite::spriteWithFile("fg.png"); //带冰的地面
- sprite->setAnchorPoint(CCPointZero);
- this->addChild(sprite, 10);
你也许注意到了很多使用Y坐标的地方用了宏FLOOR_HEIGHT,但我们并未define它。
- #define FLOOR_HEIGHT 62.0f
定义了这个宏之后,如果我们改变了地板高度,我们可以更加简便的放置精灵。
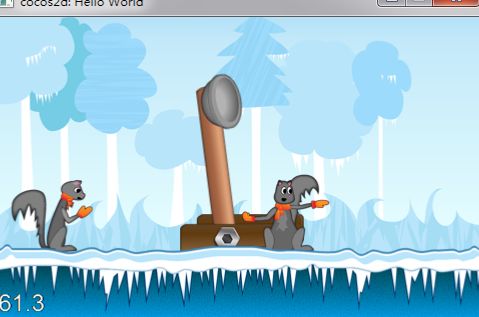
上效果图。
看起来不错!
上面就是非物理模拟的部分。
增加弹弓臂
是时候给世界加些物理属性了,接下来的代码就是加世界边框的模板式的代码了,让我们改变一点来描述我们的世界。
类声明中添加:
- private:
- b2World* m_world;
- b2Body* m_groundBody;
init方法尾部添加:
- b2Vec2 gravity;
- gravity.Set(0.0f, -10.0f);
- bool doSleep = true;
- m_world = new b2World(gravity);
- m_world->SetAllowSleeping(doSleep);
- m_world->SetContinuousPhysics(true);
- // Define the ground body.
- b2BodyDef groundBodyDef;
- groundBodyDef.position.Set(0, 0); // bottom-left corner
- // Call the body factory which allocates memory for the ground body
- // from a pool and creates the ground box shape (also from a pool).
- // The body is also added to the world.
- m_groundBody = m_world->CreateBody(&groundBodyDef);
默认是世界的尺寸是iphone屏幕尺寸。因为我们场景的宽度是世界宽度的2被。完成这个任务我们只需要让宽度乘以1.5.
另外,由于我们世界的地板并不是在屏幕的底部,所以我们需要编写相应的代码。
边界代码:
- b2EdgeShape groundBox;
- // bottom
- groundBox.Set(b2Vec2(0,FLOOR_HEIGHT/PTM_RATIO), b2Vec2(screenSize.width*2.0f/PTM_RATIO,FLOOR_HEIGHT/PTM_RATIO));
- m_groundBody->CreateFixture(&groundBox, 0);
- // top
- groundBox.Set(b2Vec2(0,screenSize.height/PTM_RATIO), b2Vec2(screenSize.width*2.0f/PTM_RATIO,screenSize.height/PTM_RATIO));
- m_groundBody->CreateFixture(&groundBox, 0);
- // left
- groundBox.Set(b2Vec2(0,screenSize.height/PTM_RATIO), b2Vec2(0,0));
- m_groundBody->CreateFixture(&groundBox, 0);
- // right
- groundBox.Set(b2Vec2(screenSize.width*1.5f/PTM_RATIO,screenSize.height/PTM_RATIO), b2Vec2(screenSize.width*1.5f/PTM_RATIO,0));
- m_groundBody->CreateFixture(&groundBox, 0);
说明:box2d某次更新后以前的SetAsEdge函数被删除了,但是可以使用b2EdgeShape类型对象来生成边界,函数名也变为Set。
现在让我们增加弹弓臂,首先增加物体(body)和夹具(fixture)的指针。打开HelloWorld.h把下面的代码加入到类中。
- private:
- b2Fixture *m_armFixture;
- b2Body *m_armBody;
进入到HelloWorld.cpp文件中的init函数的底部:
- // Create the catapult's arm
- CCSprite *arm = CCSprite::spriteWithFile("catapult_arm.png");
- this->addChild(arm, 1);
- b2BodyDef armBodyDef;
- armBodyDef.type = b2_dynamicBody;
- armBodyDef.linearDamping = 1;
- armBodyDef.angularDamping = 1;
- armBodyDef.position.Set(230.0f/PTM_RATIO, (FLOOR_HEIGHT+91.0f)/PTM_RATIO);
- armBodyDef.userData = arm;
- m_armBody = m_world->CreateBody(&armBodyDef);
- b2PolygonShape armBox;
- b2FixtureDef armBoxDef;
- armBoxDef.shape = &armBox;
- armBoxDef.density = 0.3F;
- armBox.SetAsBox(11.0f/PTM_RATIO, 91.0f/PTM_RATIO);
- m_armFixture = m_armBody->CreateFixture(&armBoxDef);
你如果看过之前的Box2D教程那么这些代码对你而言应该很熟悉。
我们先读取弹弓臂精灵并把它加入到层中。注意z轴索引。当我们向scene中加入静态精灵时候我们使用Z轴索引。
让我们的弹弓臂位于2块弹弓底部之间看起来不错!
类声明中增加:
- void tick(cocos2d::ccTime dt);
cpp文件增加:
- void HelloWorld::tick(ccTime dt)
- {
- int velocityIterations = 8;
- int positionIterations = 1;
- m_world->Step(dt, velocityIterations, positionIterations);
- //Iterate over the bodies in the physics world
- for (b2Body* b = m_world->GetBodyList(); b; b = b->GetNext())
- {
- if (b->GetUserData() != NULL) {
- //Synchronize the AtlasSprites position and rotation with the corresponding body
- CCSprite* myActor = (CCSprite*)b->GetUserData();
- myActor->setPosition( CCPointMake( b->GetPosition().x * PTM_RATIO, b->GetPosition().y * PTM_RATIO) );
- myActor->setRotation( -1 * CC_RADIANS_TO_DEGREES(b->GetAngle()) );
- }
- }
- }
在init方法尾部加入:
- schedule(schedule_selector(Catapult::tick));
看到没?我们并没有设置精灵的位置,因为tick方法会更正精灵的位置到box2D物体的位置。
接下来我们创建box2d物体作为一个动态物体。userData属性在这里很重要,因为正如我上段提到的,精灵会跟随物体。
另外注意到坐标被设置到在FLOOR_HEIGHT之上。因为我们这里使用的坐标是物体的中心,我们不能用左下角在使用Box2d时候。
接下来就是创建物体物理特性的夹具,一个简单的矩形。
我们设置物体夹具的大小比精灵尺寸小一点,因为精灵尺寸比实际弹弓臂图案尺寸大一点。
在这幅图中,黑色矩形框是精灵尺寸,红色矩形框是夹具尺寸。
运行你会看到机器臂直立着。
旋转关节
我们需要某种约束来限制投射器的转动在一定角度内。借助关节(joints)你可以约束Box2D关联物体运动.
有一种特殊的关节可以完美解决我们的问题——旋转关节(revolute joint)。想象一个钉子将2个物体钉在一个特殊的点,但仍然允许他们转动。
让我们试试吧!回到HelloWorld.h在类中加入属性:
- b2RevoluteJoint *m_armJoint;
回到类实现文件在生成发射器臂之后加入下面的代码:
- b2RevoluteJointDef armJointDef;
- armJointDef.Initialize(m_groundBody, m_armBody, b2Vec2(233.0f/PTM_RATIO, FLOOR_HEIGHT/PTM_RATIO));
- armJointDef.enableMotor = true;
- armJointDef.enableLimit = true;
- armJointDef.motorSpeed = -10; //-1260;
- armJointDef.lowerAngle = CC_DEGREES_TO_RADIANS(9);
- armJointDef.upperAngle = CC_DEGREES_TO_RADIANS(75);
- armJointDef.maxMotorTorque = 700;
- m_armJoint = (b2RevoluteJoint*)m_world->CreateJoint(&armJointDef);
当我们创建关节时你不得不修改2个物体和连接点。你可能会想:“我们不应该把投射器臂连接到投射器底部吗》”。在现实世界中,没错。
但是在Box2D中这可不是必要的。你可以这样做但你不得不再为投射器底部创建另一个物体并增加了模拟的复杂性。
由于投射器底部在何时都是静态的并且在Box2d中枢纽物体(hinge body)不必要在其他的任何物体中,我们可以只使用我们已拥有的大地物体(groundBody)。
角度限制外加马达(motor)然我们的投射器更加像真实世界中的投射器。
你也许会注意到我们在关节上设置一个马达激活,通过设置“enableMotor”,“motorSpeed”,和“maxMotorTorque”。
通过设置马达速度为负,可以使投射器臂持续的顺时针转动。
然而,我们还需要通过设置”enableLimit“,”lowerAngle“,”upperAngle“激活关节。这让关节活动范围角度9到75°。这如我们所想的那样模拟投射器运动。
然后我们为了向后拉动投射器将增加另一个关节。当我们释放这个力后马达会让投射器臂向前运动,更像真实的投射器啦!
马达的速度值是每秒弧度值。没错,不是很直观,我知道。我所做的就是不听修改值直到获得了我想的效果。你可以从小的值开始增加知道你获得了期望的速度。最大马达扭矩(maxMotorTorque)是马达可达的最大扭矩。你可以改变这个值来看看物体的反应。那么你会清楚他的作用。
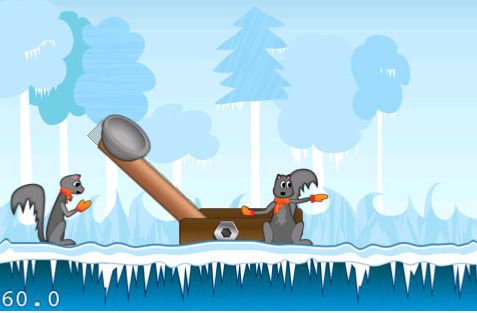
运行app你会看到投射器臂位置现在偏左了:
推动投射器臂吧!
好的,现在是时候移动这个投射器臂啦!为了完成这个任务我们将会使用鼠标关节(mouse joint)。如果你读了雷的弹球游戏教程你就一定已经知道鼠标关节是什么了。
但你没读过,这里是Ray的定义:
“In Box2D, a mouse joint is used to make a body move toward a specified point.”
那就是我们正需要的,所以,然我们先声明一个鼠标关节变量在类定义中:
- private:
- b2MouseJoint *m_mouseJoint;
- public:
- virtual void ccTouchesBegan(cocos2d::CCSet* touches, cocos2d::CCEvent* event);
- virtual void ccTouchesMoved(cocos2d::CCSet* touches, cocos2d::CCEvent* event);
- virtual void ccTouchesEnded(cocos2d::CCSet* touches, cocos2d::CCEvent* event);
接下来在类实现文件增加CCTouchesBegan方法:
- void Catapult::ccTouchesBegan(cocos2d::CCSet* touches, cocos2d::CCEvent* event)
- {
- if (m_mouseJoint != NULL) { return; }
- CCTouch *touch = (CCTouch *)touches->anyObject();
- CCPoint location = touch->locationInView(touch->view());
- location = CCDirector::sharedDirector()->convertToGL(location);
- b2Vec2 locationWorld = b2Vec2(location.x/PTM_RATIO, location.y/PTM_RATIO);
- if (locationWorld.x < m_armBody->GetWorldCenter().x + 150.0/PTM_RATIO)
- {
- b2MouseJointDef md;
- md.bodyA = m_groundBody;
- md.bodyB = m_armBody;
- md.target = locationWorld;
- md.maxForce = 2000;
- m_mouseJoint = (b2MouseJoint *)m_world->CreateJoint(&md);
- }
- }
在init方法中调用tick方法代码前:
- m_mouseJoint = NULL;
又是引用Ray的话:
"When you set up a mouse joint, you have to give it two bodies. The first isn’t used, but
the convention is to use the ground body. The second is the body you want to move”.
当你创建一个鼠标关节,你不得不给他2个物体,第一个实际上并不会被使用,但为了方便就把ground body赋给它吧,第二个是你想移动的物体。
目标就是我们想要用关节来移动物体。我们首先要将触摸点左边转换成cocos2d-x坐标在转换为Box2D坐标。我们只在触摸在投射器臂物体左边时才会创建关节。50像素的偏移让我们可以触摸投射器臂稍微偏右的位置。
最大力参数将决定应用在投射器臂上跟随目标点移动的最大力。就我们而言,我们不得不确保它足够强壮来抵消被应用与旋转关节的马达的扭矩。
In our case we have to make it strong enough to counteract the torque applied by the motor of the revolute joint.
如果你把这个值设置的太小,那么你将不能拉回投射器臂,因为它的扭矩过大。你可以减小我们的转动关节的最大马达扭矩(maxMotorTorque)或增大最大力(maxForce)参数。
为了确定什么值合适我建议你用下鼠标关节的最大力参数和旋转关节的最大马达扭矩参数。减小maxForce到500并试验,你将看到你不能推动投射器臂。那么减小maxMotorTroque到1000你将看到你又可以推动它了。但让我们先完成这些的实现。。
我们现在不得不实现CCTouchesMoved方法,这样鼠标关节会跟随你的触摸:
- void Catapult::ccTouchesMoved(cocos2d::CCSet* touches, cocos2d::CCEvent* event)
- {
- if (m_mouseJoint == NULL) { return; }
- CCTouch *touch = (CCTouch *)touches->anyObject();
- CCPoint location = touch->locationInView(touch->view());
- location = CCDirector::sharedDirector()->convertToGL(location);
- b2Vec2 locationWorld = b2Vec2(location.x/PTM_RATIO, location.y/PTM_RATIO);
- m_mouseJoint->SetTarget(locationWorld);
- }
这个方法足够简单。它只是把屏幕坐标转换为世界坐标,在将鼠标关节的目标点转换为这个点。
为了完成它我们不得不通过销毁鼠标关节释放投射器臂。让我们在CCTouchesEnded方法中实现它:
- void Catapult::ccTouchesEnded(cocos2d::CCSet* touches, cocos2d::CCEvent* event)
- {
- if (m_mouseJoint != NULL)
- {
- m_world->DestroyJoint(m_mouseJoint);
- m_mouseJoint = NULL;
- return;
- }
- }
很简单!只是销毁了关节清理了变量。试试看程序吧!用你的鼠标拉动投射器臂。当你放开左键时你会看到投射器臂很快的恢复到初始位置。
这真是太快了。正如你记得的,控制它的速度的,就是旋转关节(revolute joint)的马达速度(motorSpeed)和最大马达扭矩(maxMotorTorque)。让我们减小马达速度来看看会发生什么。
回到init方法改小值。一个让我的程序工作的不错的值是-10.改变这个值然后你会看到速度是用来让投射器看起来更真实的参数。
- std::vector<b2Body *> m_bullets;
- int m_currentBullet;
- void Catapult::createBullets(int count)
- {
- m_currentBullet = 0;
- float pos = 62.0f;
-
- if (count > 0)
- {
- // delta is the spacing between corns
- // 62 is the position o the screen where we want the corns to start appearing
- // 165 is the position on the screen where we want the corns to stop appearing
- // 30 is the size of the corn
-
- float delta = (count > 1)?((165.0f - 62.0f - 30.0f) / (count - 1)):0.0f;
-
- for (int i=0; i<count; i++, pos += delta)
- {
- // Create the bullet
- CCSprite *sprite = CCSprite::spriteWithFile("acorn.png");
- this->addChild(sprite, 1);
-
- b2BodyDef bulletBodyDef;
- bulletBodyDef.type = b2_dynamicBody;
- bulletBodyDef.bullet = true;
- bulletBodyDef.position.Set(pos/PTM_RATIO,(FLOOR_HEIGHT+15.0f)/PTM_RATIO);
- bulletBodyDef.userData = sprite;
- b2Body *bullet = m_world->CreateBody(&bulletBodyDef);
- bullet->SetActive(false);
-
- b2CircleShape circle;
- circle.m_radius = 15.0/PTM_RATIO;
-
- b2FixtureDef ballShapeDef;
- ballShapeDef.shape = &circle;
- ballShapeDef.density = 0.8f;
- ballShapeDef.restitution = 0.2f;
- ballShapeDef.friction = 0.99f;
- bullet->CreateFixture(&ballShapeDef);
-
- m_bullets.push_back(bullet);
- }
- }
- }
- b2Body *m_bulletBody;
- b2WeldJoint *m_bulletJoint;
- bool Catapult::attachBullet()
- {
- if (m_currentBullet < m_bullets.size())
- {
- m_bulletBody = (b2Body*)m_bullets.at(m_currentBullet++);
- m_bulletBody->SetTransform(b2Vec2(230.0f/PTM_RATIO, (155.0f+FLOOR_HEIGHT)/PTM_RATIO), 0.0f);
- m_bulletBody->SetActive(true);
-
- b2WeldJointDef weldJointDef;
- weldJointDef.Initialize(m_bulletBody, m_armBody, b2Vec2(230.0f/PTM_RATIO,(155.0f+FLOOR_HEIGHT)/PTM_RATIO));
- weldJointDef.collideConnected = false;
-
- m_bulletJoint = (b2WeldJoint*)m_world->CreateJoint(&weldJointDef);
- return true;
- }
-
- return false;
- }
我们首先获得当前子弹的指针(之后我们有一个方法来循环遍历它们)。SetTramsform方法改变了物体中心的位置。坐标就是投射器的尖端坐标。我们接下来激活子弹物体来让box2d开始进行对它的物理模拟。
然后我们创建了一个连接关节(weld joint)。连接关节通过初始化时指定的点来连接2个物体并且不允许在它们之间的连接点向前方的其他移动。
我们设置碰撞连接为假,因为我们不想子弹和投射器臂之间碰撞。
注意,如果还有可用子弹我们返回真。对于之后检查关卡是否因为我们发射完所有子弹而结束很有用。
让我们再创建一个方法在连接子弹后调用初始化方法。
- void Catapult::resetGame( )
- {
- this->createBullets(4);
- this->attachBullet();
- }
现在增加一个函数调用在init方法末尾:(调用tick前)
- CCCallFunc *callSelectorAction = CCCallFunc::actionWithTarget(this, callfunc_selector(HelloWorld::resetGame));
- this->runAction(CCSequence::actions(
- callSelectorAction,
- NULL));
运行程序你会发现有些诡异的事情发生了!
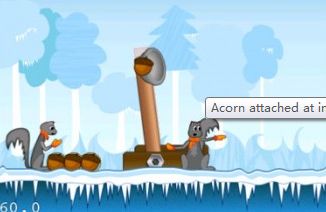
橡子在投射器放弹位置偏左。这是因为我设置橡子的位置在投射器臂顶部偏9度。但在init方法最后投射器仍然是0度,那么子弹实际上粘到了错误的位置。
为了修补这个bug我们只能给引擎些时间来放置投射器臂。让我们来改变调用resetGame方法的时间:
- CCDelayTime *delayAction = CCDelayTime::actionWithDuration(0.2f);
- CCCallFunc *callSelectorAction = CCCallFunc::actionWithTarget(this, callfunc_selector(HelloWorld::resetGame));
- this->runAction(CCSequence::actions(delayAction,
- callSelectorAction,
- NULL));
这样使得调用推迟了半秒。我们之后会有更好的解决方法,但现在就用这个办法。现在你会看到橡子到了正确的位置。
如果我们现在拉动投射器臂并释放,橡子并不会飞出去,因为它仍被焊在投射器上。我们需要释放子弹。那么久销毁关节吧。但何时何处来销毁关节呢?
最佳方法就是在每个模拟步中被调用的tick方法中确认坐标。
首先我们需要一种方法来知道投射器臂是否被释放。在类声明中增加代码:
- bool m_releasingArm;
现在回到CCTouchesEnded方法中在销毁鼠标关节前的条件:
- void Catapult::ccTouchesEnded(cocos2d::CCSet* touches, cocos2d::CCEvent* event)
- {
- if (m_mouseJoint != NULL)
- {
- if (m_armJoint->GetJointAngle() >= CC_DEGREES_TO_RADIANS(5))
- {
- m_releasingArm = true;
- }
- m_world->DestroyJoint(m_mouseJoint);
- m_mouseJoint = NULL;
- return;
- }
- }
在init方法中添加:
- m_releasingArm = false;
这让我们仅在投射器臂被拉的角度大于20度时才设置释放的变量为真。如果我们只是拉动投射器臂一点点,子弹并不会被释放。
增加下面代码在tick方法尾部:
- // Arm is being released
- if (m_releasingArm && m_bulletJoint != NULL)
- {
- // Check if the arm reached the end so we can return the limits
- if (m_armJoint->GetJointAngle() <= CC_DEGREES_TO_RADIANS(10))
- {
- m_releasingArm = false;
- // Destroy joint so the bullet will be free
- m_world->DestroyJoint(m_bulletJoint);
- m_bulletJoint = NULL;
- }
- }
很简单,是吧?我们等到投射器臂几乎回到了初始位置然后我们释放了子弹。
运行工程你将看到子弹飞的很快!
在我看来有点太快了,通过减小旋转关节的最大扭矩来让子弹慢点吧。
回到init方法,将最大扭矩从4800减小到700。你也可以试试其他的值。
- armJointDef.maxMotorTorque = 700;//4800
移动的镜头
要是场景跟随子弹移动,那么我们就能看到全部运动过程。这实在是不错。
我们可以很容易的做到,只要适当的改变场景的坐标属性。增加下面的代码到tick方法末端
- // Bullet is moving.
- if (m_bulletBody && m_bulletJoint == NULL)
- {
- b2Vec2 position = m_bulletBody->GetPosition();
- CCPoint myPosition = this->getPosition();
- CCSize screenSize = CCDirector::sharedDirector()->getWinSize();
- // Move the camera.
- if (position.x > screenSize.width / 2.0f / PTM_RATIO)
- {
- myPosition.x = -MIN(screenSize.width * 2.0f - screenSize.width, position.x * PTM_RATIO - screenSize.width / 2.0f);
- this->setPosition(myPosition);
- }
- }
条件语句判断子弹如果不是粘在投射器上,那它一定在运动。我们获得坐标然后确认它是否在屏幕正中右侧。如果是就改变屏幕坐标来使子弹遗址位于屏幕正中。
注意MIN的负号,我们这样做是让屏幕朝相反方向(左)移动。
现在程序很COOL!
资源已经打包到附件
原文地址:
http://www.raywenderlich.com/4756/how-to-make-a-catapult-shooting-game-with-cocos2d-and-box2d-part-1


