terracotta 3.7 +tomcat 6.x +apache2.x 集群配置
terracotta 是一款集群框架,好处如下
- 简单易用
- 完全支持Java Web Session的标准实现,用户对HttpServletSession接口的访问方式不变
- Terracotta通过对不同应用服务器进行配置,将session数据集群化
- 高效、可靠
- 近乎内存读写的访问速度
- session数据自动持久化
- 性能可线性扩展
- 强大、灵活
- 广泛支持各种应用服务器:WebLogic, WebSphere, Tomcat, JBoss, Jetty, Geronimo等等
- 自动session数据迁移
- 适用于各种大小的session数据
- 集群范围内数据可视以及强大的管理和监控功能
以上优点 copy于老马博客:http://blog.csdn.net/lima01/article/details/5606192
既然它有这么多好处,那咱就配置一个前台用apache处理静态页面,tomcat处理jsp动态页面,然后将session回话状态分离出来用terracotta做session服务器
apache+tomcat我上篇文章已经写了,所以请参考上篇博客,和那篇博客差不多,注意的是要将tomcat里的session复制标签去掉,禁止使用tomcat里面的session复制功能,仅仅配置集群
接下来的需要下载 http://www.terracotta.org/downloads/open-source terracotta-3.7.7.tar.gz 这个是属于linux上的,没有下载到windows的,不过经测试,这个也可以在win7 64位系统上运行
tc-config.xml
<?xml version="1.0" encoding="UTF-8" ?>
<tc:tc-config xmlns:tc="http://www.terracotta.org/config"
  xmlns:xsi="http://www.w3.org/2001/XMLSchema-instance"
  xsi:schemaLocation="http://www.terracotta.org/schema/terracotta-6.xsd">

  <tc-properties>
    <property name="l2.nha.dirtydb.autoDelete" value="true"/>
    <property name="l1.cachemanager.enabled" value="true"/>
    <property name="logging.maxLogFileSize" value="1024"/>
  </tc-properties>


  <system>
    <configuration-model>development</configuration-model>
  </system>


  <servers>

    <server host="127.0.0.1" name="localhost" bind="0.0.0.0">


      <statistics>/opt/terracotta/server-statistics</statistics>
      <dso-port bind="127.0.0.1">9510</dso-port>
      <jmx-port bind="127.0.0.1">9520</jmx-port>
      <l2-group-port bind="127.0.0.1">9530</l2-group-port>
      <authentication/>


      <dso>


        <client-reconnect-window>120</client-reconnect-window>


        <persistence>

          <mode>temporary-swap-only</mode>
        </persistence>


        <garbage-collection>

          <enabled>true</enabled>

          <verbose>false</verbose>

          <interval>3600</interval>
        </garbage-collection>

      </dso>
    </server>

    <mirror-groups>

      <mirror-group group-name="group1">
        <members>
          <member>localhost</member>
        </members>

        <ha>
          <mode>networked-active-passive</mode>
          <networked-active-passive>
            <election-time>5</election-time>
          </networked-active-passive>
        </ha>
       </mirror-group>
    </mirror-groups>
    <ha>
      <mode>networked-active-passive</mode>
      <networked-active-passive>
        <election-time>5</election-time>
      </networked-active-passive>
    </ha>
    <update-check>
      <enabled>true</enabled>
      <period-days>10</period-days>
    </update-check>
  </servers>
  <clients>
    <logs>logs-%i</logs>
  </clients>

</tc:tc-config>
然后在%TERRACOTTER_HOME%\sessions\samples\cart\target\WEB-INF\lib
下将
terracotta-session-1.3.7
terracotta-toolkit-1.6-runtime-5.7.0
复制到tomcat的lib下面
再将tc-config.xml复制到%_HOME%\bin目录下 ,win+R-->cmd-->进入 %TERRACOTTER_HOME%\bin
然后tim-get.bat tc-config.xml
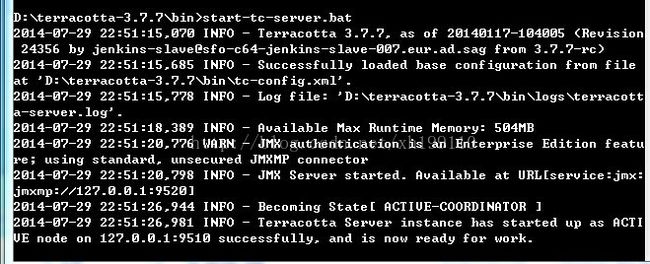
然后stop-tc-server.bat
如果显示如下界面则成功了
然后在需要应用的tomcat的应用下面的META-INF 新建context.xml 并将一下内容复制进去
<?xml version="1.0" encoding="UTF-8"?>
<Context>
<Valve className="org.terracotta.session.TerracottaTomcat60xSessionValve" tcConfigUrl="127.0.0.1:9510" />
</Context>
<Context>
<Valve className="org.terracotta.session.TerracottaTomcat60xSessionValve" tcConfigUrl="127.0.0.1:9510" />
</Context>
我这里的是两个tomcat tomcat1 和tomcat2
然后分别启动两个tomcat
请看图,会提示
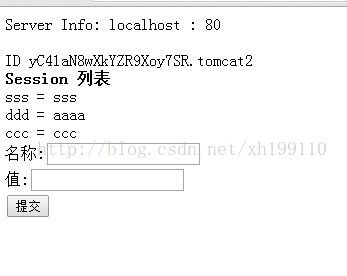
当然服务器也启动成功;可以写个测试页面test.jsp
这个测试页面在上一篇的apache+tomcat有说明
效果图如下:
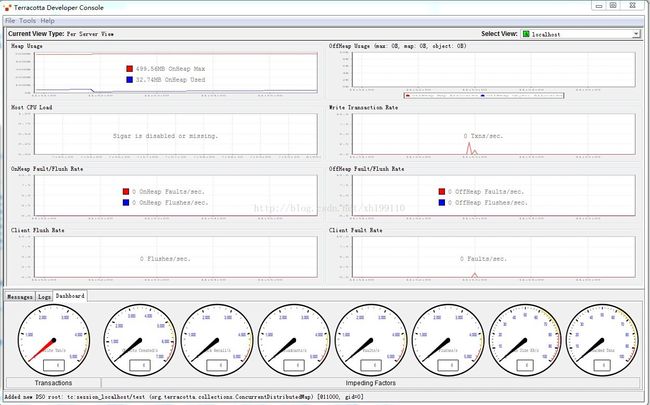
也可以看看terrocottor控制台
至此就配置完成
注意的是Terracotta这里都是单机,并且是开发模式,配置相对简单
这里的apache,tomcat,terracotta都在一台机器上,两个tomcat使用不同端口


