NVIDIA Jetson TK1学习与开发——安装cuda和opencv
1、开箱第一步
进入从命令行界面进入图形界面
cd NVIDIA-INSTALLER
sudo ./installer.sh (只能运行一次)
sudo reboot
重启后进入开机登陆界面,账号和密码均是:ubuntu
2、平台开发的选择
一般来说,对嵌入式的开发有两种选择,原生编译(native compilation)和交叉编译(cross-compilation)。
所谓原生编译,就是在目标板上直接运行自己的代码,以TK1为例,就是说在TK1目标板上编译代码;所谓交叉编译,这也是我们大多数采用的编译方法,简单来说就是在台式机上编译,然后挂载在目标板上运行的方式。
对于开发TK1,推荐使用原生编译。
3、下载并安装CUDA包
下载安装包:https://developer.nvidia.com/cuda-toolkit-60
(注意:下载的版本要与TK1的CUDA Driver版本一致,否则后面的samples无法执行。)
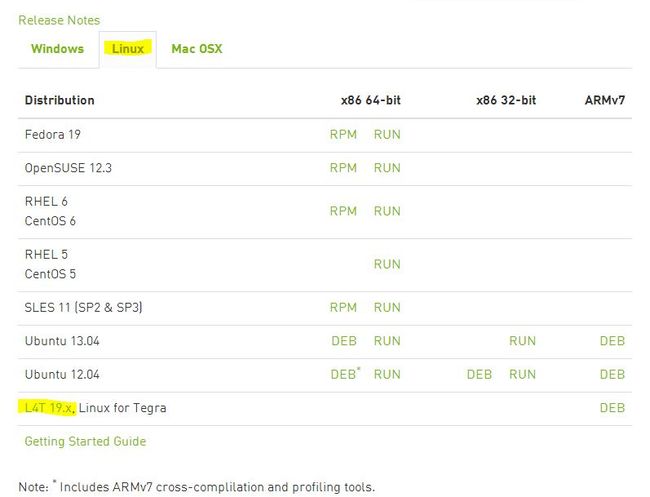
下载后如下图所示:
安装方法:
- sudo dpkg -i xxx.deb
4、更新apt-get
- sudo apt-get update
5、安装samples和toolkit
- sudo apt-get install cuda-samples-6-0
- sudo apt-get install cuda-toolkit-6-0
6、设置当前用户下可以访问GPU
- sudo usermod -a -G video $USER
7、修改环境变量
- cd
- vim .bashrc
在最后一行加上:
- export PATH=/usr/local/cuda-6.0/bin:$PATH
- export LD_LIBRARY_PATH=/usr/local/cuda-6.0/lib:$LD_LIBRARY_PATH
最后不要忘记执行下面的命令:
![]()
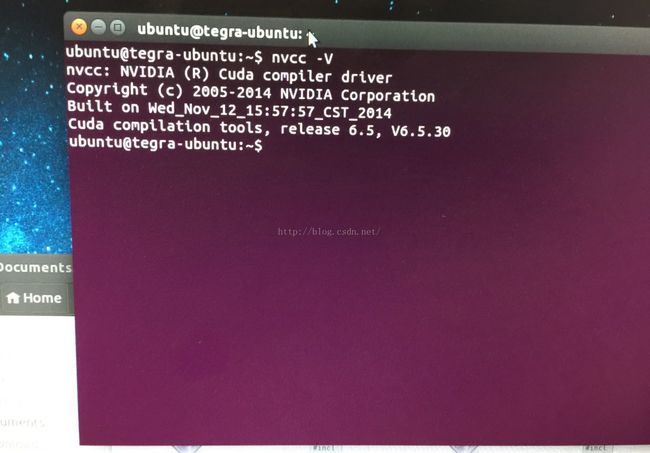
8、查看编译环境是否安装成功
- cd /usr/local/cuda
- nvcc -V
从图中可以看到已经成功安装了CUDA6.0了。![]()
9、编译与运行例程
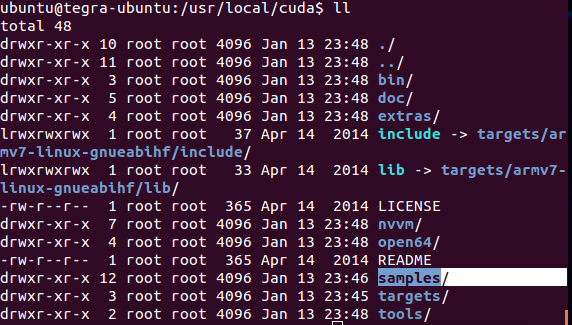
查看当前目录中是否有samples:
(注意是字母l。)
复制samples:
然后,
- cd
- ls
可以看到NVIDIA_CUDA-6.0_Samples。
最后,
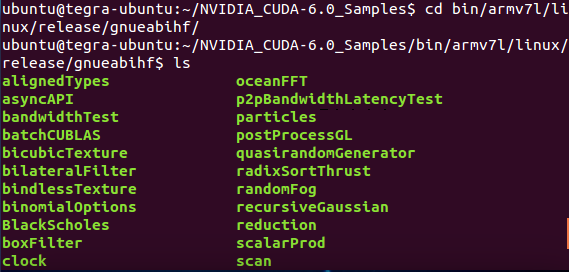
make完成后,可以在...NVIDIA_CUDA-6.0_Samples/bin/armv7/linux/release/gnueabihf/下可以看到编译成功的可执行文件。
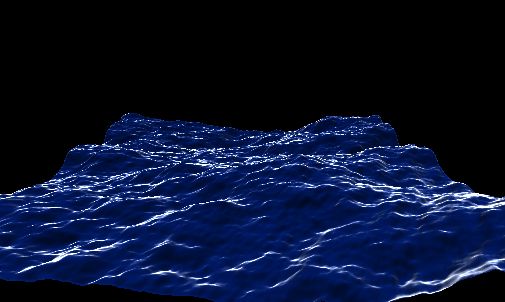
10、示例演示
Tegra 平台为OpenCV提供了GPU加速的功能。除了OpenCV中的GPU模块外,例如核心的Core模块等一系列OpenCV中的常用模块都可以使用GPU加速。但是GPU加速的前提是你已经安装好Cuda并且用nvcc device 编译OpenCV。
在Jetson配置OpenCV和Cuda有两种方法,一种是使用官方的Jetpack安装方法,可以安装最新的Tegra4OpenCV。这需要你有一台Ubuntu 14.04 LST X64系统的电脑,并使得Jetson Tk1进入Recovery模式,此方法在后续教程中再涉及。
最新Jetpcak安装包下载地址:链接:http://pan.baidu.com/s/1c2x8tFi 密码:1mi9
更新时间2016/6/16
第二种方式是下载好各个部分的安装包下载好以后直接在Jeston tk1上安装,此种方法的好处是不用使用Ubuntu X64的系统,可以减少使用Windows用户的使用负担。但此方法仅限于教程版本安装,每个版本的安装方法不同,不可兼容,阅读是请务必注意Cuda, Tegra4OpenCV, OpenCV相对应的版本号。安装步骤也请严格按照Cuda->Tegra4OpenCV->OpenCV的顺序,切忌颠倒。
1. 安装Cuda
首先确认你的Tk1的系统是R21.4,否则你可能需要刷机或是安装低版本的Cuda。确认方法:
0.1 进入超级用户模式
<code class="hljs bash has-numbering"><span class="hljs-built_in">sudo</span> <span class="hljs-operator">-s</span></code>
0.2 查看版本号
<code class="hljs perl has-numbering">uname -<span class="hljs-keyword">m</span> && cat /etc/<span class="hljs-variable">*release</span></code>
-
下载 cuda-repo-l4t-r21.3-6-5-prod_6.5-50_armhf.deb 安装包(注意版本号!!)
下载链接:http://pan.baidu.com/s/1qXVzAR6 密码:r17y
(r19.8版本以后,Nvidia官网不再提供单独的cuda,Tegra4opencv安装包,此安装包为JetPackTK1-1.2-cuda6.5-linux-x64.run中析出的版本,以方便大家安装) -
安装Cuda
cd 到你保存安装包的路径下
<code class="hljs lasso has-numbering">dpkg <span class="hljs-attribute">-i</span> cuda<span class="hljs-attribute">-repo</span><span class="hljs-attribute">-l4t</span><span class="hljs-attribute">-r21</span><span class="hljs-number">.3</span><span class="hljs-subst">-</span><span class="hljs-number">6</span><span class="hljs-subst">-</span><span class="hljs-number">5</span><span class="hljs-attribute">-local_6</span><span class="hljs-number">.5</span><span class="hljs-subst">-</span><span class="hljs-number">50</span>_armhf<span class="hljs-built_in">.</span>deb
sudo apt<span class="hljs-attribute">-get</span> update
sudo apt<span class="hljs-attribute">-get</span> install cuda<span class="hljs-attribute">-toolkit</span><span class="hljs-subst">-</span><span class="hljs-number">6</span><span class="hljs-subst">-</span><span class="hljs-number">5</span></code>
可能遇到的问题(持续更新中)
- 没有启用Universe的源,会提示无cuda-toolket-6-5 解决方法:sudo apt-add-repository universe
- 使用了非官方的Ubuntu source,有些国内的服务器虽然速度快,但是基本不更新,所有建议不要修改Source.list里的内容
- 没有更新源:sudo apt-get update
3.添加用户组
<code class="hljs bash has-numbering"><span class="hljs-built_in">sudo</span> usermod <span class="hljs-operator">-a</span> -G video <span class="hljs-variable">$USER</span></code>
4.添加环境变量
<code class="hljs avrasm has-numbering">gedit ~/<span class="hljs-preprocessor">.bashrc</span></code>
在记事本的最后添加:
<code class="hljs ruby has-numbering"><span class="hljs-comment"># Add CUDA bin & library paths:</span>
export <span class="hljs-constant">PATH</span>=<span class="hljs-regexp">/usr/local</span><span class="hljs-regexp">/cuda/bin</span><span class="hljs-symbol">:</span><span class="hljs-variable">$PATH</span>
export <span class="hljs-constant">LD_LIBRARY_PATH</span>=<span class="hljs-regexp">/usr/local</span><span class="hljs-regexp">/cuda/lib</span><span class="hljs-symbol">:</span><span class="hljs-variable">$LD_LIBRARY_PATH</span></code>
点击保存退出(这一步一定要在超级用户下完成)
. source ~/.bashrc
5.检查CUDA是否安装完成
<code class="hljs lasso has-numbering">nvcc <span class="hljs-attribute">-V</span></code>
如果出现一下信息表示已经安装完成:
<code class="hljs css has-numbering"><span class="hljs-tag">nvcc</span>: <span class="hljs-tag">NVIDIA</span> (<span class="hljs-tag">R</span>) <span class="hljs-tag">Cuda</span> <span class="hljs-tag">compiler</span> <span class="hljs-tag">driver</span>
<span class="hljs-tag">Copyright</span> (<span class="hljs-tag">c</span>) 2005<span class="hljs-tag">-2014</span> <span class="hljs-tag">NVIDIA</span> <span class="hljs-tag">Corporation</span>
<span class="hljs-tag">Built</span> <span class="hljs-tag">on</span> <span class="hljs-tag">Tue_Feb_17_22</span><span class="hljs-pseudo">:53</span><span class="hljs-pseudo">:16_CST_2015</span>
<span class="hljs-tag">Cuda</span> <span class="hljs-tag">compilation</span> <span class="hljs-tag">tools</span>, <span class="hljs-tag">release</span> 6<span class="hljs-class">.5</span>, <span class="hljs-tag">V6</span><span class="hljs-class">.5</span><span class="hljs-class">.45</span>
<span class="hljs-tag">this</span> <span class="hljs-tag">message</span> <span class="hljs-tag">indicates</span> <span class="hljs-tag">you</span> <span class="hljs-tag">have</span> <span class="hljs-tag">successfully</span> <span class="hljs-tag">installed</span> <span class="hljs-tag">Cuda</span></code>
第四行为安装的CUDA版本号。
2. 安装OpenCV
安装好了CUDA之后我们就可以安装OpenCV了,安装OpenCV主要分为安装Tegra4OpenCV和OpenCV源码两个部分。
1.安装一些必要的组件
<code class="hljs lasso has-numbering"><span class="hljs-number">1.1</span> 基本的g<span class="hljs-subst">++</span>编译器和cmake
    sudo apt<span class="hljs-attribute">-get</span> install build<span class="hljs-attribute">-essential</span> make cmake cmake<span class="hljs-attribute">-curses</span><span class="hljs-attribute">-gui</span> g<span class="hljs-subst">++</span>
<span class="hljs-number">1.2</span> 输入输出库
    sudo apt<span class="hljs-attribute">-get</span> install libavformat<span class="hljs-attribute">-dev</span> libavutil<span class="hljs-attribute">-dev</span> libswscale<span class="hljs-attribute">-dev</span>
<span class="hljs-number">1.3</span> Video4Linux摄像头模块
    sudo apt<span class="hljs-attribute">-get</span> install libv4l<span class="hljs-attribute">-dev</span>
<span class="hljs-number">1.4</span> Eigen3模块
    sudo apt<span class="hljs-attribute">-get</span> install libeigen3<span class="hljs-attribute">-dev</span>
<span class="hljs-number">1.5</span> OpenGL开发模块(并不是OpenGL全体)
    sudo apt<span class="hljs-attribute">-get</span> install libglew1<span class="hljs-number">.6</span><span class="hljs-attribute">-dev</span>
<span class="hljs-number">1.6</span> GTK库函数
    sudo apt<span class="hljs-attribute">-get</span> install libgtk2<span class="hljs-number">.0</span><span class="hljs-attribute">-dev</span></code>
2.下载 libopencv4tegra-repo_l4t-r21_2.4.10.1_armhf.deb**(注意版本!!)**
下载地址:链接:http://pan.baidu.com/s/1miKY9nE 密码:ol4n
3.启用Universe源
<code class="hljs lasso has-numbering">sudo apt<span class="hljs-attribute">-add</span><span class="hljs-attribute">-repository</span> universe
sudo apt<span class="hljs-attribute">-get</span> update</code>
4.安装Tegra4OpenCV
<code class="hljs lasso has-numbering">sudo dpkg <span class="hljs-attribute">-i</span> libopencv4tegra<span class="hljs-attribute">-repo_l4t</span><span class="hljs-attribute">-r21_2</span><span class="hljs-number">.4</span><span class="hljs-number">.10</span><span class="hljs-number">.1</span>_armhf<span class="hljs-built_in">.</span>deb
sudo apt<span class="hljs-attribute">-get</span> update
sudo apt<span class="hljs-attribute">-get</span> install libopencv4tegra libopencv4tegra<span class="hljs-attribute">-dev</span></code>
注意:此方法不适用于最新的libopencv4tegra-repo_2.4.12.3_armhf_l4t-r21.deb安装包,如果希望安装最新版本请使用Jetpack安装。
5.下载Opencv Linux 2.4.10
注意:此处如果用2.4.9编译会在83%出现编译错误,这是2.4.9自身的一个BUG,2.4.10已经修复。
下载链接:http://pan.baidu.com/s/1o8myB4Q 密码:glkr
读者也可自行前往OpenCV.org下载源码。
6.编译OpenCV
cd 到含有OpenCV的文件夹下:
<code class="hljs java has-numbering">unzip opencv-<span class="hljs-number">2.4</span><span class="hljs-number">.10</span>.zip
cd  <span class="hljs-javadoc">/**YOUR_PATH_OPENCV**/</span>opencv-<span class="hljs-number">2.4</span><span class="hljs-number">.10</span>/
mkdir build
cd build
cmake -DWITH_CUDA=ON -DCUDA_ARCH_BIN=<span class="hljs-string">"3.2"</span> -DCUDA_ARCH_PTX=<span class="hljs-string">""</span> -DBUILD_TESTS=OFF -DBUILD_PERF_TESTS=OFF ..</code>
这一步通过以后会出现config OK 的标志,表示检查已经成功,可以编译了。
最后一句中 .. 的意思表示你的MakeFile文件在上一层文件夹,如果系统提示找不到MakeFile文件的话可以将它改为包含OpenCV Makefile的路径。
7.编译OpenCV
<code class="hljs bash has-numbering"><span class="hljs-built_in">sudo</span> make -j4 install </code>
出现上图表示已经开始编译,编译过程大约需要20分钟。
可以看到OpenCV的GPU模块使用NVCC进行编译
![]()
core模块也使用NVCC进行了编译。
如果最后没有出现错误(如上图)表示OpenCV已经安装成功。
8.配置环境变量
<code class="hljs bash has-numbering"><span class="hljs-built_in">echo</span> <span class="hljs-string">"# Use OpenCV and other custom-built libraries."</span> >> ~/.bashrc
<span class="hljs-built_in">echo</span> <span class="hljs-string">"export LD_LIBRARY_PATH=<span class="hljs-variable">$LD_LIBRARY_PATH</span>:/usr/local/lib/"</span> >> ~/.bashrc
<span class="hljs-built_in">source</span> ~/.bashrc</code>
这样OpenCV的配置就大功告成了,接下来我们就可以在Jeston tk1上使用基于GPU加速的OpenCV函数库了!
(经昨夜隔壁实验室宝宝的测试,此方法亦可用在大疆妙算Mainfold 图像处理单元上)
2.1安装前的准备
由于之前装的是版本21的系统,所以要装适用于这个系统的包。
下载适用于tk1的CUDA包:cuda-repo-l4t-r21.2-6-5-prod_6.5-34_armhf.deb
地址:http://developer.download.nvidia.com/compute/cuda/6_5/rel/installers/cuda-repo-l4t-r21.2-6-5-prod_6.5-34_armhf.deb
下载适用于tk1的opencv包:libopencv4tegra-repo_l4t-r21_2.4.10.1_armhf.deb
地址:http://developer.download.nvidia.com/embedded/OpenCV/L4T_21.2/libopencv4tegra-repo_l4t-r21_2.4.10.1_armhf.deb
2.2开始安装CUDA
把下载好的cuda-repo-l4t-r21.2-6-5-prod_6.5-34_armhf.deb放到开发板的某一个文件夹里,然后打开terminal,cd进入这个文件夹,在这个文件夹里输入下列指令:
- sudo dpkg -i cuda-repo-<distro>_<cuda_version>_amd64.deb
- sudo apt-get update
- sudo apt-get install cuda-toolkit-6-5
- sudo usermod -a -G video $USER
- echo"# Add CUDA bin & library paths:" >> ~/.bashrc
- echo"export PATH=/usr/local/cuda-6.5/bin:$PATH">> ~/.bashrc
- echo"exportLD_LIBRARY_PATH=/usr/local/cuda-6.5/lib:$LD_LIBRARY_PATH">>~/.bashrc
- source~/.bashrc
就说明你把CUDA装上了,接着用reboot重启一下电脑
- sudo reboot
CUDA已经安装完成。
如果你想接着把devicequery给跑出来,运行下列代码:
- ubuntu@tegra-ubuntu:/usr/local$cd /usr/local/cuda
- ubuntu@tegra-ubuntu:/usr/local/cuda$sudo chmod o+w samples/ -R
- ubuntu@tegra-ubuntu:/usr/local/cuda$cd samples/1_Utilities/deviceQuery
- ubuntu@tegra-ubuntu:/usr/local/cuda/samples/1_Utilities/deviceQuery$make
- ubuntu@tegra-ubuntu:/usr/local/cuda/samples/1_Utilities/deviceQuery$../../bin/armv7l/linux/release/gnueabihf/deviceQueryarmv7l
2.3开始安装opencv4tegra
把下载好的libopencv4tegra-repo_l4t-r21_2.4.10.1_armhf.deb 拷贝到tk1的任意文件夹,cd进入这个文件夹,ls发现有这个文件之后,运行下列代码开始安装
- sudo dpkg -i libopencv4tegra-repo_l4t-r21_2.4.10.1_armhf.deb
- sudo apt-get update
- sudo apt-get install libopencv4tegra libopencv4tegra-dev
如果没出现error的话,就安装成功了。
Jetson/Installing CUDA
You have two options for developing CUDA applications for Jetson TK1:
- native compilation (compiling code onboard the Jetson TK1)
- cross-compilation (compiling code on an x86 desktop in a special way so it can execute on the Jetson TK1 target device).
Native compilation is generally the easiest option, but takes longer to compile, whereas cross-compilation is typically more complex to configure and debug, but for large projects it will be noticeably faster at compiling. The CUDA Toolkit currently only supports cross-compilation from an Ubuntu 12.04 or 14.04 Linux desktop. In comparison, native compilation happens onboard the Jetson device and thus is the same no matter which OS or desktop you have.
Installing the CUDA Toolkit onto your device for native CUDA development
Download the .deb file for the CUDA Toolkit for L4T either using a web browser on the device, or download on your PC then copy the file to your device using a USB flash stick or across the network. (Make sure you download the Toolkit for L4T and not the Toolkit for Ubuntu since that is for cross-compilation instead of native compilation). A more direct link: CUDA 6.5 Toolkit for L4T Rel 21.2.
On the device, install the .deb file and the CUDA Toolkit. eg:
cd ~/Downloads
# Install the CUDA repo metadata that you downloaded manually for L4T
sudo dpkg -i cuda-repo-l4t-r19.2_6.0-42_armhf.deb
# Download & install the actual CUDA Toolkit including the OpenGL toolkit from NVIDIA. (It only downloads around 15MB)
sudo apt-get update
# Install "cuda-toolkit-6-0" if you downloaded CUDA 6.0, or "cuda-toolkit-6-5" if you downloaded CUDA 6.5, etc.
sudo apt-get install cuda-toolkit-6-5
# Add yourself to the "video" group to allow access to the GPU
sudo usermod -a -G video $USER
Add the 32-bit CUDA paths to your .bashrc login script, and start using it in your current console:
echo "# Add CUDA bin & library paths:" >> ~/.bashrc
echo "export PATH=/usr/local/cuda/bin:$PATH" >> ~/.bashrc
echo "export LD_LIBRARY_PATH=/usr/local/cuda/lib:$LD_LIBRARY_PATH" >> ~/.bashrc
source ~/.bashrc
Verify that the CUDA Toolkit is installed on your device:
nvcc -V
(note that the above flag is a capital "V" not lower-case "v").
Installing & running the CUDA samples (optional)
If you think you will write your own CUDA code or you want to see what CUDA can do, then follow this section to build & run all of the CUDA samples.
Install writeable copies of the CUDA samples to your device's home directory (it will create a "NVIDIA_CUDA-6.5_Samples" folder):
cuda-install-samples-6.5.sh /home/ubuntu
Build the CUDA samples (takes around 15 minutes on Jetson TK1):
cd ~/NVIDIA_CUDA-6.5_Samples
make
Run some CUDA samples:
1_Utilities/deviceQuery/deviceQuery
1_Utilities/bandwidthTest/bandwidthTest
cd 0_Simple/matrixMul
./matrixMulCUBLAS
cd ../..
cd 0_Simple/simpleTexture
./simpleTexture
cd ../..
cd 3_Imaging/convolutionSeparable
./convolutionSeparable
cd ../..
cd 3_Imaging/convolutionTexture
./convolutionTexture
cd ../..
Note: Many of the CUDA samples use OpenGL GLX and open graphical windows. If you are running these programs through an SSH remote terminal, you can remotely display the windows on your desktop by typing "export DISPLAY=:0" and then executing the program. (This will only work if you are using a Linux/Unix machine or you run an X server such as the free "Xming" for Windows). eg:
export DISPLAY=:0
cd ~/NVIDIA_CUDA-6.5_Samples/2_Graphics/simpleGL
./simpleGL
cd ~/NVIDIA_CUDA-6.5_Samples/3_Imaging/bicubicTexture
./bicubicTexture
cd ~/NVIDIA_CUDA-6.5_Samples/3_Imaging/bilateralFilter
./bilateralFilter
Note: the Optical Flow sample (HSOpticalFlow) and 3D stereo sample (stereoDisparity) take rouglhy 1 minute each to execute since they compare results with CPU code.
Some of the CUDA samples use other libraries such as OpenMP or MPI or OpenGL.
If you want to compile those samples then you'll need to install these toolkits like this:
(to be added)
Jetson/Installing OpenCV
Contents
- 1 Installing OpenCV (including the GPU module) on Jetson TK1
- 2 Prebuilt OpenCV library versus Building the OpenCV library from source
- 3 Native vs Cross-development
- 4 Natively compiling the OpenCV library from source onboard the device
- 5 Testing OpenCV
- 6 Getting to know OpenCV
Installing OpenCV (including the GPU module) on Jetson TK1
First you should download & install the CUDA Toolkit by following the Installing CUDA instructions, since it is needed by OpenCV.
And if you haven't already added the "universe" repository to your system, do it now since you will need it for some OpenCV dependencies:
sudo apt-add-repository universe
sudo apt-get update
Once you have installed the CUDA Toolkit, you can begin to install OpenCV. You have several options (deciding between prebuilt library vs building the library from source, and then deciding whether to compile your code onboard the Jetson TK1 or cross-compile it from your desktop).
Prebuilt OpenCV library versus Building the OpenCV library from source
There are two compatible implementations of OpenCV available for Jetson TK1, but only the first option gives you the CPU optimized library, so you are highly recommended to use this first option:
Option 1) Prebuilt OpenCV4Tegra library for L4T:
OpenCV4Tegra is a CPU & GPU optimized version of OpenCV, available as a prebuilt library in JetPack or as separate .deb packages (available for L4T rel-19 and L4T rel-21).
eg: For OpenCV v2.4.10.1, run the following commands to manually install the prebuilt packages:
Under L4T 19.x:
sudo dpkg -i libopencv4tegra_2.4.10.1_armhf.deb
sudo dpkg -i libopencv4tegra-dev_2.4.10.1_armhf.deb
Under L4T 21.x:
sudo dpkg -i libopencv4tegra-repo_l4t-r21_2.4.10.1_armhf.deb
sudo apt-get update
sudo apt-get install libopencv4tegra libopencv4tegra-dev
Continue to the "Testing OpenCV" section lower in this page to ensure OpenCV4Tegra works on your device.
Option 2) Building the public OpenCV library from source:
If you want the latest OpenCV code, or you want to customize the OpenCV library, and don't want NVIDIA's CPU & multi-core optimizations of OpenCV4Tegra, then follow the instructions below to compile the OpenCV library from source code. Note that you won't obtain the full performance of OpenCV4Tegra.
Note about SIFT/SURF in the nonfree module: OpenCV4Tegra doesn't include the opencv_nonfree package (containing SIFT & SURF feature detectors) since those algorithms are patented by other companies and therefore anyone using opencv_nonfree is at risk of liability.
If you need something from the nonfree module, you have 2 options:
- Analyze the public OpenCV source code then copy/paste the parts of the nonfree module that you want (eg: SURF feature detector) from OpenCV into your own project. You will have the CPU optimizations of OpenCV4Tegra for most of your code and will have the GPU module and will have the non-optimized patented code that you need from the nonfree package such as SURF. So this option gives full performance (for everything except the nonfree code) but is tedious.
- Ignore OpenCV4Tegra, and instead, download & build public OpenCV (by following the instructions below for natively compiling the OpenCV library from source). You will still have the GPU module but not any CPU optimizations, but you won't need to spend time ripping out parts of the OpenCV non-free module code. So this option is easiest but produces slower code if you are running most of your code on CPU.
Native vs Cross-development
Just like with the CUDA development guide, you have two options for developing OpenCV applications for Jetson TK1:
- native compilation (compiling code onboard the Jetson TK1)
- cross-compilation (compiling code on an x86 desktop in a special way so it can execute on the Jetson TK1 target device).
Native compilation is generally the easiest option, but takes longer to compile, whereas cross-compilation is typically more complex to configure and debug, but for large projects it will be noticeably faster at compiling.
Natively compiling the OpenCV library from source onboard the device
Note: Compiling OpenCV from source will not give you NVIDIA's CPU optimizations that are only available in the closed-source prebuilt OpenCV4Tegra packages.
If you haven't added the "universal" repository to Ubuntu, then do it now:
sudo add-apt-repository universe
sudo apt-get update
Now you need to install many libraries:
# Some general development libraries
sudo apt-get -y install build-essential make cmake cmake-curses-gui g++
# libav video input/output development libraries
sudo apt-get -y install libavformat-dev libavutil-dev libswscale-dev
# Video4Linux camera development libraries
sudo apt-get -y install libv4l-dev
# Eigen3 math development libraries
sudo apt-get -y install libeigen3-dev
# OpenGL development libraries (to allow creating graphical windows)
sudo apt-get -y install libglew1.6-dev
# GTK development libraries (to allow creating graphical windows)
sudo apt-get -y install libgtk2.0-dev
Download the source code of OpenCV for Linux onto the device. eg: Open a web-browser to "www.opencv.org" & click on "OpenCV for Linux/Mac", or from the command-line you can run this on the device:
wget http://downloads.sourceforge.net/project/opencvlibrary/opencv-unix/2.4.9/opencv-2.4.9.zip
Unzip the OpenCV source code:
cd Downloads
unzip opencv-2.4.9.zip
mv opencv-2.4.9 ~
Configure OpenCV using CMake:
cd ~/opencv-2.4.9
mkdir build
cd build
cmake -DWITH_CUDA=ON -DCUDA_ARCH_BIN="3.2" -DCUDA_ARCH_PTX="" -DBUILD_TESTS=OFF -DBUILD_PERF_TESTS=OFF ..
If you want to customize any more of the build settings such as whether to support Firewire cameras or Qt GUI, it is easiest to use the curses interactive version of CMake from here on:
ccmake ..
(Change any settings you want, then click Configure and Generate).
Now you should be ready to build OpenCV and then install it. Unfortunately, OpenCV is currently experiencing a problem with CMake where installing the built libraries (that normally takes a few seconds) re-compiles the whole OpenCV (that normally takes close to an hour). So to save time, instead of running "make -j4 ; make install", we will build & install OpenCV using a single command.
To build & install the OpenCV library using all 4 Tegra CPU cores (takes around 40 minutes), including copying the OpenCV library to "/usr/local/include" and "/usr/local/lib":
sudo make -j4 install
Finally, make sure your system searches the "/usr/local/lib" folder for libraries:
echo "# Use OpenCV and other custom-built libraries." >> ~/.bashrc
echo "export LD_LIBRARY_PATH=$LD_LIBRARY_PATH:/usr/local/lib/" >> ~/.bashrc
source ~/.bashrc
Testing OpenCV
Compile & run a few of the OpenCV sample programs to make sure OpenCV is working. To get the OpenCV sample codes, you can download the full OpenCV source code, or just download each sample individually from the CPP folder and the GPU folder.For simple programs you can just link to a few OpenCV libs, but for other programs you might as well link to all the OpenCV libs:
# Make sure we have installed a C++ compiler.
sudo apt-get install build-essential g++
# Test a simple OpenCV program. Creates a graphical window, hence you should plug a HDMI monitor in or use a remote viewer such as X Tunneling or VNC or TeamViewer on your desktop.
cd ~/opencv-2.4.9/samples/cpp
g++ edge.cpp -lopencv_core -lopencv_imgproc -lopencv_highgui -o edge
(Or for OpenCV 3.0: g++ edge.cpp -lopencv_core -lopencv_imgproc -lopencv_highgui -lopencv_imgcodecs -o edge)
./edge
# If you have a USB webcam plugged in to your board, then test one of the live camera programs and linking to every OpenCV module.
g++ laplace.cpp -lopencv_core -lopencv_imgproc -lopencv_highgui -lopencv_calib3d -lopencv_contrib -lopencv_features2d -lopencv_flann -lopencv_gpu -lopencv_legacy -lopencv_ml -lopencv_objdetect -lopencv_photo -lopencv_stitching -lopencv_superres -lopencv_video -lopencv_videostab -o laplace
(Or for OpenCV 3.0 with full GPU libs: g++ laplace.cpp -lopencv_adas -lopencv_bgsegm -lopencv_bioinspired -lopencv_calib3d -lopencv_ccalib -lopencv_core -lopencv_datasets -lopencv_face -lopencv_features2d -lopencv_flann -lopencv_highgui -lopencv_imgcodecs -lopencv_imgproc -lopencv_latentsvm -lopencv_line_descriptor -lopencv_ml -lopencv_objdetect -lopencv_optflow -lopencv_photo -lopencv_reg -lopencv_rgbd -lopencv_saliency -lopencv_shape -lopencv_stitching -lopencv_superres -lopencv_surface_matching -lopencv_text -lopencv_tracking -lopencv_videoio -lopencv_video -lopencv_videostab -lopencv_xfeatures2d -lopencv_ximgproc -lopencv_xobjdetect -lopencv_xphoto -o laplace)
(Or for regular OpenCV 3.0: g++ laplace.cpp -lopencv_calib3d -lopencv_core -lopencv_features2d -lopencv_flann -lopencv_highgui -lopencv_imgcodecs -lopencv_imgproc -lopencv_ml -lopencv_objdetect -lopencv_photo -lopencv_shape -lopencv_stitching -lopencv_superres -lopencv_videoio -lopencv_video -lopencv_videostab -o laplace)
./laplace
# Test a GPU accelerated OpenCV sample.
cd ../gpu
g++ houghlines.cpp -lopencv_core -lopencv_imgproc -lopencv_highgui -lopencv_calib3d -lopencv_contrib -lopencv_features2d -lopencv_flann -lopencv_gpu -lopencv_legacy -lopencv_ml -lopencv_objdetect -lopencv_photo -lopencv_stitching -lopencv_superres -lopencv_video -lopencv_videostab -o houghlines
./houghlines ../cpp/logo_in_clutter.png
If the houghlines GPU sample program worked then you have successfully installed OpenCV and its GPU module!
Getting to know OpenCV
Now you can start building your own projects using OpenCV on CPU and GPU, such as by following the Using OpenCV with gcc and CMake introduction tutorial then following many of the official OpenCV Tutorials, playing with the sample GPU programs in the samples/gpu folder of OpenCV and the many sample CPU programs in the samples/cpp folder. To get offline documentation and tutorials of OpenCV, the easiest way is to download the OpenCV Reference Manual PDF file, or if you want offline HTML docs then try building it:
sudo apt-get install python sphinx-common python-sphinx texlive-binaries
make html_docs
Then open the "doc/_html/index.html" page.
You can learn more about NVIDIA's Tegra hardware acceleration of OpenCV on the OpenCV Performance page, including a long list showing how much electrical power is used by Jetson TK1 for various OpenCV & computer vision sample programs.
