TensorFlow保存和载入模型方法
保存和载入模型方法
保存模型
首先建立一个tf.train.Saver,然后使用save方法保存会话sess即可。
#之前为构建模型graph的操作
saver = tf.train.Saver()
with tf.Session as sess:
    #进行训练,训练完毕后保存会话状态
    saver.save(sess, "save_path/file_name")
    #filename如果不存在则自动创建
载入模型
新创建一个session,直接调用saver的restore函数,即可在指定路径下找到模型文件,并覆盖到相关参数中。 拿上次的MNIST手写数字识别代码演示
from tensorflow.examples.tutorials.mnist import input_data
import tensorflow as tf

def weight_variable(shape):
    inite = tf.truncated_normal(shape=shape, stddev=0.1)
    return tf.Variable(inite)
def bias_variable(shape):
    inite = tf.constant(0.1, shape=shape)
    return tf.Variable(inite)
def conv2d(x, W):
    return tf.nn.conv2d(x, W, strides=[1,1,1,1], padding="SAME")
def max_pool_2x2(x):
    return tf.nn.max_pool(x, ksize=[1,2,2,1], strides=[1,2,2,1], padding='SAME')

mnist = input_data.read_data_sets("MNIST_data/", one_hot=True)
x = tf.placeholder(tf.float32, [None, 784])
y_ = tf.placeholder(tf.float32, [None, 10])
keep_prob = tf.placeholder(tf.float32)
x_image = tf.reshape(x, [-1, 28, 28, 1])

W_conv1 = weight_variable([5,5,1,32])
b_conv1 = bias_variable([32])
h_conv1 = tf.nn.relu(conv2d(x_image, W_conv1) + b_conv1)
h_pool1 = max_pool_2x2(h_conv1)

W_conv2 = weight_variable([5,5,32,64])
b_conv2 = bias_variable([64])
h_conv2 = tf.nn.relu(conv2d(h_pool1, W_conv2) + b_conv2)
h_pool2 = max_pool_2x2(h_conv2)

W_fc1 = weight_variable([7*7*64, 1024])
b_fc1 = bias_variable([1024])
h_pool2_flat = tf.reshape(h_pool2, [-1, 7*7*64])
h_fc1 = tf.nn.relu(tf.matmul(h_pool2_flat, W_fc1) + b_fc1)
h_fc1_drop = tf.nn.dropout(h_fc1, keep_prob=keep_prob)

W_fc2 = weight_variable([1024,10])
b_fc2 = bias_variable([10])
y_conv = tf.matmul(h_fc1_drop, W_fc2) + b_fc2

cross_entropy = tf.reduce_mean(tf.nn.softmax_cross_entropy_with_logits(labels=y_, logits=y_conv))
train_step = tf.train.AdamOptimizer(1e-4).minimize(cross_entropy)#1e-4即为0.0001

correct_prediction = tf.equal(tf.argmax(y_conv, 1), tf.argmax(y_, 1))
accuracy = tf.reduce_mean(tf.cast(correct_prediction, tf.float32))

saver = tf.train.Saver()

with tf.Session() as sess:
    saver.restore(sess, "log/mnist.cpkt")
    print("test accuracy %g" % (sess.run(accuracy, feed_dict={x:mnist.test.images, y_:mnist.test.labels, keep_prob:1.0})))
分析模型内容
打印模型内容
from tensorflow.python.tools.inspect_checkpoint import print_tensors_in_checkpoint_file
savedir = "log/"
print_tensors_in_checkpoint_file(savedir + "mnist.cpkt", None, True)
可以看到变量名以及数值
可以通过saver的参数实现指定变量名
如:
saver = tf.train.Saver({'weight':w, 'bias':b})
#代表将W的值放在weight中,b的值放在bias中
#或者也可如下:
saver = tf.train.Saver([w, b])
tensor_name:  bias
[0.10058576 0.10087684 0.09988532 0.09978773 0.09973277 0.10014107
 0.1005658  0.10065529 0.09837893 0.10010849]
tensor_name:  weight
[[-0.03061387 -0.03395451 -0.03043846 ...  0.13138811  0.06879874
   0.03287138]
 [-0.0122749   0.19011912 -0.0747104  ... -0.06414281  0.00082714
  -0.11080016]
 [-0.04010233  0.08927327 -0.08089745 ... -0.00734681  0.1315242
  -0.09481777]
 ...
 [ 0.04308376 -0.03622526  0.15524617 ...  0.01482591  0.09107535
  -0.14549917]
 [-0.02372661  0.01388895  0.0540239  ...  0.05673037  0.06090247
  -0.08266103]
 [-0.13596585  0.00741524  0.03665136 ... -0.07278766 -0.08052275
   0.10394417]]
检查点
保存模型并不限于在训练之后,在训练中也需要保存,因为tensorflow训练模型时难免又出现中断的情况,我们自然希望能够将辛苦得到的中间参数保存下来,否则下次又要重新开始。这种在训练中保存模型,我们习惯称之为检查点。
sever = tf.train.Saver(max_to_keep=1)
#表明最多只保存一个检查点文件,迭代过程只保存一个文件,在循环训练的过程中,新生成的模型会覆盖以前的模型
sever.save(sess, save_path=savedir + 'mnist.cpkt', global_step=epoch)#global_step参数为迭代次数
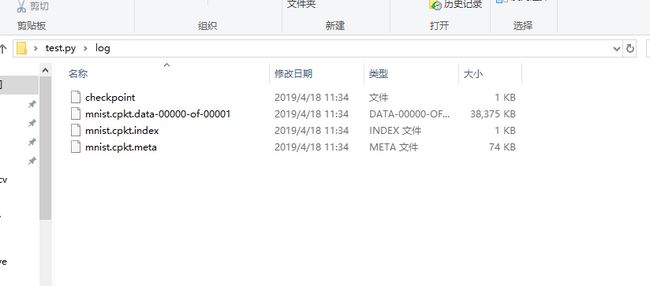
训练完后,文件名下会多出几个带有数字的文件  下面是一个快速获取检查点文件的方法
kpt = tf.train.latest_checkpoint(save_dir)
    if kpt != None:
        saver.restore(sess, kpt)
一个更加简便的保存检查点的方法
import tensorflow as tf
tf.reset_default_graph()
global_step = tf.train.get_or_create_global_step()
step = tf.assign_add(global_step, 1)
with tf.train.MonitoredTrainingSession(checkpoint_dir='log/checkpoints', save_checkpoint_secs=2) as sess:
    print(sess.run([global_step]))
    while not sess.should_stop():
        i = sess.run(step)
        print(i)
tf.train.MonitoredTrainingSession该函数可以直接实现保存及载入检查点模型的文件。与前面方式不同,该函数是按照训练时间来保存的,通过制定的save_checkpoint_sec 来指定具体的秒数,来设置多久保存一次检查点。
当程序再次运行时,并不是从第一次开始,故可见为自动载入检查点。 注意:
- 如果不设置save_check_point_secs参数,默认的保存时间为10分钟,这种按照时间保存的模式更适用于大型数据集来训练更复杂的情况
- 使用该方法时必须定义global_step变量,否则会报错
