Android Library上传到GitHub并一键发布到Bintray或JCenter
前言
最近在重构项目,看到里面有很多模块用到的类很分散,都是直接在工程目录下按包分类的,便想着可以把模块中需要用到的东西抽取出来封装成库。
封装好的库需要放置在工程目录下并在graldle中添加依赖,但一旦封装的库多了,工程就显得很沉重复杂冗余,这样明显不行。
最简单方便快捷的方法是像引用RxJava、Fresco这些第三方开源库的方式一样,在gradle中用compile引用,例如:
compile 'io.reactivex.rxjava2:rxjava:2.1.3'
compile 'com.android.support:percent:26.+'
那我们也可以按照这个方法,把自己创建的开源库上传到GitHub上,并发布到JCenter上就可以了。
步骤
首先创建库
将写好的库上传到GitHub
注册Bintray获取API Key
在Bintray中创建maven仓库并创建需要放置库的包名
修改库中build.gradle脚本
构建脚本上传到JCenter
引用自己发布在Bintray JCenter上的项目
具体操作
1. 创建库
首先创建工程,然后创建Model,这个比较简单
注:创建Model的时候名字不允许与工程名字相同,但可以在创建Model后修改Model名字与工程名字一致,但需要额外注意后面上传的库的名字要写成Model的名字(小写),不要写成工程名字(大写),不然会在JCenter中出现两个目录,并且目录里面是空的(说明引用的是工程而不是库)。
2. 上传至GitHub
这个不用说,在GitHub上创建项目,在本地创建好库后使用git关联项目即可。
https://github.com/ChunEvan/RxFields.git

We recommend every repository include a README, LICENSE, and .gitignore.
…or create a new repository on the command line

echo "# RxFields" >> README.md
git init
git add README.md
git commit -m "first commit"
git remote add origin https://github.com/ChunEvan/RxFields.git
git push -u origin master
…or push an existing repository from the command line

git remote add origin https://github.com/ChunEvan/RxFields.git
git push -u origin master
…or import code from another repository
You can initialize this repository with code from a Subversion, Mercurial, or TFS project.
3. 注册Bintray JCenter获取API Key
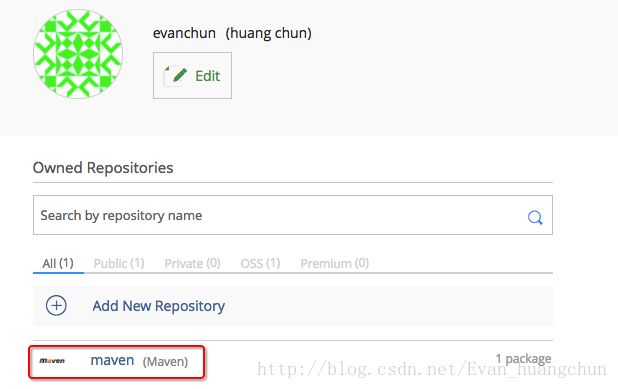
4. 在Bintray中创建maven仓库


注:Type选择 Maven ,Default Licenses (Optional)选择 Apache-2.0
5. 修改build.gradle脚本
- 首先在项目下面的build.gradle添加以下依赖,注意是项目下面的build.gradle
classpath 'com.github.dcendents:android-maven-gradle-plugin:1.5'
classpath 'com.jfrog.bintray.gradle:gradle-bintray-plugin:1.7.2'- 其次将app下和库下的build.gradle中的各版本号使用占位符保存在项目的gradle.properties中,并且去除不需要的依赖(比如Android API),方便管理。
BUILD_TOOL_VERSION=26.0.0
ANDROID_SUPPORT_VERSION=26.+
JUNIT_VERSION=4.12
ESPRESSO_VERSION=2.2.2
app下的build.gradle文件
apply plugin: 'com.android.application'
android {
    compileSdkVersion 26
    buildToolsVersion "${BUILD_TOOL_VERSION}"
    defaultConfig {
        applicationId "io.evan.rxfunction"
        minSdkVersion 15
        targetSdkVersion 26
        versionCode 1
        versionName "1.0"
        testInstrumentationRunner "android.support.test.runner.AndroidJUnitRunner"
    }
    buildTypes {
        release {
            minifyEnabled false
            proguardFiles getDefaultProguardFile('proguard-android.txt'), 'proguard-rules.pro'
        }
    }
}

dependencies {
    compile fileTree(dir: 'libs', include: ['*.jar'])
    androidTestCompile("com.android.support.test.espresso:espresso-core:${ESPRESSO_VERSION}", {
        exclude group: 'com.android.support', module: 'support-annotations'
    })
    compile "com.android.support:appcompat-v7:${ANDROID_SUPPORT_VERSION}"
    testCompile "junit:junit:${JUNIT_VERSION}"
}
库下面的build.gradle文件
apply plugin: 'com.android.library'
android {
    compileSdkVersion 26
    buildToolsVersion "${BUILD_TOOL_VERSION}"

    defaultConfig {
        minSdkVersion 15
        targetSdkVersion 26
        versionCode 1
        versionName "1.0"

        testInstrumentationRunner "android.support.test.runner.AndroidJUnitRunner"

    }
    buildTypes {
        release {
            minifyEnabled false
            proguardFiles getDefaultProguardFile('proguard-android.txt'), 'proguard-rules.pro'
        }
    }
}
dependencies {
}
apply from: 'bintrayUpload.gradle'- 然后在库下面创建上传Bintray的gradle,名字叫bintrayUpload.gradle(名字随意取,额外创建gralde是为了库结构更清晰,不用写在库自身的gradle中),并添加插件
apply plugin: 'com.github.dcendents.android-maven'
apply plugin: 'com.jfrog.bintray'- 然后在项目下新建的bintrayUpload.gradle文件中添加以下内容,并在项目下创建project.properties文件通过占位符保存需要填写的bintray相关信息
apply plugin: 'com.github.dcendents.android-maven'
apply plugin: 'com.jfrog.bintray'

// load properties
Properties properties = new Properties()
File localPropertiesFile = rootProject.file("local.properties");
if (localPropertiesFile.exists()) {
    properties.load(localPropertiesFile.newDataInputStream())
}
File projectPropertiesFile = rootProject.file("project.properties")
if (projectPropertiesFile.exists()) {
    properties.load(projectPropertiesFile.newDataInputStream())
}

// read properties
def projectName = properties.getProperty("project.name")
def projectGroupId = properties.getProperty("project.groupId")
def projectArtifactId = properties.getProperty("project.artifactId")

def projectVersionName = android.defaultConfig.versionName
def projectPackaging = properties.getProperty("project.packaging")
def projectSiteUrl = properties.getProperty("project.siteUrl")
def projectGitUrl = properties.getProperty("project.gitUrl")

def developerId = properties.getProperty("developer.id")
def developerName = properties.getProperty("developer.name")
def developerEmail = properties.getProperty("developer.email")

def bintrayUser = properties.getProperty("bintray.user")
def bintrayApikey = properties.getProperty("bintray.apikey")

def javadocName = properties.getProperty("javadoc.name")

group = projectGroupId

// This is generate POM.xml with proper parameters
install {
    repositories.mavenInstaller {
        pom {
            project {
                name projectName
                groupId projectGroupId
                artifactId projectArtifactId
                version projectVersionName
                packaging projectPackaging
                url projectSiteUrl
                licenses {
                    license {
                        name 'The Apache Software License, Version 2.0'
                        url 'http://www.apache.org/licenses/LICENSE-2.0.txt'
                    }
                }
                developers {
                    developer {
                        id developerId
                        name developerName
                        email developerEmail
                    }
                }
                scm {
                    connection projectGitUrl
                    developerConnection projectGitUrl
                    url projectSiteUrl
                }
            }
        }
    }
}

// This generates sources.jar
task sourcesJar(type: Jar) {
    from android.sourceSets.main.java.srcDirs
    classifier = 'sources'
}

task javadoc(type: Javadoc) {
    source = android.sourceSets.main.java.srcDirs
    classpath += project.files(android.getBootClasspath().join(File.pathSeparator))
}

// This generates javadoc.jar
task javadocJar(type: Jar, dependsOn: javadoc) {
    classifier = 'javadoc'
    from javadoc.destinationDir
}

artifacts {
    archives javadocJar
    archives sourcesJar
}

// javadoc configuration
javadoc {
    options {
        encoding "UTF-8"
        charSet 'UTF-8'
        author true
        version projectVersionName
        links "http://docs.oracle.com/javase/7/docs/api"
        title javadocName
    }
}

// bintray configuration
bintray {
    user = bintrayUser
    key = bintrayApikey
    configurations = ['archives']
    pkg {
        repo = "maven"
        name = projectName
        websiteUrl = projectSiteUrl
        vcsUrl = projectGitUrl
        licenses = ["Apache-2.0"]
        publish = true
    }
}- 然后在项目下创建project.properties文件,原理同bintrayUpload一样分离模块
#Project
project.name=RxFunction
project.groupId=io.evan
project.artifactId=rxfunction
project.packaging=aar

project.siteUrl=https://github.com/ChunEvan/RxFunction
project.gitUrl=https://github.com/ChunEvan/RxFunction.git

#java doc
javadoc.name=RxFunction- 最后把一些不能上传的信息保存在本地loal.properties文件中,如用户名、用户ID、邮箱,以及注册Bintray后获取的API Key等
developer.id=evanchun
developer.name=evanchun
developer.email=evan.huangchun@gmail.com

bintray.user=evanchun
bintray.apikey=204f2b2184dbbf71dxxxxxxxxxx
6. 构建脚本上传到JCenter
这里就是最后一步上传操作了,打开终端Terminal
输入 ./gradlew install,如果看到BUILD SUCCESS说明编译通过了,
再输入上传命令 ./gradlew bintrayUpload(也就是我们刚刚新建的上传bintray构建脚本),等一会,提示SUCCESS就代表上传成功了。
接下来去自己bintray仓库下查看,就能看到你的项目了。
7.引用自己发布在Bintray或JCenter上的项目
我们现在只是把项目上传到Bintray仓库上,还没有发布到JCenter
想要发布到JCenter,按照Bintray上标准文档走就好了,那个要签名还要审核过程比较麻烦,我用的是另外一种方式,直接引用Bintray仓库
- 在自己项目app下的build.gradle中添加
repositories{
    jcenter()
    maven { url "https://dl.bintray.com/evanchun/maven/"}
}- 接下来在dependencies添加依赖
compile 'io.evan:rxfunction:1.0'参考其他文章:
AndroidStuio快速发布开源项目到Jcenter/Bintray
新版Bintray-极简上传Library到JCenter
Android Studio提交库至Bintray jCenter从入门到放弃
使用Gradle发布项目到JCenter仓库
创建并发布一个 Android 库
Bintray注册地址
