【实例讲解】TensorFlow中TFRecord关键点
对于训练数据量非常大的机器学习项目,推荐使用TFRecord这种TensorFlow自带格式来制作和使用训练集,重点介绍在使用数据集时自己刚使用时有一点难以理解的地方。
对于数据集的制作下面直接给出代码,具体的代码不进行详细解释,网上有很多相关的介绍。
import os
from PIL import Image
import tensorflow as tf
import numpy as np
import matplotlib.pyplot as plt
os.environ['TF_CPP_MIN_LOG_LEVEL']='2'

cwd='D:/'
classes=['test_google_no','test_google_yes']
writer=tf.python_io.TFRecordWriter('idCard_test2.tfrecords')

for index,name in enumerate(classes):
    class_path=cwd+name+'/'
    for img_name in os.listdir(class_path):
        img_path=class_path+img_name

        img=Image.open(img_path)
        img=img.convert('RGB')
        img=img.resize((28,28))
        img_raw=img.tobytes()
        example=tf.train.Example(features=tf.train.Features(feature={
            'label':tf.train.Feature(int64_list=tf.train.Int64List(value=[index])),
            'img_raw':tf.train.Feature(bytes_list=tf.train.BytesList(value=[img_raw]))
        }))
        writer.write(example.SerializeToString())
writer.close()
#
# filename_queue = tf.train.string_input_producer(["idCard_train.tfrecords"]) #读入流中
# reader = tf.TFRecordReader()
# _, serialized_example = reader.read(filename_queue)   #返回文件名和文件
# features = tf.parse_single_example(serialized_example,
#                                    features={
#                                        'label': tf.FixedLenFeature([], tf.int64),
#                                        'img_raw' : tf.FixedLenFeature([], tf.string),
#                                    })  #取出包含image和label的feature对象
# image = tf.decode_raw(features['img_raw'], tf.uint8)
# image = tf.reshape(image, [224, 224,3])
# label = tf.cast(features['label'], tf.int32)
# with tf.Session() as sess: #开始一个会话
#     init_op = tf.global_variables_initializer()
#     sess.run(init_op)
#     coord=tf.train.Coordinator()
#     threads= tf.train.start_queue_runners(coord=coord)
#     for i in range(20):
#         print(i)
#         example, l = sess.run([image,label])#在会话中取出image和label
#         img=Image.fromarray(example, 'RGB')#这里Image是之前提到的
#         img.save('D:/test/'+str(i)+'_''Label_'+str(l)+'.jpg')#存下图片
#         #print(example, l)
#     coord.request_stop()
#     coord.join(threads)
其中,classes=[‘test_google_no’,’test_google_yes’]
是D:/下两个数据集的文件夹名字,这样生成的数据集中test_google_no的标签就是0,test_google_yes标签就是1,如果要进行多分类就可以继续添加文件夹名字。
上面的代码中注释掉的部分是将生成的数据集的图片取出来的操作,读者可以自己试试,改变一下读入的文件名。
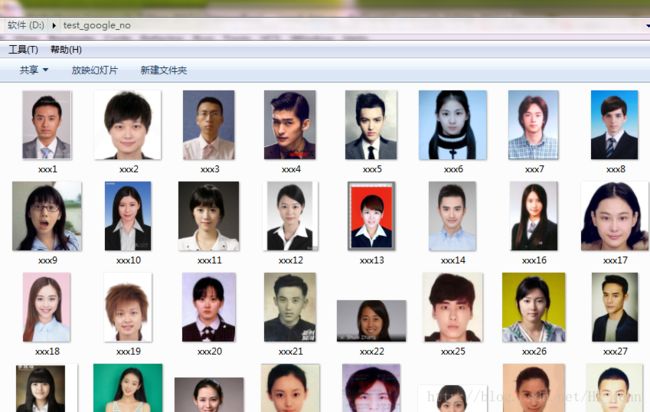
两个文件夹中的内容如下:

在使用时如下所示:

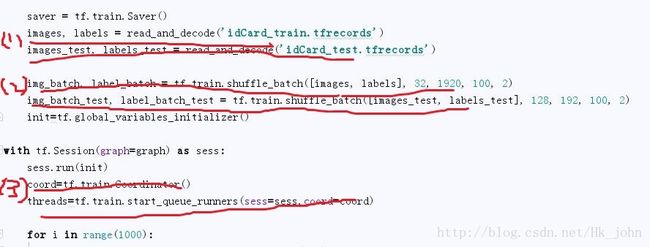
步骤(1)是读取我们生成的TFRecord文件,返回img以及对应label,代码在下面。
步骤(2)是将我们读取的img以及对应label输入队列中,然后会每次返回我们一个batch数量的数据供我们输入使用。
步骤(3)中coord是操作线程使用的,后一句是开始我们的输入队列。
其中读取函数如下所示:
def read_and_decode(filename):
    filename_queue=tf.train.string_input_producer([filename])

    reader=tf.TFRecordReader()
    _,serialized_example=reader.read(filename_queue)
    features=tf.parse_single_example(serialized_example,features={
    'label':tf.FixedLenFeature([],tf.int64),
    'img_raw':tf.FixedLenFeature([],tf.string),
    })
    img=tf.decode_raw(features['img_raw'],tf.uint8)
    img=tf.reshape(img,[224,224,3])
    img=tf.cast(img,tf.float32)#*(1./255)-0.5
    img = tf.image.per_image_standardization(img)  # 标准化
    label=tf.cast(features['label'],tf.int32)
    return img,label
这里所有的步骤通过调试相信大家都可以搞的非常清楚,当时一直比较迷茫的一点就是
    img=tf.cast(img,tf.float32)#*(1./255)-0.5
img = tf.image.per_image_standardization(img) # 标准化*这一句,经过测试你会发img=tf.cast(img,tf.float32)已经生成了原来的图片的矩阵形式,但是为什么还要#*(1./255)-0.5这一部分呢? 这一步其实是对图片进行归一化操作将【0,255】之间的像素归一化到【-0.5,0.5】,标准化处理可以使得不同的特征具有相同的尺度(Scale)。这样,在使用梯度下降法学习参数的时候,不同特征对参数的影响程度就一样了。
我没有使用这种做法,使用了第二句中TensorFlow自带的图片归一化操作函数。*
tf.image.per_image_standardization(img) # 标准化这样做的好处还会加速训练过程。

