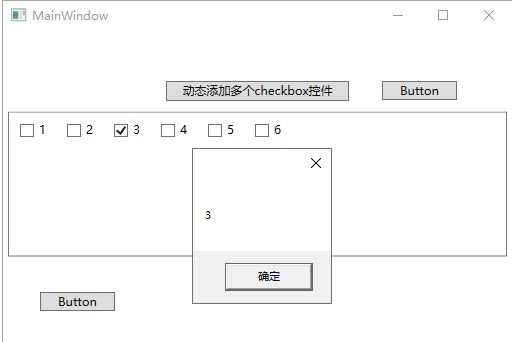
我们想要达到的结果是,绑定多个Checkbox然后我们还可以获取它是否被选中,其实很简单,我们只要找到那几个关键的对象就可以了。
下面是Ui,其中定义了一个WrapPanel来存放CheckBox,还有两个按钮,用于测试相关功能。
"WpfApplication1.MainWindow" xmlns="http://schemas.microsoft.com/winfx/2006/xaml/presentation" xmlns:x="http://schemas.microsoft.com/winfx/2006/xaml" xmlns:d="http://schemas.microsoft.com/expression/blend/2008" xmlns:mc="http://schemas.openxmlformats.org/markup-compatibility/2006" xmlns:local="clr-namespace:WpfApplication1" mc:Ignorable="d" Title="MainWindow" Height="350" Width="525"> "div" > "0,50,0,0" Orientation="Horizontal" HorizontalAlignment="Center"> "Auto" Height="150"> "#797979" BorderThickness="1" Margin="5,0,5,5"> "addCheckbox"/>
在动态添加Checkbox中我们定义了一个CheckBox数组,此后又实例化了ThickNess对象,它是用于描述矩形周围的粗细,然后我们又循环了数组的长度来进行添加(对其中name为addCheckbox的控件),至此,checkbox已动态添加。
那如何删除呢?我们依旧需要获取那个名为addCheckbox的控件的儿子们(Children)来进行remove。请看以下代码片段。
private void button1_Click(object sender, RoutedEventArgs e)
        {
            for (int i = 0; i < addCheckbox.Children.Count;)
            {
                this.addCheckbox.Children.Remove(addCheckbox.Children[i]);
            }
        }
循环其中的值也是非常的简单,因为我们在上面绑定的时候,已经给它的Content或者是DataContext都赋值了,所以我们只要获取就ok了。
private void button_Click(object sender, RoutedEventArgs e)
        {
            foreach (UIElement item in addCheckbox.Children)
            {
                if (item is CheckBox)
                {
                    CheckBox checkbox = (item as CheckBox);
                    if (checkbox.IsChecked == true)
                    {
                        MessageBox.Show(checkbox.Content.ToString());
                    }
                }
            }
        }
最后生成出来的效果是这样的,是不是非常丑,那我教你如何进行简单的美化。
在我们添加checkbox的时候有两种引入方式,一种是 checkbox.Style = Resources["NoticeBox"] as Style; 另一种的话是 Style style = (Style)this.FindResource("NoticeButton"); 那两者有什么区别呢?
第一个是必须将资源文件引用到当前页面,第二种的是在App.xaml进行查找不包括app.xaml中引入的(外部的资源文件)。下面我们写一个CheckBox样式在app,xaml中。
"WpfApplication1.App" xmlns="http://schemas.microsoft.com/winfx/2006/xaml/presentation" xmlns:x="http://schemas.microsoft.com/winfx/2006/xaml" xmlns:local="clr-namespace:WpfApplication1" StartupUri="MainWindow.xaml">
就这样我们在生成CheckBox中进行配置,代码如下。
private void btnAdd_Click(object sender, RoutedEventArgs e)
        {
            int num = 6;
            CheckBox[] check = new CheckBox[num];
            Thickness th = new Thickness();
            th.Bottom = 10;
            th.Left = 10;
            th.Right = 10;
            th.Top = 10;
            for (int i = 0; i < check.Length; i++)
            {
                check[i] = new CheckBox();
                //设置checkbox属性
                check[i].Margin = th;
                check[i].Content = i + 1;
                check[i].Name = "heheda";
                check[i].DataContext = "asdas";
                check[i].Style = (Style)this.FindResource("CheckBoxSwitchStyle");
          this.addCheckbox.Children.Add(check[i]);
            }
        }
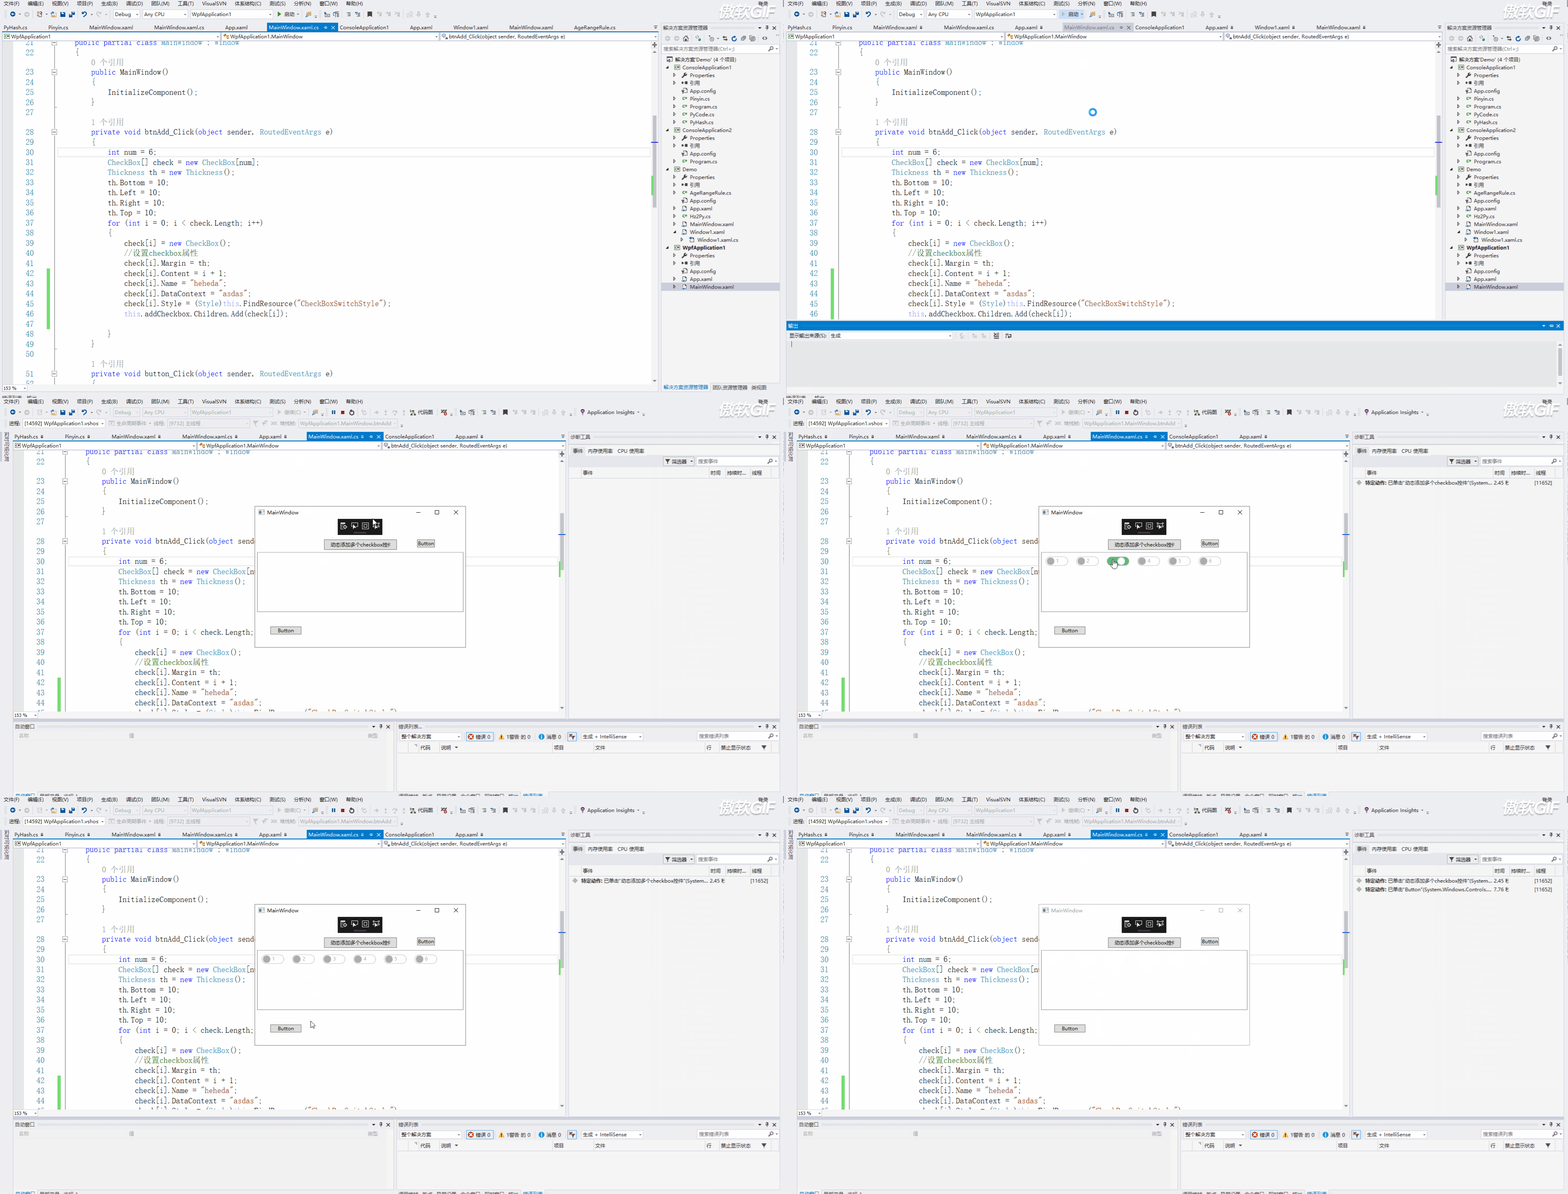
启动页面我们可以发现引入成功了。
不难发现,看一下代码,我们如何还想写别的样式,这个时候应该怎么办?难道还要往app.xaml里写?这就非常恶心了,所以我们采用引入的方式,这和css有点像!新建一个资源字典。
在其中写入写入以下样式。
"http://schemas.microsoft.com/winfx/2006/xaml/presentation" xmlns:x="http://schemas.microsoft.com/winfx/2006/xaml" xmlns:local="clr-namespace:WpfApplication1">
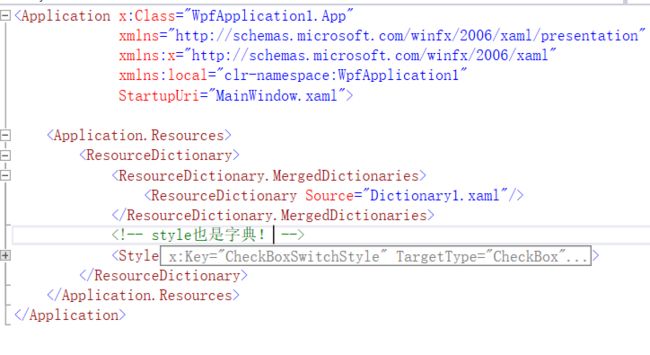
然后在app.xaml中进行引用,这里需要注意是,有可能我们的style和外部字典都放进去了,它们的关系是style其实也是一个字典,然后就变成了这样。
"Dictionary1.xaml"/>
我把缩进的截图发上来,更直观。
在其中还有内嵌的样式,可以这么写,如果是page的话你就
"Style/test.xaml"/>
那么今天就这样~


