一、启动方式与部署
Spring Boot启动按照容器来分的话大概分为两种:内置tomcat启动和外部tomcat启动。
(一)内部tomcat
- 直接在程序中run(右键启动)
- 在命令行中切换到工程目录,执行命令:
mvn spring-boot:run - 先
mvn install编译打包工程,之后切换到target路径下,使用java -jar jar包名
例如:java -jar target/first-project-1.0.0.jar --spring.profile.active=prod,其中spring.profile.active=dev指定环境
(二)外部tomcat(不推荐)
如果使用外部tomcat启动的话大概需要对工程做一下修改:
- 将项目的启动类Application.java继承SpringBootServletInitializer并重写configure方法
  @SpringBootApplication
  public class Application extends SpringBootServletInitializer {
      @Override
      protected SpringApplicationBuilder configure(SpringApplicationBuilder application) {
          return application.sources(Application.class);
      }
      public static void main(String[] args) throws Exception {
          SpringApplication.run(Application.class, args);
      }
  }
- 在pom.xml文件中,指定打包方式为war
war
- 移除Spring Boot内置tomcat
    org.springframework.boot
    spring-boot-starter-tomcat
    complied
或者
      org.springframework.boot
      spring-boot-starter-web


                   org.springframework.boot
                   spring-boot-starter-tomcat
添加web.xml
默认Spring Boot工程是不添加webapp\WEB-INF\web.xml文件的。在测试中发现,如果不添加这个文件在install的时候会报错,具体如何添加,下面的章节会有说明移除Spring Boot Thymeleaf模板引擎依赖(只有使用这个模板引擎的才需要这一步)
      org.springframework.boot
      spring-boot-starter-thymeleaf


            org.springframework.boot
            spring-boot-starter-tomcat
- 多个war部署在同一个tomcat中
在测试多个war部署在同一个web容器中,发现容器无法启动,经过排查是JMX的问题,不同的服务需要配置spring.jmx.default-domain=项目标识,保证项目标识唯一
通过以上修改,就可以将项目打成war包,部署到tomcat上。需要注意的是,通过外部tomcat部署在访问的时候需要在端口后面加上项目名才可以访问。另外,即使项目使用以上配置,依然可以使用内嵌的tomcat进行调试,通过mvn spring-boot:run命令启动服务。
如果需要在springboot中加上request前缀,需要在application.properties中添加server.contextPath=/prefix/即可。其中prefix为前缀名。这个前缀会在war包中失效,取而代之的是war包名称,如果war包名称和prefix相同的话,那么调试环境和正式部署环境就是一个request地址了
(三)Spring Boot 多环境部署
在spring Boot中多环境部署,配置文件需要满足application-{profile}.properties的格式,其中{profile}对应环境标识,例如:
- application-dev.properties 开发环境
- application-test.properties 测试环境
- application-prod.properties 生产环境
具体加载哪个配置文件,需要在application.properties中做配置,例如:spring.profiles.active=dev就会加载application-dev.properties配置文件的内容。还可以在项目启动的时候指定环境,例如:java -jar xxx.jar --spring.profiles.active=dev
(四)Spring Boot配置文件加载顺序
- 命令行参数
@Component
public class UserProperties {
    @Value("${myname}")
    private  String myname;
}
启动命令:java -jar ***.jar --myname="simon"
可以通过SpringApplication.setAddCommandLineProperties(false)禁用解析命令行参数
- SPRING_APPLICATION_JSON 参数。SPRING_APPLICATION_JSON 是以 JSON 格式配置在系统环境变量中的内容。
- 从java:comp/env 加载 JNDI 属性
- Java系统属性 (System.getProperties())
- 操作系统环境变量
- 如果有使用 random.* 属性配置,则使用 RandomValuePropertySource 产生
user.id=${random.value}
user.count=${random.int}
user.max=${random.long}
user.number=${random.int(100)}
user.range=${random.int[100, 1000]}
RandomValuePropertySource 可以用来生成测试所需要的各种不同类型的随机值,从而免去了在代码中生成的麻烦。RandomValuePropertySource 可以生成数字和字符串。数字的类型包含 int 和 long,可以限定数字的大小范围。以“random.”作为前缀的配置属性名称由 RandomValuePropertySource 来生成
- 外部特定应用配置文件 例如:application-{profile}.properties 或者 YAML variants
- 内部特定应用配置文件 例如:application-{profile}.properties 或者 YAML variants
- 外部应用配置文件 例如:application.properties 或者 YAML variants
- 内部应用配置文件 例如:application.properties 或者 YAML variants
- 加载@Configuration类的
@PropertySource或者@ConfigurationProperties指向的配置文件
@Component
@Configuration
@PropertySource("classpath:/myconfig/myconfig.yaml")
public class DBSettings {
    @Value("${db.url}")
    private String url;
    @Value("${db.username}")
    private String username;
    @Value("${db.password}")
    private String password;
}
@Component
@ConfigurationProperties(prefix="db")
public class DBSettings {
    private String url;
    private String username;
    private String password;
}
下面的章节自定义属性配置和自定义文件配置会对这两个注解做具体讲解。
- 默认配置,通过
SpringApplication.setDefaultProperties设置
(五)指定启动类(多个启动类)
不同的服务中可能会存在多个启动类,部署时就需要我们来指定启动类。在目前的项目中需要支持两种部署方式:多个服务(war包)部署在同一个外部tomcat中;不同服务(jar包)使用spring boot内置tomcat部署,为了方便,在每个服务中需要提供两个启动类和两个pom.xml文件,这样在部署发布的时候使用脚本替换pom文件(还有一些配置文件)就可以实现两种部署方式。
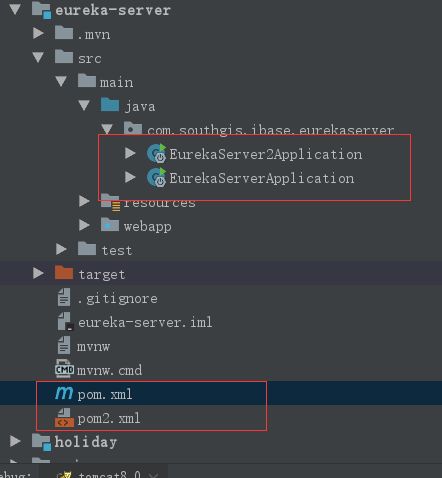
具体如何使用外部tomcat部署可以参考上面的章节。不同部署方式的pom文件中需要指定各自的启动类,否则无法正常启动,下面是指定启动类的代码:
                org.springframework.boot
                spring-boot-maven-plugin

                    com.southgis.ibase.eurekaserver.EurekaServerApplication


                            repackage
二、Spring Boot相关依赖包说明
- 应用程序的starter
| 名称 | 描述 |
|---|---|
| spring-boot-starter | 核心Spring Boot starter,包括自动配置支持,日志和YAML |
| spring-boot-starter-actuator | 生产准备的特性,用于帮我们监控和管理应用 |
| spring-boot-starter-amqp | 对”高级消息队列协议”的支持,通过spring-rabbit实现 |
| spring-boot-starter-aop | 对面向切面编程的支持,包括spring-aop和AspectJ |
| spring-boot-starter-batch | 对Spring Batch的支持,包括HSQLDB数据库 |
| spring-boot-starter-cloud-connectors | 对Spring Cloud Connectors的支持,简化在云平台下(例如,Cloud Foundry 和Heroku)服务的连接 |
| spring-boot-starter-data-elasticsearch | 对Elasticsearch搜索和分析引擎的支持,包括spring-data-elasticsearch |
| spring-boot-starter-data-gemfire | 对GemFire分布式数据存储的支持,包括spring-data-gemfire |
| spring-boot-starter-data-jpa | 对”Java持久化API”的支持,包括spring-data-jpa,spring-orm和Hibernate |
| spring-boot-starter-data-mongodb | 对MongoDB NOSQL数据库的支持,包括spring-data-mongodb |
| spring-boot-starter-data-rest | 对通过REST暴露Spring Data仓库的支持,通过spring-data-rest-webmvc实现 |
| spring-boot-starter-data-solr | 对Apache Solr搜索平台的支持,包括spring-data-solr |
| spring-boot-starter-freemarker | 对FreeMarker模板引擎的支持 |
| spring-boot-starter-groovy-templates | 对Groovy模板引擎的支持 |
| spring-boot-starter-hateoas | 对基于HATEOAS的RESTful服务的支持,通过spring-hateoas实现 |
| spring-boot-starter-hornetq | 对”Java消息服务API”的支持,通过HornetQ实现 |
| spring-boot-starter-integration | 对普通spring-integration模块的支持 |
| spring-boot-starter-jdbc | 对JDBC数据库的支持 |
| spring-boot-starter-jersey | 对Jersey RESTful Web服务框架的支持 |
| spring-boot-starter-jta-atomikos | 对JTA分布式事务的支持,通过Atomikos实现 |
| spring-boot-starter-jta-bitronix | 对JTA分布式事务的支持,通过Bitronix实现 |
| spring-boot-starter-mail | 对javax.mail的支持 |
| spring-boot-starter-mobile | 对spring-mobile的支持 |
| spring-boot-starter-mustache | 对Mustache模板引擎的支持 |
| spring-boot-starter-redis | 对REDIS键值数据存储的支持,包括spring-redis |
| spring-boot-starter-security | 对spring-security的支持 |
| spring-boot-starter-social-facebook | 对spring-social-facebook的支持 |
| spring-boot-starter-social-linkedin | 对spring-social-linkedin的支持 |
| spring-boot-starter-social-twitter | 对spring-social-twitter的支持 |
| spring-boot-starter-test | 对常用测试依赖的支持,包括JUnit, Hamcrest和Mockito,还有spring-test模块 |
| spring-boot-starter-thymeleaf | 对Thymeleaf模板引擎的支持,包括和Spring的集成 |
| spring-boot-starter-velocity | 对Velocity模板引擎的支持 |
| spring-boot-starter-web | 对全栈web开发的支持, 包括Tomcat和spring-webmvc |
| spring-boot-starter-websocket | 对WebSocket开发的支持 |
| spring-boot-starter-ws | 对Spring Web服务的支持 |
- 添加生产准备的starters
| 名称 | 描述 |
|---|---|
| spring-boot-starter-actuator | 添加生产准备特性,比如指标和监控 |
| spring-boot-starter-remote-shell | 添加远程ssh shell支持 |
- 排除或交换具体技术方面的starters
| 名称 | 描述 |
|---|---|
| spring-boot-starter-jetty | 导入Jetty HTTP引擎(作为Tomcat的替代) |
| spring-boot-starter-log4j | 对Log4J日志系统的支持 |
| spring-boot-starter-logging | 导入Spring Boot的默认日志系统 |
| spring-boot-starter-tomcat | 导入Spring Boot的默认HTTP引擎 |
| spring-boot-starter-undertow | 导入Undertow HTTP引擎(作为Tomcat的替代) |
三、Spring Boot配置详解
虽然Spring Boot干掉了 XML,但未做到零配置,它体现出了一种约定优于配置,也称作按约定编程,是一种软件设计范式,旨在减少软件开发人员需做决定的数量,获得简单的好处,而又不失灵活性。 一般情况下默认的配置足够满足日常开发所需,但在特殊的情况下,我们往往需要用到自定义属性配置、自定义文件配置等一系列功能。不用担心,这些Spring Boot都替我们考虑好了,我们只需要遵循它的规则配置即可。
为了让 Spring Boot 更好的生成配置元数据文件,我们需要添加如下依赖:
    org.springframework.boot
    spring-boot-configuration-processor
    true
这个文件在编译的时候调用,对生产没有影响。
(一)自定义属性配置
在配置文件application.properties中添加我们的自定义属性:
  my.name=simon
  my.age=23
创建User.java文件,用来映射定义在配置文件中的自定义属性,这样就可以通过操作对象来获取配置文件的信息了。
package com.southgis.properties;
import org.springframework.boot.context.properties.ConfigurationProperties;
import org.springframework.stereotype.Component;

/**
 * @author simon
 * @since 2018/6/22 11:30
 */
@Component
@ConfigurationProperties(prefix = "my")
public class User {

    private int age;
    private String name;
    // 省略 get set

    @Override
    public String toString() {
        return "User{" +
                "age=" + age +
                ", name='" + name + '\'' +
                '}';
    }
}
接下来我们就可以注入这个bean来获取配置信息:
import com.southgis.properties.User;
import org.slf4j.Logger;
import org.slf4j.LoggerFactory;
import org.springframework.beans.factory.annotation.Autowired;
import org.springframework.web.bind.annotation.GetMapping;
import org.springframework.web.bind.annotation.RequestMapping;
import org.springframework.web.bind.annotation.RestController;

/**
 * @author simon
 * @since 2018/6/22 11:40
 */
@RequestMapping("/properties")
@RestController
public class PropertiesController {

    private static final Logger log = LoggerFactory.getLogger(PropertiesController.class);

    private final User user;

    @Autowired
    public PropertiesController(User user) {
        this.user = user;
    }

    @GetMapping("/user")
    public User getProperties() {
        log.info("=================================================================================================");
        log.info(user.toString());
        log.info("=================================================================================================");
        return user;
    }
}
(二) 自定义文件配置
自定义文件的开头可以不以application开头,这里定义my.properties:
my.name=simon
my.age=age
定义User.java文件用来映射配置文件
package com.southgis.properties;

import org.springframework.boot.context.properties.ConfigurationProperties;
import org.springframework.context.annotation.PropertySource;
import org.springframework.stereotype.Component;

/**
 * @author simon
 * @since 2018/6/22 14:30
 */
@Component
@PropertySource("classpath:my.properties")
@ConfigurationProperties(prefix = "my")
public class User {

    private int age;
    private String name;
    // 省略 get set

    @Override
    public String toString() {
        return "User{" +
                "age=" + age +
                ", name='" + name + '\'' +
                '}';
    }
}
这样就可以注入使用bean了,参见上一节。