小伙伴们大家好,好久没有更新博客,今天我继续个大家介绍与百度地图相关的功能--公交查询;公交查询是属于检索功能里的,就是POI检索功能,那么POI检索到底是什么呢?它的官方是这么写的:POI(Point of Interest),中文可以翻译为“兴趣点”。在地理信息系统中,一个POI可以是一栋房子、一个商铺、一个邮筒、一个公交站等。而百度地图SDK提供三种类型的POI检索:周边检索、区域检索和城市内检索。它主要的功能模块包括以下功能:POI检索,公交方案检索,驾车路线检索,步行路线检索,行政区边界数据检索,地理编码,反地理编码,公交详情检索,在线建议查询,短串分享(包括POI搜索结果分享、驾车/公交/骑行/步行路线规划分享、反向地理编码结果分享),下面我先以搜索公交为例,向大家介绍如何使用检索服务。
我们还是先看一下简单的效果图:
想实现这个功能其实也很简单,只要按照步骤来就可以了。下面我给大家说一下实现的步骤:
BMKBusLineSearchDelegate,BMKPoiSearchDelegate这是代理
然后我为了方便把一些输入框按钮这些控件放在了一个View里,避免看着我们的地图太乱了。
如图:
这些控件的添加我就不做讲解了,我主要说检索公交功能的实现方法;
我们先把代理添加上,然后我们用到的就是
BMKPoiSearch , BMKBusLineSearch
- 在上面声明这两个类
BMKPoiSearch* poisearch;
BMKBusLineSearch* buslinesearch;
- 然后再
viewDidLoad的里初始化,以及代理跟数组初始化:
 /**POI检索-公交搜索*/
    poisearch = [[BMKPoiSearch alloc]init];
    poisearch.delegate = self;

    buslinesearch = [[BMKBusLineSearch alloc]init];
    buslinesearch.delegate = self;
    currentIndex = -1;
    _busPoiArray = [[NSMutableArray alloc]init];
- 下面
viewWillAppear,viewWillDisappear不要忘了
-(void)viewWillAppear:(BOOL)animated
{
    [mapView viewWillAppear];
    locServer.delegate = self;//定位
    mapView.delegate = self; // 此处记得不用的时候需要置nil,否则影响内存的释放
    buslinesearch.delegate = self; // 此处记得不用的时候需要置nil,否则影响内存的释放
}
-(void)viewWillDisappear:(BOOL)animated
{
    [mapView viewWillDisappear];
    locServer.delegate = self;//定位
    mapView.delegate = nil; // 不用时,置nil
    buslinesearch.delegate = nil;//-----
}
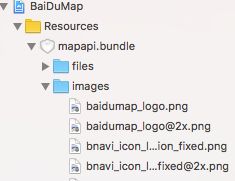
- 还有我们的设定的图片,如果不设定会是默认的图
//图片路径
#define MYBUNDLE_NAME @ "mapapi.bundle"
#define MYBUNDLE_PATH [[[NSBundle mainBundle] resourcePath] stringByAppendingPathComponent: MYBUNDLE_NAME]
#define MYBUNDLE [NSBundle bundleWithPath: MYBUNDLE_PATH]
图片是从这里来的
如果你要用这里面的图记得添加上。
- 然后就是点击上行下行时的方法
#pragma mark 公交搜索
-(void)searchBusClick:(UIButton *)btn andCity:(NSString *)cityStr andBus:(NSString *)busStr
{
    cityS = cityStr;
    busS = busStr;
//    [locServer stopUserLocationService];//关闭定位

    if (btn.tag == 10) {
        [_busPoiArray removeAllObjects];//-------------------!!!!!这里数组一定要移除掉,不然再次查询别的公交路线的时候无法找到
        BMKCitySearchOption *city = [[BMKCitySearchOption alloc] init];
        city.pageCapacity = 10;
        city.pageIndex = 0;
        city.city= cityS;
        city.keyword = busS;
        NSLog(@"111城市---%@--%@公交",cityS,busS);
        BOOL flag = [poisearch poiSearchInCity:city];
        if(flag)
        {
            NSLog(@"城市内检索发送成功");
        }
        else
        {
            NSLog(@"城市内检索发送失败");
        }
    }
    else if (btn.tag == 11)
    {


        if (_busPoiArray.count > 0) {
            if (++currentIndex >= _busPoiArray.count) {
                currentIndex -= _busPoiArray.count;
            }
            NSString* strKey = ((BMKPoiInfo*) [_busPoiArray objectAtIndex:currentIndex]).uid;
            BMKBusLineSearchOption *buslineSearchOption = [[BMKBusLineSearchOption alloc]init];
            buslineSearchOption.city= cityS;
            buslineSearchOption.busLineUid= strKey;

            BOOL flag = [buslinesearch busLineSearch:buslineSearchOption];
            if(flag)
            {
                NSLog(@"busline检索发送成功");
            }
            else
            {
                NSLog(@"busline检索发送失败");
            }
        }
        else {
            BMKCitySearchOption *citySearchOption = [[BMKCitySearchOption alloc]init];
            citySearchOption.pageIndex = 0;
            citySearchOption.pageCapacity = 10;
            citySearchOption.city= cityS;
            citySearchOption.keyword = busS;

            NSLog(@"111城市---%@--%@公交",cityS,busS);
            BOOL flag = [poisearch poiSearchInCity:citySearchOption];
            if(flag)
            {
                NSLog(@"城市内检索发送成功");
            }
            else
            {
                NSLog(@"城市内检索发送失败");
            }

        }

    }
}
因为我的按钮控件是写在一个view里的,所以上面写了一个代理方法来触发此方法
上面,上面需要注意的地方就是_busPoiArray 一定要记得移除掉,因为如果不移除里面的数据,我们再次查别的公交路线的时候就会查不到的,因为它的数据重复了添加。还有就是城市跟公交一定要跟我们写的对应上,这个大家应该都清楚。
6 . 下面是代理实现的方法
//这个方法是获取每个站点的信息
#pragma mark implement BMKSearchDelegate---2
- (void)onGetPoiResult:(BMKPoiSearch *)searcher result:(BMKPoiResult*)result errorCode:(BMKSearchErrorCode)error
{
    if (error == BMK_SEARCH_NO_ERROR) {
        BMKPoiInfo* poi = nil;
        BOOL findBusline = NO;
        for (int i = 0; i < result.poiInfoList.count; i++) {
            poi = [result.poiInfoList objectAtIndex:i];
            if (poi.epoitype == 2 || poi.epoitype == 4) {///POI类型,0:普通点 1:公交站 2:公交线路 3:地铁站 4:地铁线路
                findBusline = YES;
                [_busPoiArray addObject:poi];
            }
        }
        //开始bueline详情搜索
        if(findBusline)
        {
            currentIndex = 0;
            NSString* strKey = ((BMKPoiInfo*) [_busPoiArray objectAtIndex:currentIndex]).uid;
            BMKBusLineSearchOption *buslineSearchOption = [[BMKBusLineSearchOption alloc]init];
            buslineSearchOption.city= cityS;
            buslineSearchOption.busLineUid= strKey;
            BOOL flag = [buslinesearch busLineSearch:buslineSearchOption];
            if(flag)
            {
                NSLog(@"busline检索发送成功");
            }
            else
            {
                NSLog(@"busline检索发送失败");
            }

        }
    }
    else
    {
        NSLog(@"错误=======%u",error);
    }
//     [_busPoiArray removeAllObjects];
}
下面这个是把我们的站点用线连接起来
#pragma mark ---3
- (void)onGetBusDetailResult:(BMKBusLineSearch*)searcher result:(BMKBusLineResult*)busLineResult errorCode:(BMKSearchErrorCode)error
{
    if (error == BMK_SEARCH_NO_ERROR) {
        //在此处理正常结果
        NSArray* array = [NSArray arrayWithArray:mapView.annotations];
        [mapView removeAnnotations:array];
        array = [NSArray arrayWithArray:mapView.overlays];
        [mapView removeOverlays:array];
        if (error == BMK_SEARCH_NO_ERROR) {

            BusLineAnnotation* item = [[BusLineAnnotation alloc]init];

            //站点信息
            int size = 0;
            size = busLineResult.busStations.count;
            for (int j = 0; j < size; j++) {
                BMKBusStation* station = [busLineResult.busStations objectAtIndex:j];
                item = [[BusLineAnnotation alloc]init];
                item.coordinate = station.location;
                item.title = station.title;
                item.type = 2;
                [mapView addAnnotation:item];
            }


            //路段信息
            int index = 0;
            //累加index为下面声明数组temppoints时用
            for (int j = 0; j < busLineResult.busSteps.count; j++) {
                BMKBusStep* step = [busLineResult.busSteps objectAtIndex:j];
                index += step.pointsCount;
            }
            //直角坐标划线

            BMKMapPoint * temppoints = new BMKMapPoint[index];
            int k=0;
            for (int i = 0; i < busLineResult.busSteps.count; i++) {
                BMKBusStep* step = [busLineResult.busSteps objectAtIndex:i];
                for (int j = 0; j < step.pointsCount; j++) {
                    BMKMapPoint pointarray;
                    pointarray.x = step.points[j].x;
                    pointarray.y = step.points[j].y;
                    temppoints[k] = pointarray;
                    k++;
                }
            }


            BMKPolyline* polyLine = [BMKPolyline polylineWithPoints:temppoints count:index];
            [mapView addOverlay:polyLine];
            delete[] temppoints;

            BMKBusStation* start = [busLineResult.busStations objectAtIndex:0];
            [mapView setCenterCoordinate:start.location animated:YES];

        }
    }
    else {
        NSLog(@"抱歉,未找到结果===%u",error);
    }
}
#pragma mark -----4---设置路线颜色
- (BMKOverlayView*)mapView:(BMKMapView *)map viewForOverlay:(id)overlay
{
    if ([overlay isKindOfClass:[BMKPolyline class]]) {
        BMKPolylineView* polylineView = [[BMKPolylineView alloc] initWithOverlay:overlay];
        polylineView.fillColor = [[UIColor cyanColor] colorWithAlphaComponent:1];
        polylineView.strokeColor = [[UIColor blueColor] colorWithAlphaComponent:0.7];
        polylineView.lineWidth = 3.0;
        return polylineView;
    }
    return nil;
}
7.下面是设置站点的图片,如果我们不设置的话它会有一个默认的图片
如果我们需要自己设置图片的话,还需要添加上一个类,如图:
#pragma mark imeplement BMKMapViewDelegate
- (BMKAnnotationView *)mapView:(BMKMapView *)view viewForAnnotation:(id )annotation
{
    if ([annotation isKindOfClass:[BusLineAnnotation class]]) {
        return [self getRouteAnnotationView:view viewForAnnotation:(BusLineAnnotation*)annotation];
    }
    return nil;
}


- (BMKAnnotationView*)getRouteAnnotationView:(BMKMapView *)mapview viewForAnnotation:(BusLineAnnotation*)routeAnnotation
{
    //这里是设置的图片
    BMKAnnotationView* view = nil;
    switch (routeAnnotation.type) {
        case 0:
        {
            view = [mapview dequeueReusableAnnotationViewWithIdentifier:@"start_node"];
            if (view == nil) {
                view = [[BMKAnnotationView alloc]initWithAnnotation:routeAnnotation reuseIdentifier:@"start_node"];
                view.image = [UIImage imageWithContentsOfFile:[self getMyBundlePath1:@"images/icon_nav_start.png"]];
                view.centerOffset = CGPointMake(0, -(view.frame.size.height * 0.5));
                view.canShowCallout = TRUE;
            }
            view.annotation = routeAnnotation;
        }
            break;
        case 1:
        {
            view = [mapview dequeueReusableAnnotationViewWithIdentifier:@"end_node"];
            if (view == nil) {
                view = [[BMKAnnotationView alloc]initWithAnnotation:routeAnnotation reuseIdentifier:@"end_node"];
                view.image = [UIImage imageWithContentsOfFile:[self getMyBundlePath1:@"images/icon_nav_end.png"]];
                view.centerOffset = CGPointMake(0, -(view.frame.size.height * 0.5));
                view.canShowCallout = TRUE;
            }
            view.annotation = routeAnnotation;
        }
            break;
        case 2:
        {
            view = [mapview dequeueReusableAnnotationViewWithIdentifier:@"bus_node"];
            if (view == nil) {
                view = [[BMKAnnotationView alloc]initWithAnnotation:routeAnnotation reuseIdentifier:@"bus_node"];
                view.image = [UIImage imageWithContentsOfFile:[self getMyBundlePath1:@"images/icon_nav_bus.png"]];
                view.canShowCallout = TRUE;
            }
            view.annotation = routeAnnotation;
        }
            break;
        case 3:
        {
            view = [mapview dequeueReusableAnnotationViewWithIdentifier:@"rail_node"];
            if (view == nil) {
                view = [[BMKAnnotationView alloc]initWithAnnotation:routeAnnotation reuseIdentifier:@"rail_node"];
                view.image = [UIImage imageWithContentsOfFile:[self getMyBundlePath1:@"images/icon_nav_rail.png"]];
                view.canShowCallout = TRUE;
            }
            view.annotation = routeAnnotation;
        }
            break;
        case 4:
        {
            view = [mapview dequeueReusableAnnotationViewWithIdentifier:@"route_node"];
            if (view == nil) {
                view = [[BMKAnnotationView alloc]initWithAnnotation:routeAnnotation reuseIdentifier:@"route_node"];
                view.canShowCallout = TRUE;
            } else {
                [view setNeedsDisplay];
            }

            UIImage* image = [UIImage imageWithContentsOfFile:[self getMyBundlePath1:@"images/icon_direction.png"]];
            view.image = [image imageRotatedByDegrees:routeAnnotation.degree];
            view.annotation = routeAnnotation;

        }
            break;
        default:
            break;
    }

    return view;
}
#pragma mark 站点图片
/*
 这里的图片路径必须一样  不然公交路线站点图片不会显示
 */
- (NSString*)getMyBundlePath1:(NSString *)filename
{

    NSBundle * libBundle = MYBUNDLE ;

    if ( libBundle && filename ){
        NSString * s=[[libBundle resourcePath ] stringByAppendingPathComponent : filename];
        return s;
    }
    return nil ;
}
别的就没有了,其实这个比较简单,只要按照步骤来就没问题。
下面我说一下需要注意的地方:
- 上面第 2. 步一定不能少了,如果缺少了,就会检索失败,
- 我们在创建应用的时候所输入的Bundle Identifier一定要跟我们的项目一样,不然也会检索失败
- 在强调一下
_busPoiArray这个数组一定要记得移除掉里面的数据,不然我们检索别的公交的时候也会无法检索到 - 还有第 3. 步里 也不能少了,不然也会导致我们检索的时候失败
- 还有如果我们需要添加自己的图片,一定要按照第 4. 步来做,添加上图盘,然后在
(BMKAnnotationView*)getRouteAnnotationView:(BMKMapView *)mapview viewForAnnotation:(BusLineAnnotation*)routeAnnotation
里面设置我们的图片就行。
好了,这就是百度地图的公交检索实现的步骤,接下来我会继续为大家更新百度地图别的POI检索功能,如果有什么问题或者建议,请留言或简信我。如果有写的不好的地方也请指出来。谢谢。
百度地图源码地址BaiDuMap.git


