openCV学习笔记(一): 一个最简单的openCV Demo
一直想研究openCV,这段时间终于静下心来做个学习笔记,边学边记,大部分内容都来自官网https://docs.opencv.org/3.3.1/, 从基础开始,我把学习openCV中的过程和问题尽量记录下来(包括各种坑!!),希望能有条理的回顾这方面的知识,也希望能帮助到同样学习openCV的同学,暂时以ios平台为例,后期会整理android相关。
安装openCV运行环境(for IOS)
保证我们学习最新版本,建议大家去官方下载最新的source,我这边暂时按照搭建IOS开发环境的方式介绍:
官方推荐我们下载git库来获取源码:
cd ~/
git clone https://github.com/opencv/opencv.git
然后生成framework。
Building OpenCV from Source, using CMake and Command Line
Make symbolic link for Xcode to let OpenCV build scripts find the compiler, header files etc.
cd /
sudo ln -s /Applications/Xcode.app/Contents/Developer Developer
Build OpenCV framework:
cd ~/
python opencv/platforms/ios/build_framework.py ios
也可以通过cocoapod管理依赖。
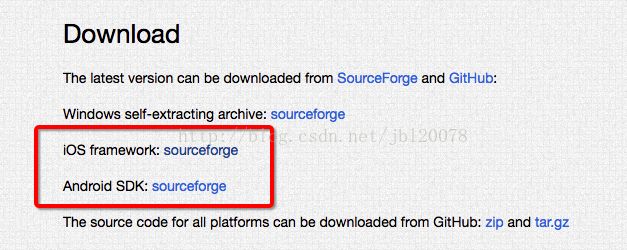
也可以去首页直接下载ios的framework。我是以从官网下载源码的方式,然后编译成framework,导入工程中
我编译源码报错:
Executing: ['cmake', '-GXcode', '-DAPPLE_FRAMEWORK=ON', '-DCMAKE_INSTALL_PREFIX=install', '-DCMAKE_BUILD_TYPE=Release', '-DIOS_ARCH=armv7', '-DCMAKE_TOOLCHAIN_FILE=/Users/jiabl/work/openCV/opencv/platforms/ios/cmake/Toolchains/Toolchain-iPhoneOS_Xcode.cmake', '-DENABLE_NEON=ON', '/Users/jiabl/work/openCV/opencv', '-DCMAKE_C_FLAGS=-fembed-bitcode', '-DCMAKE_CXX_FLAGS=-fembed-bitcode'] in /Users/jiabl/work/openCV/ios/build/build-armv7-iphoneos
============================================================
ERROR: [Errno 2] No such file or directory
============================================================
Traceback (most recent call last):
  File "opencv/platforms/ios/build_framework.py", line 112, in build
    self._build(outdir)
  File "opencv/platforms/ios/build_framework.py", line 104, in _build
    self.buildOne(t[0], t[1], mainBD, cmake_flags)
  File "opencv/platforms/ios/build_framework.py", line 186, in buildOne
    execute(cmakecmd, cwd = builddir)
  File "opencv/platforms/ios/build_framework.py", line 36, in execute
    retcode = check_call(cmd, cwd = cwd)
  File "/System/Library/Frameworks/Python.framework/Versions/2.7/lib/python2.7/subprocess.py", line 535, in check_call
    retcode = call(*popenargs, **kwargs)
  File "/System/Library/Frameworks/Python.framework/Versions/2.7/lib/python2.7/subprocess.py", line 522, in call
    return Popen(*popenargs, **kwargs).wait()
  File "/System/Library/Frameworks/Python.framework/Versions/2.7/lib/python2.7/subprocess.py", line 710, in __init__
    errread, errwrite)
  File "/System/Library/Frameworks/Python.framework/Versions/2.7/lib/python2.7/subprocess.py", line 1335, in _execute_child
    raise child_exception
OSError: [Errno 2] No such file or directoryhttps://cmake.org/install/
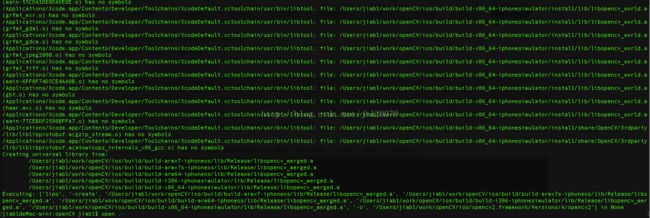
安装或者更新好cmake,编译framework,需要等待数十分钟(编译了很多cpu版本,所以很慢),提示如下,编译成功。
在我们源码根目录下生成如下文件
ios/opencv2.framework下面我们将framework导入ios工程中写一个openCV demo。
第一个openCV Demo
1、Create a new XCode project.

2、Now we need to link opencv2.framework with Xcode. Select the project Navigator in the left hand panel and click on project name.

3、Under the TARGETS click on Build Phases. Expand Link Binary With Libraries option.

4、Click on Add others and go to directory where opencv2.framework is located and click open

5、Now you can start writing your application.首先是最基本的图片处理,根据官网的介绍,openCV中对图片的处理是通过Mat structure来做的,需要与ios的UIImage做转化。所以,我整理了一个CVUtil单例类,定义这些常用的API,下面是代码,同时第一个坑到来了:
我按照官网引入opencv头文件的时候,报错:
#ifdef __cplusplus
#import
#endif

发现报错代码中人家说了:
#if defined(NO)
#  warning Detected Apple 'NO' macro definition, it can cause build conflicts. Please, include this header before any Apple headers.
#endif
原因是我引入头文件要在其他引入文件最上方,好吧,改正一下
CVUtil.h文件
#import
#import
#import
#import "include.h"

/**
 openCV常用方法
 */
@interface CVUtil : NSObject

/**
UIImage转mat

 @param image image description
 @return return value description
 */
- (cv::Mat)cvMatFromUIImage:(UIImage *)image;

/**
 UIImage转matGray

 @param image image description
 @return return value description
 */
- (cv::Mat)cvMatGrayFromUIImage:(UIImage *)image;

/**
 mat转UIImage

 @return return value description
 */
-(UIImage *)UIImageFromCVMat:(cv::Mat)cvMat; - (cv::Mat)cvMatFromUIImage:(UIImage *)image{
CGColorSpaceRef colorSpace = CGImageGetColorSpace(image.CGImage);
CGFloat cols = image.size.width;
CGFloat rows = image.size.height;
cv::Mat cvMat(rows, cols, CV_8UC4); // 8 bits per component, 4 channels (color channels + alpha)
CGContextRef contextRef = CGBitmapContextCreate(cvMat.data, // Pointer to data
cols, // Width of bitmap
rows, // Height of bitmap
8, // Bits per component
cvMat.step[0], // Bytes per row
colorSpace, // Colorspace
kCGImageAlphaNoneSkipLast |
kCGBitmapByteOrderDefault); // Bitmap info flags
CGContextDrawImage(contextRef, CGRectMake(0, 0, cols, rows), image.CGImage);
CGContextRelease(contextRef);
return cvMat;
}
- (cv::Mat)cvMatGrayFromUIImage:(UIImage *)image{
CGColorSpaceRef colorSpace = CGImageGetColorSpace(image.CGImage);
CGFloat cols = image.size.width;
CGFloat rows = image.size.height;
cv::Mat cvMat(rows, cols, CV_8UC1); // 8 bits per component, 1 channels
CGContextRef contextRef = CGBitmapContextCreate(cvMat.data, // Pointer to data
cols, // Width of bitmap
rows, // Height of bitmap
8, // Bits per component
cvMat.step[0], // Bytes per row
colorSpace, // Colorspace
kCGImageAlphaNoneSkipLast |
kCGBitmapByteOrderDefault); // Bitmap info flags
CGContextDrawImage(contextRef, CGRectMake(0, 0, cols, rows), image.CGImage);
CGContextRelease(contextRef);
return cvMat;
}
-(UIImage *)UIImageFromCVMat:(cv::Mat)cvMat{
NSData *data = [NSData dataWithBytes:cvMat.data length:cvMat.elemSize()*cvMat.total()];
CGColorSpaceRef colorSpace;
if (cvMat.elemSize() == 1) {
colorSpace = CGColorSpaceCreateDeviceGray();
} else {
colorSpace = CGColorSpaceCreateDeviceRGB();
}
CGDataProviderRef provider = CGDataProviderCreateWithCFData((__bridge CFDataRef)data);
// Creating CGImage from cv::Mat
CGImageRef imageRef = CGImageCreate(cvMat.cols, //width
cvMat.rows, //height
8, //bits per component
8 * cvMat.elemSize(), //bits per pixel
cvMat.step[0], //bytesPerRow
colorSpace, //colorspace
kCGImageAlphaNone|kCGBitmapByteOrderDefault,// bitmap info
provider, //CGDataProviderRef
NULL, //decode
false, //should interpolate
kCGRenderingIntentDefault //intent
);
// Getting UIImage from CGImage
UIImage *finalImage = [UIImage imageWithCGImage:imageRef];
CGImageRelease(imageRef);
CGDataProviderRelease(provider);
CGColorSpaceRelease(colorSpace);
return finalImage;
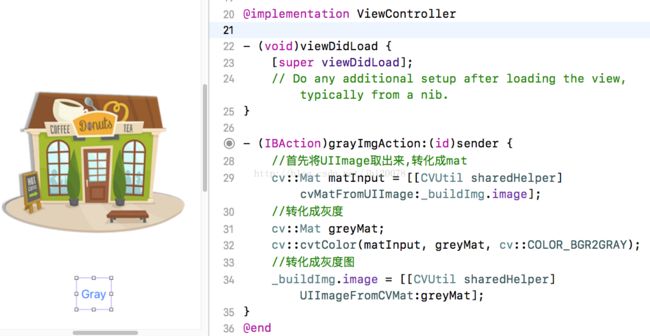
}下面我尝试做一个简单的例子,将一个图片转化为灰色
Also you have to locate the prefix header that is used for all header files in the project. The file is typically located at "ProjectName/Supporting Files/ProjectName-Prefix.pch". There, you have add an include statement to import the opencv library. However, make sure you include opencv before you include UIKit and Foundation, because else you will get some weird compile errors that some macros like min and max are defined multiple times. For example the prefix header could look like the following:
//
// Prefix header for all source files of the 'VideoFilters' target in the 'VideoFilters' project
//
#import
#ifndef __IPHONE_4_0
#warning "This project uses features only available in iOS SDK 4.0 and later."
#endif
#ifdef __cplusplus
#import
#endif
#ifdef __OBJC__
    #import
    #import
#endif
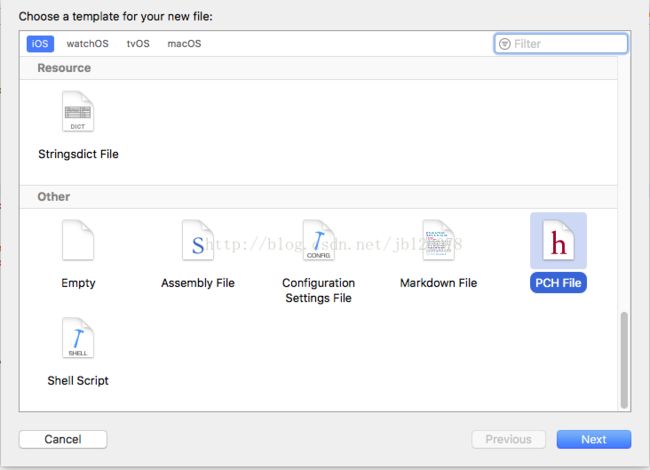
我们新建pch文件(ios8以后工程中可能不默认创建,需要我们手动创建),将引入写在pch中,让程序在预编译阶段完成对opencv库的引入,步骤如下:
完成!
第一次尝试openCV结束,后面继续深入研究相关模块!!
下一篇:openCV处理摄像机图像:
http://blog.csdn.net/jbl20078/article/details/78839702


