bert学习
Bert中文提取词向量GPU
参考网址:https://blog.csdn.net/jufengada9/article/details/90229931
1、环境安装
安装conda
1) 下载
https://repo.anaconda.com/miniconda/Miniconda3-latest-Linux-x86_64.sh
2) 安装
$ sh Miniconda3-latest-Linux-x86_64.sh
2、 配置python3.6虚拟环境
1) conda create -n python36 python=3.6
2) conda env list
参考命令:
查询操作
conda list 查看安装包
conda env list 查看虚拟环境
conda updata conda 检查更新当前conda
环境操作
conda create -n python27 python=2.7 创建名称为Python27的python2.7环境
source activate envName 切换环境linux
conda activate envName 切换环境windows
python --version 查看当前python版本
conda deactivate 关闭环境windows
source deativate 关闭环境linux
conda remove -n envName 删除环境
包操作
conda install -n envName [package] 安装包
conda remove --name envName [package] 删除包
3、 安装Tensorflow 1.10
1) 启动python36
$source activate python36
2) 更改pip源
$ vim ~/.pip/pip.conf
[global]
index-url = https://pypi.tuna.tsinghua.edu.cn/simple
3) 安装tf-1.13
$pip install tensorflow-gpu==1.12.0
4、安装bert server and client
pip install bert-serving-server
pip install bert-serving-client
5、启动bert服务
下载模型:https://storage.googleapis.com/bert_models/2018_11_03/chinese_L-12_H-768_A-12.zip
启动服务:bert-serving-start -model_dir ./chinese_L-12_H-768_A-12 -num_worker 1/2/4
注意:注意port和port_out的参数
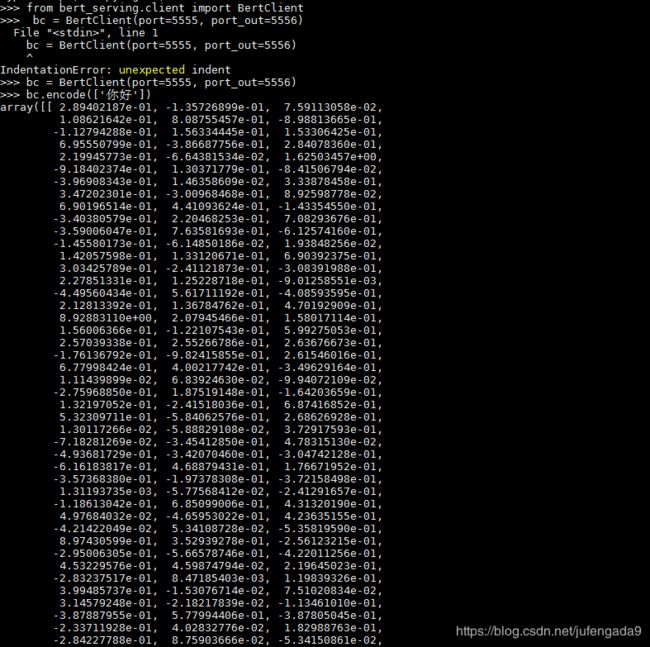
6、获取词向量
启动BERT之后,在服务器重新打开一个窗口,进入要运行的文件夹,启动python
将肖涵博士bert-as-server包里的client的bert_serving放入文件夹
肖涵博士bert-as-server的链接:https://github.com/hanxiao/bert-as-service
Bert模型预训练
参考:https://daiwk.github.io/posts/nlp-bert-code.html
1、创建预训练数据
python create_pretraining_data.py \
  --input_file=./sample_text.txt \
  --output_file=/tmp/tf_examples.tfrecord \
  --vocab_file=$BERT_BASE_DIR/vocab.txt \
  --do_lower_case=True \
  --max_seq_length=64\
  --max_predictions_per_seq=20 \
  --masked_lm_prob=0.15 \
  --random_seed=12345 \
  --dupe_factor=5
2、预训练
python run_pretraining.py \
  --input_file=/tmp/tf_examples.tfrecord \
  --output_dir=/tmp/pretraining_output \
  --do_train=True \
  --do_eval=True \
  --bert_config_file=$BERT_BASE_DIR/bert_config.json \
  --init_checkpoint=$BERT_BASE_DIR/bert_model.ckpt \
  --train_batch_size=16 \
  --max_seq_length=64 \
  --max_predictions_per_seq=20 \
  --num_train_steps=20 \
  --num_warmup_steps=10 \
  --learning_rate=2e-5
Bert模型训练
参考:https://daiwk.github.io/posts/nlp-bert-code.html
https://blog.csdn.net/weixin_43927437/article/details/85162533
1、模型训练
export BERT_BASE_DIR=/path/to/bert/uncased_L-12_H-768_A-12
export GLUE_DIR=/path/to/glue

python run_classifier.py \
  --task_name=MRPC \
  --do_train=true \
  --do_eval=true \
  --data_dir=$GLUE_DIR/MRPC \
  --vocab_file=$BERT_BASE_DIR/vocab.txt \
  --bert_config_file=$BERT_BASE_DIR/bert_config.json \
  --init_checkpoint=$BERT_BASE_DIR/bert_model.ckpt \
  --max_seq_length=64 \
  --train_batch_size=16 \
  --learning_rate=2e-5 \
  --num_train_epochs=3.0 \
  --output_dir=/tmp/mrpc_output/
2、模型预测
export BERT_BASE_DIR=/path/to/bert/uncased_L-12_H-768_A-12
export GLUE_DIR=/path/to/glue
export TRAINED_CLASSIFIER=/path/to/fine/tuned/classifier

python run_classifier.py \
  --task_name=MRPC \
  --do_predict=true \
  --data_dir=$GLUE_DIR/MRPC \
  --vocab_file=$BERT_BASE_DIR/vocab.txt \
  --bert_config_file=$BERT_BASE_DIR/bert_config.json \
  --init_checkpoint=$TRAINED_CLASSIFIER \
  --max_seq_length=64 \
  --output_dir=/tmp/mrpc_output/
Bert抽取特征向量
参考:https://daiwk.github.io/posts/nlp-bert-code.html
export BERT_BASE_DIR=/path/to/bert/uncased_L-12_H-768_A-12
export GLUE_DIR=/path/to/glue
export TRAINED_CLASSIFIER=/path/to/fine/tuned/classifier

python extract_features.py \
  --input_file=input.txt \
  --output_file=/tmp/output.json \
  --vocab_file=$BERT_BASE_DIR/vocab.txt \
  --bert_config_file=$BERT_BASE_DIR/bert_config.json \
  --init_checkpoint=$BERT_BASE_DIR/bert_model.ckpt \
  --layers=-1,-2,-3,-4 \
  --max_seq_length=128 \
  --batch_size=8