caffe入门学习:caffe.Classifier的使用
caffe入门学习:caffe.Classifier的使用
在学习pycaffe的时候,官方一直用到的案例就是net=caffe.net(.../deploy.protxt,..../xxx.caffemodel,caffe.TEST),之后会涉及一段和数据预处理的代码,但是这篇段code对于任何的图片分类预测都是相同的。每次都要写,并且每次都相同,好麻烦,那就来看看这个caffe.Classifier()里面的三个参数和上一个的类是一模一样的,只不过是这个class从caffe.net继承过来的.首先看看这个class的源码。
class Classifier(caffe.Net):
    """
    Classifier extends Net for image class prediction
    by scaling, center cropping, or oversampling.

    Parameters
    ----------
    image_dims : dimensions to scale input for cropping/sampling.
        Default is to scale to net input size for whole-image crop.
    mean, input_scale, raw_scale, channel_swap: params for
        preprocessing options.
    """
    def __init__(self, model_file, pretrained_file, image_dims=None,
                 mean=None, input_scale=None, raw_scale=None,
                 channel_swap=None):
        caffe.Net.__init__(self, model_file, pretrained_file, caffe.TEST)

        # configure pre-processing
        in_ = self.inputs[0]
        self.transformer = caffe.io.Transformer(//caffe.io.Transformer在前面我们是提到过的,主要是用于图片的预处理
            {in_: self.blobs[in_].data.shape})
        self.transformer.set_transpose(in_, (2, 0, 1))//格式转换为(cannel,weight,high)
        if mean is not None:
            self.transformer.set_mean(in_, mean)//添加均值图片
        if input_scale is not None:
            self.transformer.set_input_scale(in_, input_scale)
        if raw_scale is not None:
            self.transformer.set_raw_scale(in_, raw_scale)//像素数值恢复[0-255]
        if channel_swap is not None://RGB-->BGR
            self.transformer.set_channel_swap(in_, channel_swap)

        self.crop_dims = np.array(self.blobs[in_].data.shape[2:])
        if not image_dims:
            image_dims = self.crop_dims
        self.image_dims = image_dims

    def predict(self, inputs, oversample=True)://只是自己实现了一个predict函数
predict函数中的input是一幅图片(w*H*K),后面的那个布尔值代表的是是否需要对图片crop,也就是1幅图片是否需要转化到10张图片,四个角+一个中心,水平翻转之后再来一次,总计10张。否则我们仅仅需要中心的那张就可以。返回的是一张N*C的numpy.ndarry。代表每张图片有可能对应的C个类别。也就是说,你以后用这个class会很方便,直接省去图片的初始化,下面看一个例子:
import caffe
import numpy as np
from scipy.io import loadmat
import sys
caffe_root ="/opt/modules/caffe-master"
sys.path.insert(0, caffe_root + 'python')
ref_model_file = caffe_root+'/models/bvlc_reference_caffenet/deploy.prototxt'
ref_pretrained = caffe_root+'/models/bvlc_reference_caffenet/bvlc_reference_caffenet.caffemodel'
net = caffe.Classifier(ref_model_file, ref_pretrained,
                       mean=imagenet_mean,
                       channel_swap=(2,1,0),
                       raw_scale=255,
                       image_dims=(256, 256))
image_file = '/opt/data/person/liyao.jpg'
input_image = caffe.io.load_image(image_file)
output = net.predict([input_image])
predictions = output[0]
print predictions.argmax()
import os
labels_file = caffe_root + '/data/ilsvrc12/synset_words.txt'
if not os.path.exists(labels_file):
    !../data/ilsvrc12/get_ilsvrc_aux.sh

labels = np.loadtxt(labels_file, str, delimiter='\t')

print 'output label:', labels[predictions.argmax()]

import matplotlib.pyplot as plt
# display plots in this notebook
%matplotlib inline
plt.rcParams['figure.figsize'] = (10, 10)        # large images
plt.rcParams['image.interpolation'] = 'nearest'  # don't interpolate: show square pixels
plt.rcParams['image.cmap'] = 'gray'  # use grayscale output rather than a (potentially misleading) color heatmap

def vis_square(data):
    """Take an array of shape (n, height, width) or (n, height, width, 3)
       and visualize each (height, width) thing in a grid of size approx. sqrt(n) by sqrt(n)"""

    # normalize data for display
    data = (data - data.min()) / (data.max() - data.min())

    # force the number of filters to be square
    n = int(np.ceil(np.sqrt(data.shape[0])))
    padding = (((0, n ** 2 - data.shape[0]),
               (0, 1), (0, 1))                 # add some space between filters
               + ((0, 0),) * (data.ndim - 3))  # don't pad the last dimension (if there is one)
    data = np.pad(data, padding, mode='constant', constant_values=1)  # pad with ones (white)

    # tile the filters into an image
    data = data.reshape((n, n) + data.shape[1:]).transpose((0, 2, 1, 3) + tuple(range(4, data.ndim + 1)))
    data = data.reshape((n * data.shape[1], n * data.shape[3]) + data.shape[4:])

    plt.imshow(data); plt.axis('off')
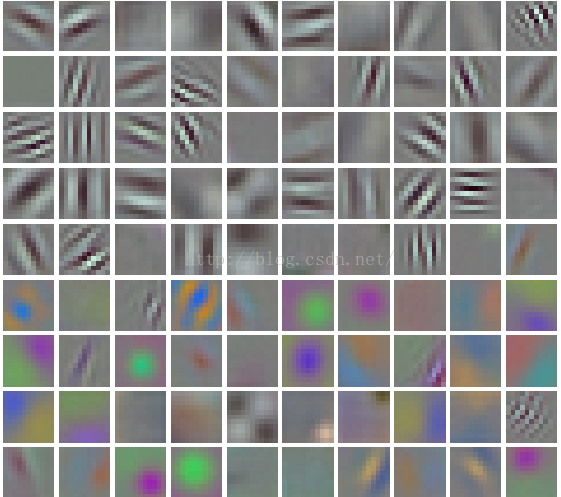
filters = net.params['conv1'][0].data
vis_square(filters.transpose(0, 2, 3, 1))
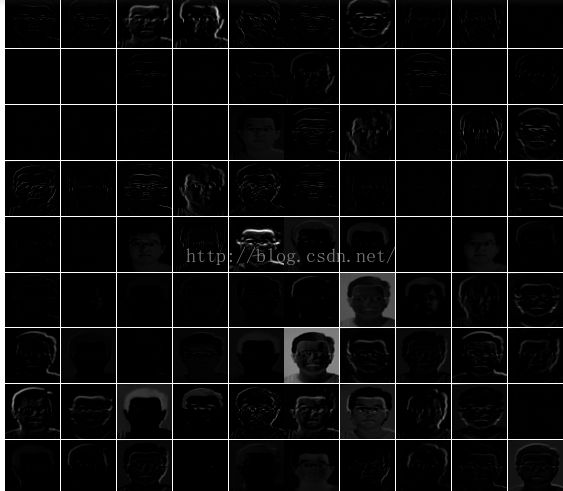
feat = net.blobs['conv1'].data[0]
vis_square(feat)
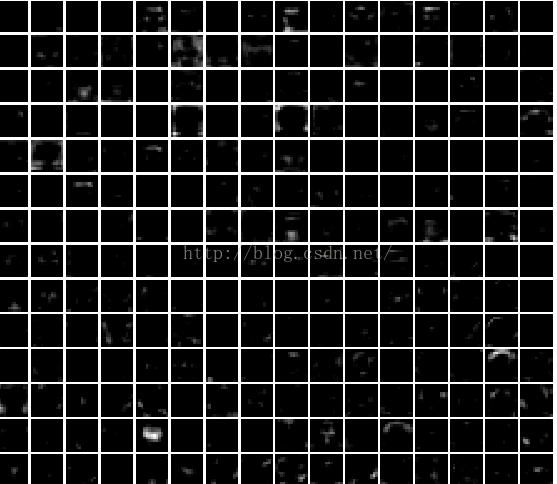
feat = net.blobs['conv5'].data[0]
vis_square(feat)
整体来看,低从层次的灰抽取抽取颜色和纹理方向的特征,而高层次的灰更加抽象与整体的轮廓。