Opencv学习记录(四)——基于Python(pil、imageio)、Opencv处理 GIF图片
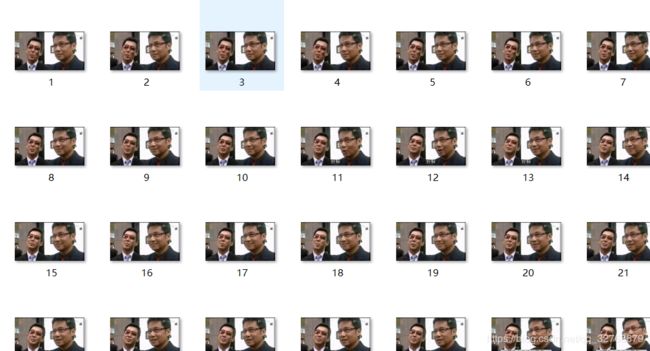
1. 使用python pil库进行gif图片的分成静态图片格式
注意:不支持生成 jpg、jpeg格式;支持生成bmp、png,推荐png格式,因为后面使用 imageio库进行生成 gif格式时仅支持 png格式。

from PIL import Image,ImageSequence
gif = Image.open(r'sample.gif')
if os.path.exists("output") == False:                       #判断该文件夹是否存在,如果存在再创建则会报错
    os.mkdir("output")
    for i,frame in enumerate(ImageSequence.Iterator(gif),1):
        frame.save(r'output/%d.png' % i)                      #保存在等目录的output文件夹下
2、使用python pil库添加汉字
1)bgr格式(opencv图片)转为rgb格式(pil图片)
img_PIL = Image.fromarray(cv2.cvtColor(image, cv2.COLOR_BGR2RGB))
2)确定字体格式
font = ImageFont.truetype("simhei.ttf", 30,encoding="utf-8") #第一项为字体文件,第二项为字体大小,第三项编码方式
3)写入汉字**
第一项为字符串左下角坐标,第二项为字符串,第三项为颜色,第四项为字体格式
    draw = ImageDraw.Draw(img_PIL)                                                    #操作的图片
    draw.text((0,0)," sorry,我...",fill = (0,255,255),font = font)			#写入文字
4)转为opencv能显示的图片(RGB格式)
image = cv2.cvtColor(np.asarray(img_PIL), cv2.COLOR_RGB2BGR)
3、生成 gif 文件(imageio库方法)
这步比较简单,先确定需要的帧,以及帧的查找表,调用imageio.mimsave(gif_name, frames, ‘GIF’, duration=duration)即完成。参数看函数就明白了。
def create_gif(gif_name, path, duration = 0.3):
    frames = []
    image_list = []
    for i in range(1,167):
        image_list.append(path+"/%d.png" % i)
    for image_name in image_list:
        frames.append(imageio.imread(image_name))
    imageio.mimsave(gif_name, frames, 'GIF', duration=duration)
    return
4、应用:
我所得到的结果是:
所用的的opencv方法:
1)用鼠标选定感兴趣区域并将其文字去掉
鼠标操作:左键点击图片中文字的左上与右下两点,右键确定
去文字操作:感兴趣区域每个像素点赋值一样就行了
注意:因为不会OCR,所以在生成的每帧中找出需要改变的图片(有文字),再手动选取文字区域来达到目的。 #text前面加 u 才不会乱码
def MouseHandle(event,x,y,flags,param):
    global img
    global  click_num
    global change_flag
    global x1, x2, y1, y2
    if event == cv2.EVENT_LBUTTONDOWN:
        click_num += 1
        print "left click"
        if click_num == 1:
            x1,y1 = x,y
            print  click_num,'(',x1,y1,')'
        if click_num == 2:
            x2,y2 = x,y
            print click_num,'(',x2,y2,')'
    elif event == cv2.EVENT_RBUTTONDOWN:
        if click_num >= 2:
            click_num = 0
            change_flag += 1
            print change_flag
            if change_flag == 1:
                change_text(27, 36,20,8,2 ,u"就算你人头抢的再多")          #前面加 u 才不会乱码

                img = cv2.imread("output/44.png")
                cv2.imshow("img", img)
            if change_flag == 2:
                change_text(44, 60,20,8,2 , u"就算你经济再好")  # 少2

                img = cv2.imread("output/62.png")
                cv2.imshow("img", img)
            if change_flag == 3:
                change_text(62, 80,20,8,2 , u"我想举报就举报")  #少2

                img = cv2.imread("output/83.png")
                cv2.imshow("img", img)
            if change_flag == 4:
                change_text(82, 93,20,0,2, u"谁叫我是峡谷暴躁姜呢")  #少0

                img = cv2.imread("output/97.png")
                cv2.imshow("img", img)
            if change_flag == 5:
                change_text(97, 105,20,0,2 , u"那你了不起啊")  #少0

                img = cv2.imread("output/112.png")
                cv2.imshow("img", img)
            if change_flag == 6:
                change_text(112, 131,20,0,2 , u"呵!我在这真的可以为所欲为")  # 多1

                img = cv2.imread("output/146.png")
                cv2.imshow("img", img)
            if change_flag == 7:
                #change_text(146, 157,20,0,2 , u"以后就让他刷野")  # 少0
                change_text(146, 157,20,0,2 , u"等会全都举报了")  # 少0

                img = cv2.imread("output/158.png")
                cv2.imshow("img", img)
            if change_flag == 8:
     #           change_text(158, 167,20,0,2 , u"一直刷")  # 少0
                change_text(158, 167,20,0,2 , u"全部举报")  # 少0
2)新文字生成
步骤2已记录,文字改变操作函数如下。
def change_text(num1,num2,font,add_x,add_y,text):
    global x1, x2, y1, y2
    for i in range(num1,num2+1):
        # change_flag = 0
        img = cv2.imread("output/%d.png" % i)
        #去文字和写文字操作
        # roi = img[x1:x2,y1:y2]
        # roi = cv2.cvtColor(roi, cv2.COLOR_RGB2GRAY)
        print x1,y1,x2,y2
        for x in range(x1,x2):
            for y in range(y1,y2):
                img[y,x] = [200,200,200]
        #cv2.putText(img, text, (x1, y2), cv2.FONT_HERSHEY_SIMPLEX,1.0, (0, 255, 0),2)

        image = text_to_Image(text,img,(x1+ add_x,y1+add_y),font,(0,0,0))
        cv2.imshow("ss",image)
        cv2.imwrite("output/%d.png" % i,image)
3)图像缩放、帧数减少来减小生成的 gif 文件大小
注意:image.shape[1] — x , [0] —y
def resize_frames(path,wid,hig):
    for i in range(167):                                                           #生成的167帧
        image = cv2.imread(path+"/%d.png" % i)
        res = cv2.resize(image,(int(image.shape[1]/wid), int(image.shape[0]/hig)), interpolation=cv2.INTER_AREA)
        cv2.imwrite("outputRES/%d.png" % i,res)
    print image.shape
    print res.shape
参考文章:
gif分解
gif合成
添加汉字
完整代码:GitHub