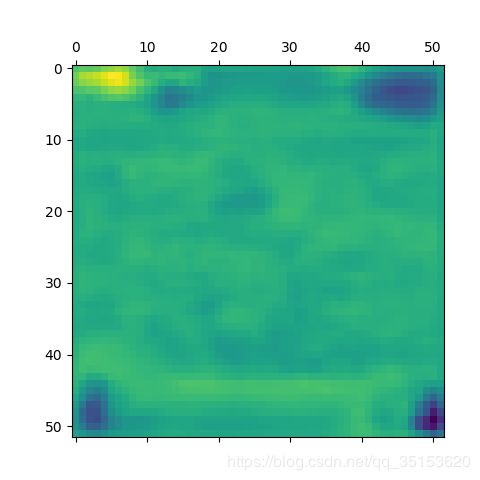
使用keras框架编写的深度模型 输出及每一层的特征可视化
使用训练好的模型进行预测的时候,为分析效果,通常需要对特征提取过程中的特征映射做可视化操作
本文以keras为例,对特征可视化操作进行详解。
一、首先,对模型的最后输出层进行特征可视化
from keras import models
#使用matlpotlib模块进行绘图的操作
import matplotlib.pylot as plt
#images是一个batch的输入图像,batch_input[batch图像数量,尺寸高,尺寸宽,3(rgb通道数量)]
#model是训练好的模型
#model = load_model('path')
nb_images = len(images)
batch_input = np.zeros((nb_images, net_h, net_w, 3))
# preprocess the input
for i in range(nb_images):
batch_input[i] = preprocess_input(images[i], net_h, net_w)
# run the prediction
#batch_output为一个样本的所有通道输出特征映射,本文应用特征金字塔结构,有三个维度的特征提取层
#batch_output[0]是第一个维度的特征提取层所有通道的输出特征映射,四维,本文例子中为[1, 52, 52, 72]
#[一个样本,尺寸,尺寸,通道数]
#也可以是batch_output = model.predict(batch_input)
batch_output = model.predict_on_batch(batch_input)
batch_boxes = [None]*nb_images
print(batch_output[0].shape)
#display feature map
#下面为归一化到0-255空间内
xx = batch_output[0]
max = np.max(xx)
print(max,"max value is :")
X_output = X_output .astype("float32") / max * 255
#下面的30为第30个通道
X_output = xx[0,:,:,30]
#使用matplotlib显示图像
plt.figure()
plt.imshow(X_output, cmap='viridis')
plt.show()
#输出结果
原始图像
输出层的特征可视化
二、可视化某一层的特征映射
from keras import backend as k
from keras import models
import matplotlib.pylot as plt
model = load_model('...')
layer_1 =k.function([model.layers[0].input], [model.layers[1].output])
#第2个model,layers[]改成你想显示的层数
f1 = layer_1[input_image][0]
f1.image = f1[0,:,:,channel]
plt,matshow(f1.image, camp='viridis')
plt.show()
示例:
from keras import models
import matplotlib.pylot as plt
from keras import backend as k
#images是一个batch的输入图像,batch_input[batch图像数量,尺寸高,尺寸宽,3(rgb通道数量)]
#model是训练好的模型
#model = load_model('path')
nb_images = len(images)
batch_input = np.zeros((nb_images, net_h, net_w, 3))
# preprocess the input
for i in range(nb_images):
batch_input[i] = preprocess_input(images[i], net_h, net_w)
#display feature map
#可视化第一层的特征映射
layer_1 = K.function([model.layers[0].input], [model.layers[1].output])
f1 = layer_1([batch_input])[0]
print(f1.shape)
max = np.max(f1)
f1 =f1.astype("float32") / max * 255
plt.figure()
#显示第一层网络前5个通道的特征映射
for i in range(5):
plt.subplot(2, 3, i+1)
plt.imshow(f1[0,:,:,i], cmap='viridis')
plt.show()


