Centos7 安装nginx以及搭建基于nginx的本地yum服务器
1.安装nginx
我尝试了两个下载nginx的途径,第一个是源码编译安装(推荐,性能稳定),但是写systemctl 脚本时失败了(已解决),于是我懒得再配,删掉直接yum了,yum后自带systemctl脚本,可以轻松的开启关闭
1.1 源码编译安装nginx
为了编译Nginx源代码,需要标准的GCC编译器。GCC的全称为GNU Compiler Collection, 其由GNU开发,并以GPL及LGPL许可证发行,是自由的类UNIX即苹果电脑Mac OSX操作系统的标准编译器。因为GCC原本只能处理C语言,所以原名为GNU C语言编译器,后来得到快速扩展,可处理C++、Fortran、Pascal、Objective-C、Java以及Ada等其他语言。
除此之外,还需要Automake工具,以完成自动创建Makefile文件的工作。
由于Nginx的一些模块需要依赖其他第三方库,通常有pcre库(支持rewrite模块)、zlib库(支持gzip模块)和openssl库(支持ssl模块)等。
1.1.1 所以第一步先安装依赖(已安装的可以忽略)
$ yum -y install gcc gcc-c++ automake pcre pcre-devel zlib zlib-devel openssl openssl-devel
1.1.2 创建nginx用户
因为在启动nginx服务时,会先判断电脑上有没有它默认的nginx用户,如果没有则会报错,我们后续也可以将它改为root或其他用户,为了以防万一,我们先简单建一个nginx用户
useradd nginx
如果有需要,也可以给他加个组什么的,因为只是练习,我就一会直接要改成root用户
1.1.3 下载nginx
这里下载的是1.16.1版本,如果又需要可以换成更低或更高
wget会下载到当前目录下,没有wget指令的话可以先yum -y install wget
wget https://nginx.org/download/nginx-1.16.1.tar.gz
1.1.4 解压文件
解压到你的指定的目录,如我的在/usr/nginx
tar -zxvf nginx-1.16.1.tar.gz -C /usr/nginx --strip-components 1
这里的 --strip-components n 是指给压缩包扒掉n层衣服(羞耻!),这样你打开nginx目录就直接是bin等内容了
这里对解压完成后的部分目录和文件做个简单的介绍:
src 该目录存放了Nginx的所有源码;
man 该目录存放了Nginx的帮助文档;
html 该目录存放了两个html文件。这两个文件与Nginx服务器的运行相关,这两个文件的作用会在下文
给出,这里不做赘述;
conf 该目录存放的是Nginx服务器的配置文件,包含Nginx服务器的基本配置文件;
auto 该目录存放了大量脚本文件,和configure脚本程序有关;
configure 该文件是Nginx软件的自动脚本程序。运行configure脚本一般会完成两项工作:
一是检查环境,根据环境检查结果生成C代码;二是生成编译代码需要的Makefile文件。
1.1.5 编译安装
我们进入到安装目录,比如我在/usr/nginx
我们在make之前要先生成Makefile可执行文件
./configure --user=nginx --prefix=/usr/nginx --http-log-path=/var/log/nginx/access.log --error-log-path=/var/log/nginx/error.log --lock-path=/var/lock/nginx.lock --pid-path=/run/nginx.pid --with-pcre-jit --with-http_ssl_module --with-http_v2_module --with-http_sub_module --with-stream --with-stream_ssl_module
–prefix配置指定了Nginx的安装路径,其他的配置使用默认的配置。
但是我本人直接 ./configure 把东西都安到了默认目录也不会有问题
在运行过程中,configure脚本调用auto目录中的各种脚本对系统环境及相关配置和设置进行了检查。
直接make
make
make install
应该没有问题了,有问题就是少依赖,按照报错解决
1.1.6 启动nginx
./sbin/nginx
通过netstat -tunlp | grep nginx 查看进程端口

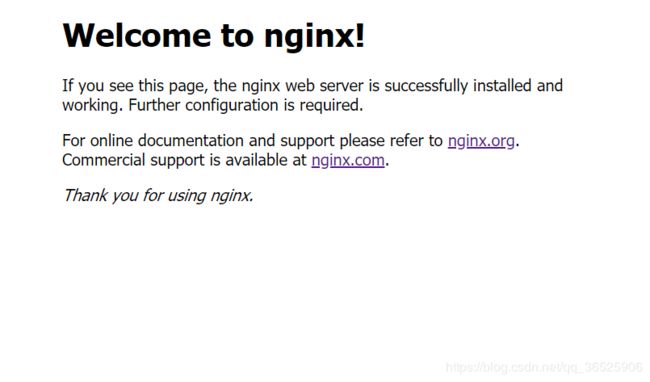
然后我们可以去浏览器中访问此台机器的80端口:master:80
可以看到welcome就成了
1.1.7 给nginx一个systemctl
1.创建nginx.service
vim /usr/lib/systemd/system/nginx.service //此处位置为固定位置,无需改动
2.编辑如下内容
  [Unit]

    Description=nginx - high performance web server

    After=network.target remote-fs.target nss-lookup.target

    [Service]

    Type=forking

    WorkingDirectory=/usr/nginx //此处位置为你的nginx安装目录,根据实际情况进行更改

    ExecStart=/usr/nginx/sbin/nginx //此处位置为你的nginx安装目录中的nginx可执行文件位置,根据实际位置进行更改

    ExecReload=/bin/kill -s HUP $MAINPID

    ExecStop=/bin/kill -s QUIT $MAINPID

    PrivateTmp=true


    [Install]

    WantedBy=multi-user.target
3.使文件生效
systemctl daemon-reload
4.启动nginx
systemctl start nginx
5.关闭nginx
systemctl stop nginx
6.重启nginx
systemctl restart nginx
7.开机启动
systemctl enable nginx
1.1.8 配置一下nginx
在/etc/nginx/ 路径下是nginx的文件,其中我们需要配置nginx.conf 文件来修改一些参数 路径为/etc/nginx/nginx.conf
vi /etc/nginx/nginx.conf
user  root; #调整用户,可以改成root用户
worker_processes  8; #调整工作进程数量
error_log  /var/log/nginx/error.log warn;
pid        /var/run/nginx.pid;
events {
    worker_connections  1024;#连接池数量1024
}
http {
    include       /etc/nginx/mime.types;#接受的类型
    default_type  application/octet-stream;
    log_format  main  '$remote_addr - $remote_user [$time_local] "$request" '
                      '$status $body_bytes_sent "$http_referer" '
                      '"$http_user_agent" "$http_x_forwarded_for"';
    access_log  /var/log/nginx/access.log  main;
    sendfile        on;
    #tcp_nopush     on;
    keepalive_timeout  65;
    #gzip  on;
   include /etc/nginx/conf.d/*.conf;#扩展配置的文件夹/etc/nginx/conf.d/
第二步
vi /etc/nginx/conf.d/default.conf
server {
    listen       80;
    server_name  localhost;
    #charset koi8-r;
    #access_log  /var/log/nginx/host.access.log  main;
    location / {
        root   /usr/share/nginx/html; #存放html文件的地方
        index  index.html index.htm;
    }
    #error_page  404              /404.html;
    # redirect server error pages to the static page /50x.html
    #
    error_page   500 502 503 504  /50x.html;
    location = /50x.html {
        root   /usr/share/nginx/html;
    }
    # proxy the PHP scripts to Apache listening on 127.0.0.1:80
    #
    #location ~ \.php$ {
    #    proxy_pass   http://127.0.0.1;
    #}
    # pass the PHP scripts to FastCGI server listening on 127.0.0.1:9000
    #
    #location ~ \.php$ {
    #    root           html;
    #    fastcgi_pass   127.0.0.1:9000;
    #    fastcgi_index  index.php;
    #    fastcgi_param  SCRIPT_FILENAME  /scripts$fastcgi_script_name;
    #    include        fastcgi_params;
    #}
    # deny access to .htaccess files, if Apache's document root
    # concurs with nginx's one
    #
    #location ~ /\.ht {
    #    deny  all;
    #}
}
第三步
cd /usr/share/nginx/html/
现在在此路径下自己写一个html
vi my.html

this is my html
html内容怎么写都可以
1.2 yum安装nginx
1.2.1 安装依赖
先安装一个必要的依赖
yum install yum-utils -y
1.2.2 配置源路径
vim /etc/yum.repos.d/nginx.repo 编写源路径
[nginx-stable]
name=nginx stable repo
baseurl=http://nginx.org/packages/centos/$releasever/$basearch/
gpgcheck=1
enabled=1
gpgkey=https://nginx.org/keys/nginx_signing.key

[nginx-mainline]
name=nginx mainline repo
baseurl=http://nginx.org/packages/mainline/centos/$releasever/$basearch/
gpgcheck=1
enabled=0
gpgkey=https://nginx.org/keys/nginx_signing.key
以上内容让我们在浏览yum list nginx时提供最新的稳定版本
1.2.3 安装nginx
yum list nginx
yum install nginx -y 安装nginx服务
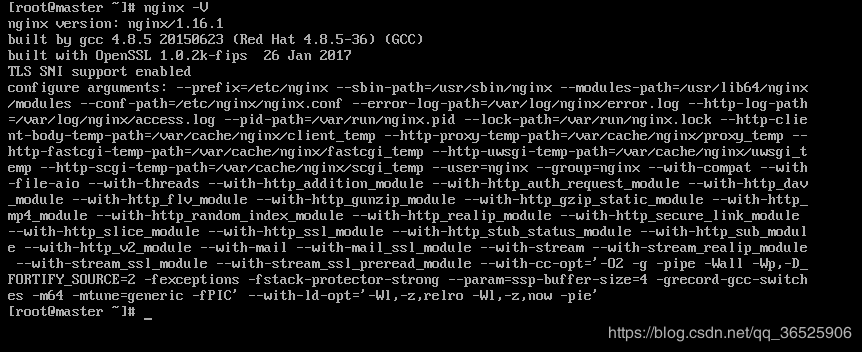
nginx -V 查看他的安装版本及路径
nginx -t 检查nginx是否有错误
如果报错为没有用户,就是没有创建nginx用户也没有改变默认配置

快看!yum自带systemctl!!惊不惊喜!
2. 搭建基于nginx的本地yum服务器
2.1 改配置文件
修改 local读取路径
vi /etc/nginx/nginx.conf
user  root;
worker_processes  8;
error_log  /var/log/nginx/error.log warn;
pid        /var/run/nginx.pid;
events {
    worker_connections  1024;
}
http {
    include       /etc/nginx/mime.types;
    default_type  application/octet-stream;
    log_format  main  '$remote_addr - $remote_user [$time_local] "$request" '
                      '$status $body_bytes_sent "$http_referer" '
                      '"$http_user_agent" "$http_x_forwarded_for"';
    access_log  /var/log/nginx/access.log  main;
    sendfile        on;
    #tcp_nopush     on;
    keepalive_timeout  65;
    #gzip  on;
   #include /etc/nginx/conf.d/*.conf;#注释掉扩展
#添加服务端和本地端 ,修改根路径  ,location为/data/www/web
server {
        listen 80;
        server_name www.gpy.com;
        location ~ / {
          index index.html;
          autoindex on;#有时会无法加载页面,因为Nginx默认是不允许列出整个目录的,打开就好了
          root /data/www/web;
        }
}
}
一旦注释掉include…这一行,/etc/nginx/conf.d/ 目录下的.conf 文件和默认 /etc/nginx/conf.d/default.conf 文件失效,此时默认访问我们刚刚添加的server
2.2 创建文件夹
注意权限应为nginx用户权限,如我是root
mkdir -p /data/www/web/noarch/RMPS
2.3 安装createrepo
- yum -y createrepo
- 复制一个rpm文件到 /data/www/web/noarch/RPMS(我随便找的)
cp /etc/yum.repos.d/nginx-release-centos-7-0.el7.ngx.noarch.rpm /data/www/web/noarch/RPMS
使用createrepo制作repodata
createrepo -o ./ ./RPMS/
去到/data/www/web/noarch里看看是不是成功创建了repodata

注意:createrepo 后必须跟一个文件,文件里面可以放多个rpm文件,将文件制作为repodata
2.4 制作制作自己的repo文件
在/etc/yum.repos.d/中制作制作自己的repo文件
vi /etc/yum.repos.d/test.repo
在test.repo中写入
#test.repo
[test]
name=qf repo
baseurl=http://master/noarch/  #此处应为自己的地址
gpgcheck=0
enabled=1
此时,访问master/noarch应该可以看到如下页面

就成功了!
2.5 错误总结
1、如果在安装nginx时报错为无用户,则创建nginx用户或更改配置
2、如果报错为创建路径失败则手动创建路径
3、如果访问页面为403(权限被拒),则权限不够,仔细查看目录当前用户的权限
4、如果依然403,尝试关闭防火墙
5、如果还是403请关闭centos7的高安全模式 setenforce 0 这是两个单词 set + enforce 设置为0即关闭。

