版本记录
| 版本号 | 时间 |
|---|---|
| V1.0 | 2017.10.29 |
前言
目前世界上科技界的所有大佬一致认为人工智能是下一代科技革命,苹果作为科技界的巨头,当然也会紧跟新的科技革命的步伐,其中ios API 就新出了一个框架
Core ML。ML是Machine Learning的缩写,也就是机器学习,这正是现在很火的一个技术,它也是人工智能最核心的内容。感兴趣的可以看我写的下面几篇。
1. Core ML框架详细解析(一) —— Core ML基本概览
2. Core ML框架详细解析(二) —— 获取模型并集成到APP中
一个简单示例
使用Vision和Core ML可以对图像进行分类,下面看一个简单例子。
下面我们就看一下代码。
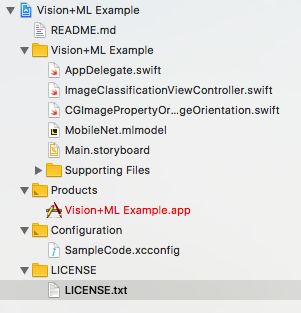
1. ImageClassificationViewController.swift
import UIKit
import CoreML
import Vision
import ImageIO

class ImageClassificationViewController: UIViewController {
    // MARK: - IBOutlets

    @IBOutlet weak var imageView: UIImageView!
    @IBOutlet weak var cameraButton: UIBarButtonItem!
    @IBOutlet weak var classificationLabel: UILabel!

    // MARK: - Image Classification

    /// - Tag: MLModelSetup
    lazy var classificationRequest: VNCoreMLRequest = {
        do {
            /*
             Use the Swift class `MobileNet` Core ML generates from the model.
             To use a different Core ML classifier model, add it to the project
             and replace `MobileNet` with that model's generated Swift class.
             */
            let model = try VNCoreMLModel(for: MobileNet().model)

            let request = VNCoreMLRequest(model: model, completionHandler: { [weak self] request, error in
                self?.processClassifications(for: request, error: error)
            })
            request.imageCropAndScaleOption = .centerCrop
            return request
        } catch {
            fatalError("Failed to load Vision ML model: \(error)")
        }
    }()

    /// - Tag: PerformRequests
    func updateClassifications(for image: UIImage) {
        classificationLabel.text = "Classifying..."

        let orientation = CGImagePropertyOrientation(image.imageOrientation)
        guard let ciImage = CIImage(image: image) else { fatalError("Unable to create \(CIImage.self) from \(image).") }

        DispatchQueue.global(qos: .userInitiated).async {
            let handler = VNImageRequestHandler(ciImage: ciImage, orientation: orientation)
            do {
                try handler.perform([self.classificationRequest])
            } catch {
                /*
                 This handler catches general image processing errors. The `classificationRequest`'s
                 completion handler `processClassifications(_:error:)` catches errors specific
                 to processing that request.
                 */
                print("Failed to perform classification.\n\(error.localizedDescription)")
            }
        }
    }

    /// Updates the UI with the results of the classification.
    /// - Tag: ProcessClassifications
    func processClassifications(for request: VNRequest, error: Error?) {
        DispatchQueue.main.async {
            guard let results = request.results else {
                self.classificationLabel.text = "Unable to classify image.\n\(error!.localizedDescription)"
                return
            }
            // The `results` will always be `VNClassificationObservation`s, as specified by the Core ML model in this project.
            let classifications = results as! [VNClassificationObservation]

            if classifications.isEmpty {
                self.classificationLabel.text = "Nothing recognized."
            } else {
                // Display top classifications ranked by confidence in the UI.
                let topClassifications = classifications.prefix(2)
                let descriptions = topClassifications.map { classification in
                    // Formats the classification for display; e.g. "(0.37) cliff, drop, drop-off".
                   return String(format: "  (%.2f) %@", classification.confidence, classification.identifier)
                }
                self.classificationLabel.text = "Classification:\n" + descriptions.joined(separator: "\n")
            }
        }
    }

    // MARK: - Photo Actions

    @IBAction func takePicture() {
        // Show options for the source picker only if the camera is available.
        guard UIImagePickerController.isSourceTypeAvailable(.camera) else {
            presentPhotoPicker(sourceType: .photoLibrary)
            return
        }

        let photoSourcePicker = UIAlertController()
        let takePhoto = UIAlertAction(title: "Take Photo", style: .default) { [unowned self] _ in
            self.presentPhotoPicker(sourceType: .camera)
        }
        let choosePhoto = UIAlertAction(title: "Choose Photo", style: .default) { [unowned self] _ in
            self.presentPhotoPicker(sourceType: .photoLibrary)
        }

        photoSourcePicker.addAction(takePhoto)
        photoSourcePicker.addAction(choosePhoto)
        photoSourcePicker.addAction(UIAlertAction(title: "Cancel", style: .cancel, handler: nil))

        present(photoSourcePicker, animated: true)
    }

    func presentPhotoPicker(sourceType: UIImagePickerControllerSourceType) {
        let picker = UIImagePickerController()
        picker.delegate = self
        picker.sourceType = sourceType
        present(picker, animated: true)
    }
}

extension ImageClassificationViewController: UIImagePickerControllerDelegate, UINavigationControllerDelegate {
    // MARK: - Handling Image Picker Selection

    func imagePickerController(_ picker: UIImagePickerController, didFinishPickingMediaWithInfo info: [String: Any]) {
        picker.dismiss(animated: true)

        // We always expect `imagePickerController(:didFinishPickingMediaWithInfo:)` to supply the original image.
        let image = info[UIImagePickerControllerOriginalImage] as! UIImage
        imageView.image = image
        updateClassifications(for: image)
    }
}
2. CGImagePropertyOrientation+UIImageOrientation.swift
import UIKit
import ImageIO

extension CGImagePropertyOrientation {
    /**
     Converts a `UIImageOrientation` to a corresponding
     `CGImagePropertyOrientation`. The cases for each
     orientation are represented by different raw values.

     - Tag: ConvertOrientation
     */
    init(_ orientation: UIImageOrientation) {
        switch orientation {
        case .up: self = .up
        case .upMirrored: self = .upMirrored
        case .down: self = .down
        case .downMirrored: self = .downMirrored
        case .left: self = .left
        case .leftMirrored: self = .leftMirrored
        case .right: self = .right
        case .rightMirrored: self = .rightMirrored
        }
    }
}
这里使用的模型就是MobileNet.mlmodel,下面看一下详细信息以及在github上的地址。
MobileNets are based on a streamlined architecture that have depth-wise separable convolutions to build light weight deep neural networks. Trained on ImageNet with categories such as trees, animals, food, vehicles, person etc. MobileNets: Efficient Convolutional Neural Networks for Mobile Vision Applications https://github.com/shicai/MobileNet-Caffe
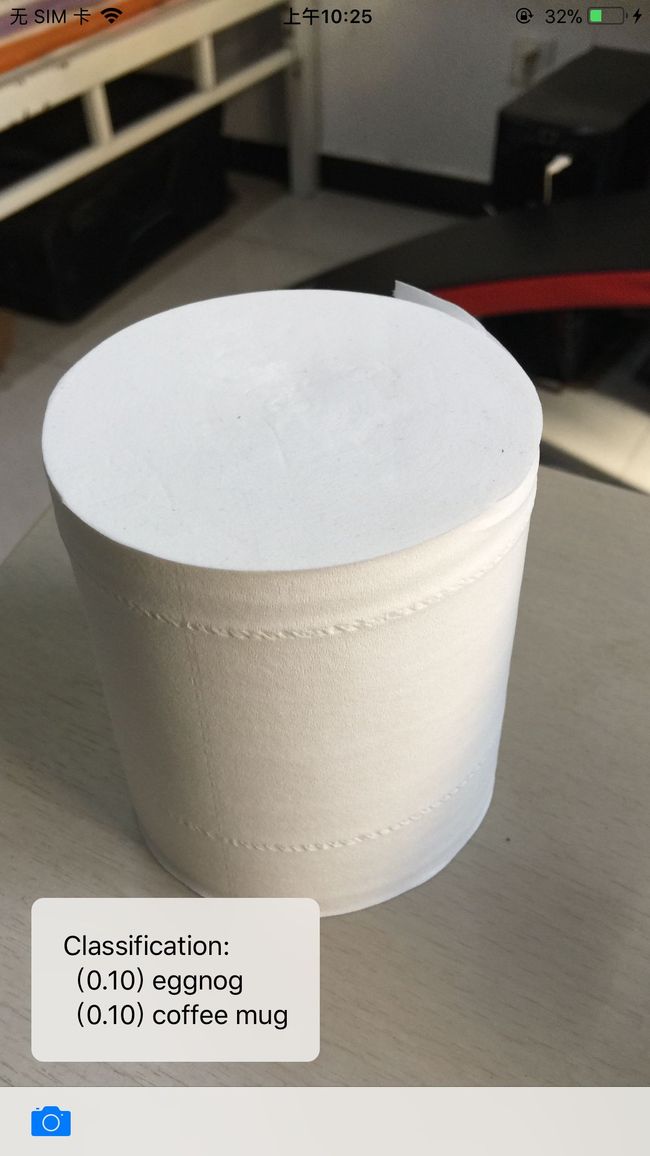
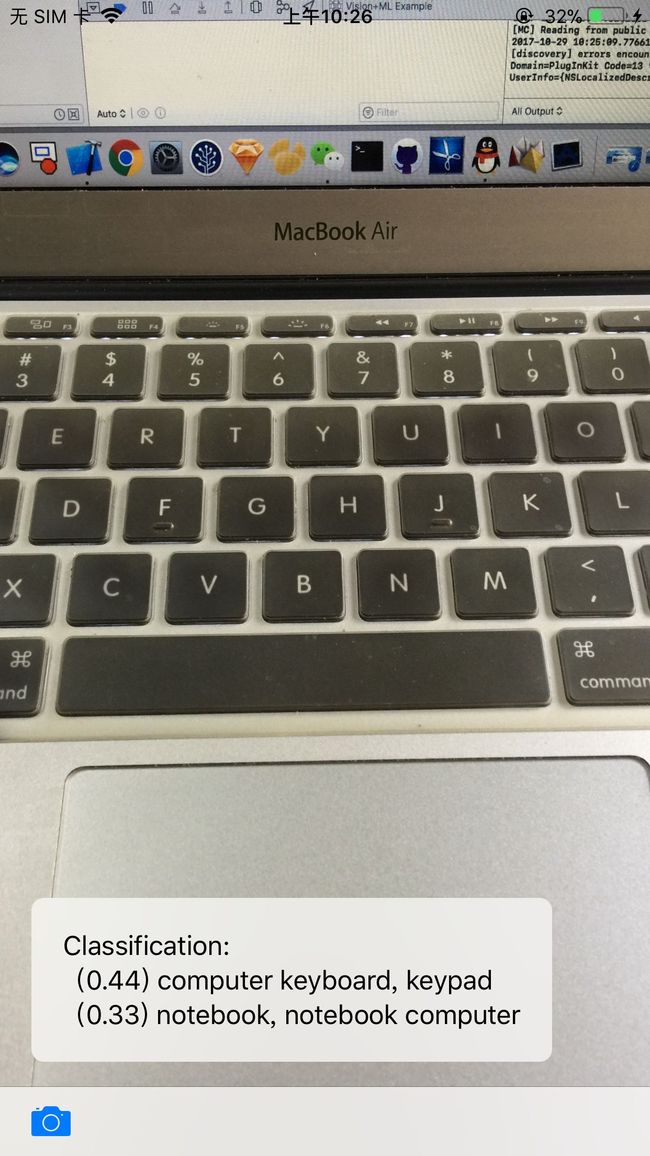
这里我直接拍了两张照片进行识别,结果是可以正确的识别出键盘,但是没有识别出卷纸。具体如下图所示。
详细说明
1. 总体概括
使用Core ML框架,您可以使用训练好的机器学习模型对输入数据进行分类。 Vision框架与Core ML合作,将分类模型应用于图像,并对这些图像进行预处理,使机器学习任务更轻松,更可靠。
此示例应用程序使用开源MobileNet模型(几种available classification models之一),来对1000个分类类别来识别图像,如下面的示例截图所示。
2. Preview the Sample App - 预览示例应用程序
要查看此示例应用程序的操作,构建并运行项目,然后使用示例应用程序工具栏中的按钮拍摄照片或从照片库中选择图像。 然后,示例应用程序使用Vision将Core ML模型应用于所选择的图像,并显示所得到的分类标签以及指示每个分类的置信水平的数字。 它按照模型分配给每个的置信分数的顺序显示前两个分类。
3. Set Up Vision with a Core ML Model - 用Core ML模型设置视觉
Core ML自动生成Swift类 - 在此示例中,MobileNet类可轻松访问ML模型。 要使用模型设置Vision请求,请创建该类的实例,并使用其model属性创建VNCoreMLRequest
对象。 运行请求后,使用请求对象的完成处理程序来指定从模型接收结果的方法。
// Listing 1

let model = try VNCoreMLModel(for: MobileNet().model)

let request = VNCoreMLRequest(model: model, completionHandler: { [weak self] request, error in
    self?.processClassifications(for: request, error: error)
})
request.imageCropAndScaleOption = .centerCrop
return request
ML模型以固定的宽高比处理输入图像,但输入图像可以具有任意的纵横比,因此Vision必须缩放或裁剪图像以适合。 为获得最佳效果,请设置请求的imageCropAndScaleOption
属性以匹配模型训练的图像布局。 对于available classification models模型,VNImageCropAndScaleOptionCenterCrop
选项是适当的,除非另有说明。
4. Run the Vision Request - 运行视觉请求
使用要处理的图像创建VNImageRequestHandler
对象,并将请求传递给该对象的performRequests:error:
方法。 此方法同步运行 - 使用后台队列,以便在请求执行时主队列不被阻塞。
// Listing 2

DispatchQueue.global(qos: .userInitiated).async {
    let handler = VNImageRequestHandler(ciImage: ciImage, orientation: orientation)
    do {
        try handler.perform([self.classificationRequest])
    } catch {
        /*
         This handler catches general image processing errors. The `classificationRequest`'s
         completion handler `processClassifications(_:error:)` catches errors specific
         to processing that request.
         */
        print("Failed to perform classification.\n\(error.localizedDescription)")
    }
}
大多数模型都对已经正确定向显示的图像进行了训练。 为了确保以任意方向正确处理输入图像,请将图像的方向传递给图像请求处理程序。 (此示例应用程序向CGImagePropertyOrientation
类型添加了一个初始化程序init(_:),用于从 UIImageOrientation
方向值转换。)
5. Handle Image Classification Results - 处理图像分类结果
Vision请求的完成处理程序指示请求是成功还是导致错误。 如果成功,其results
属性包含描述ML模型识别的可能分类的VNClassificationObservation
对象。
//Listing 3

func processClassifications(for request: VNRequest, error: Error?) {
    DispatchQueue.main.async {
        guard let results = request.results else {
            self.classificationLabel.text = "Unable to classify image.\n\(error!.localizedDescription)"
            return
        }
        // The `results` will always be `VNClassificationObservation`s, as specified by the Core ML model in this project.
        let classifications = results as! [VNClassificationObservation]
后记
未完,待续~~~


