添加路由和导航
1、添加heroes.component.ts组件
ng g component heroes
import { Component,OnInit } from '@angular/core';
import {Hero} from '../hero';
import {HeroDetailComponent} from '../hero-detail/hero-detail.component';
import {HeroService} from '../hero.service';
@Component({
selector: 'my-heroes',
template:`
-
{{hero.id}} {{hero.name}}
将app.component.css样式剪切到heroes.component.css中
改写app.component.ts组件(现在它只是一个承载的容器)
import { Component } from '@angular/core';
@Component({
selector: 'my-app',
template: `
{{title}}
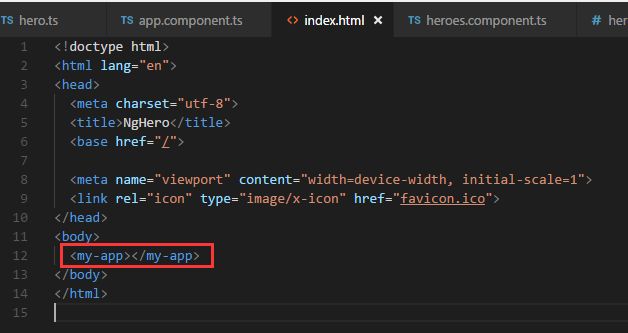
上面的selector已经更改成了 my-app,所以index.html中也要作相应的标签修改
2、添加路由
app.module.ts中添加路由
import { RouterModule }   from '@angular/router';
RouterModule.forRoot([
  {
    path: 'heroes',
    component: HeroesComponent
  }
])
在app.component.ts的template中添加路由链接和router-outlet
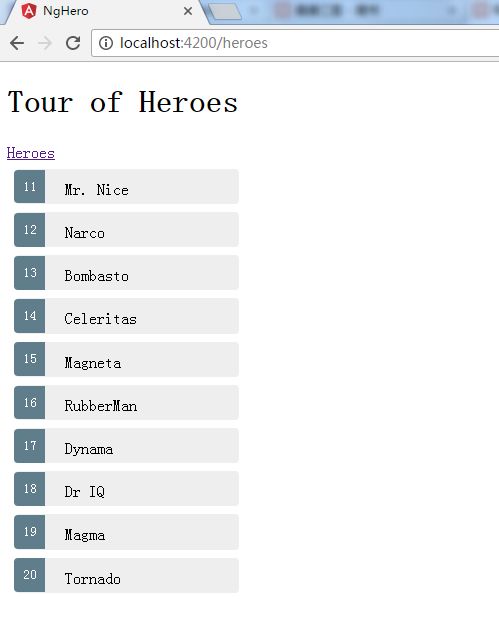
完成后效果
3、添加仪表盘组件 dashboard.component.ts ng g component dashboard
import { Component } from '@angular/core';
@Component({
selector: 'my-dashboard',
template: 'My Dashboard
'
})
export class DashboardComponent { }
并在app.module.ts的路由中添加dashboard.component.ts组件的路由和设置重定向路由
RouterModule.forRoot([
      {path:'',redirectTo:'/dashboard',pathMatch:'full'},
      { path: 'heroes', component: HeroesComponent},
      { path: 'dashboard',component: DashboardComponent }
    ])
app.component.ts的template模板稍作修改
template: `
{{title}}
修改dashboard.component.ts和dashboard.component.html文件
dashboard.component.ts
import { Component,OnInit } from '@angular/core';
import{Hero} from '../hero';
import {HeroService} from '../hero.service';
@Component({
  selector: 'my-dashboard',
  templateUrl: './dashboard.component.html'
})
export class DashboardComponent implements OnInit {
  heroes:Hero[]=[];
  constructor(private heroService:HeroService){

  }
  ngOnInit():void{
    this.heroService.getHeroes().then(heroes=>this.heroes=heroes.slice(1,5))
  }
}
dashboard.component.html
Top Heroes


      {{hero.name}}
4、参数化路由
目的: a、在dashboard和英雄列表中点击单个的英雄,导航到详情组件
b、地址栏上写上英雄详情的参数,查看详情信息
app.module.ts的路由中添加一条规则
RouterModule.forRoot([
      {path:'',redirectTo:'/dashboard',pathMatch:'full'},
      { path: 'heroes', component: HeroesComponent},
      { path: 'dashboard',component: DashboardComponent },
      { path:'detail/:id',component:HeroDetailComponent}
    ])
修改hero-detail.component.ts文件
import { Component,Input,OnInit } from '@angular/core';
import {ActivatedRoute,Params} from '@angular/router';
import {Location} from '@angular/common';
import 'rxjs/add/operator/switchMap'; //switchMap用到
import {Hero} from '../hero';
import {HeroService} from '../hero.service';
@Component({
selector: 'hero-detail',
template: `
{{hero.name}} details!
{{hero.id}}
`
})
export class HeroDetailComponent implements OnInit{
@Input() hero:Hero; //输入属性
constructor(
private heroService:HeroService,
private route:ActivatedRoute,
private location:Location
) {
}
ngOnInit():void{
this.route.params.switchMap((params:Params)=>this.heroService.getHero(+params['id']))
.subscribe(hero=>this.hero=hero)
}
goBack(): void {
this.location.back();
}
}
hero.service.ts服务中添加方法 getHero(id:number):Promise
getHero(id: number): Promise {
    return this.getHeroes()
              .then(heroes => heroes.find(hero => hero.id === id));
  }
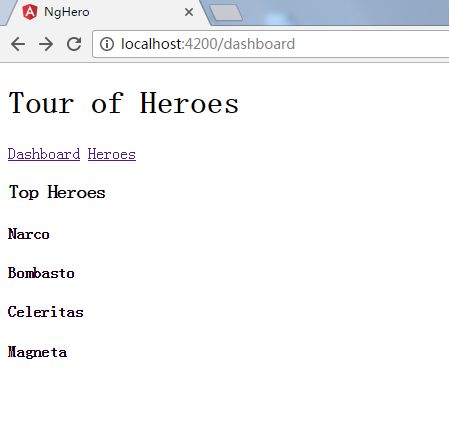
查看运行结果
5、重构路由为路由模块
按约定,路由模块的名字应该包含 “Routing”,并与导航到的组件所在的模块的名称看齐。
在app.module.ts所在目录创建app-routing.module.ts文件。将下面从AppModule类提取出来的代码拷贝进去:
import { NgModule } from '@angular/core';
import {RouterModule,Routes} from '@angular/router';
import {DashboardComponent} from './dashboard/dashboard.component';
import { HeroesComponent } from './heroes/heroes.component';
import { HeroDetailComponent } from './hero-detail/hero-detail.component';

const routes:Routes=[
  {path:'',redirectTo:'/dashboard',pathMatch:'full'},
  { path: 'heroes', component: HeroesComponent},
  { path: 'dashboard',component: DashboardComponent },
  { path:'detail/:id',component:HeroDetailComponent}
];

@NgModule({
  imports: [
    RouterModule.forRoot(routes)
  ],
  exports:[RouterModule]
})
export class AppRoutingModule { }
典型路由模块需要注意的有:
1)将路由抽出到一个变量中。如果你将来要导出这个模块,这种 "路由模块" 的模式也会更加明确。
2)添加RouterModule.forRoot(routes)到imports。
3)把RouterModule添加到路由模块的exports中,以便关联模块(比如AppModule)中的组件可以访问路由模块中的声明,比如RouterLink 和 RouterOutlet。
4)无declarations!声明是关联模块的任务。
5)如果有守卫服务,把它们添加到本模块的providers中(本例子中没有守卫服务)。
修改 AppModule
删除AppModule中的路由配置,并导入AppRoutingModule (使用 ES import语句导入,并将它添加到NgModule.imports列表)。
import { BrowserModule } from '@angular/platform-browser';
import { NgModule } from '@angular/core';
import {FormsModule} from '@angular/forms';
import {RouterModule} from '@angular/router';

import { AppComponent } from './app.component';
import { HeroDetailComponent } from './hero-detail/hero-detail.component';

import {HeroService} from './hero.service';
import { HeroesComponent } from './heroes/heroes.component';
import { DashboardComponent } from './dashboard/dashboard.component';

import {AppRoutingModule} from './app-routing.module';

@NgModule({
  declarations: [
    AppComponent,
    HeroDetailComponent,
    HeroesComponent,
    DashboardComponent
  ],
  imports: [
    BrowserModule,
    FormsModule,
    AppRoutingModule
  ],
  providers: [HeroService],
  bootstrap: [AppComponent]
})
export class AppModule { }
6、修改heroes.component.ts文件
import { Component,OnInit } from '@angular/core';
import {Router} from '@angular/router';
import {Hero} from '../hero';
import {HeroDetailComponent} from '../hero-detail/hero-detail.component';
import {HeroService} from '../hero.service';
@Component({
selector: 'my-heroes',
template:`
-
{{hero.id}} {{hero.name}}
{{selectedHero.name | uppercase}} is my hero
`,
styleUrls:['./heroes.component.css']
})
export class HeroesComponent implements OnInit {
heroes:Hero[];
selectedHero:Hero;
constructor(private heroService:HeroService,private router:Router){
}
onSelect(hero:Hero):void{
this.selectedHero=hero;
}
getHeroes():void{
this.heroService.getHeroes().then(heroes => this.heroes = heroes);
}
ngOnInit(){
this.getHeroes();
}
gotoDetail(): void {
this.router.navigate(['/detail', this.selectedHero.id]);
}
}
7、为应用添加一些样式
- hero-detail.component.css
label {
  display: inline-block;
  width: 3em;
  margin: .5em 0;
  color: #607D8B;
  font-weight: bold;
}
input {
  height: 2em;
  font-size: 1em;
  padding-left: .4em;
}
button {
  margin-top: 20px;
  font-family: Arial;
  background-color: #eee;
  border: none;
  padding: 5px 10px;
  border-radius: 4px;
  cursor: pointer; cursor: hand;
}
button:hover {
  background-color: #cfd8dc;
}
button:disabled {
  background-color: #eee;
  color: #ccc;
  cursor: auto;
}
2)app.component.css
h1 {
  font-size: 1.2em;
  color: #999;
  margin-bottom: 0;
}
h2 {
  font-size: 2em;
  margin-top: 0;
  padding-top: 0;
}
nav a {
  padding: 5px 10px;
  text-decoration: none;
  margin-top: 10px;
  display: inline-block;
  background-color: #eee;
  border-radius: 4px;
}
nav a:visited, a:link {
  color: #607D8B;
}
nav a:hover {
  color: #039be5;
  background-color: #CFD8DC;
}
nav a.active {
  color: #039be5;
}
3)dashboard.component.css
[class*='col-'] {
  float: left;
  padding-right: 20px;
  padding-bottom: 20px;
  outline: none;
}
[class*='col-']:last-of-type {
  padding-right: 0;
}
a {
  text-decoration: none;
}
*, *:after, *:before {
  -webkit-box-sizing: border-box;
  -moz-box-sizing: border-box;
  box-sizing: border-box;
}
h3 {
  text-align: center; margin-bottom: 0;
}
h4 {
  position: relative;
}
.grid {
  margin: 0;
}
.col-1-4 {
  width: 25%;
}
.module {
  padding: 20px;
  text-align: center;
  color: #eee;
  max-height: 120px;
  min-width: 120px;
  background-color: #607D8B;
  border-radius: 2px;
}
.module:hover {
  background-color: #EEE;
  cursor: pointer;
  color: #607d8b;
}
.grid-pad {
  padding: 10px 0;
}
.grid-pad > [class*='col-']:last-of-type {
  padding-right: 20px;
}
@media (max-width: 600px) {
  .module {
    font-size: 10px;
    max-height: 75px; }
}
@media (max-width: 1024px) {
  .grid {
    margin: 0;
  }
  .module {
    min-width: 60px;
  }
}
为活动路由添加样式,Angular路由器提供了routerLinkActive指令,我们可以用它来为匹配了活动路由的 HTML 导航元素自动添加一个 CSS 类。
app.component.ts中的template
template: `
{{title}}
全局样式
style.css
/* Master Styles */
h1 {
  color: #369;
  font-family: Arial, Helvetica, sans-serif;
  font-size: 250%;
}
h2, h3 {
  color: #444;
  font-family: Arial, Helvetica, sans-serif;
  font-weight: lighter;
}
body {
  margin: 2em;
}
body, input[text], button {
  color: #888;
  font-family: Cambria, Georgia;
}
/* . . . */
/* everywhere else */
* {
  font-family: Arial, Helvetica, sans-serif;
}
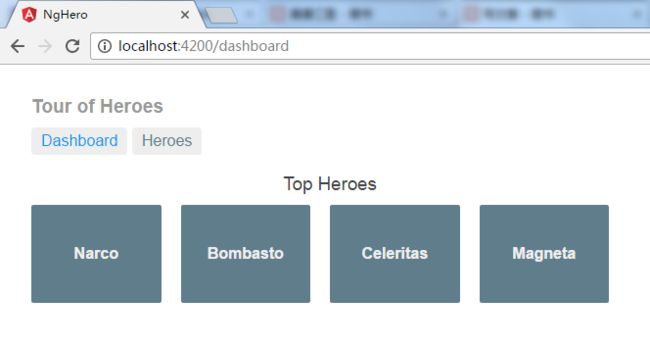
最后效果