facility: 设施 信道 (具体名称可man logger)
**auth,authpriv mail cron daemon kern lpr mark news security user uucp syslog **local0-local7
priority: 日志等级
debug,info,notice,warn(warning),err(error),crit(critcal),alert,emerg(panic)
rsyslog服务的配置文件(/etc/rsyslog.conf)规则说明
[RULES]段格式
    facility.priority   target
                facility:
                    *:所有的facility;
                    f1,f2,f3,...:列表中给定的所有facility;
                        auth,authpriv,security.info
                    f1.p1;f2,p2;f3.p3;...:列表中给定的所有facility;
                        auth.info;authpriv.notic;security,warn;

                priority:
                    *:所有级别
                    none:没有级别,不记录日志;
                    PRIORITY:此级别(含)及其以上的所有级别;
                    =PRIORITY:仅指定的级别;

                target:
                    文件:将日志信息记录到指定的文件中;文件路径之前的“-”表示异步写入之意;
                    用户:将日志事件通知给指定的用户;一般指登录到当前系统上的所有用户的终端;
                    日志服务器:@rsyslog_server,把日志信息发往指定的日志服务器;
                    管道:|COMMAND
配置rsyslog服务器
配置rsyslog服务器(/etc/rsyslog.conf):
#### modules ####
…………
# Provides UDP syslog reception
$ModLoad imudp
$UDPServerRun 514
        # Provides TCP syslog reception
        $ModLoad imtcp
        $InputTCPServerRun 514
其它几个日志文件:
last, lastb - show listing of last logged in users
-num, -n num
            /var/log/btmp:登录当前系统的所有的失败的尝试;
            /var/log/wtmp:所有成功登录至当前系统的相关信息;

        lastlog - reports the most recent login of all users or of a given user


        /var/log/dmesg:系统引导过程中的日志信息;
            文本查看工具;
            也可以使用dmesg命令;
rsyslog记录日志于mysql:
前提:准备好msql server或mariadb server;
在/etc/my.conf里添加两行内容:
    skip_name_resolve=ON
    innodb_file_per_table=ON
(1) 安装rsyslog连接至mysql(mariadb) server的驱动模块;
    # yum install rsyslog-mysql
ommysql.so --> rsyslog输出时用到的模块,需要在/etc/rsyslog.conf配置文件里进行配置
mysql-createDB.sql --> 帮我们生成rsyslog所依赖的数据(表,字段,表结构等等)的sql脚本
(2) 在mysql server准备rsyslog专用的用户账号(数据库名叫Syslog是有原因的!查看第3步)
     GRANT ALL ON Syslog.* TO 'rsyslog'@'127.0.0.1' IDENTIFIED BY 'rsyslogpass';
     GRANT ALL ON Syslog.* TO 'rsyslog'@'local' IDENTIFIED BY 'rsyslogpass';
     flush privileges;
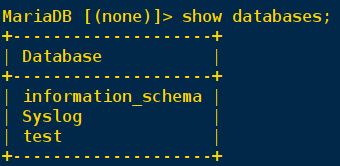
(3) 生成所需要的数据库和表;
    mysql -ursyslog -h127.0.0.1 -prsyslogpass <  /usr/share/doc/rsyslog-7.4.7/mysql-createDB.sql
(4) 配置rsyslog使用ommysql模块
        #### MODULES ####
        ......
        $ModLoad ommysql
(5) 配置RULES,将所期望的日志信息记录于mysql中;
    facility.priority       :ommysql:DBHOST,DB,DBUSER,DBUSERPASS
(6) 重启rsyslog服务;
    systemctl restart rsyslog.service
loganalyzer 日志分析(软件loganalyzer-3.6.6.tar.gz)
    WebGUI的程序, 运行amp环境中;
    (a) 准备amp环境
    # yum -y install httpd php php-mysql php-gd
    # systemctl start httpd.service
        (b) 安装loganalyzer  # 更具体的内容可以查看loganalyzer目录中的INSTALL文件.
        # tar xf loganalyzer-VERSION.tar.gz
        # cd loganalyzer-VERSION
        # cp -a src  /var/www/html/loganalyzer-VERSION
        # cd /var/www/html
        # ln -sv loganalyzer-VERSION log
                # cd -; cp contrib/* /var/www/html/log
        # cd /var/www/html/log
                # touch config.php
        # chmod 666 config.php    # 通过web浏览器进行配置一路下一步配置生成配置文件
        打开浏览器,配置;
        MySQL Native, Syslog Field
        Table Type:"Monitorware“
        # chmod 644 config.php   # 配置完毕后注意要缩小配置文件权限
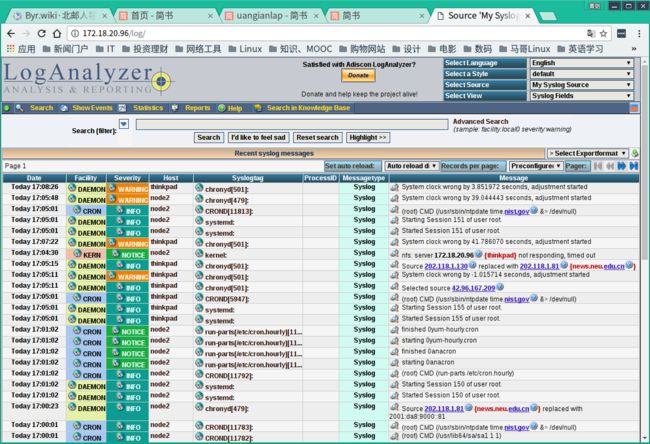
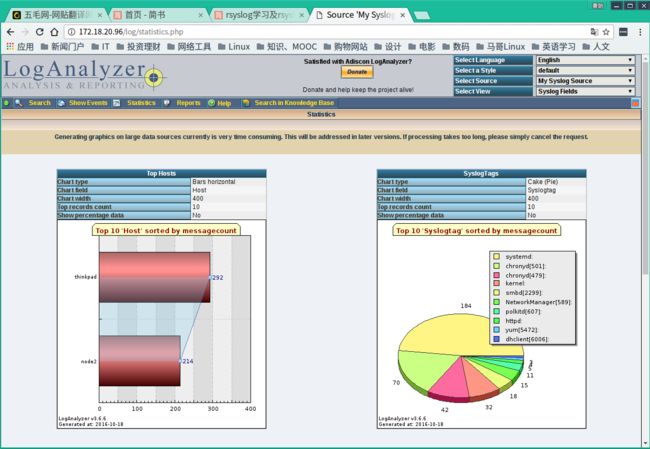
这时在浏览器端即可用LogAnalyzer来查看存储于服务器数据库中的rsyslog日志数据了,如下图所示:


