相信各位再开发中经常会用到人脸识别的技术,opencv是其中的一种实现方案,但是需要精通NDK,不然光是配置都搞死一堆人,不啰嗦了。
第一步:去官网下载:https://sourceforge.net/projects/opencvlibrary/files/opencv-android/3.2.0/opencv-3.2.0-android-sdk.zip/download
第二步:解压后创建一个androidProject

接着下一步下一步,记得异常支持的两个勾勾上
第三步:点击File->importModule(选择你下载的Opencv-android-sdk)目录下sdk/java,点击Ok

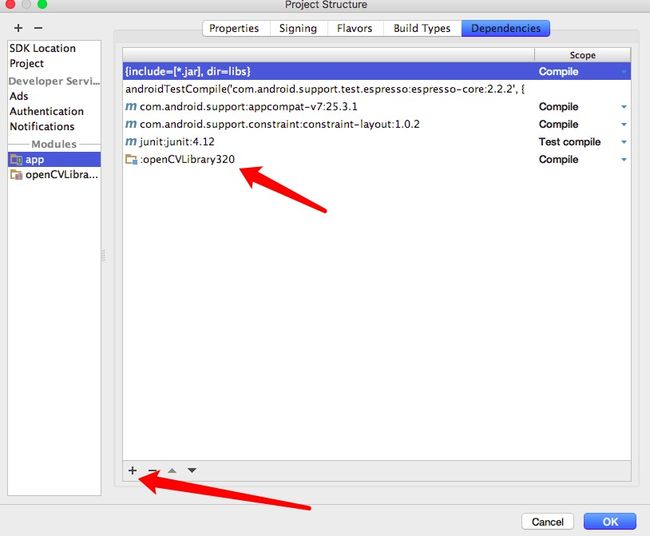
第四步:再把导入的类库添加依赖,我导入的这里项目叫app
第五步:
5.1,samples目录下的face-detection中的src复制到app这个项目的src下(把系统生成的删除)
5.2,导入layout,和raw
5.3,把jni目录下的DetectionBasedTracker_jni.cpp和DetectionBasedTracker_jni.h拷贝到cpp目录下,
5.4,在main目录下新建jniLibs目录,在jniLibs下新建armeabi,再sdk/native/libs/armeabi目录下的libopencv_java3.so,拷贝到新建的jniLibs目下的armeabi,
5.5,将sdk/native/jni/include文件下的所有东西,全部考入到jniLibs目录下。
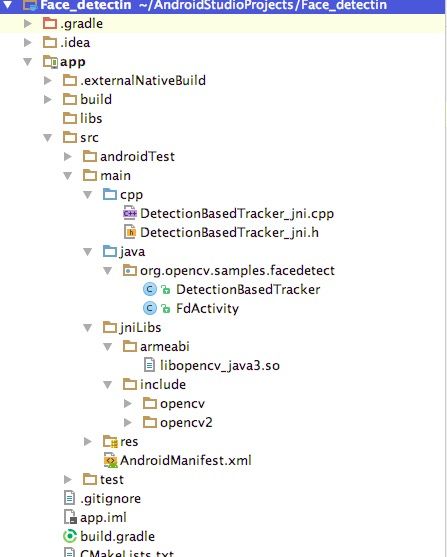
完成后的结构如下图
第六步:在CMakeList.txt文件中写入(原来文件中的全部删除,复制粘贴下面的即可,这是NDK的配置,在这里就不多解释,老司机一看就明白)
# For more information about using CMake with Android Studio, read the
# documentation: https://d.android.com/studio/projects/add-native-code.html
# Sets the minimum version of CMake required to build the native library.
cmake_minimum_required(VERSION 3.4.1)
# Creates and names a library, sets it as either STATIC
# or SHARED, and provides the relative paths to its source code.
# You can define multiple libraries, and CMake builds them for you.
# Gradle automatically packages shared libraries with your APK.
add_library(
opencv_java3
SHARED
IMPORTED)
set_target_properties(
opencv_java3
PROPERTIES IMPORTED_LOCATION
../../../../src/main/jniLibs/armeabi/libopencv_java3.so)
#set(CMAKE_CXX_FLAGS "${CMAKE_CXX_FLAGS} -std=gnu++11")
if(CMAKE_COMPILER_IS_GNUCXX)
set(CMAKE_CXX_FLAGS "-std=c++11 ${CMAKE_CXX_FLAGS}")
message(STATUS "optional:-std=c++11")
endif(CMAKE_COMPILER_IS_GNUCXX)
include_directories(src/main/jniLibs/include)
add_library( # Sets the name of the library.
detection_based_tracker
# Sets the library as a shared library.
SHARED
# Provides a relative path to your source file(s).
src/main/cpp/DetectionBasedTracker_jni.cpp )
# Searches for a specified prebuilt library and stores the path as a
# variable. Because CMake includes system libraries in the search path by
# default, you only need to specify the name of the public NDK library
# you want to add. CMake verifies that the library exists before
# completing its build.
find_library( # Sets the name of the path variable.
log-lib
# Specifies the name of the NDK library that
# you want CMake to locate.
log )
# Specifies libraries CMake should link to your target library. You
# can link multiple libraries, such as libraries you define in this
# build script, prebuilt third-party libraries, or system libraries.
target_link_libraries( # Specifies the target library.
detection_based_tracker opencv_java3
# Links the target library to the log library
# included in the NDK.
${log-lib} )
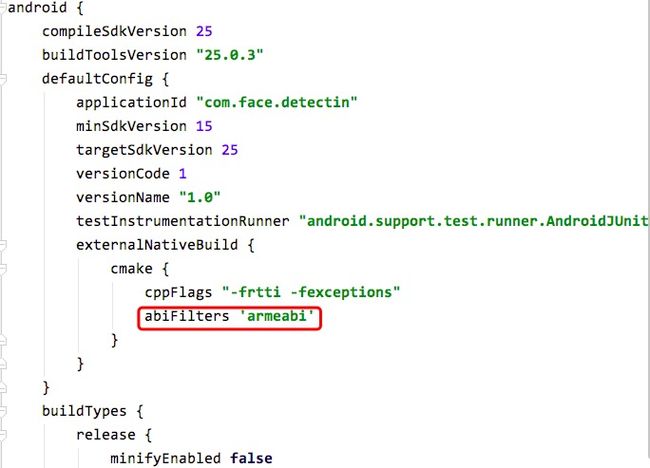
第七步:在build-gradle文件中加入,接着同步一下,检查是否报错(记得加相机权限哟)
第八步:记得运行成功后是需要添加Manager的,但是按照下面做就不需要了(最重要一步)。
8.1在加载类库的前面加上

8.2并且注释掉

在点击运行,这次就不需要Manager了,记得没有申请运行时权限的请在应用管理中打开哟,至于,相机全屏的,请参考它的demo,确实不会就复制它的AndroidManifest.xml文件到覆盖你自己的就行。
第一次写文章,老司机和大神们多多关照。