我们可以在UIView(UIViewRendering)的方法- (void)drawRect:(CGRect)rect;中去绘制一些我们所需要的图形,如虚线、圆形、方形以及曲线等等图形。但在使用drawRect时有一些需要注意的事项:
- 我们只能在继承了
UIView的子类中通过重写drawRect方法来绘制图形。 - 如果需要绘制图形的子类直接继承自
UIView,则子类的drawRect方法中不需要调用父类方法[super drawRect:rect];。如果子类继承自其他继承UIView的View类,则drawRect方法中需要调用父类方法[super drawRect:rect];。 -
drawRect方法不能手动直接调用,我们可以通过调用其他方法来实现drawRect方法的调用。如:在子类初始化时调用- (instancetype)initWithFrame:(CGRect)frame方法,且frame不为CGRectZero时。 - 我们可以调用
setNeedsDisplay()方法或setNeedsDisplayInRect方法,但是该方法不会自己调用drawRect方法,而是会标记视图,并在下一次循环更新的时候让视图通过drawRect来进行重绘,前提是rect不为CGRectZero。
一、虚线
绘制虚线的基本思路:
- 通过
UIGraphicsGetCurrentContext来获取需要处理的上下文线条。
CGContextRef context = UIGraphicsGetCurrentContext();
- 通过
CGContextSetLineWidth来设置线条的宽度。
CGContextSetLineWidth(context, 2.0);
- 通过
CGContextSetStrokeColorWithColor或者CGContextSetRGBStrokeColor来设置线条的颜色。
CGContextSetStrokeColorWithColor(context, [UIColor blackColor].CGColor);
CGContextSetRGBStrokeColor(context, 0.0, 0.0, 0.0, 1.0);
- 通过
CGContextSetLineDash来设置虚线点的大小以及虚线点间隔大小。其中{3, 1}表示先画3个实点再画1个虚点,即实点多虚点少表示虚线点大且间隔小,实点少虚点多表示虚线点小且间隔大。最后的参数1代表排列的个数。
CGFloat dashArray[] = {3, 1};
CGContextSetLineDash(context, 1, dashArray, 1);
- 然后设置虚线的起点和终点坐标,并且有两种方法。第一种是通过
CGContextMoveToPoint设置线条的起点坐标(CGFloat x1, CGFloat y1),通过CGContextAddLineToPoint设置线条的终点坐标(CGFloat x2, CGFloat y2)。第二种设置坐标点数组,通过CGContextAddLines添加坐标点数组。
第一种:
CGContextMoveToPoint(context, K_PDD_WIDTH, K_HEIGHT*3);
CGContextAddLineToPoint(context, (rect.size.width - K_PDD_WIDTH), K_HEIGHT*3);
第二种:
CGPoint aPoints[2];
aPoints[0] = CGPointMake(K_PDD_WIDTH, K_HEIGHT);
aPoints[1] = CGPointMake((rect.size.width - K_PDD_WIDTH), K_HEIGHT);
CGContextAddLines(context, aPoints, 2);
- 最后通过
CGContextStrokePath来绘制两点之间的路径。
CGContextStrokePath(context);
完整代码:
#define K_HEIGHT      100.0
#define K_PDD_WIDTH   20.0
- (void)drawRect:(CGRect)rect {
    //获得处理的上下文
    CGContextRef context = UIGraphicsGetCurrentContext();
    //线条宽
    CGContextSetLineWidth(context, 2.0);
    //线条颜色
    CGContextSetStrokeColorWithColor(context, [UIColor blackColor].CGColor);
    //画虚线
    CGFloat dashArray[] = {3, 1};//表示先画3个实点再画1个虚点,即实点多虚点少表示虚线点大且间隔小,实点少虚点多表示虚线点小且间隔大
    CGContextSetLineDash(context, 1, dashArray, 1);//最后的参数1代表排列的个数
    //起点坐标
    CGContextMoveToPoint(context, K_PDD_WIDTH, K_HEIGHT*3);
    //终点坐标
    CGContextAddLineToPoint(context, (rect.size.width - K_PDD_WIDTH), K_HEIGHT*3);
    //绘制路径
    CGContextStrokePath(context);
}
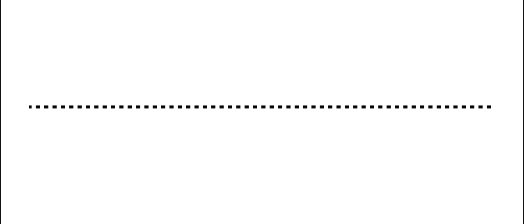
绘制图像如下:
二、实线
绘制实线的思路和虚线的思路基本一样,主要区别在于需要去掉绘制虚线方法中设置虚线点大小的方法CGContextSetLineDash。
完整代码:(代码中使用了绘制虚线思路中设置线条颜色和设置起点终点坐标的第二种方法)
- (void)firstDrawStraightLineWithRect:(CGRect)rect {
    //获得处理的上下文
    CGContextRef context = UIGraphicsGetCurrentContext();
    //线条宽
    CGContextSetLineWidth(context, 1.0);
    //线条颜色
    CGContextSetRGBStrokeColor(context, 0.0, 0.0, 0.0, 1.0); //设置线条颜色第一种方法
    //坐标点数组
    CGPoint aPoints[2];
    aPoints[0] = CGPointMake(K_PDD_WIDTH, K_HEIGHT);
    aPoints[1] = CGPointMake((rect.size.width - K_PDD_WIDTH), K_HEIGHT);
    //添加线 points[]坐标数组,和count大小
    CGContextAddLines(context, aPoints, 2);
    //根据坐标绘制路径
    CGContextDrawPath(context, kCGPathStroke);
}
绘制图像如下:
三、绘制文本
直接上代码,其中有注释:
- (void)drawRect:(CGRect)rect {
    NSString * text = @"这是一段绘制文本、这是一段绘制文本、这是一段绘制文本、这是一段绘制文本、这是一段绘制文本、这是一段绘制文本、这是一段绘制文本”;
    //文本段落样式
    NSMutableParagraphStyle * textStyle = [[NSMutableParagraphStyle alloc] init];
    textStyle.lineBreakMode = NSLineBreakByWordWrapping;//结尾部分的内容以……方式省略 ( "...wxyz" ,"abcd..." ,"ab…yz”)
    textStyle.alignment = NSTextAlignmentLeft;//文本对齐方式:(左,中,右,两端对齐,自然)
    textStyle.lineSpacing = 8; //字体的行间距
    textStyle.firstLineHeadIndent = 35.0; //首行缩进
    textStyle.headIndent = 0.0; //整体缩进(首行除外)
    textStyle.tailIndent = 0.0; //尾部缩进
    textStyle.minimumLineHeight = 40.0; //最低行高
    textStyle.maximumLineHeight = 40.0; //最大行高
    textStyle.paragraphSpacing = 15; //段与段之间的间距
    textStyle.paragraphSpacingBefore = 22.0f; // 段首行空白空间
    textStyle.baseWritingDirection = NSWritingDirectionLeftToRight; //从左到右的书写方向
    textStyle.lineHeightMultiple = 15;
    textStyle.hyphenationFactor = 1; //连字属性 在iOS,唯一支持的值分别为0和1
    //文本属性
    NSMutableDictionary *textAttributes = [[NSMutableDictionary alloc] init];
    //段落样式
    [textAttributes setValue:textStyle forKey:NSParagraphStyleAttributeName];
    //字体名称和大小
    [textAttributes setValue:[UIFont systemFontOfSize:20.0] forKey:NSFontAttributeName];
    //颜色
    [textAttributes setValue:[UIColor redColor] forKey:NSForegroundColorAttributeName];
    //绘制文字
    [text drawInRect:rect withAttributes:textAttributes];
}
绘制图像如下:
四、绘制图片
绘制图片的基本思路:
- 通过
UIGraphicsGetCurrentContext来获取需要处理的上下文线条。
CGContextRef context = UIGraphicsGetCurrentContext();
- 通过
CGContextSaveGState来保存初始状态。
CGContextSaveGState(context);
- 利用
CGContextTranslateCTM来移动图形上下文。
CGContextTranslateCTM(context, 50.0, 80.0);
- 利用
CGContextScaleCTM来缩放图形上下文。
CGContextScaleCTM(context, 0.9, 0.9);
- 利用
CGContextRotateCTM来进行旋转操作。
CGContextRotateCTM(context, M_PI_4 / 4);
- 设置绘制图片的尺寸大小。
UIImage *image = [UIImage imageNamed:@"512”];
CGRect rectImage = CGRectMake(0.0, 0.0, rect.size.width, (rect.size.width*image.size.height/image.size.width));
- 设置绘制图片展示的三种状态:
- 在
rect范围内完整显示图片:
[image drawInRect:rectImage];
- 图片上下颠倒:
CGContextDrawImage(context, rectImage, image.CGImage);
- 图片上下颠倒并拼接填充:
CGContextDrawTiledImage(context, rectImage, image.CGImage);
- 最后恢复到初始状态。
CGContextRestoreGState(context);
完整代码:
- (void)drawRect:(CGRect)rect {
    CGContextRef context = UIGraphicsGetCurrentContext();
    //保存初始状态(压栈操作,保存一份当前图形上下文)
    CGContextSaveGState(context);
    //图形上下文移动{x,y}
    CGContextTranslateCTM(context, 50.0, 80.0);
    //图形上下文缩放{x,y}
    CGContextScaleCTM(context, 0.9, 0.9);
    //旋转
    CGContextRotateCTM(context, M_PI_4 / 4);
    //需要绘制的图片
    UIImage *image = [UIImage imageNamed:@"512”];
    CGRect rectImage = CGRectMake(0.0, 0.0, rect.size.width, (rect.size.width*image.size.height/image.size.width));
    //三种方式绘制图片
    // 1、在rect范围内完整显示图片-正常使用
        [image drawInRect:rectImage];
    // 2、图片上下颠倒
//        CGContextDrawImage(context, rectImage, image.CGImage);
    // 3、图片上下颠倒并拼接填充
//    CGContextDrawTiledImage(context, rectImage, image.CGImage);
    //恢复到初始状态(出栈操作,恢复一份当前图形上下文)
    CGContextRestoreGState(context);
}
只展示一种绘制图片:
五、圆形图片
绘制圆形图片的基本思路:
- 获取
UIView的图形上下文对象; - 利用
CG_EXTERN void CGContextAddArc(CGContextRef cg_nullable c, CGFloat x, CGFloat y, CGFloat radius, CGFloat startAngle, CGFloat endAngle, int clockwise)方法在上下文对象上绘制一个圆形路径。其中参数(x, y)是圆弧的中心;radius是它的半径;startAngle是与圆弧第一个端点的夹角;endAngle是到弧的第二个端点的角度;startAngle和endAngle用弧度表示;如果圆弧是顺时针画的,clockwise是1,否则是0; - 利用
CGContextClip方法来裁剪出上下文的显示区域,即只有在被裁减出的区域内绘制的图形才会显示; - 把图片绘制到上下文上。
完整代码:
- (void)drawRect:(CGRect)rect {
    //获取上下文
    CGContextRef context = UIGraphicsGetCurrentContext();
    //画一个上下文显示的区域
    CGContextAddArc(context, rect.size.width/2, rect.size.height/2, rect.size.width/2, 0, 2 *M_PI, 1);
    //裁剪上下文的显示区域
    CGContextClip(context);
    //获取图片
    UIImage* image1 = [UIImage imageNamed:@"512”];
    //绘制到上下文上
    [image1 drawInRect:rect];
}
绘制圆角图片如下:
六、圆形
绘制圆形的思路和绘制圆形图片一样,直接上代码:
#define K_R    150.0
#define K_PDD  10.0
- (void)drawRect:(CGRect)rect {
    CGContextRef context = UIGraphicsGetCurrentContext();
    //背景颜色设置
    [[UIColor greenColor] set];
    CGContextFillRect(context, rect);
    CGContextSetLineWidth(context, 2.0);
    //画虚线
    CGFloat dashArray[] = {3, 1};
    CGContextSetLineDash(context, 1, dashArray, 1);
    CGContextSetStrokeColorWithColor(context, [UIColor blueColor].CGColor);
    CGContextSetFillColorWithColor(context, [UIColor orangeColor].CGColor);
    CGContextAddArc(context,
                    K_PDD+K_R/2, K_R*2+20, K_R/2, 0, 2 * M_PI, 0);
    CGContextDrawPath(context, kCGPathFillStroke);
}
绘制图形效果为下图中左下角圆形图案:
七、椭圆形
完整代码:
#define K_H    100.0
#define K_PDD  10.0
- (void)drawRect:(CGRect)rect {
    CGContextRef context = UIGraphicsGetCurrentContext();
    //背景颜色设置
    [[UIColor whiteColor] set];
    CGContextFillRect(context, rect);

    //实线椭圆
    CGRect rectRing = CGRectMake(K_PDD, K_PDD, (rect.size.width - K_PDD * 2), K_H);
    CGContextSetLineWidth(context, 1.0);
    CGContextSetStrokeColorWithColor(context, [UIColor blueColor].CGColor);
    CGContextAddEllipseInRect(context, rectRing);
    CGContextDrawPath(context, kCGPathStroke);

    //虚线椭圆
    rectRing = CGRectMake(K_PDD, K_H+K_PDD*2, (rect.size.width - K_PDD * 2), K_H);
    CGFloat dashArray[] = {2, 6};
    CGContextSetLineDash(context, 1, dashArray, 2);
    CGContextSetLineWidth(context, 1.0);
    CGContextSetStrokeColorWithColor(context, [UIColor blueColor].CGColor);
    //填充颜色
    CGContextSetFillColorWithColor(context, [UIColor orangeColor].CGColor);
    CGContextAddEllipseInRect(context, rectRing);
    CGContextDrawPath(context, kCGPathStroke);
    CGContextFillPath(context);

    //填充椭圆
    rectRing = CGRectMake(K_PDD, K_H*2+K_PDD*3, (rect.size.width - K_PDD * 2), K_H);
    CGContextSetLineWidth(context, 1.0);
    //填充颜色
    CGContextSetFillColorWithColor(context, [UIColor orangeColor].CGColor);
    CGContextAddEllipseInRect(context, rectRing);
    CGContextFillPath(context);
}
绘制图形效果如下:
八、扇形
扇形是圆形的一部分,所以在绘制的时候可以利用CGContextAddArc方法来设置扇形的圆弧路径,并添加原点为起始点开始绘制。即设置为:
CGContextAddArc(context, R, R, R/2, (-60 * M_PI / 180), (-120 * M_PI / 180), 1);
(-60 * M_PI / 180), (-120 * M_PI / 180)为两个端点的角度。最后一位参数表示如果圆弧是顺时针画的,clockwise是1,否则是0。
完整代码:
#define K_PDD  10.0
@implementation FanshapedView

- (void)drawRect:(CGRect)rect {
    CGFloat R = (CGRectGetWidth(self.frame)-K_PDD*2)/2;
    CGContextRef context = UIGraphicsGetCurrentContext();

    //背景颜色设置
    [[UIColor whiteColor] set];
    CGContextFillRect(context, rect);

    //实线扇形-顺时针-有边框,有填充
    //边框宽度
    CGContextSetLineWidth(context, 2.0);
    CGContextSetStrokeColorWithColor(context, [UIColor greenColor].CGColor);
    CGContextMoveToPoint(context, R, R);
    //填充颜色
    CGContextSetFillColorWithColor(context, [UIColor purpleColor].CGColor);
    CGContextAddArc(context, R, R, R/2, (-60 * M_PI / 180), (-120 * M_PI / 180), 1);//如果圆弧是顺时针画的,“clockwise”是1,否则是0;
    CGContextClosePath(context);
    CGContextDrawPath(context, kCGPathFillStroke);

    //实线扇形-逆时针-有边框,有填充
    //边框宽度
    CGContextSetLineWidth(context, 2.0);
    CGContextSetStrokeColorWithColor(context, [UIColor greenColor].CGColor);
    CGContextMoveToPoint(context, R, R*2);
    //填充颜色
    CGContextSetFillColorWithColor(context, [UIColor purpleColor].CGColor);
    CGContextAddArc(context, R, R*2, R/2, (-60 * M_PI / 180), (-120 * M_PI / 180), 0);//如果圆弧是顺时针画的,“clockwise”是1,否则是0;
    CGContextClosePath(context);
    CGContextDrawPath(context, kCGPathFillStroke);
}
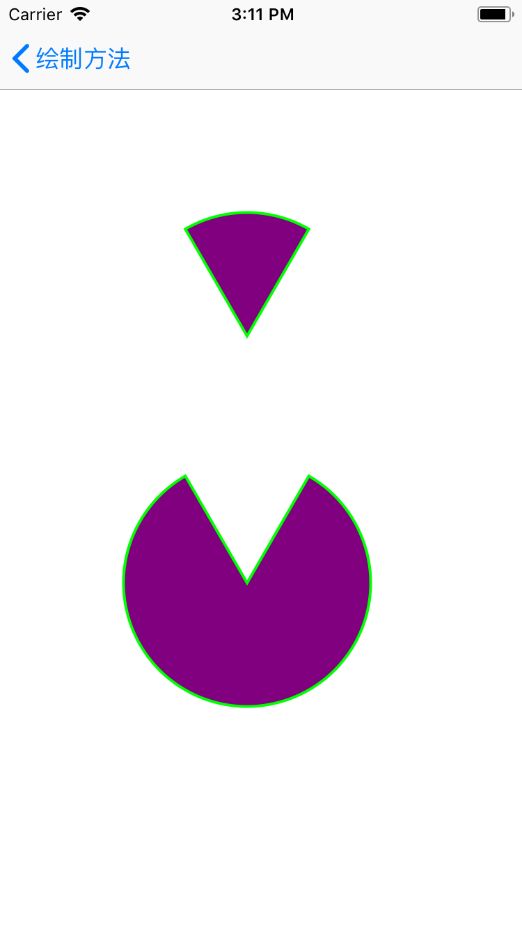
绘制扇形如下:
九、正方形
绘制正方形的基本思路:
- 获取
UIView的图形上下文对象; - 设置边线宽度;
- 可以添加虚线边框:
CGFloat dashArray[] = {1, 4};
CGContextSetLineDash(context, 1, dashArray, 2);
- 设置正方形的四个顶点位置,有三种方法:
- 直接设置四个顶点:
CGContextMoveToPoint(context, K_X, K_Y);
CGContextAddLineToPoint(context, K_X+K_W, K_Y);
CGContextAddLineToPoint(context, K_X+K_W, K_Y+K_H);
CGContextAddLineToPoint(context, K_X, K_Y+K_H);
CGContextAddLineToPoint(context, K_X, K_Y);
2.利用CGContextAddLines方法:
CGPoint pointsRect[5] = {CGPointMake(K_X, K_Y), CGPointMake(K_X+K_W, K_Y), CGPointMake(K_X+K_W, K_Y+K_H), CGPointMake(K_X, K_Y+K_H), CGPointMake(K_X, K_Y)};
CGContextAddLines(context, pointsRect, 5);
3.利用CGContextAddRect方法设置Rect大小:
CGContextAddRect(context, CGRectMake(K_X, K_Y, K_W, K_H));
- 使用绘制模式绘制上下文路径。
CGContextDrawPath(context, kCGPathFillStroke);
完整代码:
#define K_X   CGRectGetWidth(self.frame)/3
#define K_Y   20
#define K_W   CGRectGetWidth(self.frame)/3
#define K_H   CGRectGetWidth(self.frame)/3

- (void)drawRect:(CGRect)rect {
    CGContextRef context = UIGraphicsGetCurrentContext();
    //背景颜色设置
    [[UIColor whiteColor] set];
    CGContextFillRect(context, rect);

    //边框
    CGContextSetLineWidth(context, 2.0);
    CGContextSetStrokeColorWithColor(context, [UIColor redColor].CGColor);
    CGFloat dashArray[] = {1, 4};//表示先画1个点再画4个点(前者小后者大时,虚线点小且间隔大;前者大后者小时,虚线点大且间隔小)
    CGContextSetLineDash(context, 1, dashArray, 2);//其中的2表示dashArray中的值的个数
    //方法1 正方形起点-终点
//        CGContextMoveToPoint(context, K_X, K_Y);
//        CGContextAddLineToPoint(context, K_X+K_W, K_Y);
//        CGContextAddLineToPoint(context, K_X+K_W, K_Y+K_H);
//        CGContextAddLineToPoint(context, K_X, K_Y+K_H);
//        CGContextAddLineToPoint(context, K_X, K_Y);
    //方法2 正方形起点-终点
    CGPoint pointsRect[5] = {CGPointMake(K_X, K_Y), CGPointMake(K_X+K_W, K_Y), CGPointMake(K_X+K_W, K_Y+K_H), CGPointMake(K_X, K_Y+K_H), CGPointMake(K_X, K_Y)};
    CGContextAddLines(context, pointsRect, 5);
    //方法3 方形起点-终点
//    CGContextAddRect(context, CGRectMake(K_X, K_Y, K_W, K_H));
    //填充
    CGContextSetFillColorWithColor(context, [UIColor blueColor].CGColor);
    //绘制路径及填充模式
    CGContextDrawPath(context, kCGPathFillStroke);
}
绘制正方形如图:
十、矩形和菱形
矩形、菱形和正方形绘制方式类似,部分区别就是:
- 绘制矩形和菱形的四个顶点坐标不同。
- 绘制正方形四个顶点的三种方法矩形都可以适用,但第三种不适用于菱形。
十一、弧线和曲线
弧线和曲线的区别是:
- 弧线利用
CGContextAddQuadCurveToPoint方法添加弧线的控制点坐标(即弧线起点与弧线相切线和弧线终点与弧线相切线的焦点)和终点坐标。 - 曲线利用
CGContextAddCurveToPoint方法添加两个弧线的控制点坐标和终点坐标。
完整代码:
#define K_PDD  50.0
- (void)drawRect:(CGRect)rect {
    CGContextRef context = UIGraphicsGetCurrentContext();
    //背景颜色设置
    [[UIColor whiteColor] set];
    CGContextFillRect(context, rect);

    //弧线
    CGContextSetLineWidth(context, 2.0);
    CGContextSetStrokeColorWithColor(context, [UIColor orangeColor].CGColor);
    //起点
    CGContextMoveToPoint(context, K_PDD, K_PDD);
    //设置贝塞尔曲线的控制点坐标{cp1x,cp1y} 终点坐标{x,y}
    CGContextAddQuadCurveToPoint(context, (rect.size.width/2), K_PDD*4, (rect.size.width - K_PDD), K_PDD*2);
    //绘制前设置边框和填充颜色
    [[UIColor redColor] setStroke];
    [[UIColor darkGrayColor] setFill];
    CGContextDrawPath(context, kCGPathFillStroke);

    //曲线
    CGContextSetLineWidth(context, 2.0);
    CGContextSetStrokeColorWithColor(context, [UIColor greenColor].CGColor);
    //起点坐标
    CGContextMoveToPoint(context, K_PDD, K_PDD*8);
    //设置贝塞尔曲线的控制点坐标{cp1x,cp1y} 控制点坐标{cp2x,cp2y} 终点坐标{x,y}
    CGContextAddCurveToPoint(context, 100.0, 100.0, 200.0, 500.0, (rect.size.width - 10.0), K_PDD*6);
    //绘制前设置边框和填充颜色
    [[UIColor redColor] setStroke];
    [[UIColor darkGrayColor] setFill];
    CGContextDrawPath(context, kCGPathFillStroke);
}
绘制弧线和曲线图像如下:
十二、渐变背景颜色
直接上代码:
- (void)drawRect:(CGRect)rect {
    CGContextRef context = UIGraphicsGetCurrentContext();
    CGContextClip(context);
    CGColorSpaceRef rgb = CGColorSpaceCreateDeviceRGB();
    CGFloat colors[] = {
        200.0 / 255.0, 224.0 / 255.0, 244.0 / 0.0, 1.00,
        100.0 / 255.0, 156.0 / 255.0, 215.0 / 100.0, 1.00,
        0.0 / 255.0,  50.0 / 255.0, 126.0 / 200.0, 1.00,
    };
    CGGradientRef gradient = CGGradientCreateWithColorComponents(rgb, colors, NULL, sizeof(colors) / (sizeof(colors[0]) * 4));
    CGColorSpaceRelease(rgb);
    CGContextDrawLinearGradient(context, gradient, CGPointMake(0.0,0.0), CGPointMake(0.0, rect.size.height), kCGGradientDrawsBeforeStartLocation);
}
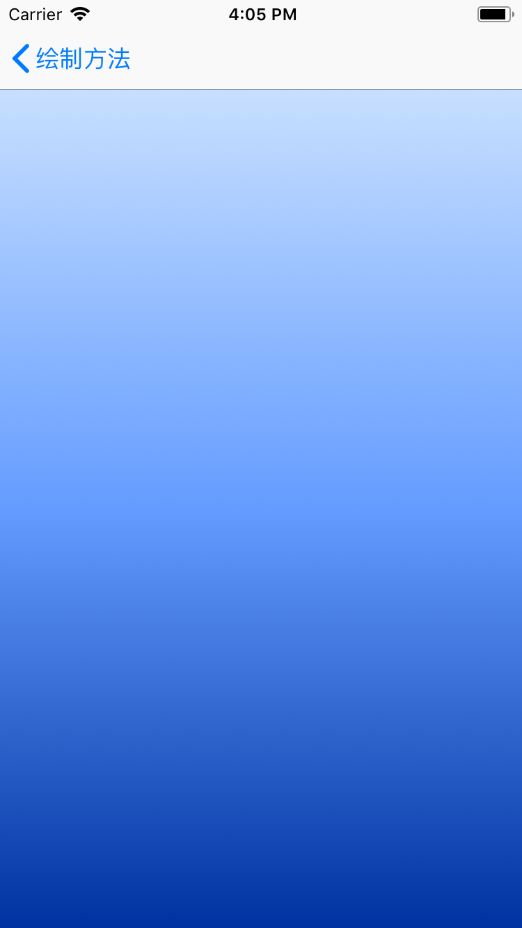
效果:
部分绘制图形效果请参考完整Demo drawRect绘制图形


