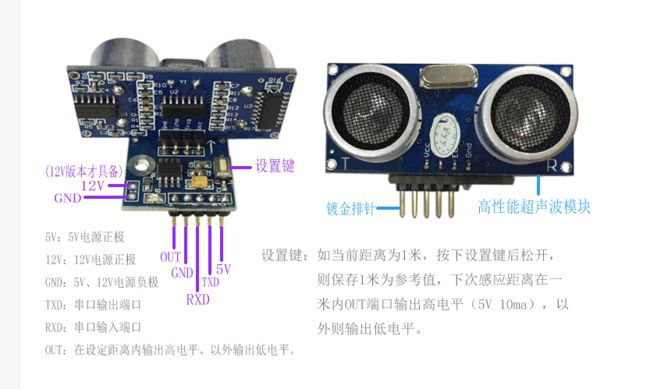
用超声波控制舵机:
超声波arduino中文社区手册了解一下
再了解一下
搞了两天,分分钟的事情,结果BUG千奇百怪。
1,上传Nano失败:工具》开发板或者处理器,改变他们。或者 改变编程器。
2再试试上传时候按一下板子上的按钮。
3程序逻辑自己认为没问题的,在各个判断循环等处加上 Serial.println("helloword"); //测试用
4超声波5V电压!!!!!!!Vcc没有特殊说明就是5V
5今天BUG已被浪翻,更多BUG,明天见!!!!
代码:
// Trig接Arduino板的Digital 5口,触发测距;Echo接Digital 4口,接收距离信号。#include //舵机头文件
Servo myservo; // 设置舵机名
int inputPin = 4; // 定义超声波信号接收接口
int outputPin = 5; // 定义超声波信号发出接口
int pos = 0; // varible to store the servo position
void setup()
{
Serial.begin(9600);
pinMode(inputPin, INPUT);
pinMode(outputPin, OUTPUT);
myservo.attach(9); // 连接舵机到数字接口9
}
void loop()
{
digitalWrite(outputPin, LOW); // 使发出发出超声波信号接口低电平2μs
delayMicroseconds(2);
digitalWrite(outputPin, HIGH); // 使发出发出超声波信号接口高电平10μs,这里是至少10μs
delayMicroseconds(10);
digitalWrite(outputPin, LOW); // 保持发出超声波信号接口低电平
int distance = pulseIn(inputPin, HIGH); // 读出脉冲时间
distance = distance / 58; // 将脉冲时间转化为距离(单位:厘米)
Serial.println(distance); //输出距离值
delay(2000);
if (distance < 20)
{ //analogWrite(motor,0);
myservo.write(90); // tell servo to go to position in variable 'pos'
Serial.println("helloword"); //测试用
delay(1000);
// tell servo to go to position in variable 'pos'
}
else {
// goes from 180 degrees to 0 degrees
myservo.write(0); // tell servo to go to position in variable 'pos'
// waits 15ms for the servo to reach the position
Serial.println("zk"); //测试用
}
}
