mac+nginx+mysql 安装指南
由于最近需要安装php开发环境,而网络中包含很多陈旧的文章不适合新版本,现整理了安装过程。
一、安装环境
操作系统:macos majove
开发工具:phpstorm
二、安装步骤
由于开发环境主要是由nginx、php、mysql组成。先独立安装各个部分,再进行相关配置修改
mac中包管理器推荐使用brew,使用一下脚本进行安装,安装目录为/usr/local/
/usr/bin/ruby -e "$(curl -fsSL https://raw.githubusercontent.com/Homebrew/install/master/install)"
2.1 nginx安装
2.1.1下载并安装nginx
web服务这里也可以使用mac自带的apache,但是出于当前项目使用nginx,就安装nginx了
brew install nginx
安装完成后nginx目录,主要有以下几个:
/usr/local/etc/nginx (配置文件路径)
/usr/local/var/www (服务器默认路径)
/usr/local/Cellar/nginx/1.15.9 (安装包路径)
针对nginx安装完成后,主要是配置参数的修改
2.1.2 nginx基本操作
启动nginx
sudo nginx -s reload
如果出现一下报错信息,nginx.pid找不到,主要是nginx的master进程的进程号被关闭。
nginx: [error] open() "/usr/local/Cellar/nginx/1.15.9/logs/nginx.pid" failed (2: No such file or directory)
端口号查询
ps -ef | grep nginx
可以使用以下方式开启
sudo nginx -c /usr/local/etc/nginx/nginx.conf
开启后可以查询端口信息
➜  local ps -ef | grep nginx
    0 17669     1   0  8:07下午 ??         0:00.00 nginx: master process nginx -c /usr/local/etc/nginx/nginx.conf
   -2 17670 17669   0  8:07下午 ??         0:00.00 nginx: worker process
  501 14531 14391   0 12:07下午 ttys001    0:00.03 vi nginx.conf
  501 17687 15171   0  8:07下午 ttys002    0:00.00 grep --color=auto --exclude-dir=.bzr --exclude-dir=CVS --exclude-dir=.git --exclude-dir=.hg --exclude-dir=.svn nginx
2.1.2 nginx 简单配置
一般其他不用改,改下源文件目录地址就可以了
vi nginx.conf
从下面配置文件可以看出服务为localhost, 端口号是8080,这里的地址是根目录下html,默认启动文件index.html
 server {
 listen       8080;
 server_name  localhost;
 location / {
       root   html;
       index  index.html index.htm;
  }
这里需要注意html为软链接地址
lrwxr-xr-x 1 person staff 16 3 4 23:36 html -> ../../../var/www
我们php文件同样可以配置一个软链接地址
ln -s < 目标文件夹 > < 当前目录 >
不过,我们是php文件,所以还要使用php的配置
   # pass the PHP scripts to FastCGI server listening on 127.0.0.1:9000
  location ~ \.php$ {
      root           html;
      fastcgi_pass   127.0.0.1:9000;
      fastcgi_index  index.php;
      fastcgi_param  SCRIPT_FILENAME  /scripts$fastcgi_script_name;
      include        fastcgi_params;
 }
FastCGI 主要是将CGI解释器进程保持在内存中,实现高速脚本解析。
FastCGI 原理
1、Web Server启动时载入FastCGI进程管理器(IIS ISAPI或Apache Module)
2、FastCGI进程管理器自身初始化,启动多个CGI解释器进程(可见多个php-cgi)并等待来自Web Server的连接。
3、当客户端请求到达Web Server时,FastCGI进程管理器选择并连接到一个CGI解释器。Web server将CGI环境变量和标准输入发送到FastCGI子进程php-cgi。
4、FastCGI子进程完成处理后将标准输出和错误信息从同一连接返回Web Server。当FastCGI子进程关闭连接时,请求便告处理完成。FastCGI子进程接着等待并处理来自FastCGI进程管理器(运行在Web Server中)的下一个连接。 在CGI模式中,php-cgi在此便退出了。
当前php包中使用的是PHP-FPM
至此nginx已完成安装
2.2 php安装
虽然mac中已经自带了php,但是缺少FastCGI无法运行,所以,听从建议直接安装一个php就可以了,还是直接使用brew安装
brew install php
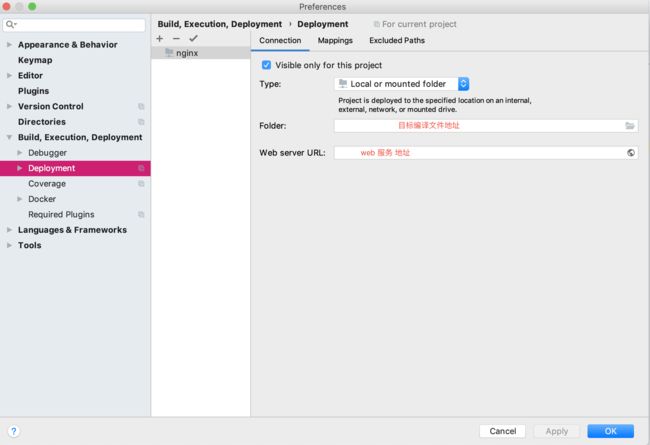
这里使用的开发工具是phpstorm(由于phpstorm只是一个工具,具体安装方法不详说),由于它会自带web服务,这个时候需要切换至本地nginx
在phpstorm => preferences 里面,进行配置,可以实现web服务部署的配置
使用本地nginx服务,需要手动启动FastCGI,
sudo php-fpm
查看端口
➜  nginx ps -ef | grep php-fpm
  501 22503     1   0 11:43下午 ??         0:00.00 php-fpm
  501 22504 22503   0 11:43下午 ??         0:00.12 php-fpm
  501 22505 22503   0 11:43下午 ??         0:00.04 php-fpm
  501 22563 14391   0 11:44下午 ttys001    0:00.00 grep --color=auto --exclude-dir=.bzr --exclude-dir=CVS --exclude-dir=.git --exclude-dir=.hg --exclude-dir=.svn php-fpm
这样就可以运行php代码了
2.3 mysql安装
使用命令行安装mysql
brew install mysql
安装完成,进入mysql
mysql -u root -p
未完待续。。。