前两篇文章讲解了使用和register方法,本篇文章主要讲解post方法以及注解处理器
EventBus源码解析系列
EventBus源码解析(一)关于用法和注解
EventBus源码解析(二)register与unregister
EventBus源码解析(三)Post方法和注解处理器
Post方法
从post开始
public void post(Object event) {
PostingThreadState postingState = currentPostingThreadState.get();
Listpost里面主要进行以下操作
- 从
ThreadLocal中获取PostingThreadState,然后把事件Event添加都里面的队列中postingState.eventQueue
这里PostingThreadState这个类为
final static class PostingThreadState {
final List用来保存一些些状态
判断当前事件是否发送,进入到if中,设置是否是主线程以及posting=true,然后循环调用队列
postSingleEvent(eventQueue.remove(0), postingState);,使用完的事件则被移除队列最后finally设置属性为false
看下这个事件处理方法
 private void postSingleEvent(Object event, PostingThreadState postingState) throws Error {
        Class eventClass = event.getClass();
        boolean subscriptionFound = false;
        //①处理子类
        if (eventInheritance) {
            List> eventTypes = lookupAllEventTypes(eventClass);
            int countTypes = eventTypes.size();
            for (int h = 0; h < countTypes; h++) {
                Class clazz = eventTypes.get(h);
                subscriptionFound |= postSingleEventForEventType(event, postingState, clazz);
            }
        } else {
            subscriptionFound = postSingleEventForEventType(event, postingState, eventClass);
        }
        //②结果判断
        if (!subscriptionFound) {
            if (logNoSubscriberMessages) {
                Log.d(TAG, "No subscribers registered for event " + eventClass);
            }
            if (sendNoSubscriberEvent && eventClass != NoSubscriberEvent.class &&
                    eventClass != SubscriberExceptionEvent.class) {
                post(new NoSubscriberEvent(this, event));
            }
        }
    }
这里也比较好理解,首先还是这个eventInheritance这个上篇有讲过,是来处理含有子类的方法的。最终都是调用postSingleEventForEventType来处理事件,之后结果赋值给subscriptionFound如果没有找到对应的方法则消费一个默认事件NoSubscriberEvent。
 private boolean postSingleEventForEventType(Object event, PostingThreadState postingState, Class eventClass) {
        CopyOnWriteArrayList subscriptions;
        synchronized (this) {
            //①根据事件类型eventType拿到方法集
            subscriptions = subscriptionsByEventType.get(eventClass);
        }
        if (subscriptions != null && !subscriptions.isEmpty()) {
            for (Subscription subscription : subscriptions) {
               //②保存当前状态到PostingState
                postingState.event = event;
                postingState.subscription = subscription;
                boolean aborted = false;
                try {
                    //③开始执行
                    postToSubscription(subscription, event, postingState.isMainThread);
                    aborted = postingState.canceled;
                } finally {
                    postingState.event = null;
                    postingState.subscription = null;
                    postingState.canceled = false;
                }
                if (aborted) {
                    break;
                }
            }
            return true;
        }
        return false;
    }
在这里通过subscriptions = subscriptionsByEventType.get(eventClass);拿到我们前面register解析到的方法集,之后每进行一次处理事件都要设置下当前PostingState的状态,而前面也有说到EventBus里面ThreadLocal的泛型是PostingState,这里每次设置当前状态主要用来获取事件的执行情况。
之后则调用postToSubscription来执行事件
 private void postToSubscription(Subscription subscription, Object event, boolean isMainThread) {
        switch (subscription.subscriberMethod.threadMode) {
            case POSTING:
                invokeSubscriber(subscription, event);
                break;
            case MAIN:
                if (isMainThread) {
                    invokeSubscriber(subscription, event);
                } else {
                    mainThreadPoster.enqueue(subscription, event);
                }
                break;
            case BACKGROUND:
                if (isMainThread) {
                    backgroundPoster.enqueue(subscription, event);
                } else {
                    invokeSubscriber(subscription, event);
                }
                break;
            case ASYNC:
                asyncPoster.enqueue(subscription, event);
                break;
            default:
                throw new IllegalStateException("Unknown thread mode: " + subscription.subscriberMethod.threadMode);
        }
    }
这个大家也比较熟悉了,跟前面一篇文章分析一样,了解ThreadModel的使用后相信你自己也可以分析出来。
注解处理器
在第二篇文章中我们使用EventBus只是默认的使用,并且最终还是使用反射来获取类信息,这样很耗性能,而且在3.0版本之前也是使用反射了。所以3.0之后多了个注解处理器的使用,它则是在编译期将类信息,通过注解处理器,自动生成索引,大大提高了EventBus的运行效率。怎么使用呢,我们先看下配置说明。
打开App的build.gradle,在dependencies中添加最新的EventBus依赖:
compile 'org.greenrobot:eventbus:3.0.0'
然后在项目gradle的dependencies中引入apt编译插件:
classpath 'com.neenbedankt.gradle.plugins:android-apt:1.8'
然后在App的build.gradle中应用apt插件,并设置apt生成的索引的包名和类名:
apply plugin: 'com.neenbedankt.android-apt'
apt {
    arguments {
        eventBusIndex "com.yourpackage.MyEventBusIndex" //指定一个路径下的,生成的类则是在这里
    }
}
接着在App的dependencies中引入EventBusAnnotationProcessor:
apt 'org.greenrobot:eventbus-annotation-processor:3.0.1'
配置完成之后,我们暂且不编译,先看下我们的订阅情况
我在MainActivity.class中使用
  @Subscribe(threadMode = ThreadMode.MAIN , sticky = true , priority = 50)
    public void receiveEventString(String s){
        Log.e(TAG, "receiveEventString: " + s );
    }
    @Subscribe(threadMode = ThreadMode.BACKGROUND , sticky = false , priority = 100)
    public void receiveEventInt(Integer i){
        Log.e(TAG, "receiveEventInt: " + i );
    }
然后我们选择编译Build一下,看看生成的文件
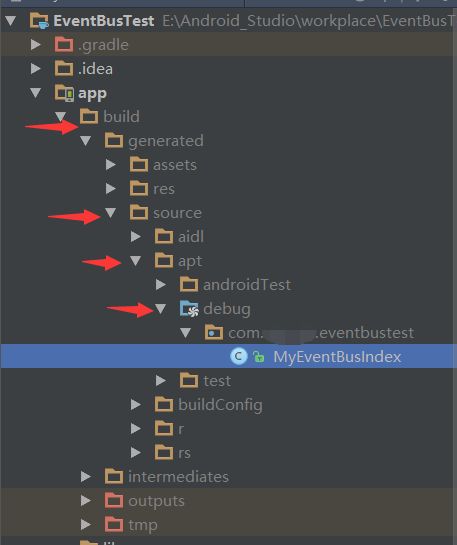
自动生成的目录则是在这里。
我们看下这个生成类的信息
/** This class is generated by EventBus, do not edit. */
public class MyEventBusIndex implements SubscriberInfoIndex {
    private static final Map, SubscriberInfo> SUBSCRIBER_INDEX;

    static {
        SUBSCRIBER_INDEX = new HashMap, SubscriberInfo>();
        //关键就是在这里。把你所有的注册信息已经在编译时期获取到,并且保存在Map中
        putIndex(new SimpleSubscriberInfo(MainActivity.class, true, new SubscriberMethodInfo[] {
            new SubscriberMethodInfo("receiveEventString", String.class, ThreadMode.MAIN, 50, true),
            new SubscriberMethodInfo("receiveEventInt", Integer.class, ThreadMode.BACKGROUND, 100, false),
        }));

    }

    private static void putIndex(SubscriberInfo info) {
        SUBSCRIBER_INDEX.put(info.getSubscriberClass(), info);
    }

    @Override
    public SubscriberInfo getSubscriberInfo(Class subscriberClass) {
        SubscriberInfo info = SUBSCRIBER_INDEX.get(subscriberClass);
        if (info != null) {
            return info;
        } else {
            return null;
        }
    }
}
可以看到在编译器生成的这个处理器已经获取到类的所有注解信息封装到SubscriberInfo中,然后存放在一个Map中,最后调用getSubscriberInfo就可以获取到信息。
MyEventBusIndex是实现SubscriberInfoIndex接口
public interface SubscriberInfoIndex {
    SubscriberInfo getSubscriberInfo(Class subscriberClass);
}
好,我们回到上一篇文章获取类方法那里。
 private List findUsingInfo(Class subscriberClass) {
       //①获取FindState对象
        FindState findState = prepareFindState();
        //初始化
        findState.initForSubscriber(subscriberClass);
        while (findState.clazz != null) {
            //②获取订阅者的信息,一开始为null,如果有使用注解处理器,则不为null
            findState.subscriberInfo = getSubscriberInfo(findState);
            if (findState.subscriberInfo != null) {
                SubscriberMethod[] array = findState.subscriberInfo.getSubscriberMethods();
                for (SubscriberMethod subscriberMethod : array) {
                    if (findState.checkAdd(subscriberMethod.method, subscriberMethod.eventType)) {
                        findState.subscriberMethods.add(subscriberMethod);
                    }
                }
            } else {
                //③通过反射来获取方法信息,之后保存在findState
                findUsingReflectionInSingleClass(findState);
            }
            findState.moveToSuperclass();
        }
        //④从findState中获取到SubscriberMethod
        return getMethodsAndRelease(findState);
    }
之前则是在这里第二步②来判断你有没有使用注解处理器的。
②通过getSubscriberInfo(findState);根据当前的findState来获取订阅者的信息。
 private SubscriberInfo getSubscriberInfo(FindState findState) {
        ...
        //判断有没有使用注解处理器,如果有使用,则在编译器时候通过读取@Subscribe()注解并解析保存到subscriberInfoIndexes中了。
        if (subscriberInfoIndexes != null) {
            for (SubscriberInfoIndex index : subscriberInfoIndexes) {
                SubscriberInfo info = index.getSubscriberInfo(findState.clazz);
                if (info != null) {
                    return info;
                }
            }
        }
        return null;
    }
关键就是这个subscriberInfoIndexes判断,而这个subscriberInfoIndexes则在它构造方法赋值的
  SubscriberMethodFinder(List subscriberInfoIndexes, boolean strictMethodVerification,
                           boolean ignoreGeneratedIndex) {
        this.subscriberInfoIndexes = subscriberInfoIndexes;
        ...
    }
 EventBus(EventBusBuilder builder) {
        ...
        subscriberMethodFinder = new SubscriberMethodFinder(builder.subscriberInfoIndexes,
                builder.strictMethodVerification, builder.ignoreGeneratedIndex);
       ...
    }
最后则是通过Builder
  /** Adds an index generated by EventBus' annotation preprocessor. */
    public EventBusBuilder addIndex(SubscriberInfoIndex index) {
        if(subscriberInfoIndexes == null) {
            subscriberInfoIndexes = new ArrayList<>();
        }
        subscriberInfoIndexes.add(index);
        return this;
    }
在Builder这里只是提供了一个方法来让你添加,而参数则是SubscriberInfoIndex,而刚刚我们那个自动生成的处理器则是实现了这个接口。
所以只需要这样设置便可以使用了
EventBus mEventBus = EventBus.builder().addIndex(new MyEventBusIndex()).build();
在这里则不能使用getDefalut来创建EventBus了。
EventBus默认有一个单例,可以通过getDefault()获取,也可以通过EventBus.builder()构造自定义的EventBus,比如要应用我们生成好的索引时。
AnnotationProcessor
前面我们说到注解处理器使用的是Apt,不过很遗憾,Apt作者已经不维护这个插件了,现在则是提倡使用谷歌的AnnotationProcessor来代替apt。android-apt只支持javac编译器,而annotationProcessor同时支持javac和jack编译器。
如何配置呢
dependencies {
    ...
    compile 'org.greenrobot:eventbus:3.0.0'
    annotationProcessor  'org.greenrobot:eventbus-annotation-processor:3.0.1'
}
只需要在dependencies这里添加annotationProcessor,而不使用apt了。
之后在defaultConfig配置添加
 defaultConfig {
        ...
        jackOptions {
            enabled true
        }
        javaCompileOptions {
            annotationProcessorOptions {
                arguments = [ eventBusIndex : 'org.greenrobot.eventbusperf.MyEventBusIndex' ]
            }
        }
    }
就可以了。
不过这个AnnotationProcessor对版本有要求,确保Android Gradle插件版本是2.2以上,我在测试的时候由于没有去更新这些版本,导致在Build的过程中太久(它去下载对应的版本了),最后才去把所有版本包括AS版本,Gradle,buildToolsVersion全部更新了。
写到最后也就可以发现EventBus的设计了。
EventBus采用了观察者模式设计,通过register(Object)方法来注册当前类监听,把所有注册的类给保存起来,并且通过反射或者注解处理器拿到当前类中的监听方法Method,最后在post发送事件的时候在内部依次搜索每个注册类,然后再根据post的参数类型(事件类型)进行筛选对应符合参数类型的方法,然后再根据ThreadMode设置的事件处理情况,选择在哪个线程中处理调用反射方法,进而接收到事件。
而在3.0之前的版本中是使用类似字符串匹配的方法,比如onEventMainThread这些,之后再使用反射获取,而使用反射则是十分损耗性能的,
所以在3.0之后引入了注解的使用,而注解又引入了注解处理器AnnotationProcessor,能够在编译期就获取到所有注册类里面对应的注解接收方法,然后在获取的时候就不需要再去反射获取类的方法,直接去使用,大大提升了性能。不过EventBus默认是没有使用注解处理器的,要自己去设置使用才有。