我们之前讲到了上传图片裁剪的相关知识点。今天就来说一说我们被裁剪的那些图片如何获取。
附上期链接细数图片上传功能用到的知识点-裁剪篇
先来说我们的需求。在用户触发选取图片之后让用户选择是拍照还是从图库选取。从图库选取图片,我们其实可以直接调用系统图库。但是调用系统图库存在着操作不顺畅的问题,如果系统中存在多个能够处理MediaStore.ACTION_IMAGE_CAPTURE的工具会弹窗选择框让用户选择,这样大大的降低了用户操作的连贯性。所以大多数app都是由自己来实现图库功能的。
所以这里会用到如下的知识点
- 弹窗让用户选择拍照还是从图库选择
- 调取相机,获取相机返回的图片
- 制作我们自己的图库
下面我就会对上面每个模块进行详尽的介绍
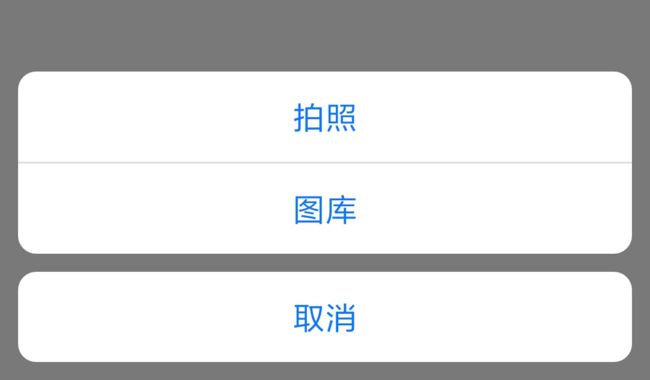
弹窗
这样的效果
这个东西是基于popupWindow实现的,比较简单就不多说了。
//弹窗的布局
 View view = LayoutInflater.from(activity).inflate(R.layout.write_popwindow_layout, null);
        popupWindow = new PopupWindow(view, LinearLayout.LayoutParams.MATCH_PARENT, LinearLayout.LayoutParams.WRAP_CONTENT, true);
//自下而上的动画
        popupWindow.setAnimationStyle(R.style.popwindow_anim_style_bottom);
        popupWindow.setOutsideTouchable(true);
        popupWindow.setFocusable(true);
        popupWindow.setOutsideTouchable(true);
        popupWindow.setOnDismissListener(new PopupWindow.OnDismissListener() {
            @Override
            public void onDismiss() {
//屏幕亮度恢复
                ScreenData.UpScreenColor(activity);
            }
        });
        view.setFocusable(true);
        view.setFocusableInTouchMode(true);
        view.setOnTouchListener(new View.OnTouchListener() {
            @Override
            public boolean onTouch(View v, MotionEvent event) {
                popupWindow.dismiss();
//屏幕亮度恢复
                ScreenData.UpScreenColor(activity);
                return true;
            }
        });
这里我们需要注意的是权限问题,由于Android6.0之后权限制度的改变。无论是访问相机,还是获取用户存储的图片都需要去动态的申请权限
我的处理是,再点击拍照 或者图库的时候申请权限,权限的申请结果会在activity的onRequestPermissionsResult()方法中回调。我们需要在里面处理下一步的逻辑,如果用户不给于权限则关闭弹窗即可。
  if (ContextCompat.checkSelfPermission(activity,
                        Manifest.permission.CAMERA)
                        != PackageManager.PERMISSION_GRANTED || ContextCompat.checkSelfPermission(activity,
                        Manifest.permission.READ_EXTERNAL_STORAGE)
                        != PackageManager.PERMISSION_GRANTED) {
                    ActivityCompat.requestPermissions(activity,
                            new String[]{"android.permission.READ_EXTERNAL_STORAGE", "android.permission.CAMERA"},
                            12546);
                } else {
//如果已经拥有权限则直接操作
                    ScreenData.UpScreenColor(activity);
                    popupWindow.dismiss();

                  //调取相机或者打开图库
                    getImageFromCamera();
                }
调取相机
调取相机功能其实我们只需传递一个ActionView为android.media.action.IMAGE_CAPTURE的Intent即可。之后我们就可以从data里获取图片的uri。真么简单,难道没有坑吗?
很明显是有的,其实通过这种方式你最后获取的图片只是一张缩略图而已。查阅官方文档我们得到了以下方法。
//给相机传递这样一个uri,相机会把图片存储到这个uri对应得文件
 intent.putExtra(MediaStore.EXTRA_OUTPUT, photoUri);
以及为这样就出坑了吗?
在部分手机上,使用这种方式无法让相机存储照片到这个uri对应的文件。如果我们创建文件,然后使用Uri.fromFile的方式来获取uri的话,我们还需要先将这个uri对应我们的file文件存入系统的数据库中。
  ContentValues values = new ContentValues();
            values.put(MediaStore.Images.Media.DATA, file.getAbsolutePath());
            values.put(MediaStore.Images.Media.MIME_TYPE, "image/jpeg");
            photoUri = activity.getContentResolver().insert(
                    MediaStore.Images.Media.EXTERNAL_CONTENT_URI, values);
跳出这个坑,我们就可以在onActivityResult中等待相机的回掉了。拍照的图片已经被存入我们的文件中了。你以为这样就结束了吗?
部分手机(三星)拍出的照片有时候会是颠倒的,我们仍然需要单独进行处理。读取照片信息中的角度,然后会进行旋转。
//读取图片的旋转信息
 public static int readPictureDegree(String path) {
        int degree = 0;
        try {
            ExifInterface exifInterface = new ExifInterface(path);
            int orientation = exifInterface.getAttributeInt(ExifInterface.TAG_ORIENTATION, ExifInterface.ORIENTATION_NORMAL);
            switch (orientation) {
                case ExifInterface.ORIENTATION_ROTATE_90:
                    degree = 90;
                    break;
                case ExifInterface.ORIENTATION_ROTATE_180:
                    degree = 180;
                    break;
                case ExifInterface.ORIENTATION_ROTATE_270:
                    degree = 270;
                    break;
            }
        } catch (IOException e) {
            e.printStackTrace();
        }
        return degree;
    }
//旋转图片
  public static Bitmap toturn(Bitmap img,int degree) {
        try {
            Matrix matrix = new Matrix();
            matrix.postRotate(degree); /*翻转90度*/
            int width = img.getWidth();
            int height = img.getHeight();
            img = Bitmap.createBitmap(img, 0, 0, width, height, matrix, true);
        } catch (Exception e) {
            e.printStackTrace();
        }
        return img;
    }
制作我们自己的图库
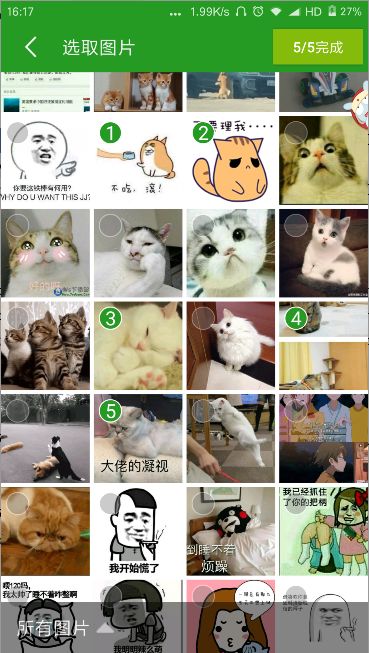
先来看看我们图库的效果。
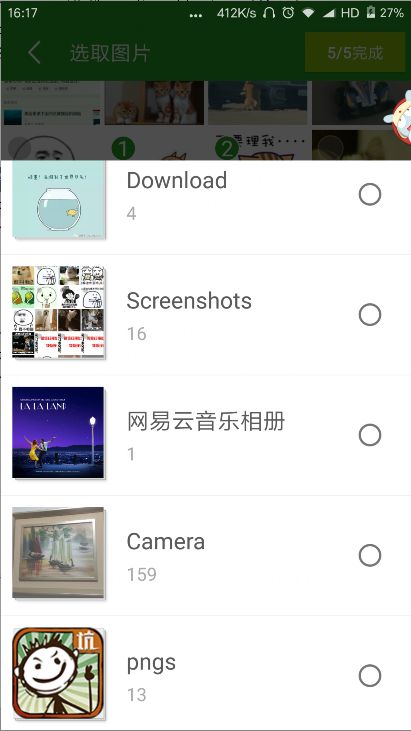
首先我们是一个支持选择多张的图库,选择后会在左上角进行标识这是选中的第几张。另外我们的相册支持相册的选择,方便用户的寻找图片。
图片列表的实现用gridview 或者recycleView 都可以,但是要注意显示图片的处理,提升流畅度。我们主要来说一说这些数据都是如何查出来的。
默认进入,我们显示的是按时间倒序排列的所有图片。要查询这些数据就要用到我们的ContentResolver了
    /**
     * 获取全部图片
     *
     * @param cr
     * @return
     */
    public static List GetAllPic(ContentResolver cr) {
        List uriList = new ArrayList<>();
        String[] projection = {MediaStore.Images.Media.DATA, MediaStore.Images.Media.DATE_MODIFIED};

//查询条件是DATE_MODIFIED 的倒序
        Cursor cursor = cr.query(MediaStore.Images.Media.EXTERNAL_CONTENT_URI, projection, null, null, MediaStore.Images.Media.DATE_MODIFIED + " desc");
        if (cursor == null) {
            return null;
        }
//遍历游标存入列表
        while (cursor.moveToNext()) {
            String image_path = cursor.getString(cursor.getColumnIndex(MediaStore.Images.Media.DATA));
            File file = new File(image_path);
            if (file.exists() && file.length() != 0)
                uriList.add(Uri.fromFile(file));
        }
        cursor.close();
        return uriList;
    }
而相册列表我没有找到单独的获取放大,用下面这种方式也可以实现,读取每张图片的时候,其实能够拿到图片所在的相册。根据id除去重复的即可。
我们只需要修改上面代码中的projection数组中的内容增加即可。统计缩略图什么都很好实现。一遍遍历就可以拿到所有想要的数据。
//获取所在相册和相册id
  String[] projection = {MediaStore.Images.Media.DATA,,MediaStore.Images.Media.DATE_MODIFIED, MediaStore.Images.Media.BUCKET_DISPLAY_NAME, MediaStore.Images.Media..BUCKET_ID};
点击相册后根据相册来查询对应的图片集合
  /**
     * 根据相册id获取图片
     *
     * @param cr
     * @param parentName
     * @return limit 限制数量
     */
    public static List GetAllPicByParentName(ContentResolver cr, String parentId, int limit) {
        List uriList = new ArrayList<>();
        String[] projection = {MediaStore.Images.Media.DATA, MediaStore.Images.Media.DATE_MODIFIED};
        Cursor cursor = null;
        if (limit!=-1) {
  //限制只取第一个 ,方便获取缩略图
            cursor = cr.query(MediaStore.Images.Media.EXTERNAL_CONTENT_URI, projection, MediaStore.Images.Media.BUCKET_ID+ "=?", new String[]{parentId}, MediaStore.Images.Media.DATE_MODIFIED + " desc" + " limit 0,"+limit);
        } else {
            cursor = cr.query(MediaStore.Images.Media.EXTERNAL_CONTENT_URI, projection, MediaStore.Images.Media.BUCKET_ID+ "=?", new String[]{parentId}, MediaStore.Images.Media.DATE_MODIFIED + " desc");
        }
        if (cursor == null) {
            return null;
        }
        while (cursor.moveToNext()) {
            String image_path = cursor.getString(cursor.getColumnIndex(MediaStore.Images.Media.DATA));
            File file = new File(image_path);
            if (file.exists())
                uriList.add(Uri.fromFile(file));
        }
        cursor.close();
        return uriList;
    }
回传
图片选取完成后我们只需要将图片对应的uri回传给上个页面即可。回传多张图片有很多方式。不可以传递bitmap,其数据过大。 一张图片可以通过intent.setData()传递uri 。但uri也没有实现Serializable接口。不能回传列表。但是我们可以获取其对应的文件,然后回传文件地址列表即可。
图片选取这里的坑也是比较多的,大家在切实尝试过后才能明白。尤其是照片部分,网上的教程很杂乱,误导也比较多。让我绕了很多圈子
细数图片上传功能用到的知识点(图片选取&拍照篇)
细数图片上传功能用到的知识点(裁剪篇)
细数图片上传功能用到的知识点(图片压缩篇)


