View的三大流程:测量,布局,绘制
上篇Android自定义View学习(一)——准备简单介绍了部分测量的知识,后面会继续学习测量的知识。本篇记录下绘制onDraw()方法的学习,只是开始。
1.View的绘制
完成了View的测量后,根据拿到的View的大小,位置,重写onDraw(Canvas canvas)就可以进行绘制。
现实中,如果想要画一幅画,必须要有画笔和画布。Canvas就是画布,Paint就是画笔。Canvas和Patint有各种各样的属性。本篇先学习部分常用的基础的属性,一些可以高度化定制的属性后续再进行学习。
2.Canvas
源码中关于Canvas的解释:
The Canvas class holds the "draw" calls. To draw something, you need 4 basic components: A Bitmap to hold the pixels, a Canvas to host the draw calls (writing into the bitmap), a drawing primitive (e.g. Rect, Path, text, Bitmap), and a paint (to describe the colors and styles for the drawing).
想要画出一个View就必须要有4个必要的元素:
- 保存像素的Bitmap
- 管理绘制请求的Canvas
- 绘画的原始基本元素,例如矩形,线,文字,Bitmap
- 拥有颜色和风格信息的画笔
翻译水平,32级 : )
Canvas有两种常见创建方法:
-
Canvas canvas = new Canvas()空参构造方法 -
Canvas canvas = new Canvas(bitmap)创建一个装载画布。构造方法中传入的bitmap存储所有绘制在canvas的信息。
常用的几个绘制方法
| 方法 | 作用 |
|---|---|
drawRect() |
画矩形 |
drawCircle() |
画圆 |
drawArc() |
画圆弧 |
drawRoundRect() |
画圆角矩形 |
drawBitmap() |
画一个Bitmap |
drawOval |
画椭圆 |
drawText() |
画文字 |
Canvas的方法有很多,这里先记录几个简单的绘制方法,其他的后续学习再做补充。
2.1 drawRect() 绘制矩形
drawRect()有三种重载方法:
drawRect(float left, float top, float right, float bottom, @NonNull Paint paint)
Draw the specified Rect using the specified paint. The rectangle will be filled or framed based on the Style in the paint.
@param left The left side of the rectangle to be drawn
@param top The top side of the rectangle to be drawn
@param right The right side of the rectangle to be drawn
@param bottom The bottom side of the rectangle to be drawn
@param paint The paint used to draw the rect
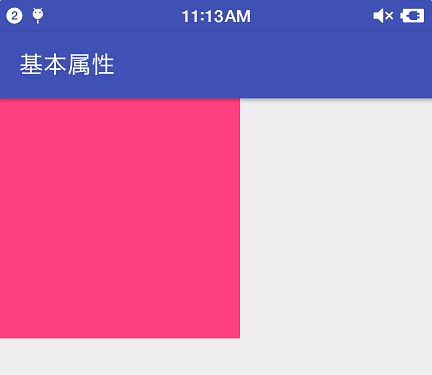
MeausreView代码,主要绘制就是onDraw()方法:
public class MeasureView extends View {

    private Paint paint = new Paint(Paint.ANTI_ALIAS_FLAG);

    public MeasureView(Context context) {
        super(context);
        initPaint();
    }

    public MeasureView(Context context, AttributeSet attrs) {
        super(context, attrs);
        initPaint();
    }

    public MeasureView(Context context, AttributeSet attrs, int defStyleAttr) {
        super(context, attrs, defStyleAttr);
        initPaint();
    }

    private void initPaint() {
        paint.setColor(Color.parseColor("#FF4081"));
    }

    @Override
    protected void onDraw(Canvas canvas) {
        super.onDraw(canvas);

        float left = getLeft();
        float right = getRight();
        float top = getTop();
        float bottom = getBottom();
        canvas.drawRect(left,top,right,bottom,paint);
    }

    @Override
    protected void onMeasure(int widthMeasureSpec, int heightMeasureSpec) {
        setMeasuredDimension(measureWidth(widthMeasureSpec), measuredHeight(heightMeasureSpec));
    }

    /**
     * 测量宽
     *
     * @param widthMeasureSpec
     */
    private int measureWidth(int widthMeasureSpec) {
        int result;
        int specMode = MeasureSpec.getMode(widthMeasureSpec);
        int specSize = MeasureSpec.getSize(widthMeasureSpec);
        if (specMode == MeasureSpec.EXACTLY) {
            result = specSize;
        } else {
            result = 200;
            if (specMode == MeasureSpec.AT_MOST) {
                result = Math.min(result, specSize);
            }
        }
        return result;
    }

    /**
     * 测量高
     *
     * @param heightMeasureSpec
     */
    private int measuredHeight(int heightMeasureSpec) {
        int result;
        int specMode = MeasureSpec.getMode(heightMeasureSpec);
        int specSize = MeasureSpec.getSize(heightMeasureSpec);
        if (specMode == MeasureSpec.EXACTLY) {
            result = specSize;
        } else {
            result = 200;
            if (specMode == MeasureSpec.AT_MOST) {
                result = Math.min(result, specSize);
            }
        }
        return result;
    }
}
在Activity的布局文件中:
MeausureView的width = right - left
MeausureView的height = bottom - top
注意drawRect(left,top,right,bottom,paint)的参数顺序。
drawRect(@NonNull Rect r, @NonNull Paint paint)drawRect(@NonNull RectF r, @NonNull Paint paint)
两个方法的差别在于Rect和RectF的差别。
Rect
Rect holds four integer coordinates for a rectangle. The rectangle is
represented by the coordinates of its 4 edges (left, top, right bottom).
These fields can be accessed directly. Use width() and height() to retrieve
the rectangle's width and height. Note: most methods do not check to see that the coordinates are sorted correctly (i.e. left <= right and top <= bottom).
RectF
RectF holds four float coordinates for a rectangle. The rectangle is represented by the coordinates of its 4 edges (left, top, right bottom). These fields can be accessed directly. Use width() and height() to retrieve
the rectangle's width and height. Note: most methods do not check to see that the coordinates are sorted correctly (i.e. left <= right and top <= bottom).
两者差别就是:Rect 坐标为integer 而RectF 坐标为float
使用:
@Override
protected void onDraw(Canvas canvas) {
    super.onDraw(canvas);
    Rect rect = new RectF(100,100,200,200);
    canvas.drawRect(rect,paint);
}
@Override
protected void onDraw(Canvas canvas) {
    super.onDraw(canvas);
    RectF rect = new RectF(100.5f,100.5f,200.5f,200.5f);
    canvas.drawRect(rect,paint);
}
注意构造方法中的参数顺序
2.2 drawCricle() 绘制圆形
drawCircle(float cx, float cy, float radius, @NonNull Paint paint)
Draw the specified circle using the specified paint. If radius is <= 0, then nothing will be drawn. The circle will be filled or framed based on the Style in the paint.
@param cx The x-coordinate of the center of the cirle to be drawn
@param cy The y-coordinate of the center of the cirle to be drawn
@param radius The radius of the cirle to be drawn
@param paint The paint used to draw the circle
radius: 半径
cx : 圆心的x坐标
cy : 圆心的y坐标
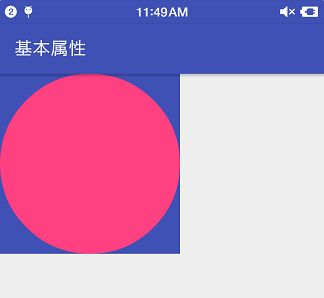
使用的时候需要考虑圆心和半径
使用:
@Override
protected void onDraw(Canvas canvas) {
    super.onDraw(canvas);
    float width = getWidth();
    float height = getHeight();
    float radius = Math.min(width,height)/2;
    canvas.drawCircle(width/2,height/2,radius,paint);
}
绘制圆形时,半径是宽和高中较小者的二分之一
2.3 drawArc() 绘制扇形
drawArc(float left, float top, float right, float bottom, float startAngle,float sweepAngle, boolean useCenter, @NonNull Paint paint)drawArc(@NonNull RectF oval, float startAngle, float sweepAngle, boolean useCenter, @NonNull Paint paint)
两个方法的差别:
- 方法2把坐标封装进
RectF对象中 - 方法1要求系统最低为21
drawArc(@NonNull RectF oval, float startAngle, float sweepAngle, boolean useCenter, @NonNull Paint paint)
@param oval The bounds of oval used to define the shape and size of the arc
@param startAngle Starting angle (in degrees) where the arc begins
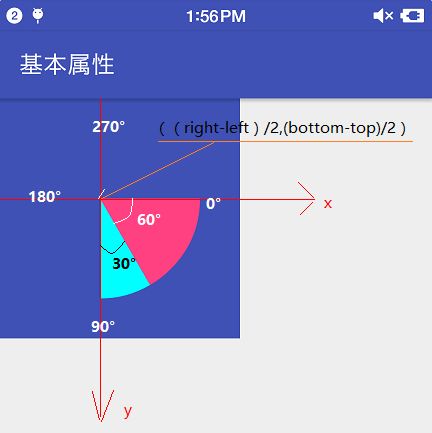
@param sweepAngle Sweep angle (in degrees) measured clockwise
@param useCenter If true, include the center of the oval in the arc, and close it if it is being stroked. This will draw a wedge
@param paint The paint used to draw the arc
-
float startAngle开始绘制的角度 -
float sweepAngle扇形扫过的角度,并不是停止时的角度。停止角度 =startAngle+sweepAngle -
boolean useCenterture就是有焦点圆心 , false 没有
@Override
protected void onDraw(Canvas canvas) {
    super.onDraw(canvas);
    RectF rect = new RectF(0f,0f,500f,500f);
    canvas.drawArc(rect,0,60,true,paint);
    canvas.drawArc(rect,60,30,true,paint_2);
}
此时的boolean useCenter为true
当把boolean useCenter设置为false时
此时之画出了开始点和结束点两点之间的区域
2.4 drawBitmap() 绘制Bitmap
drawBitmap(@NonNull Bitmap bitmap, float left, float top, @Nullable Paint paint)
@param bitmap The bitmap to be drawn
@param left The position of the left side of the bitmap being drawn
@param top The position of the top side of the bitmap being drawn
@param paint The paint used to draw the bitmap (may be null)
-
left左上角横坐标 -
top左上角纵坐标
@Override
protected void onDraw(Canvas canvas) {
    super.onDraw(canvas);
    Bitmap bitmap = BitmapFactory.decodeResource(getResources(), R.mipmap.ic_launcher);
    float width = (getWidth()-bitmap.getWidth())/2;
    float height = (getHeight()-bitmap.getHeight())/2;
    canvas.drawBitmap(bitmap,width,height,paint);
}
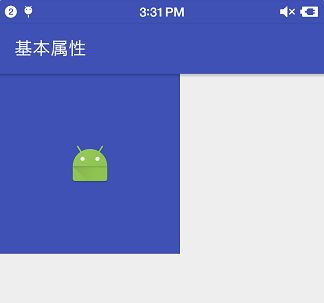
根据left和top确定绘制的位置,此时Paint的用于绘制文字的属性设置在绘制Bitmap时是无效的。
2.5 drawText()绘制文字
drawText(@NonNull String text, float x, float y, @NonNull Paint paint)
Draw the text, with origin at (x,y), using the specified paint. The
origin is interpreted based on the Align setting in the paint.
@param text The text to be drawn
@param x The x-coordinate of the origin of the text being drawn
@param y The y-coordinate of the baseline of the text being drawn
@param paint The paint used for the text (e.g. color, size, style)
private void initPaint() {
    paint.setColor(Color.parseColor("#FF4081"));
    paint.setTextSize(90f);
}

/**
 * 绘制文字
 * @param canvas
 */
@Override
protected void onDraw(Canvas canvas) {
    super.onDraw(canvas);
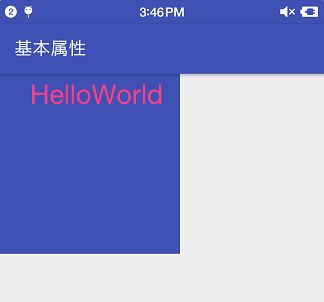
    canvas.drawText("HelloWorld",100,100,paint);
}
绘制文字需要设置Paint的属性。
2.6 drawPath() 绘制路径
drawPath()
@param path The path to be drawn
@param paint The paint used to draw the path
@Override
protected void onDraw(Canvas canvas) {
    super.onDraw(canvas);
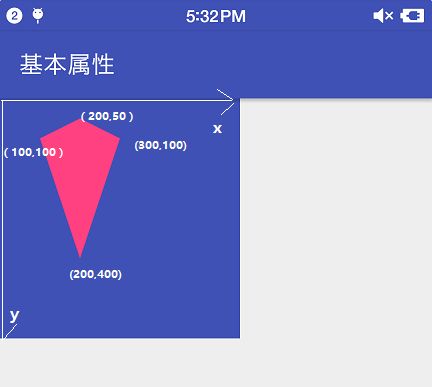
    Path p = new Path();
    p.moveTo(100, 100);
    p.lineTo(200, 50);
    p.lineTo(300, 100);
    p.lineTo(200,400);

    canvas.drawPath(p,paint);
}
-
moveTo()就是绘制的起始点,默认为(0,9) -
lineTo()连接的点
3.Paint
The Paint class holds the style and color information about how to draw geometries, text and bitmaps.
画笔能够拿到,所要绘制的几何图形、文字或者Bitmap的颜色、风格等信息
画笔有三种构造方法:
public Paint() { this(0); }
Create a new paint with default settings.
创建一个默认属性的画笔
public Paint(int flags) {...}
Create a new paint with the specified flags. Use setFlags() to change these after the paint is created.
@param flags initial flag bits, as if they were passed via setFlags().
创建一个带有标记的画笔。也可以通过setFlags()去为一个已经创建过的画笔设置标签
public Paint(Paint paint) {...}
Create a new paint, initialized with the attributes in the specified paint parameter.
@param paint Existing paint used to initialized the attributes of the new paint.
通过一个已经配置好信息的画笔来创建一个新的画笔
3.1常用属性方法
- 绘制文字
| 方法 | 作用 |
|---|---|
setColor(@ColorInt int color) |
设置画笔颜色 |
setStrokeWidth(float width) |
设置画笔粗细 |
setTextSkewX(float f) |
设置倾斜,负右斜,正为左 |
setARGB(int a,int r,int g,int b) |
设置颜色,a为透明度 |
setTextSize(float textSize) |
设置绘制文字大小 |
setFakeBoldText(boolean fakeBoldText) |
是否粗体 |
setTextAlign(Paint.Align align) |
设置文字对齐方式,LEFT,CENTER,RIGHT |
setUnderlineText(boolean underlineText) |
设置下划线 |
setStyle(Style style) |
设置画笔样式,FILL,STROKE,FILL_AND_STROKE |
setTypeface(Typeface typeface) |
设置Typeface对象,即字体风格,包括粗体,斜体以及衬线体,非衬线体等 |
- 绘制图像
| 方法 | 作用 |
|---|---|
setDither(boolean dither) |
设置抖动处理 |
setAlpha(int a) |
设置透明度 |
setAntiAlias(boolean aa) |
是否开启抗锯齿 |
setFilterBitmap() |
是否开启优化Bitmap |
setColorFilter(ColorFilter filter) |
设置颜色过滤 |
setMaskFilter(MaskFilter maskfilter) |
设置滤镜的效果 |
setShader(Shader shader) |
设置图像渐变效果 |
setSrokeJoin(Paint.Join join) |
设置图像结合方式 |
setXfermode(Xfermode xfermode) |
设置图像重叠效果 |
setPathEffect(PathEffect effect) |
设置路径效果 |
reset() |
恢复默认设置 |
暂时就是先看看,知道有这么个方法。然而方法还有很多 :)
4.最后
这篇了解部分Canvas和Paint部分基础知识。就是调用了方法而已。下篇继续记录学习Paint。
通过这篇的学习,我再去看网络其他的自定义View博客,感觉能大概了解所讲内容了。不再是一头的污水。才刚刚开始呢。:)
嗯,本篇有个小坑,不过也不想修改了,这里说一下,onDraw()方法中,最好不要进行new对象,会有警告。本篇这里只是学习,也并无大碍。之后会注意
共勉。
